หมายเหตุ
การเข้าถึงหน้านี้ต้องได้รับการอนุญาต คุณสามารถลอง ลงชื่อเข้าใช้หรือเปลี่ยนไดเรกทอรีได้
การเข้าถึงหน้านี้ต้องได้รับการอนุญาต คุณสามารถลองเปลี่ยนไดเรกทอรีได้
Applies to: Azure Local 2311.2 and later
This article explains how to preserve static IP addresses during virtual machine (VM) migration to Azure Local using Azure Migrate. It provides detailed instructions for running the static IP migration scripts on Windows and Linux VMs.
About the static IP migration package
For Windows VMs, this article supports guest operating systems from Windows Server 2012 R2 and later. For Linux VMs, it supports Ubuntu, Red Hat Enterprise Linux, CentOS, and Debian distributions.
Download the static IP migration package (.zip format). The .zip file includes different scripts for Windows and Linux VMs.
The following scripts are included for Windows:
Prepare-MigratedVM.ps1 – Prepares the VM for static IP migration using the
-StaticIPMigrationcmdlet, which runs the Initialize-StaticIPMigration.ps1 script.Logs are automatically created in the script's directory.
Initialize-StaticIPMigration.ps1 - Collects the VM network interface information into a configuration file (InterfaceConfigurations.json in the local directory) and sets up a scheduled task to run the Set-StaticIPConfiguration.ps1 script.
Set-StaticIPConfiguration.ps1 - Runs at VM startup to apply the network interface configuration file generated.
Utilities.psm1 - This script contains helper functions for the scripts.
Prerequisites
Before you begin, prepare the source and target environments for IP migration.
Prepare source VMs for IP migration
To migrate Windows VMs with static IPs from the source system (Hyper-V or VMware), make sure the following requirements are met.
Ensure the VMs are powered on throughout the replication process and up to planned failover (migration).
For VMware VMs, ensure that VMware Tools are installed.
For Hyper-V VMs, ensure that Hyper-V Integration Services are installed. For more information, see Manage Hyper-V Integration Services.
- Ensure the preparation script is run on the source VM by an account with administrator privileges to create scheduled tasks.
Prepare target Azure Local instance and logical network
On the target Azure Local instance, provision a static Azure Arc logical network to support the migration. This setup requires defining the following:
- IP address space
- Gateway address
- DNS servers
- an IP pool range (optional)
For detailed guidance on creating and configuring static or dynamic Azure Arc logical networks, see Create logical networks for Azure Local.
Ensure that the static IP addresses you plan to migrate are available in the static logical network and not assigned to another VM. If an IP address is already in use, the migration fails with the error: The address is already in use. To avoid this:
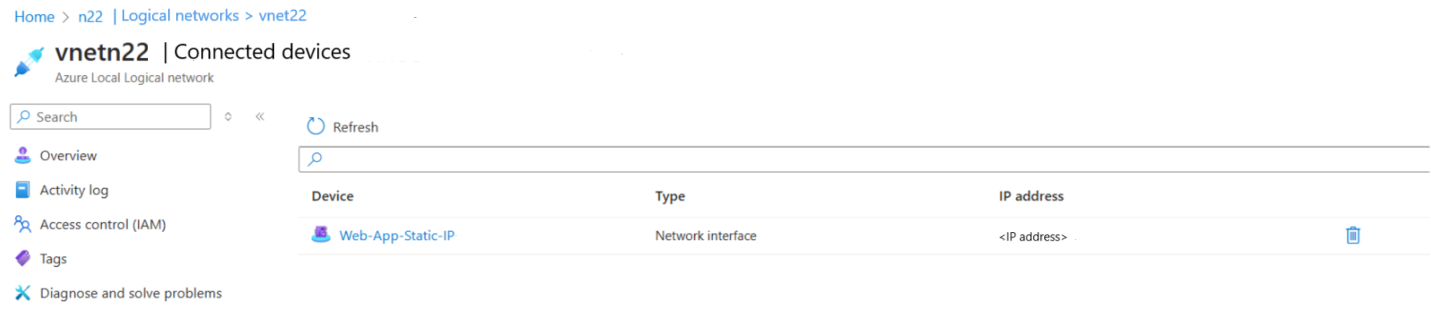
- Go to the target static logical network.
- Check which IP addresses are in use.
- Remove any NICs assigned to the static IPs you want to migrate.
(Optional) Prepare to deploy IP migration at scale using group policy
To use this method, you need domain administrator privileges and access to the Group Policy Editor. Additionally, one of the following conditions must be met:
The source VMs must have internet access to download the static IP migration package directly to their local file system.
The source VMs must have read-only access to a remote file share hosting the static IP migration package, which must be prepared and downloaded to the remote share in advance.
Set up IP migration
Follow these steps to set up IP migration. The steps are different for Windows and Linux VMs.
For Windows VMs, you can set up IP migration manually or by using group policy.
Set up IP migration manually
To set up IP migration manually for Windows VMs:
Download the .zip file and install the static IP migration package contents onto a local folder on the VM.
Open PowerShell as an administrator and run the Prepare-MigratedVM.ps1 script with the following command:
.\Prepare-MigratedVM.ps1 -StaticIPMigrationIn the Azure portal, create a migration project, trigger discovery, and replicate the VM. For more information, see Create an Azure Migrate project.
Before you select the VMs to migrate, use the Replication Wizard to assign and configure the correct logical networks for each network interface on the source VM.
In the Replications > General > Compute and Network section, select VM. On this tab, ensure that the network interfaces are assigned to the correct logical network. DHCP network interfaces are assigned to dynamic logical networks, and static network interfaces are assigned to static logical networks.
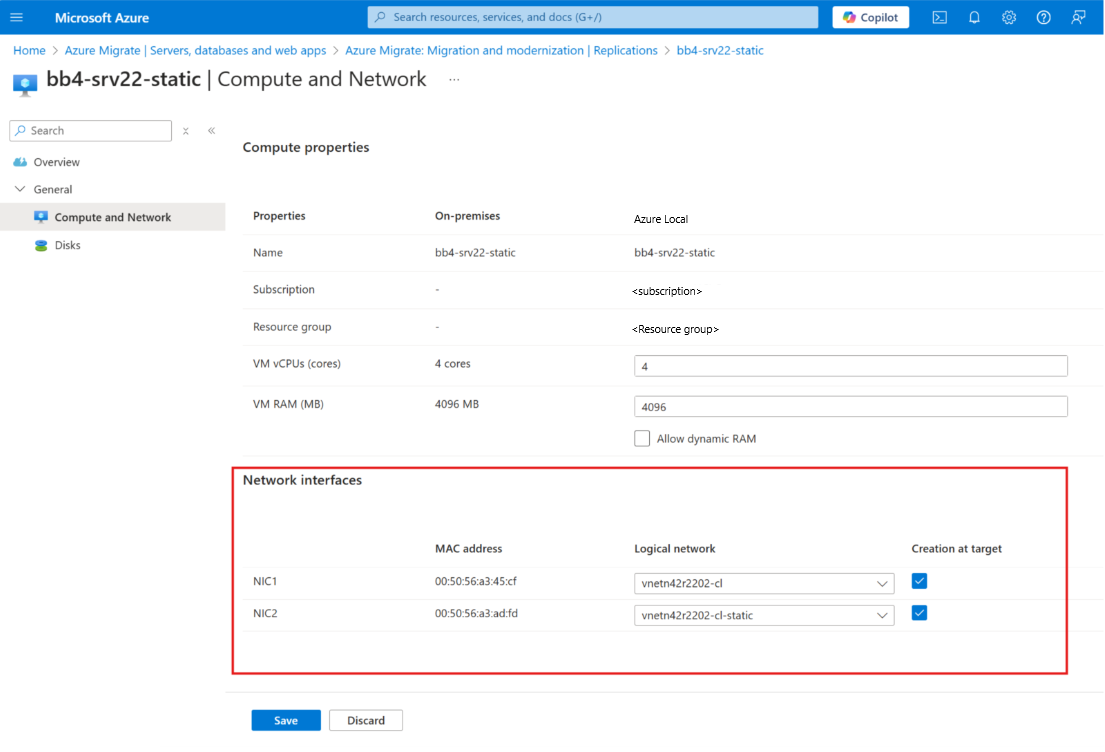
Failure to correctly assign the network interfaces to their corresponding logical networks results in incorrect IP address information displayed in Azure Local and Azure portal.
On the Migrate view, under Shut down virtual machines, select Yes, shut down virtual machines (ensures no data loss).

After the VM is migrated, check the migrated VM to verify that the static IP settings were migrated over.


Set up IP migration using group policy
Follow these steps to set up static IP migration at scale on domain-joined VMs using group policy.
- Review the prerequisites listed for static IP migrations using group policy.
Create a group policy object
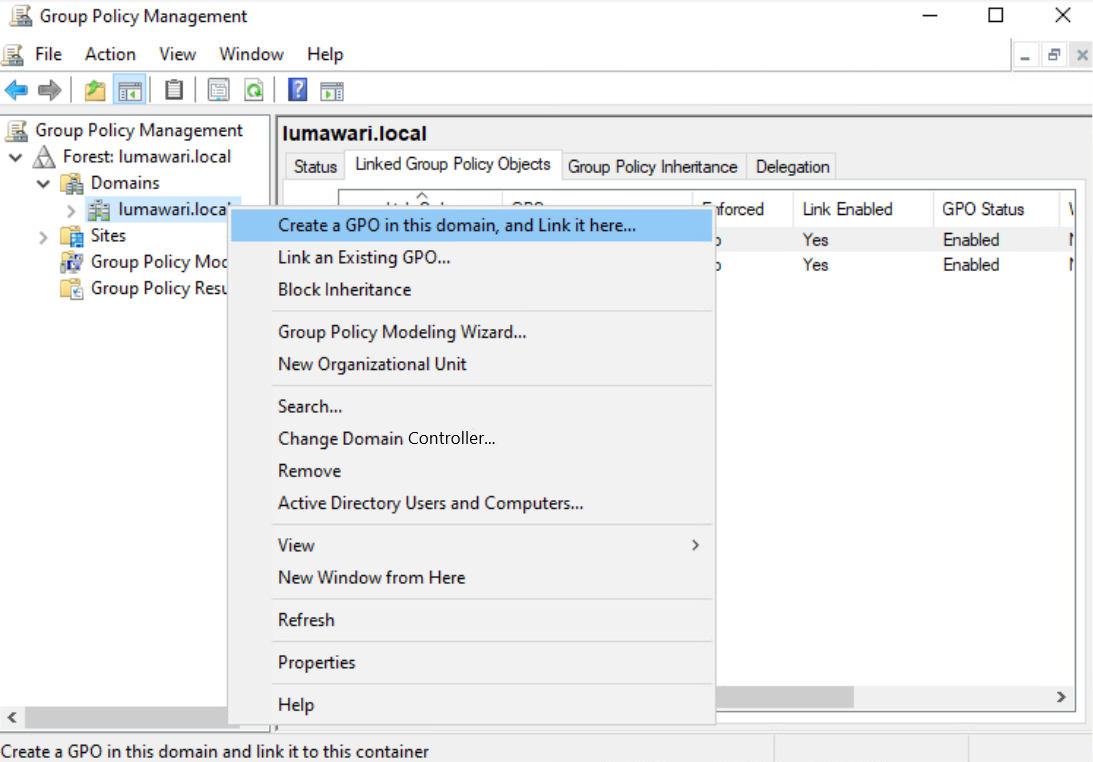
Open the Group Policy Management Console for your Active Directory (AD) environment.
In your AD forest, navigate to the location that contains the VMs you want to migrate with preserved static IPs.
Right-click and select Create a GPO on this domain, and Link it here.
When prompted, assign a descriptive name to this Group Policy Object (GPO):
Edit the GPO:
Right-click the newly created GPO and select Edit.
In the Group Policy Management Editor, go to Computer Configuration > Preferences > Control Panel Settings > Scheduled Tasks.
Right-click the blank area under Scheduled Tasks and select New > Immediate Task (At least Windows 7).

Define the scheduled task
Select New > Immediate Task. When the Scheduled Task Wizard opens, configure each tab as follows:
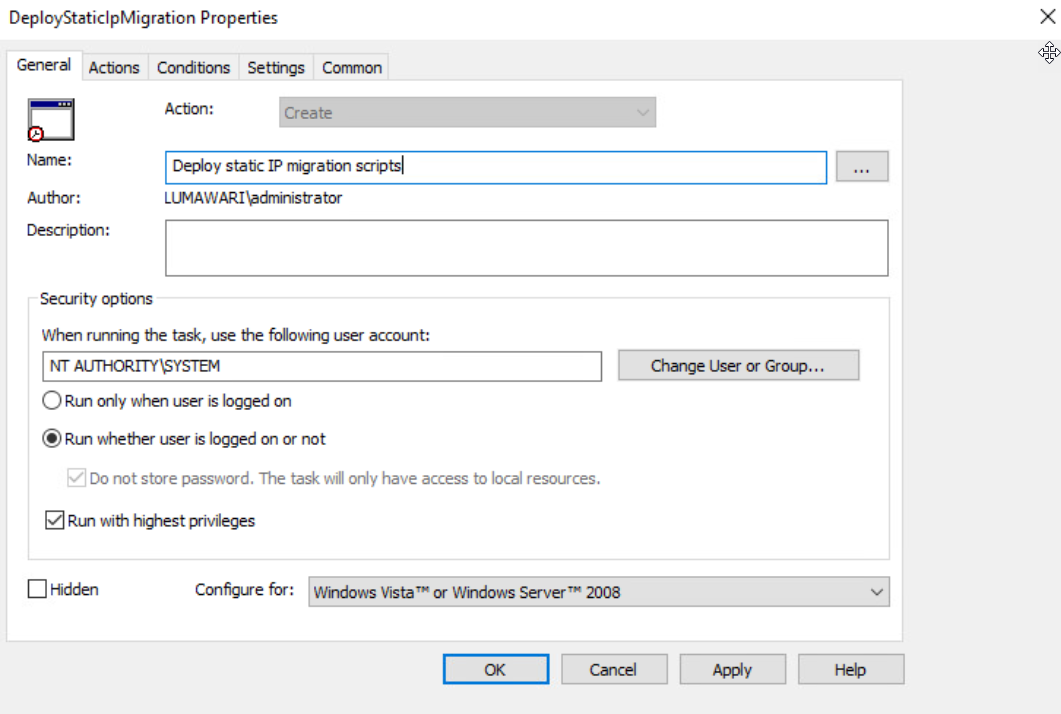
On the General tab, under Action, select Create and enter a descriptive name for the task.
Under Security Options, select the following settings:
When running the task, use the following user account NT AUTHORITY\SYSTEM.
Select Run whether user is logged on or not.
Select Run with highest privileges.
Under Configure for, select Windows Vista or Windows Server 2008 for configuration:
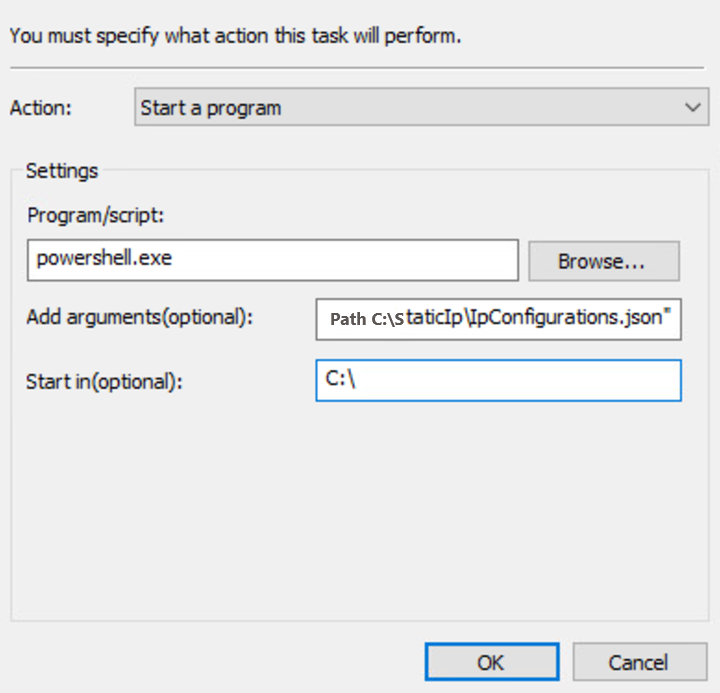
On the Actions tab, select New under the Actions tab.
Under Action, select Start a program.
Under Settings:
Run Program/script: Type powershell.exe.
If your VMs can access the download link for the .zip file, add the following arguments, replacing the parameters in brackets:
-ExecutionPolicy Bypass -Command "Invoke-WebRequest -Uri [download link] -OutFile [path to static IP migration package] ; Expand-Archive Path [path to static IP migration package] -DestinationPath C:\StaticIp ; & C:\StaticIp\Prepare-MigratedVM.ps1 -StaticIPMigration
```
(Alternate) If you have a remote share hosting the .zip file, add the following arguments, replacing the parameters in brackets:
-ExecutionPolicy Bypass -Command "Copy-Item -Path [ZIP file path in remote share] -Destination [path to static IP migration package] -Force ; Expand-Archive -Path [path to static IP migration package] DestinationPath C:\StaticIp ; & C:\StaticIp\Prepare-MigratedVM.ps1 -StaticIPMigrationSelect an Action, Program/script, add optional arguments, and optional Start in information as shown:
Select OK to finalize the scheduled task configuration.


Apply the group policy object
Link the GPO to the desired Organizational Unit (OU):
If the GPO isn't already linked, right-click the desired OU in the Group Policy Management Console and select Link an existing GPO.
Select the GPO you created.
Wait for replication to complete. After 10-20 minutes, the group policy object replicates to the respective domain controllers. You can also force the policy update by running the
gpupdatecmdlet in PowerShell on a specific VM.Verify the changes:
Check the VM to confirm that an interface configuration file has been created under C:\StaticIp\IpConfigurations.json.
Ensure that a scheduled task named
Set-StaticIpConfigurationhas been created to run on restart.
Known limitations
These are the known limitations and display issues when migrating static IP addresses:
Old network adapter information in Device Manager
After migration, Device Manager may still display the old network adapter information from pre-migration. While this doesn't affect the new network adapter created post-migration and won't cause IP conflicts, the script doesn't currently delete this old registration, so it remains visible.
Multiple IP addresses on a single network adapter
When the source VM has multiple static IP addresses assigned to a single network adapter, those IP addresses are correctly assigned on the migrated VM. However, Azure Local VMs enabled by Azure Arc in Azure Local display only one IP address per network adapter in Azure portal. This is a known display issue in the Azure Local portal and does not affect the actual functionality of the IP addresses on the migrated VM.
Multiple network adapters and types
If the source VM has multiple network adapters with a mix of DHCP and static configurations, the migrated VM will preserve the correct number of network adapter, network adapter types, and static IP addresses on the static network adapter. However, the Azure Local portal view of the migrated VM may incorrectly display duplicate or inaccurate IPs on the network adapters. This is a known display issue in the Azure Local portal and doesn't impact the functionality of the IP addresses on the migrated VM. See the example below of a migrated VM with a DHCP network adapter and a static network adapter.

IPv6 static IP addresses not supported
Azure Local VMs currently only support IPv4 addresses. NICs configured with IPv6 addresses will not be migrated, as IPv6 is not supported.
Logs
When configuring static IP migration for VMs using the Prepare-MigratedVM.ps1 or prepare_migrated_vm.sh script, logs are automatically created in the script's directory.