Connect your Azure subscriptions
In this guide, you'll learn how to enable Microsoft Defender for Cloud on your Azure subscription.
Microsoft Defender for Cloud is a cloud-native application protection platform (CNAPP) with a set of security measures and practices designed to protect your cloud-based applications end-to-end by combining the following capabilities:
- A development security operations (DevSecOps) solution that unifies security management at the code level across multicloud and multiple-pipeline environments
- A cloud security posture management (CSPM) solution that surfaces actions that you can take to prevent breaches
- A cloud workload protection platform (CWPP) with specific protections for servers, containers, storage, databases, and other workloads
Defender for Cloud includes Foundational CSPM capabilities and access to Microsoft Defender XDR for free. You can add additional paid plans to secure all aspects of your cloud resources. You can try Defender for Cloud for free for the first 30 days. After 30 days, charges begin in accordance with the plans enabled in your environment. To learn more about these plans and their costs, see the Defender for Cloud pricing page.
Important
Malware scanning in Defender for Storage is not included for free in the first 30 day trial and will be charged from the first day in accordance with the pricing scheme available on the Defender for Cloud pricing page.
Defender for Cloud helps you find and fix security vulnerabilities. Defender for Cloud also applies access and application controls to block malicious activity, detect threats using analytics and intelligence, and respond quickly when under attack.
Prerequisites
- To view information related to a resource in Defender for Cloud, you must be assigned the Owner, Contributor, or Reader role for the subscription or for the resource group that the resource is located in.
Enable Defender for Cloud on your Azure subscription
Tip
To enable Defender for Cloud on all subscriptions within a management group, see Enable Defender for Cloud on multiple Azure subscriptions.
Sign in to the Azure portal.
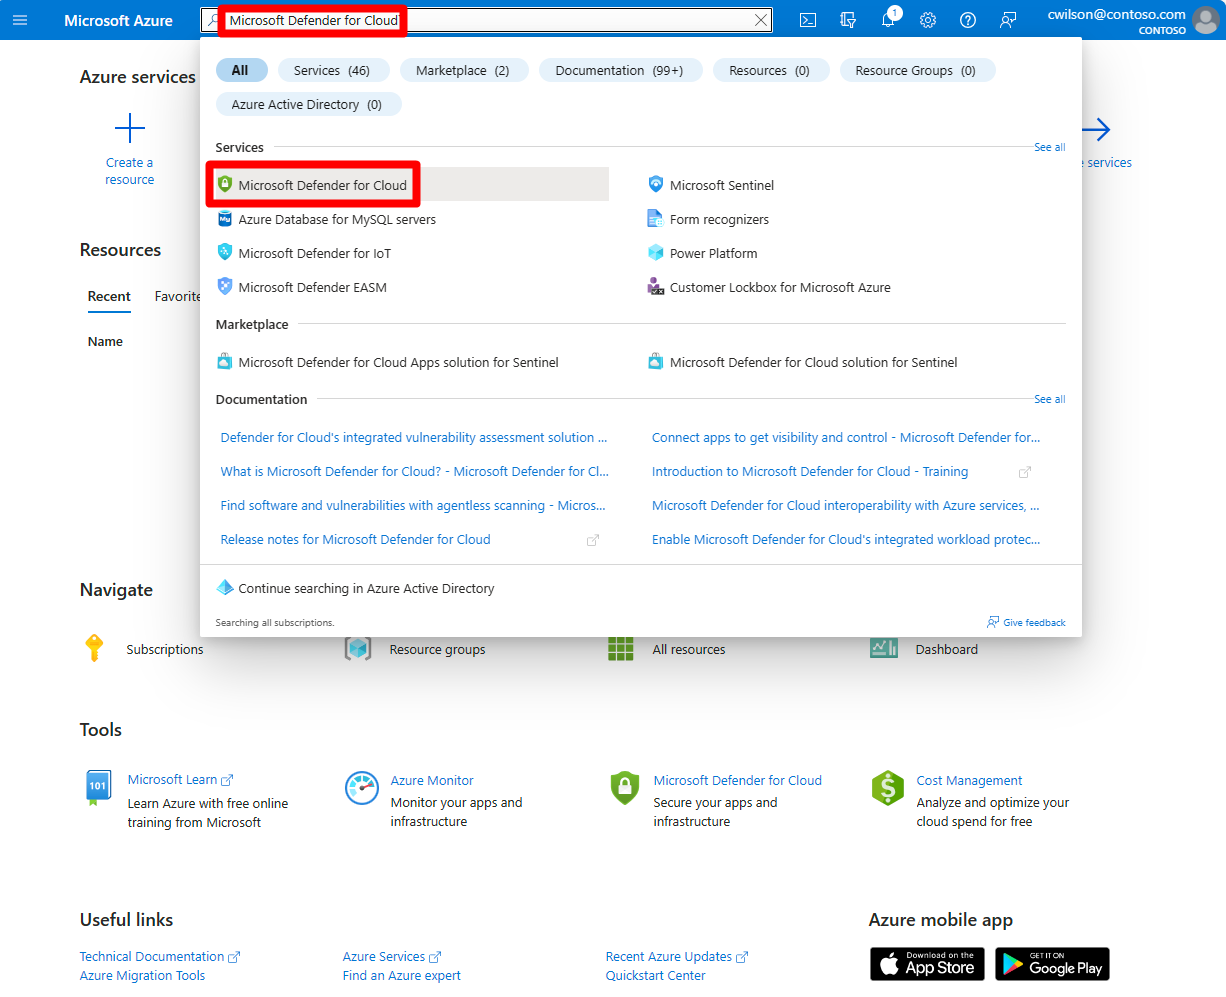
Search for and select Microsoft Defender for Cloud.
The Defender for Cloud's overview page opens.
Defender for Cloud is now enabled on your subscription and you have access to the basic features provided by Defender for Cloud. These features include:
- The Foundational Cloud Security Posture Management (CSPM) plan.
- Recommendations.
- Access to the Asset inventory.
- Workbooks.
- Secure score.
- Regulatory compliance with the Microsoft cloud security benchmark.
The Defender for Cloud overview page provides a unified view into the security posture of your hybrid cloud workloads, helping you discover and assess the security of your workloads and to identify and mitigate risks. Learn more in Microsoft Defender for Cloud's overview page.
You can view and filter your list of subscriptions from the subscriptions menu to have Defender for Cloud adjust the overview page display to reflect the security posture to the selected subscriptions.
Within minutes of launching Defender for Cloud for the first time, you might see:
- Recommendations for ways to improve the security of your connected resources.
- An inventory of your resources that Defender for Cloud assesses along with the security posture of each.
Enable all paid plans on your subscription
To enable all of Defender for Cloud's protections, you need to enable the plans for the workloads that you want to protect.
Note
- You can enable Microsoft Defender for Storage accounts, Microsoft Defender for SQL, Microsoft Defender for open-source relational databases at either the subscription level or resource level.
- The Microsoft Defender plans available at the workspace level are: Microsoft Defender for Servers, Microsoft Defender for SQL servers on machines.
Important
Microsoft Defender for SQL is a subscription level bundle that uses either a default or custom workspace.
When you enable Defender plans on an entire Azure subscription, the protections are applied to all other resources in the subscription.
To enable additional paid plans on a subscription:
Sign in to the Azure portal.
Search for and select Microsoft Defender for Cloud.
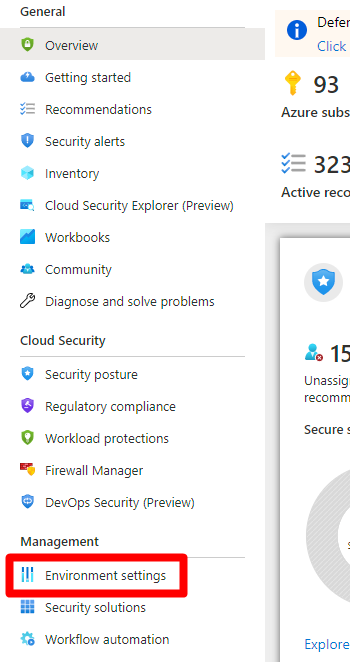
In the Defender for Cloud menu, select Environment settings.

Select the subscription or workspace that you want to protect.
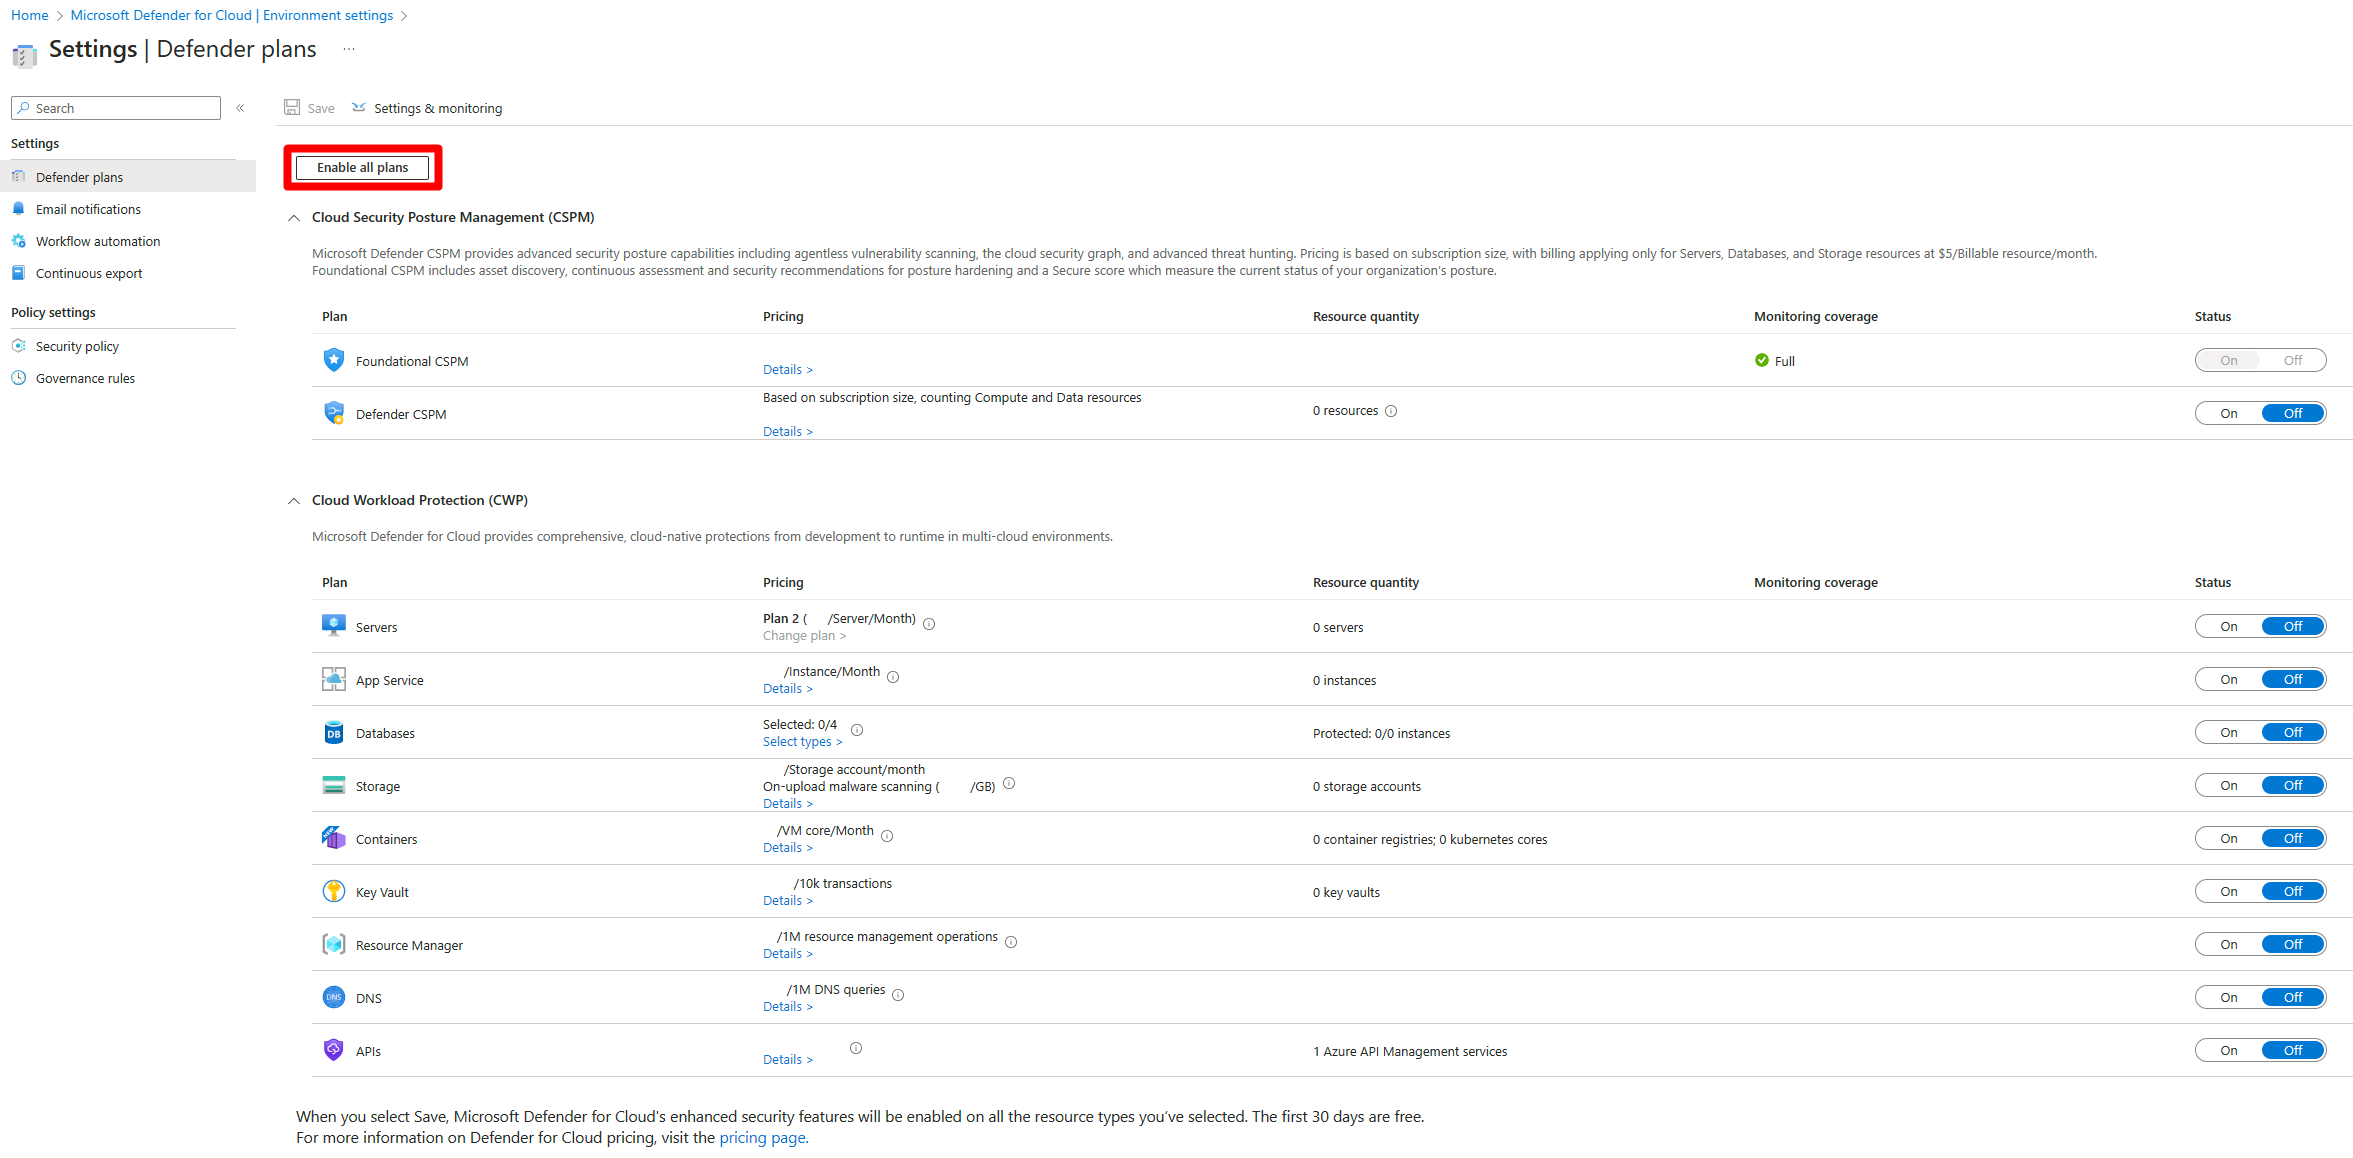
Select Enable all to enable all of the plans for Defender for Cloud.
Select Save.
All of the plans are turned on and the monitoring components required by each plan are deployed to the protected resources.
If you want to disable any of the plans, toggle the individual plan to off. The extensions used by the plan aren't uninstalled but, after a short time, the extensions stop collecting data.
Tip
To enable Defender for Cloud on all subscriptions within a management group, see Enable Defender for Cloud on multiple Azure subscriptions.
Integrate with Microsoft Defender XDR
When you enable Defender for Cloud, Defender for Cloud's alerts are automatically integrated into the Microsoft Defender Portal. No further steps are needed.
The integration between Microsoft Defender for Cloud and Microsoft Defender XDR brings your cloud environments into Microsoft Defender XDR. With Defender for Cloud's alerts and cloud correlations integrated into Microsoft Defender XDR, SOC teams can now access all security information from a single interface.
Learn more about Defender for Cloud's alerts in Microsoft Defender XDR.
Next steps
In this guide, you enabled Defender for Cloud on your Azure subscription. The next step is to set up your hybrid and multicloud environments.


