Pipeline default branch
Azure DevOps Services | Azure DevOps Server 2022 | Azure DevOps Server 2020
This article describes how to view and edit a pipeline's default branch. A pipeline's default branch defines the pipeline version used for manual builds, scheduled builds, retention policies, and in pipeline resource triggers. By default, a pipeline's default branch is the default branch of the repository.
View and update the default branch
To view and update the Default branch for manual and scheduled builds setting:
In your Azure DevOps project, select your pipeline from the Pipelines list.
On the pipeline page, select Edit.

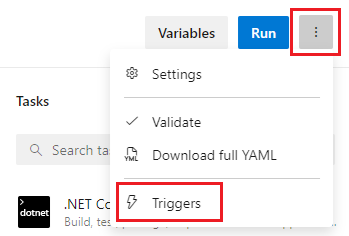
In the More actions menu, select Triggers.

Select YAML > Get sources, and view the Default branch for manual and scheduled builds setting.
To change the branch, select the Browse icon next to the branch name, select a different branch name, and select Select. Then select Save or Save & queue on the pipeline page.

Important
Azure Pipelines loads a maximum of 2,000 branches from a repository into the Default branch for manual and scheduled builds selector. If you don't see your desired branch in the list, enter the desired branch name manually.