Create a lab account
Important
The information in this article applies to lab accounts. Azure Lab Services lab plans replace lab accounts. Learn how you can get started by creating a lab plan. For existing lab account customers, we recommend that you migrate from lab accounts to lab plans.
In Azure Lab Services, a lab account is a container for labs. An administrator creates a lab account with Azure Lab Services and provides access to lab owners who can create labs in the account. This article describes how to create a lab account, view all lab accounts, and delete a lab account.
The following steps illustrate how to use the Azure portal to create a lab account with Azure Lab Services.
Sign in to the Azure portal.
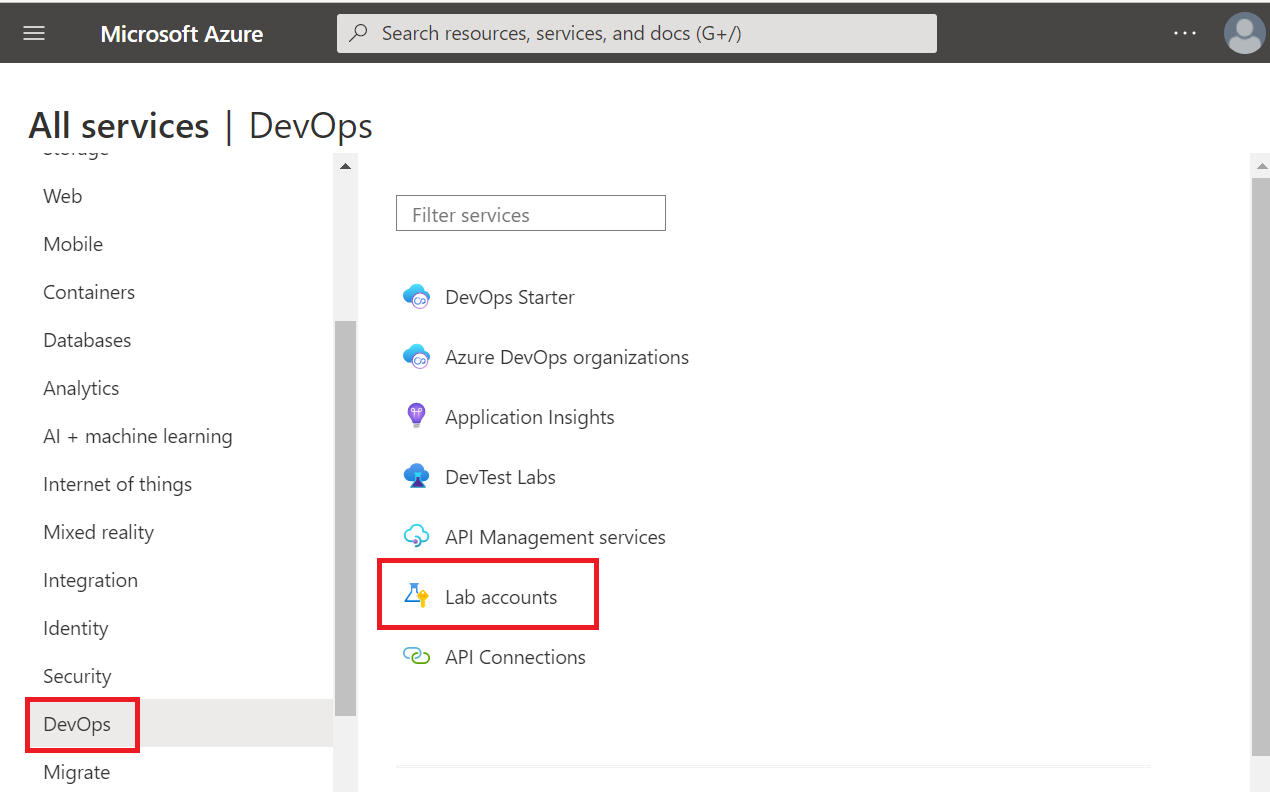
Select All services on the left menu. Select the DevOps category. Select the Lab accounts tile.
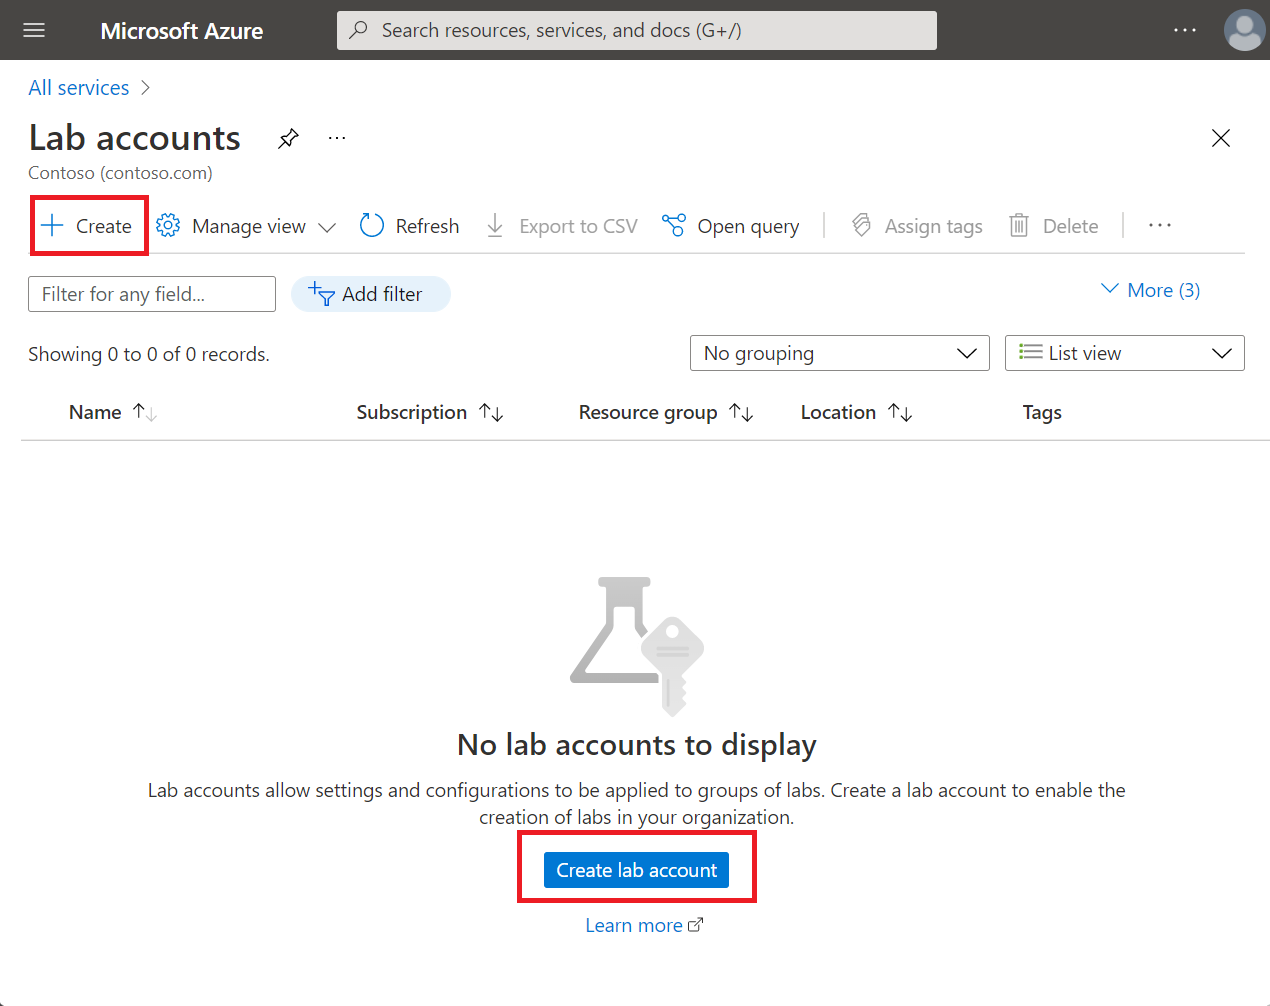
On the Lab Accounts page, select Create on the toolbar or Create lab account on the page.
On the Basics tab of the Create a lab account page, do the following actions:
Select the Azure subscription in which you want to create the lab account.
For Resource group, select Create new, and enter a name for the resource group.
For Lab account name, enter a name.
For Location, select a location/region in which you want the lab account to be created.
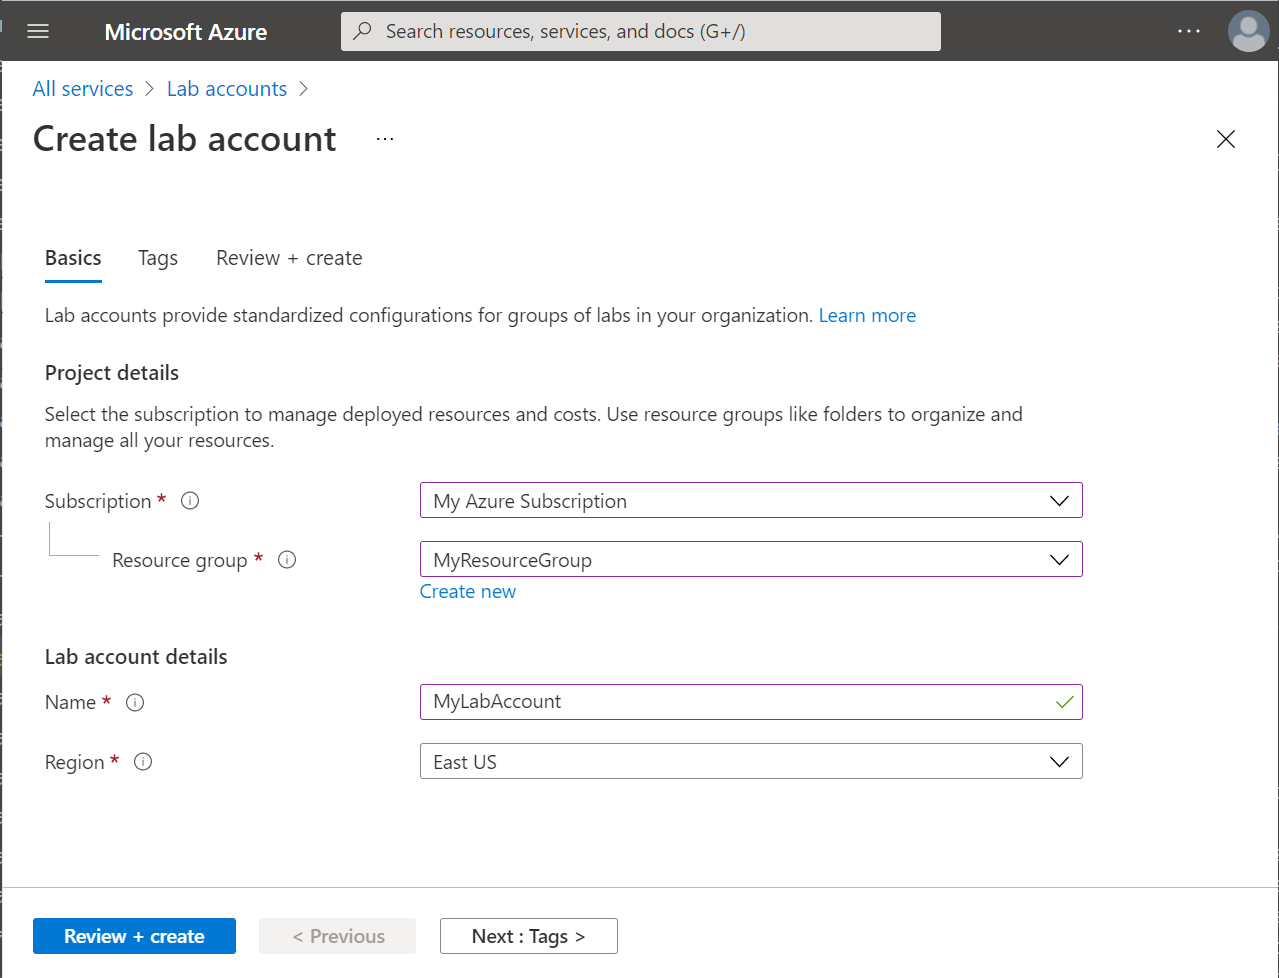
Select Next: Tags.
On the Tags tab, add any tags you want to associate with the lab account. Tags are name/value pairs that enable you to categorize resources and view consolidated billing by applying the same tag to multiple resources and resource groups. For more information, see Use tags to organize your Azure resources.
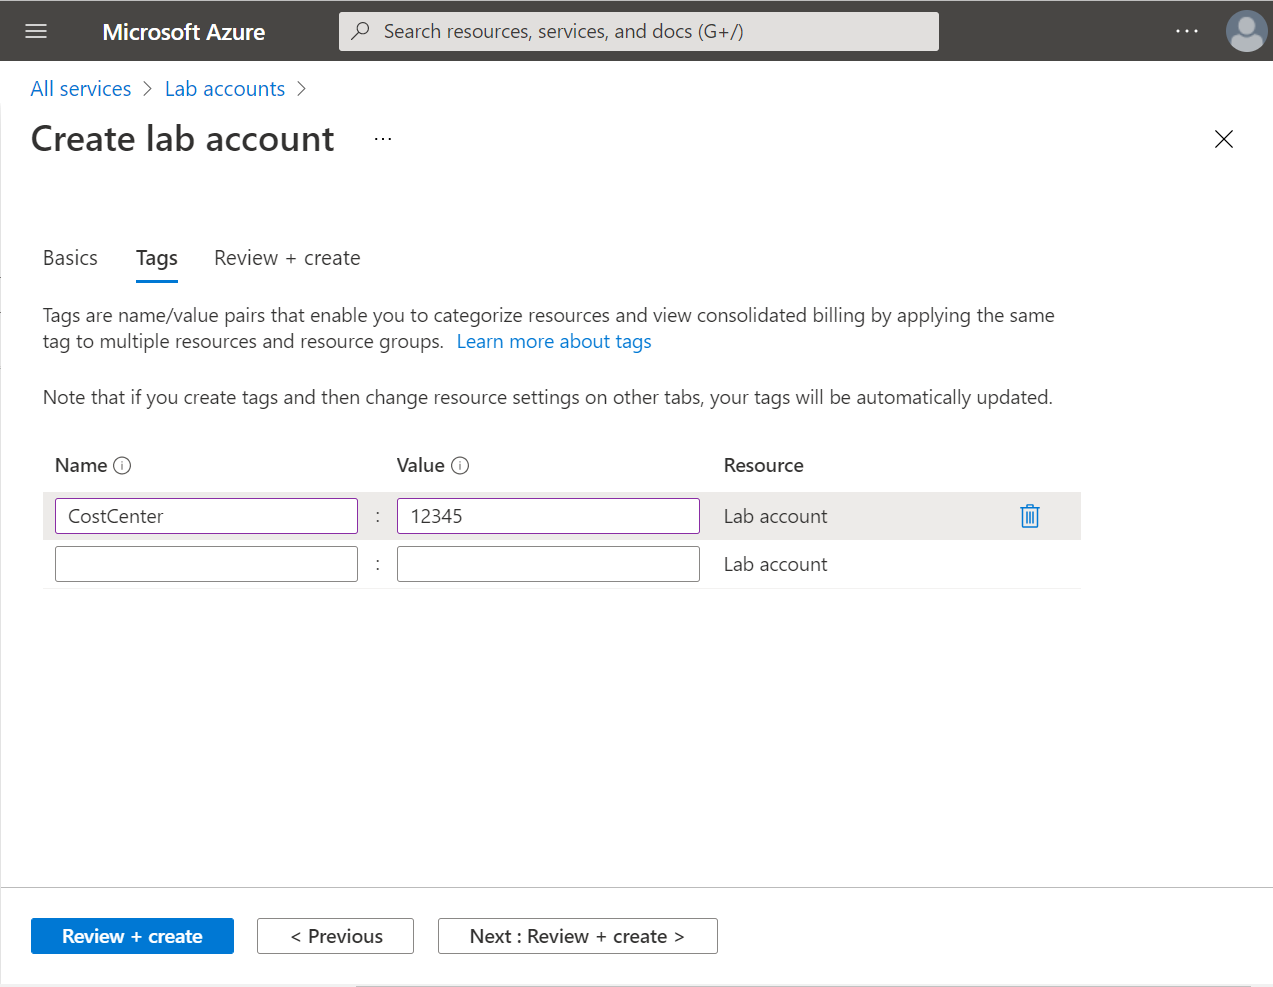
Select Next: Review + create.
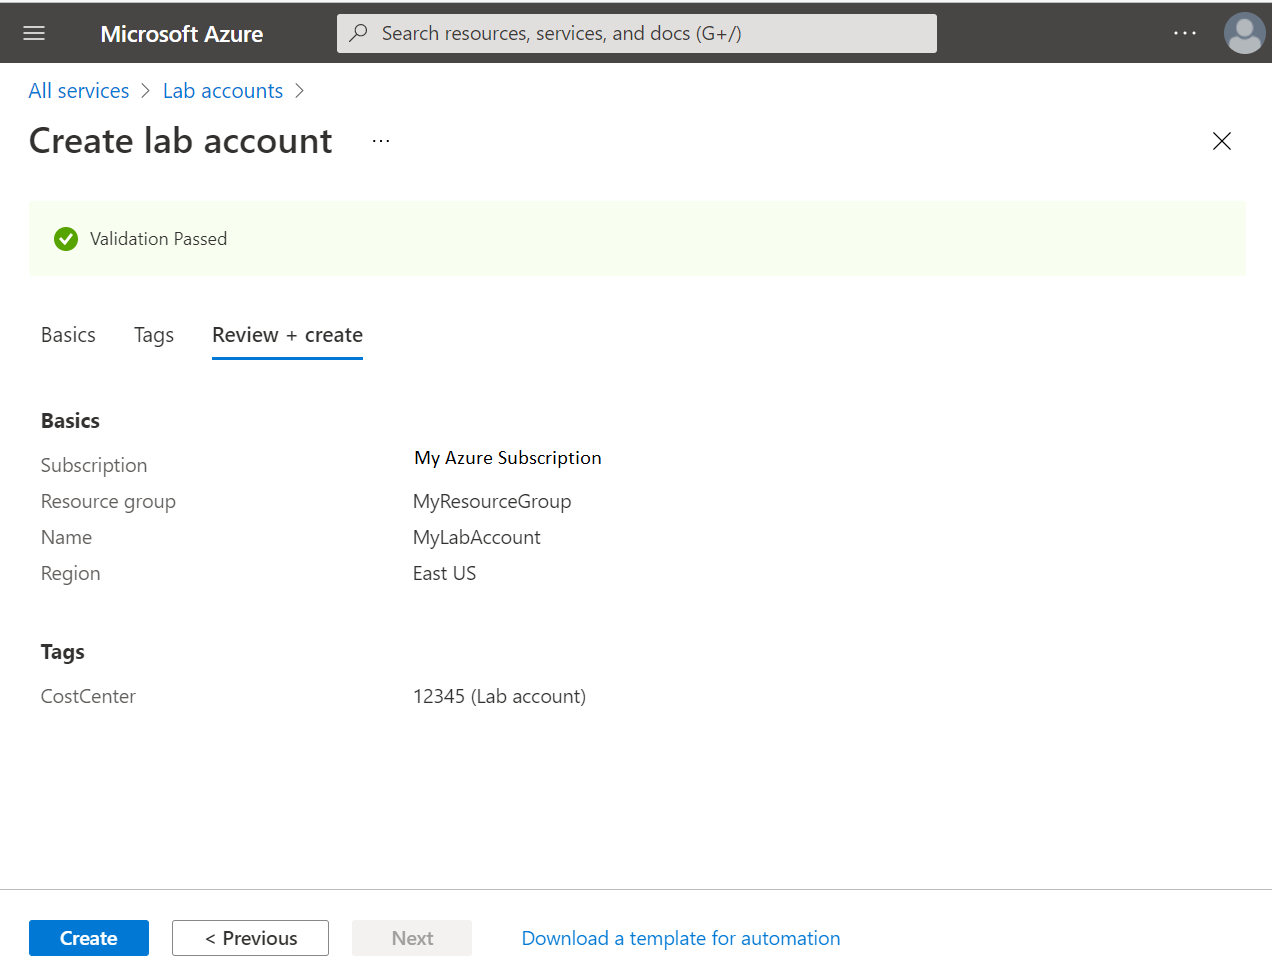
Wait for validation to pass. Review the summary information on the Review + create page, and select Create.
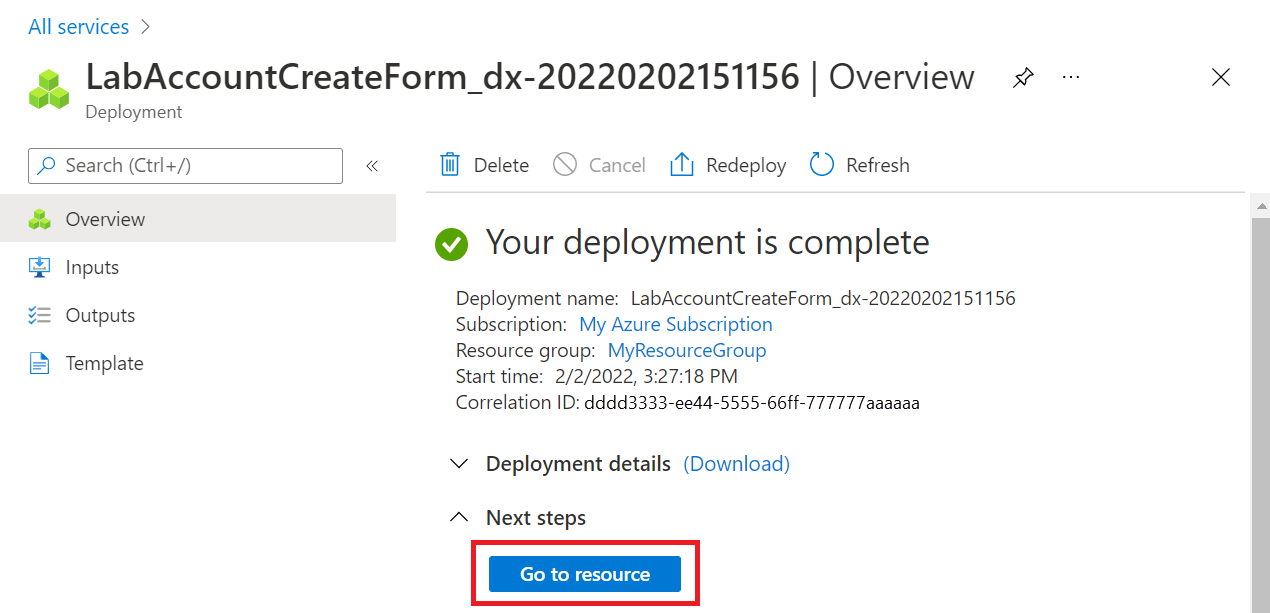
Wait until the deployment is complete, expand Next steps, and select Go to resource.
You can also select the bell icon on the toolbar (Notifications), confirm that the deployment succeeded, and then select Go to resource.
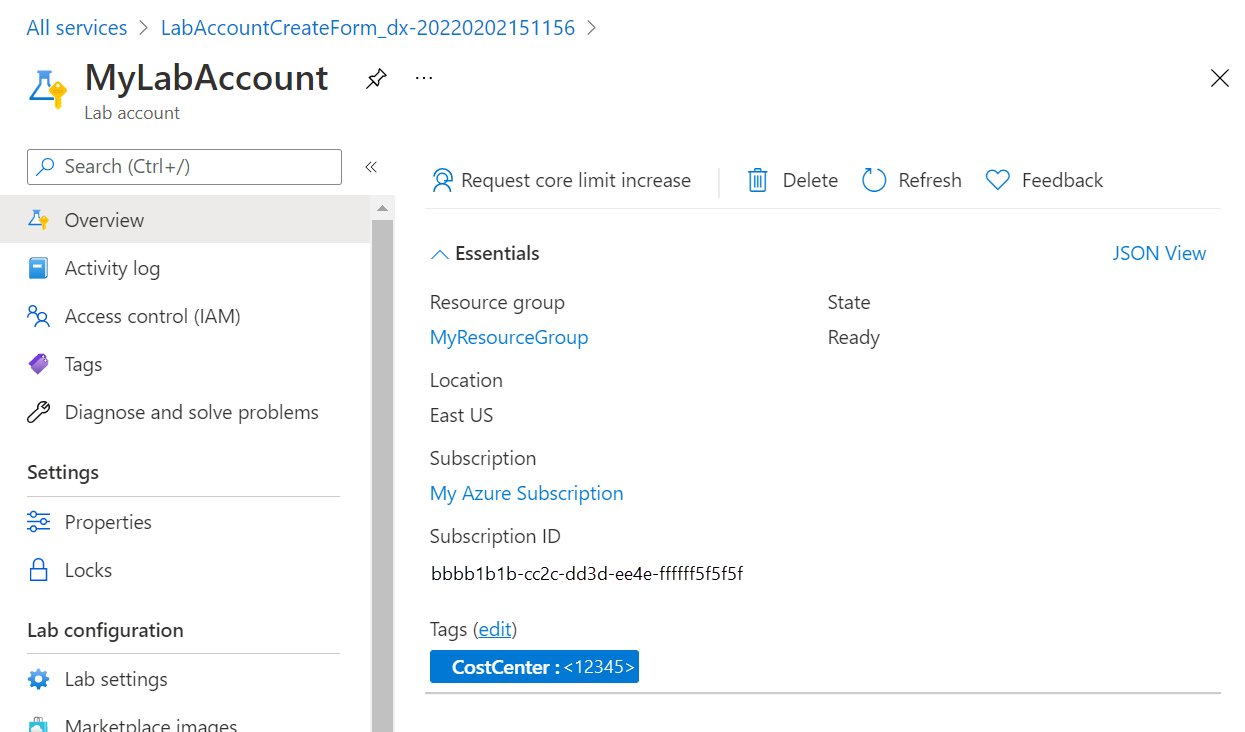
Notice the Overview page for the lab account.
Next steps
- As an admin, configure automatic shutdown settings for a lab account.
- As an admin, use the Az.LabServices PowerShell module to manage lab accounts.
- As an educator, configure automatic shutdown settings for a lab.
คำติชม
เร็วๆ นี้: ตลอดปี 2024 เราจะขจัดปัญหา GitHub เพื่อเป็นกลไกคำติชมสำหรับเนื้อหา และแทนที่ด้วยระบบคำติชมใหม่ สำหรับข้อมูลเพิ่มเติม ให้ดู: https://aka.ms/ContentUserFeedback
ส่งและดูข้อคิดเห็นสำหรับ