หมายเหตุ
การเข้าถึงหน้านี้ต้องได้รับการอนุญาต คุณสามารถลอง ลงชื่อเข้าใช้หรือเปลี่ยนไดเรกทอรีได้
การเข้าถึงหน้านี้ต้องได้รับการอนุญาต คุณสามารถลองเปลี่ยนไดเรกทอรีได้
Important
Microsoft Playwright Testing will be retired on March 8, 2026. To continue running your Playwright tests, create a new Playwright Workspace in Azure App Testing, now generally available. Learn how to migrate.
In this quickstart, you learn how to run your Playwright tests with highly parallel cloud browsers and troubleshoot failed tests easily using Microsoft Playwright Testing Preview. Use cloud infrastructure to validate your application across multiple browsers, devices, and operating systems. Publish the results and artifacts generated by Playwright to the service and view them in the service portal.
After you complete this quickstart, you have a Microsoft Playwright Testing workspace to run your Playwright tests at scale and view test results and artifacts in the service portal.
Important
Microsoft Playwright Testing is currently in preview. For legal terms that apply to Azure features that are in beta, in preview, or otherwise not yet released into general availability, see the Supplemental Terms of Use for Microsoft Azure Previews.
Prerequisites
- An Azure account with an active subscription. If you don't have an Azure subscription, create a free account before you begin.
- Your Azure account needs the Owner, Contributor, or one of the classic administrator roles.
- A Playwright project. If you don't have project, create one by using the Playwright getting started documentation or use our Microsoft Playwright Testing sample project.
- Azure CLI. If you don't have Azure CLI, see Install Azure CLI.
Create a workspace
To get started with running your Playwright tests at scale on cloud browsers, you first create a Microsoft Playwright Testing workspace in the Playwright portal.
Sign in to the Playwright portal with your Azure account.
If you already have a workspace, select an existing workspace, and move to the next step.
Tip
If you have multiple workspaces, you can switch to another workspace by selecting the workspace name at the top of the page, and then select Manage all workspaces.
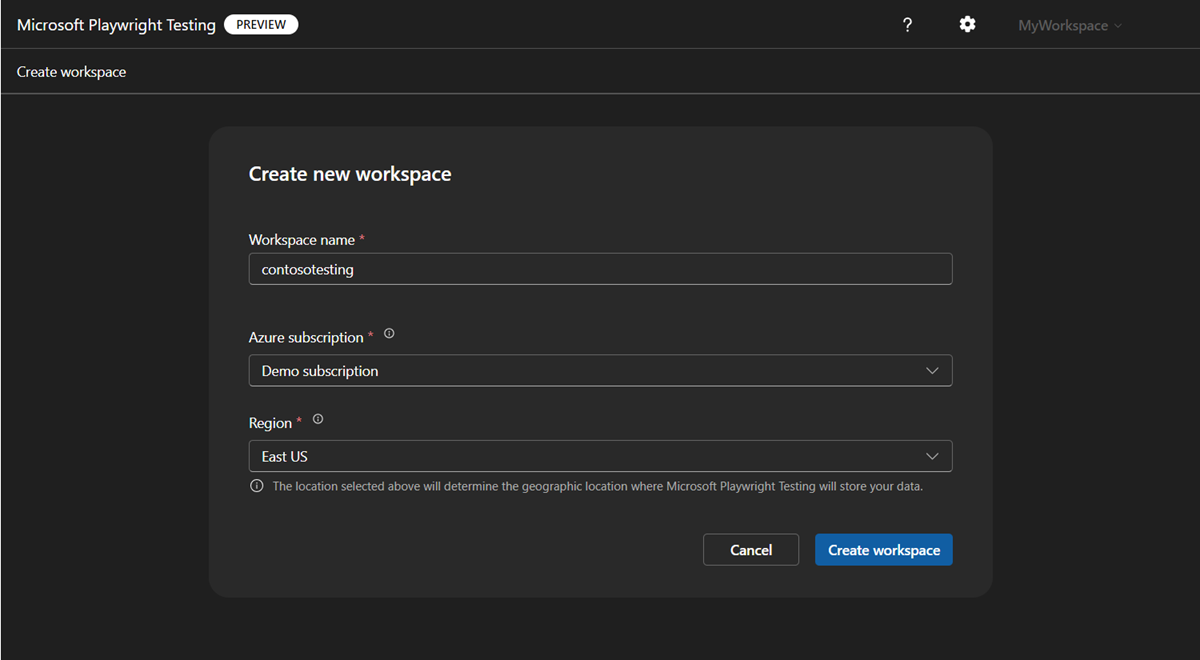
If you don't have a workspace yet, select + New workspace, and then provide the following information:
Field Description Workspace name Enter a unique name to identify your workspace.
The name can only consist of alphanumerical characters, and have a length between 3 and 64 characters.Azure subscription Select the Azure subscription that you want to use for this Microsoft Playwright Testing workspace. Region Select a geographic location to host your workspace.
This is the location where the test run data is stored for the workspace.Select Create workspace to create the workspace in your subscription.
During the workspace creation, a new resource group and a Microsoft Playwright Testing Azure resource are created in your Azure subscription.
When the workspace creation finishes, you're redirected to the setup guide.
Install Microsoft Playwright Testing package
To use the service, install Microsoft Playwright Testing package.
npm init @azure/microsoft-playwright-testing@latest
This generates playwright.service.config.ts file which serves to:
- Direct and authenticate Playwright to the Microsoft Playwright Testing service.
- Adds a reporter to publish test results and artifacts.
If you already have this file, the package asks you to override it.
To use the service, install Microsoft Playwright Testing package.
dotnet add package Azure.Developer.MicrosoftPlaywrightTesting.NUnit --prerelease
Configure the service region endpoint
In your setup, you have to provide the region-specific service endpoint. The endpoint depends on the Azure region you selected when creating the workspace.
To get the service endpoint URL, perform the following steps:
In Add region endpoint in your setup, copy the region endpoint for your workspace.
The endpoint URL matches the Azure region that you selected when creating the workspace. Make sure this URL is available in
PLAYWRIGHT_SERVICE_URLenvironment variable.
Set up your environment
To set up your environment, you have to configure the PLAYWRIGHT_SERVICE_URL environment variable with the value you obtained in the previous steps.
We recommend that you use the dotenv module to manage your environment. With dotenv, you define your environment variables in the .env file.
Add the
dotenvmodule to your project:npm i --save-dev dotenvCreate a
.envfile alongside theplaywright.config.tsfile in your Playwright project:PLAYWRIGHT_SERVICE_URL={MY-REGION-ENDPOINT}Make sure to replace the
{MY-REGION-ENDPOINT}text placeholder with the value you copied earlier.
Set up service configuration
Create a file PlaywrightServiceSetup.cs in your project with the following content.
using Azure.Developer.MicrosoftPlaywrightTesting.NUnit;

namespace PlaywrightTests; // Remember to change this as per your project namespace

[SetUpFixture]
public class PlaywrightServiceSetup : PlaywrightServiceNUnit {};
Note
Make sure your project uses Microsoft.Playwright.NUnit version 1.47 or above.
Set up Authentication
To run your Playwright tests in your Microsoft Playwright Testing workspace, you need to authenticate the Playwright client where you're running the tests with the service. This could be your local dev machine or CI machine.
The service offers two authentication methods: Microsoft Entra ID and Access Tokens.
Microsoft Entra ID uses your Azure credentials, requiring a sign-in to your Azure account for secure access. Alternatively, you can generate an access token from your Playwright workspace and use it in your setup.
Set up authentication using Microsoft Entra ID
Microsoft Entra ID is the default and recommended authentication for the service. From your local dev machine, you can use Azure CLI to sign-in
az login
Note
If you're a part of multiple Microsoft Entra tenants, make sure you sign in to the tenant where your workspace belongs. You can get the tenant ID from Azure portal. See Find your Microsoft Entra Tenant. Once you get the ID, sign-in using the command az login --tenant <TenantID>
Set up authentication using access tokens
You can generate an access token from your Playwright Testing workspace and use it in your setup. However, we strongly recommend Microsoft Entra ID for authentication due to its enhanced security. Access tokens, while convenient, function like long-lived passwords and are more susceptible to being compromised.
Authentication using access tokens is disabled by default. To use, Enable access-token based authentication
Caution
We strongly recommend using Microsoft Entra ID for authentication to the service. If you are using access tokens, see How to Manage Access Tokens
Enable artifacts in your Playwright setup
In the playwright.config.ts file of your project, make sure you are collecting all the required artifacts.
  use: {
    trace: 'on-first-retry',
    video:'retain-on-failure',
    screenshot:'on'
  }
Enable artifacts such as screenshot, videos and traces to be captured by Playwright.
- For screenshots, see capture screenshots
- For videos, see record videos for your tests
- For traces, see recording a trace
Once you collect these artifacts, attach them to the TestContext to ensure they are available in your test reports. For more information, see our sample project for NUnit
Run your tests at scale and troubleshoot easily with Microsoft Playwright Testing
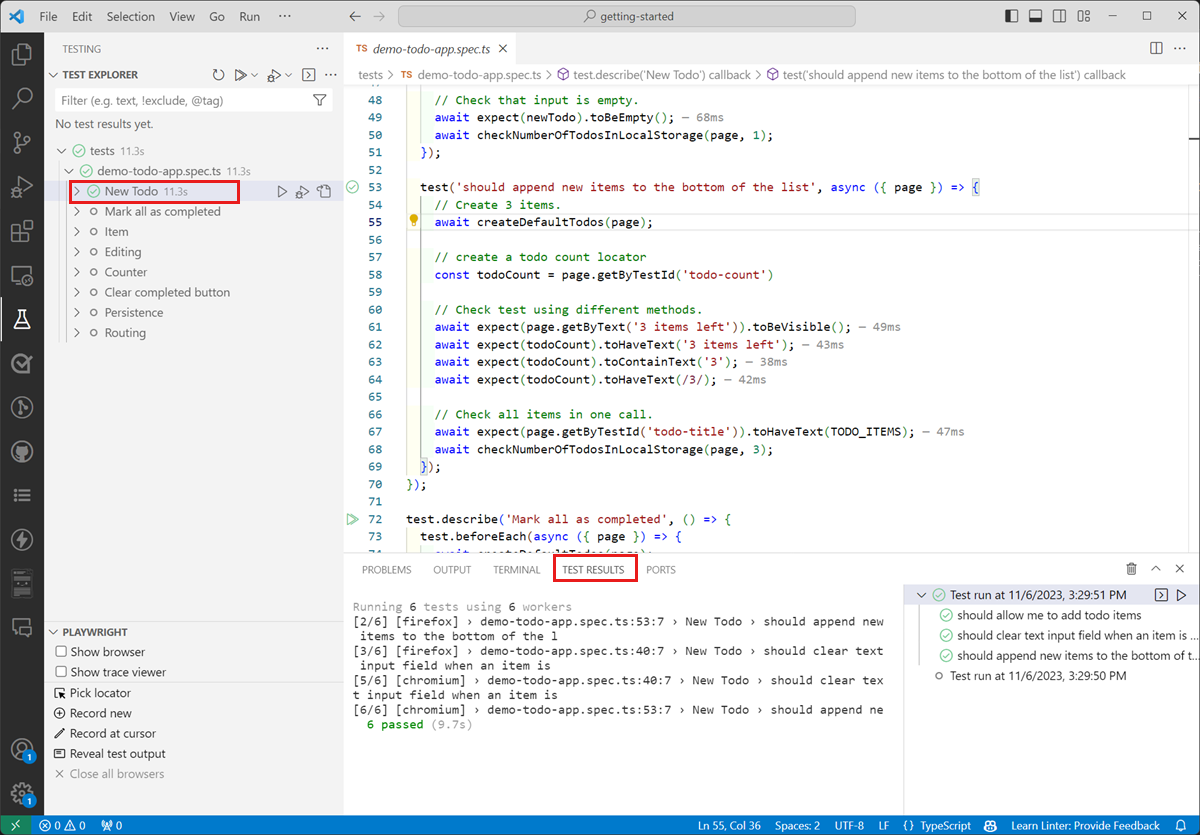
You've now prepared the configuration for running your Playwright tests in the cloud with Microsoft Playwright Testing. You can either use the Playwright CLI to run your tests, or use the Playwright Test Visual Studio Code extension.
Run a single test with the service
With Microsoft Playwright Testing, you get charged based on the number of total test minutes and number of test results published. If you're a first-time user or getting started with a free trial, you might start with running a single test at scale instead of your full test suite to avoid exhausting your free trial limits.
Note
Reporting feature is enabled by default for existing workspaces. This is being rolled out in stages and will take a few days. To avoid failures, confirm that Rich diagnostics using reporting setting is ON for your workspace before proceeding. See, Enable reporting for workspace.
After you validate that the test runs successfully, you can gradually increase the test load by running more tests with the service.
Perform the following steps to run a single Playwright test with Microsoft Playwright Testing:
To use the Playwright CLI to run your tests with Microsoft Playwright Testing, pass the service configuration file as a command-line parameter.
Open a terminal window.
Enter the following command to run your Playwright test on remote browsers in your workspace:
Replace the
{name-of-file.spec.ts}text placeholder with the name of your test specification file.npx playwright test {name-of-file.spec.ts} --config=playwright.service.config.tsAfter the test completes, you can view the test status in the terminal.
Running 1 test using 1 worker
    1 passed (2.2s)

To open last HTML report run:

npx playwright show-report
You can now run multiple tests with the service, or run your entire test suite on remote browsers.
Caution
Depending on the size of your test suite, you might incur additional charges for the test minutes and test results beyond your allotted free test minutes and free test results.
Run a full test suite with the service
Now that you've validated that you can run a single test with Microsoft Playwright Testing, you can run a full Playwright test suite at scale.
Perform the following steps to run a full Playwright test suite with Microsoft Playwright Testing:
When you run multiple Playwright tests or a full test suite with Microsoft Playwright Testing, you can optionally specify the number of parallel workers as a command-line parameter.
Open a terminal window.
Enter the following command to run your Playwright test suite on remote browsers in your workspace:
npx playwright test --config=playwright.service.config.ts --workers=20Depending on the size of your test suite, this command runs your tests on up to 20 parallel workers.
After the test completes, you can view the test status in the terminal.
Running 6 tests using 6 workers
    6 passed (18.2s)

Test report: https://playwright.microsoft.com/workspaces/<workspace-id>/runs/<run-id>
Run Playwright tests against browsers managed by the service and see the results in the unified portal using the configuration you created above.
dotnet test --settings:.runsettings --logger "microsoft-playwright-testing" -- NUnit.NumberOfTestWorkers=20
The settings for your test run are defined in .runsettings file. See how to use service package options
After the test run completes, you can view the test status in the terminal.
Starting test execution, please wait...

Initializing reporting for this test run. You can view the results at: https://playwright.microsoft.com/workspaces/<workspace-id>/runs/<run-id>

A total of 100 test files matched the specified pattern.

Test Report: https://playwright.microsoft.com/workspaces/<workspace-id>/runs/<run-id>

Passed!  - Failed:     0, Passed:     100, Skipped:     0, Total:     100, Duration: 59 s - PlaywrightTestsNUnit.dll (net7.0)

Workload updates are available. Run `dotnet workload list` for more information.
View test runs and results in the Playwright portal
You can now troubleshoot the failed test cases in the Playwright portal.
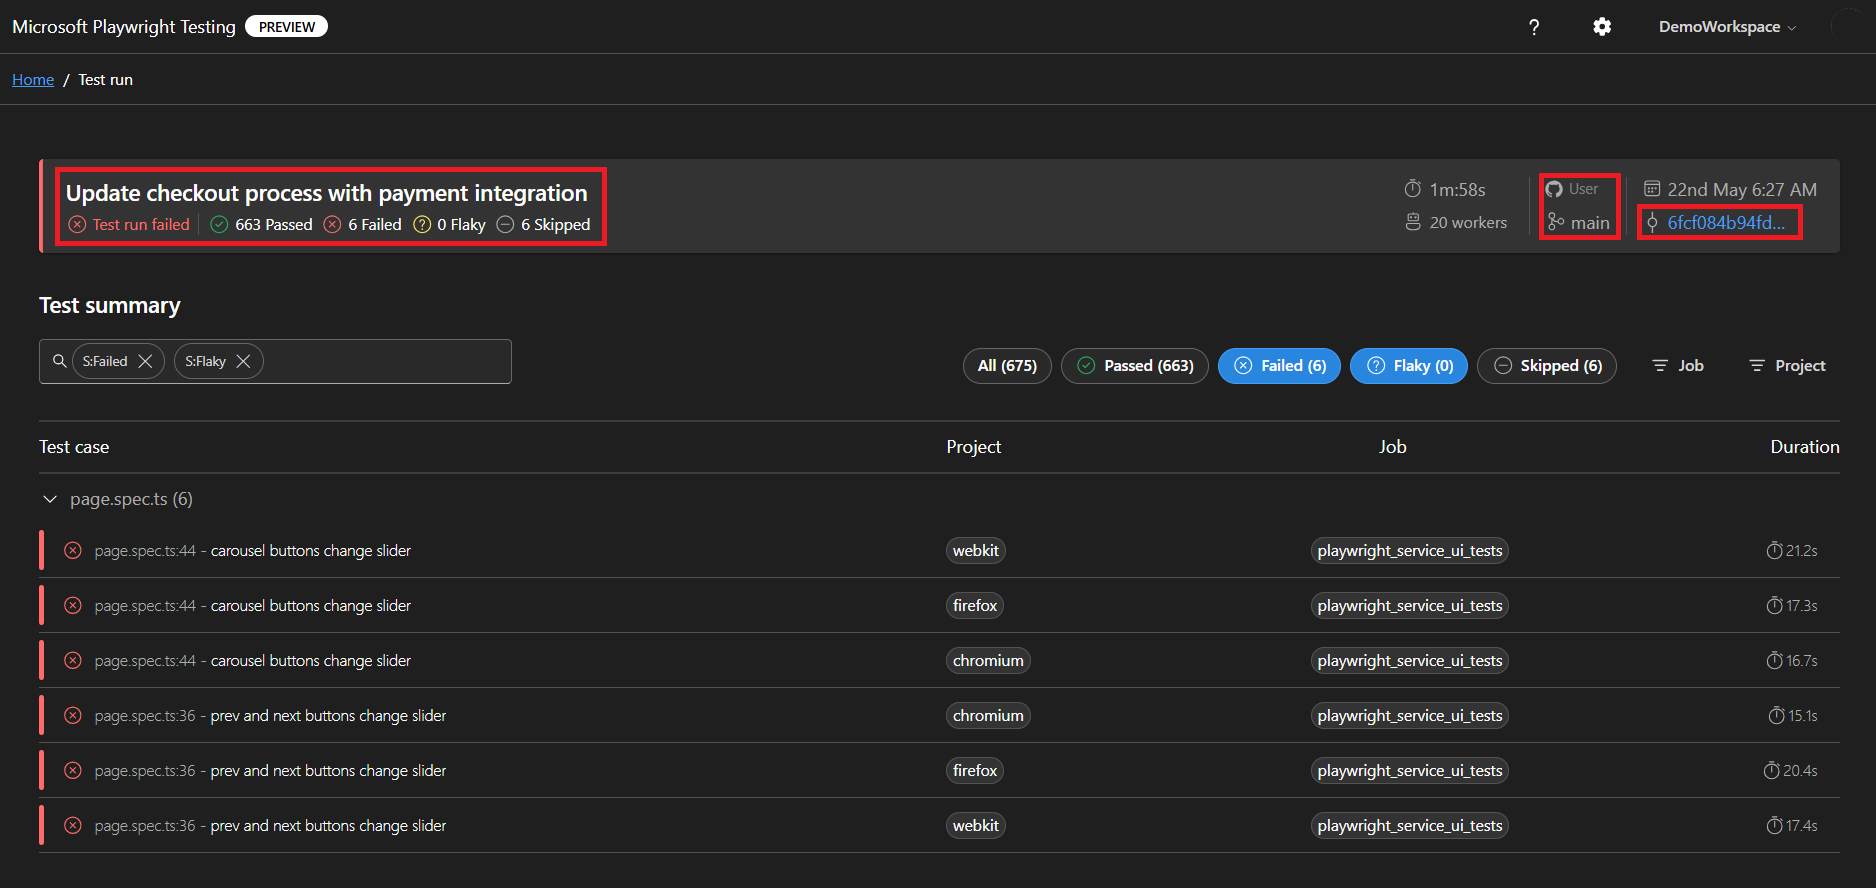
After your test run completes, a link to the Playwright Portal is generated. Open this link to view detailed test results and associated artifacts. The portal displays essential information, including:
- CI build details
- Overall test run status
- The commit ID linked to the test run
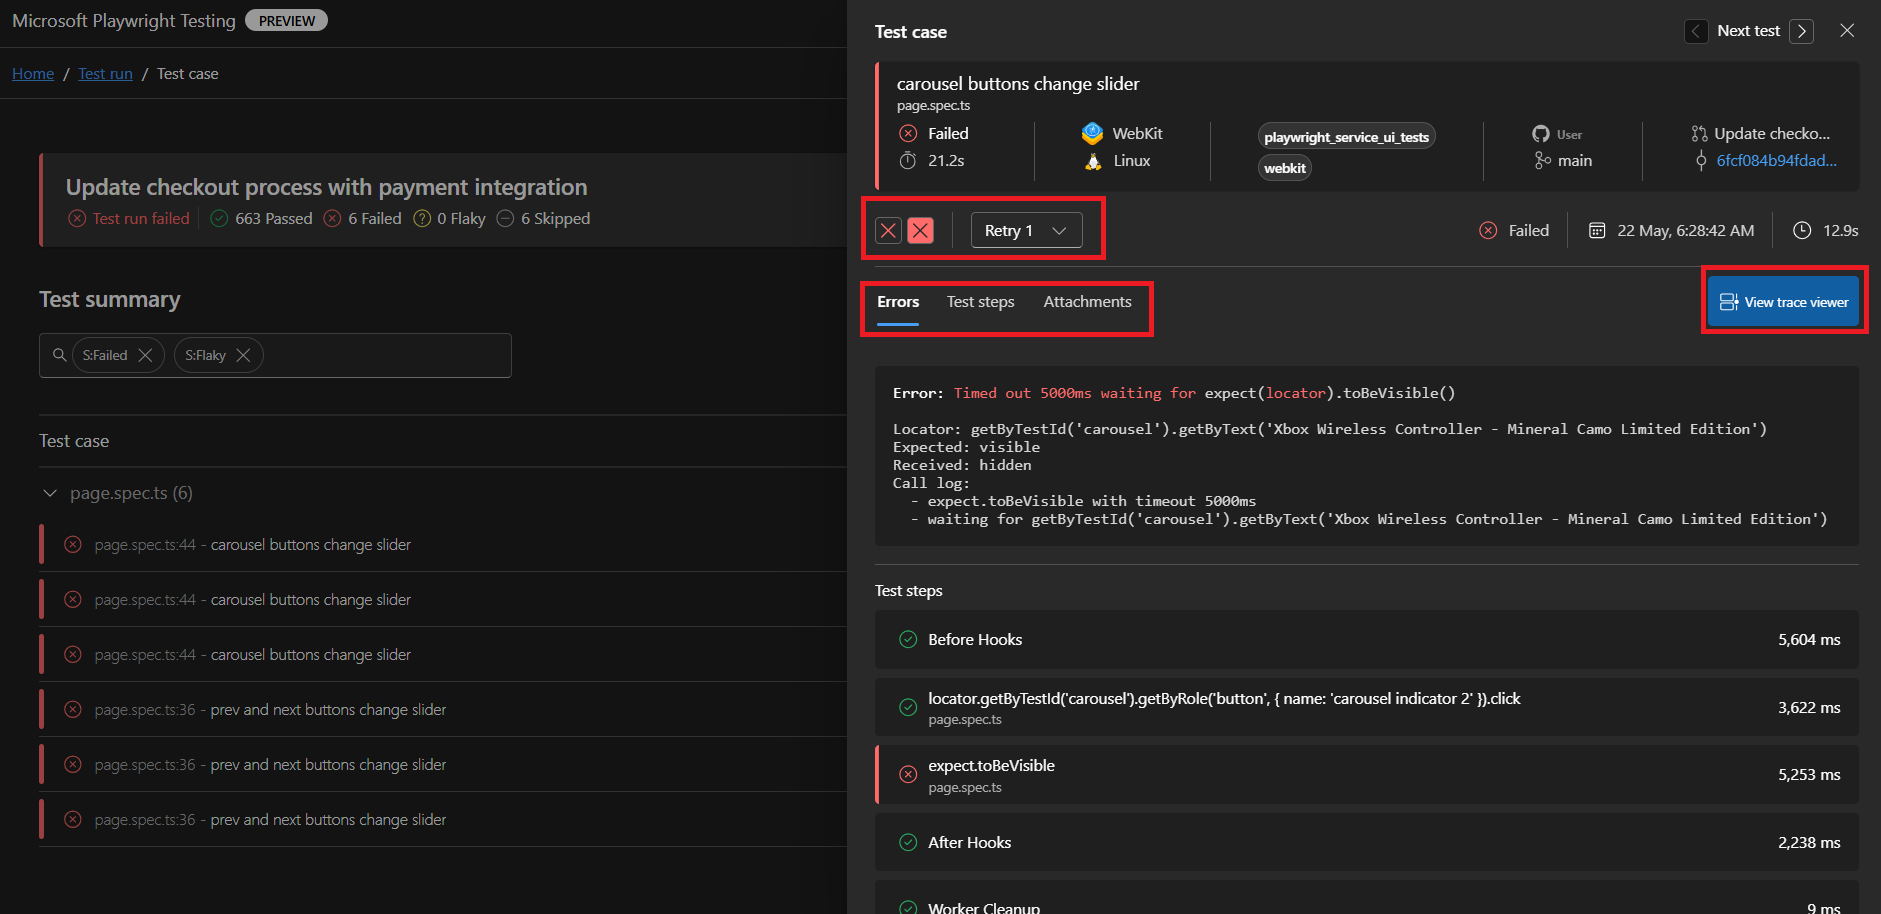
The Playwright portal provides all the necessary information for troubleshooting. You can:
- Switch between retries.
- View detailed error logs, test steps, and attached artifacts such as screenshots or videos.
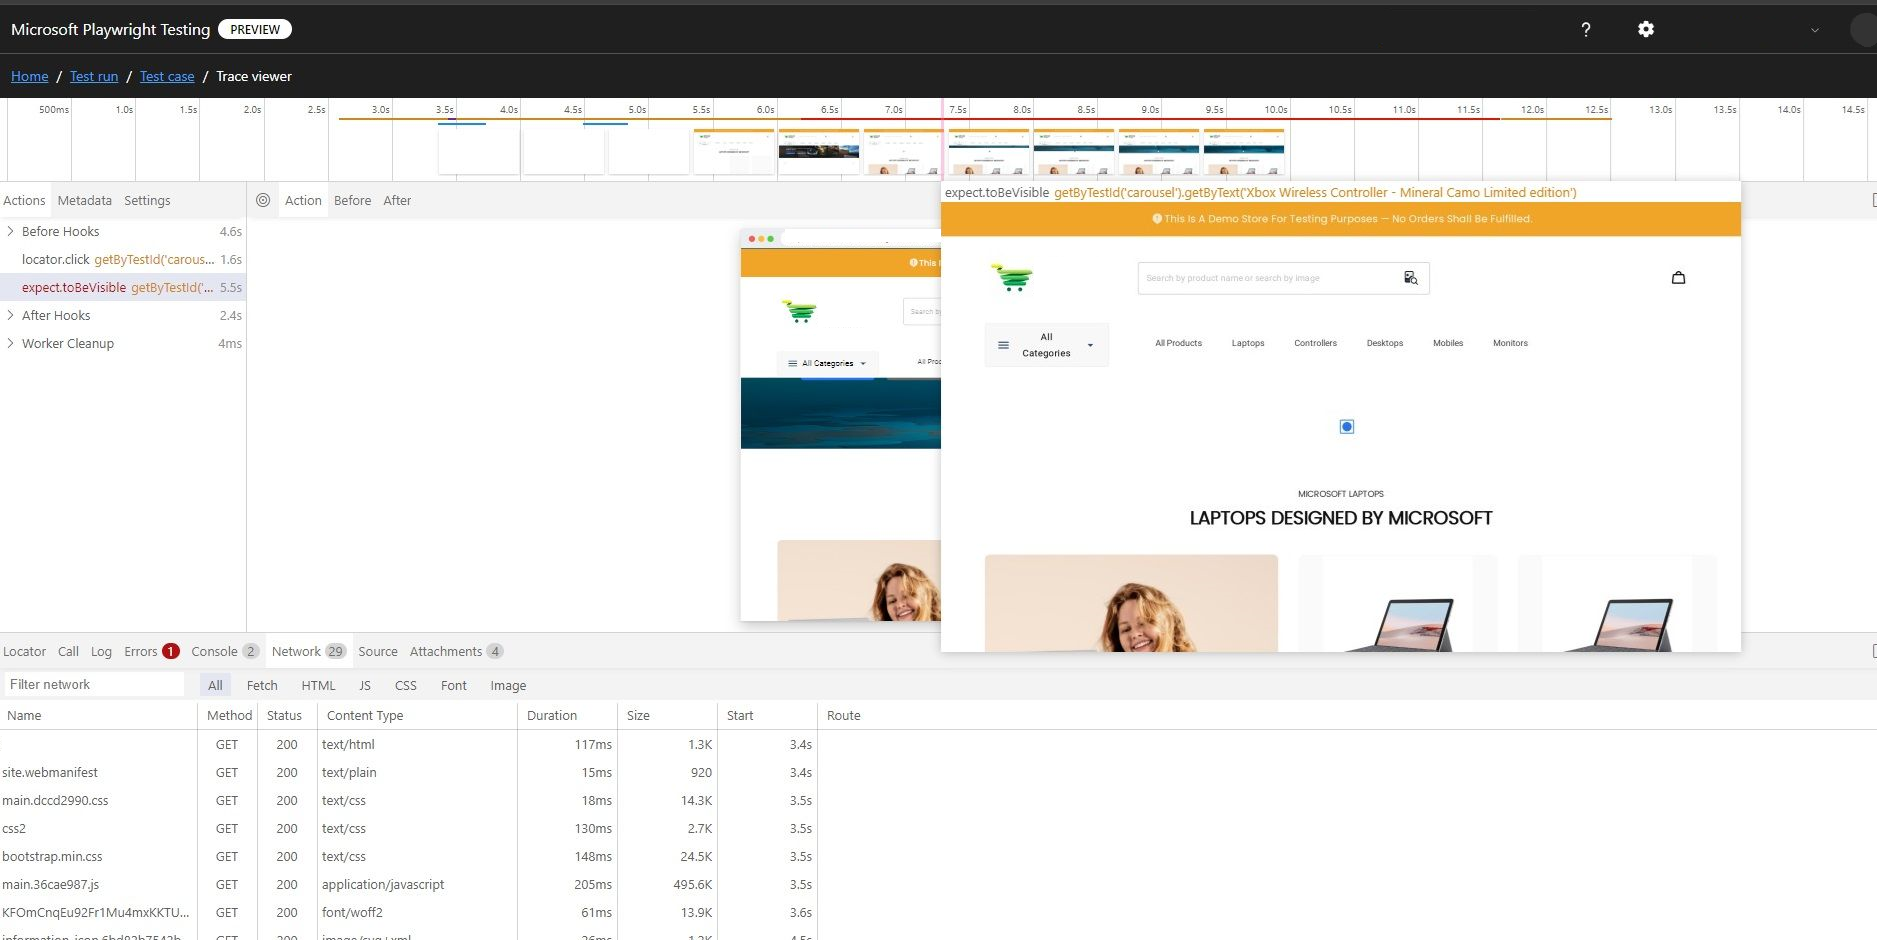
- Navigate directly to the Trace Viewer for deeper analysis.
The Trace Viewer allows you to step through your test execution visually. You can:
- Use the timeline to hover over individual steps, revealing the page state before and after each action.
- Inspect detailed logs, DOM snapshots, network activity, errors, and console output for each step.
After your test run completes, you get a link to the Playwright portal in your terminal. Open this link to view detailed test results and associated artifacts. The portal displays essential information, including:
- CI build details
- Overall test run status
- The commit ID linked to the test run
The Playwright portal provides all the necessary information for troubleshooting. You can:
- View detailed error logs, and attached artifacts such as screenshots or videos.
- Navigate directly to the Trace Viewer for deeper analysis.
Note
Some metadata, such as the owner, description, and category, is currently not displayed on the service dashboard. If there’s additional information you’d like to see included, please submit a GitHub issue in our repository.
Tip
You can use Microsoft Playwright Testing service features independently. You can publish test results to the portal without using the cloud-hosted browsers feature and you can also use only cloud-hosted browsers to expedite your test suite without publishing test results.
Note
The test results and artifacts that you publish are retained on the service for 90 days. After that, they are automatically deleted.
Optimize parallel worker configuration
Once your tests are running smoothly with the service, experiment with varying the number of parallel workers to determine the optimal configuration that minimizes test completion time.
With Microsoft Playwright Testing, you can run with up to 50 parallel workers. Several factors influence the best configuration for your project, such as the CPU, memory, and network resources of your client machine, the target application's load-handling capacity, and the type of actions carried out in your tests.
You can specify the number of parallel workers on the Playwright CLI command-line, or configure the workers property in the Playwright service configuration file.
You can specify the number of parallel workers on the Playwright CLI command-line, or configure the NumberOfTestWorkers property in the .runsettings file.
Learn more about how to determine the optimal configuration for optimizing test suite completion.
Next step
You've successfully created a Microsoft Playwright Testing workspace in the Playwright portal and run your Playwright tests on cloud browsers.
Advance to the next quickstart to set up continuous end-to-end testing by running your Playwright tests in your CI/CD workflow.
