หมายเหตุ
การเข้าถึงหน้านี้ต้องได้รับการอนุญาต คุณสามารถลอง ลงชื่อเข้าใช้หรือเปลี่ยนไดเรกทอรีได้
การเข้าถึงหน้านี้ต้องได้รับการอนุญาต คุณสามารถลองเปลี่ยนไดเรกทอรีได้
✔️ Applies to: File shares created with the Microsoft.FileShares resource provider
✖️ Doesn't apply to: Classic file shares created with the Microsoft.Storage resource provider
The Microsoft.FileShares resource provider lets you deploy file shares without creating or managing a storage account. Before you create a file share, review the supported features and networking options in this article. If you need SMB or the HDD media tier, see Create a classic file share.
Supported features
The Microsoft.FileShares resource provider and management model currently supports only NFS file shares, which require SSD (premium) storage. SSD media provides consistent high performance and low latency, within single-digit milliseconds for most IO operations.
The Microsoft.FileShares resource provider only supports the provisioned v2 billing model, which allows you to specify how much storage, IOPS, and throughput your file share needs. The amount that you provision determines your total bill. When you create a new file share using the provisioned v2 model, Azure provides a recommendation for how many IOPS and how much throughput you need based on the amount of provisioned storage you specify. You can choose to override these recommendations with your own values.
The Microsoft.FileShares resource provider only supports locally redundant storage (LRS) and zone-redundant storage (ZRS). It doesn't support geo-redundant storage. See Azure Files redundancy for more information.
To compare feature support for both resource providers, see the comparison chart.
For more information on Azure Files management concepts, see Azure Files management concepts.
Prerequisites
This article assumes that you have an Azure subscription. If you don't have an Azure subscription, create a free account before you begin.
Make sure both Microsoft.FileShares and Microsoft.Storage resource providers are registered for the subscription. The Microsoft.FileShares resource provider is required to create NFS file shares by using the new management model described in this article. To register a resource provider, follow these steps:
- Sign in to the Azure portal.
- In the search box, enter subscriptions.
- Select the subscription you want to use to register a resource provider.
- Under Settings, select Resource providers to see the list of resource providers.
- Select the resource provider you want to add and then select Register.
Create a file share (Microsoft.FileShares)
You can create a file share with Microsoft.FileShares by using the Azure portal, Azure PowerShell, Azure CLI, or Azure MCP Server. To learn more about using Azure MCP Server, see Azure Files tools for the Azure MCP Server overview.
To create a file share by using the Azure portal, use the search box at the top of the Azure portal to search for file share and select the matching result.
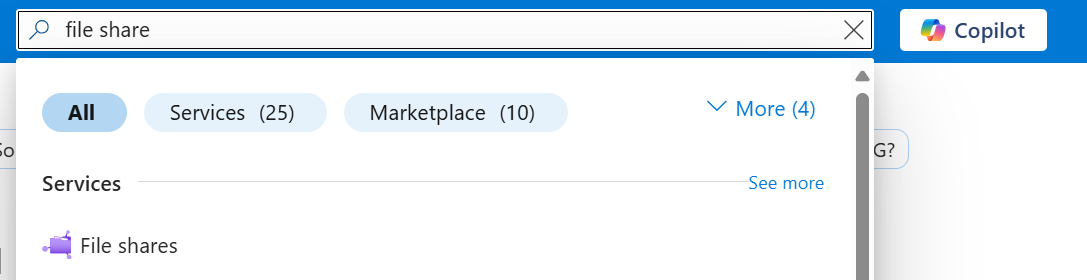
Select + Create to create a new file share.

Basics
The first tab to complete when creating a file share is labeled Basics. It contains the required fields to create a file share.
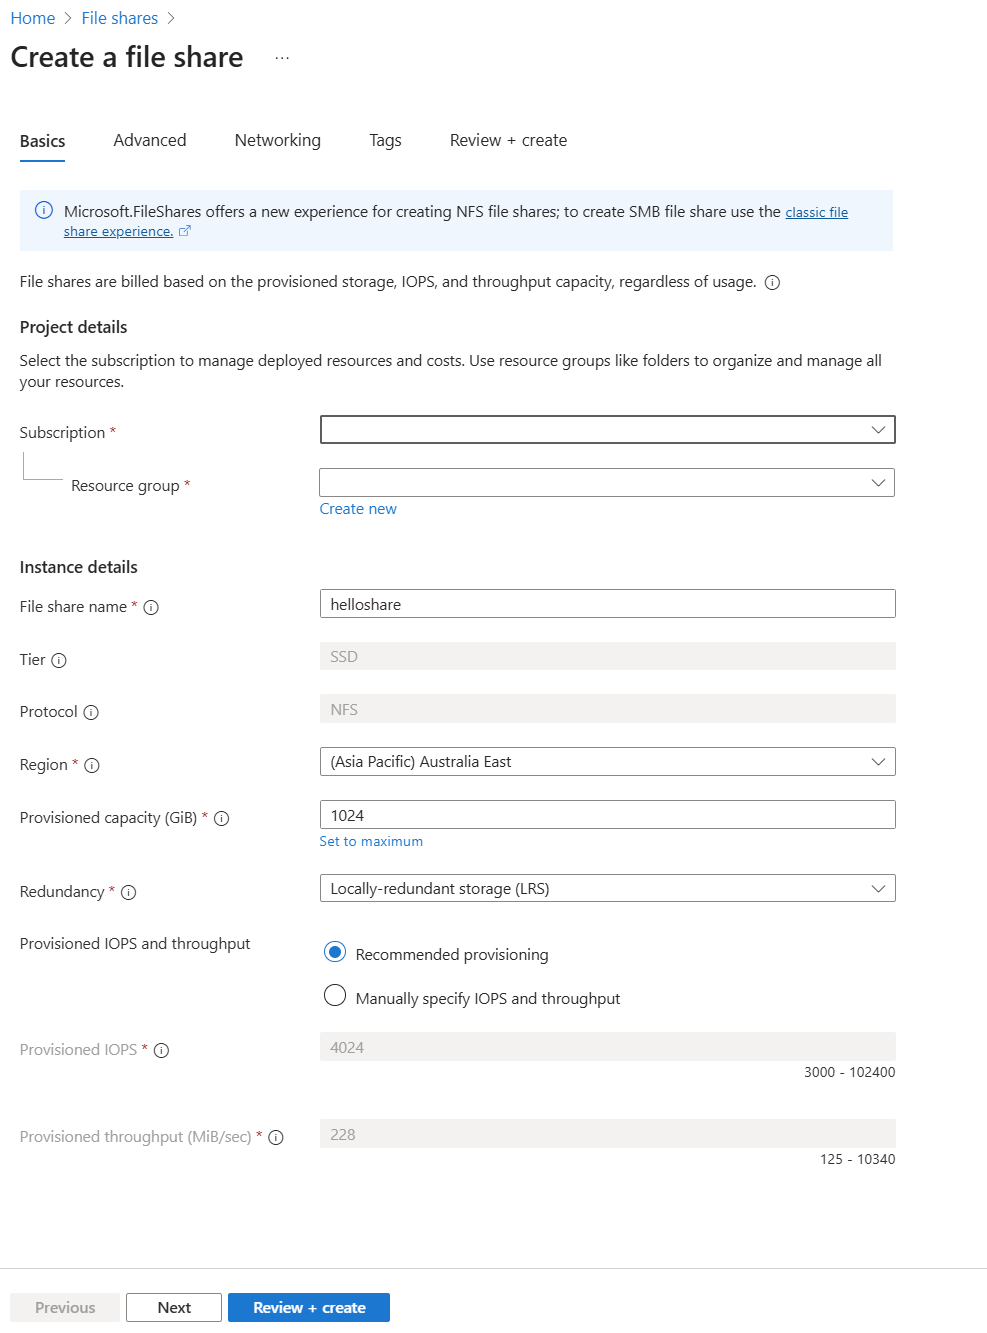
| Field name | Input type | Values | Meaning |
|---|---|---|---|
| Subscription | Drop-down list | Available Azure subscriptions | The selected subscription in which to deploy the file share. |
| Resource group | Drop-down list | Available resource groups in selected subscription | The resource group in which to deploy the file share. A resource group is a logical container for organizing Azure resources, including file shares. |
| File share name | Text box | -- | The name of the file share must be unique across all existing file share names in Azure. It must be 3 to 63 characters long and can contain only lowercase letters, numbers, and hyphens. The name must start and end with a letter or number. |
| Tier | N/A | -- | The media tier for the file share. The Microsoft.FileShares resource provider only supports the SSD media tier. |
| Protocol | N/A | -- | Microsoft.FileShares currently supports the NFS protocol. Classic file shares support SMB and NFS. |
| Region | Drop-down list | Available Azure regions | The region for the file share to be deployed into. This region can be the region associated with the resource group, or any other available region. |
| Provisioned capacity (GiB) | Text box | Integer | Provisioned capacity for the file share, ranging from 32 GiB to 262,144 GiB. |
| Redundancy | Drop-down list |
|
The redundancy choice for the file share. See Azure Files redundancy for more information. |
| Provisioned IOPS and throughput | Radio button group |
|
The Microsoft.FileShares resource provider only uses the provisioned v2 billing model. |
Advanced
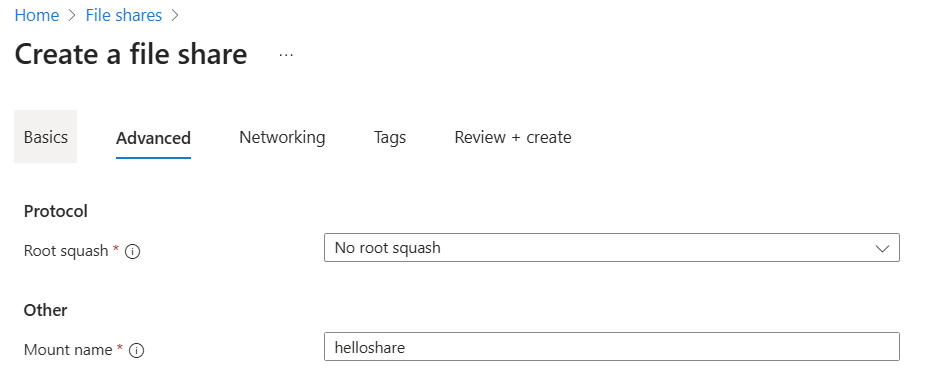
The Advanced tab is optional and provides more granular settings. You can choose to set up root squash options, require this specific file share to use the encryption in transit setting, or specify a mount name for the file share. Mount name allows you to choose a different name to use to mount the file share. By default, it's the same as the file share name. Customize it if you want a unique mount name. The same rules still apply to the naming policy. See Naming rules and restrictions for Azure resources.
Networking
NFS file shares use network access rules to authenticate clients. You configure these rules on the individual file share. Clients can connect through a private endpoint or a service endpoint with virtual network restrictions.
A private endpoint provides a private IP address in your virtual network for access to the file share. Clients can connect from that virtual network or from peered virtual networks. For on-premises access, connect your network to the virtual network through VPN or ExpressRoute. To allow access only through private endpoints, disable public network access.
A service endpoint lets clients in a subnet reach the file share's public endpoint over the Azure backbone. Enable the service endpoint on the client subnet and allow that subnet in the file share's network rules. Allowed subnets can be in the same subscription or a different subscription, including a different Microsoft Entra tenant. There's no extra charge for service endpoints.
Note
If the client subnet has a service endpoint policy, clients must use a private endpoint to access this file share. Microsoft.FileShares doesn't currently support access through service endpoints from subnets with a policy. For more information, see Restrict outbound access with service endpoint policies.
The Networking tab is optional. You can configure networking during creation or afterward, before clients connect. A virtual network is required to create a private endpoint.
To use service endpoints, enable public network access from selected virtual networks. Select or create the virtual network and subnet that clients use. Disabling public network access prevents access through service endpoints, but it doesn't disable the service endpoint on the subnet.
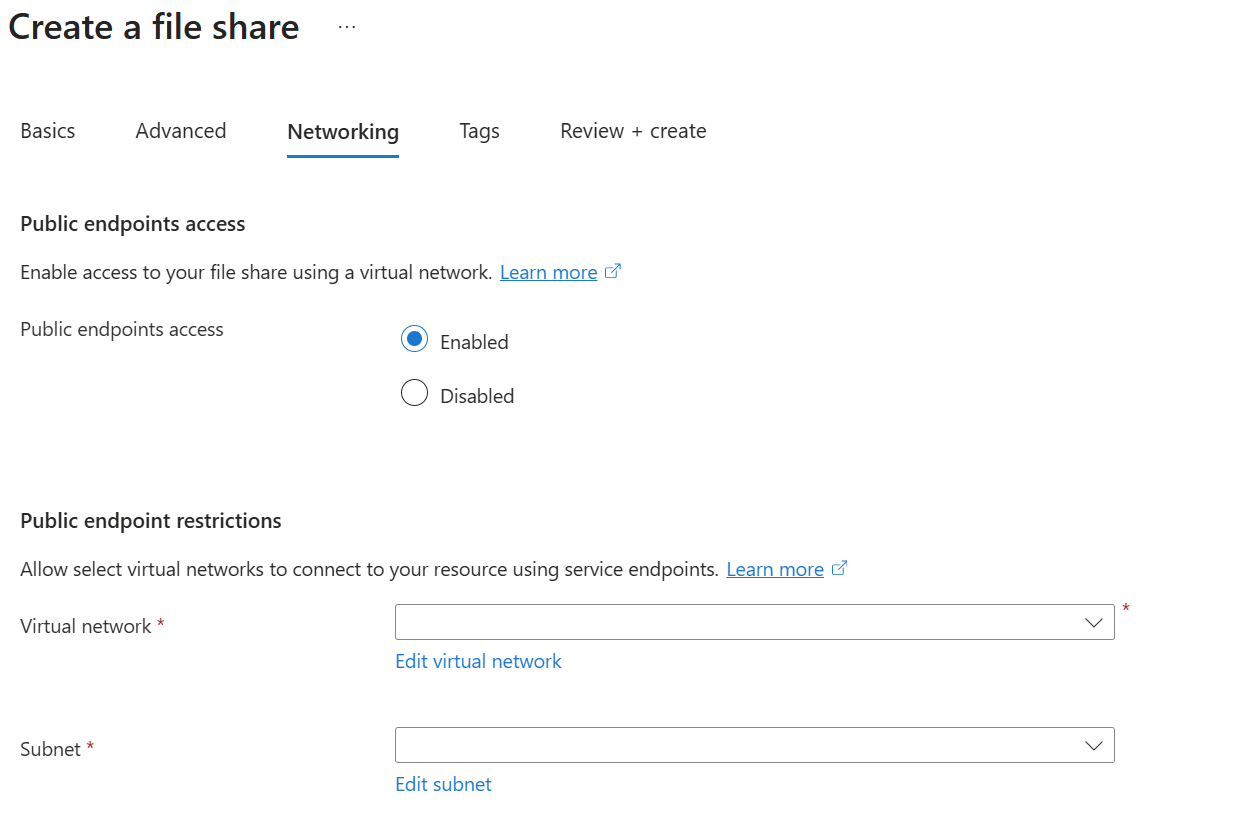
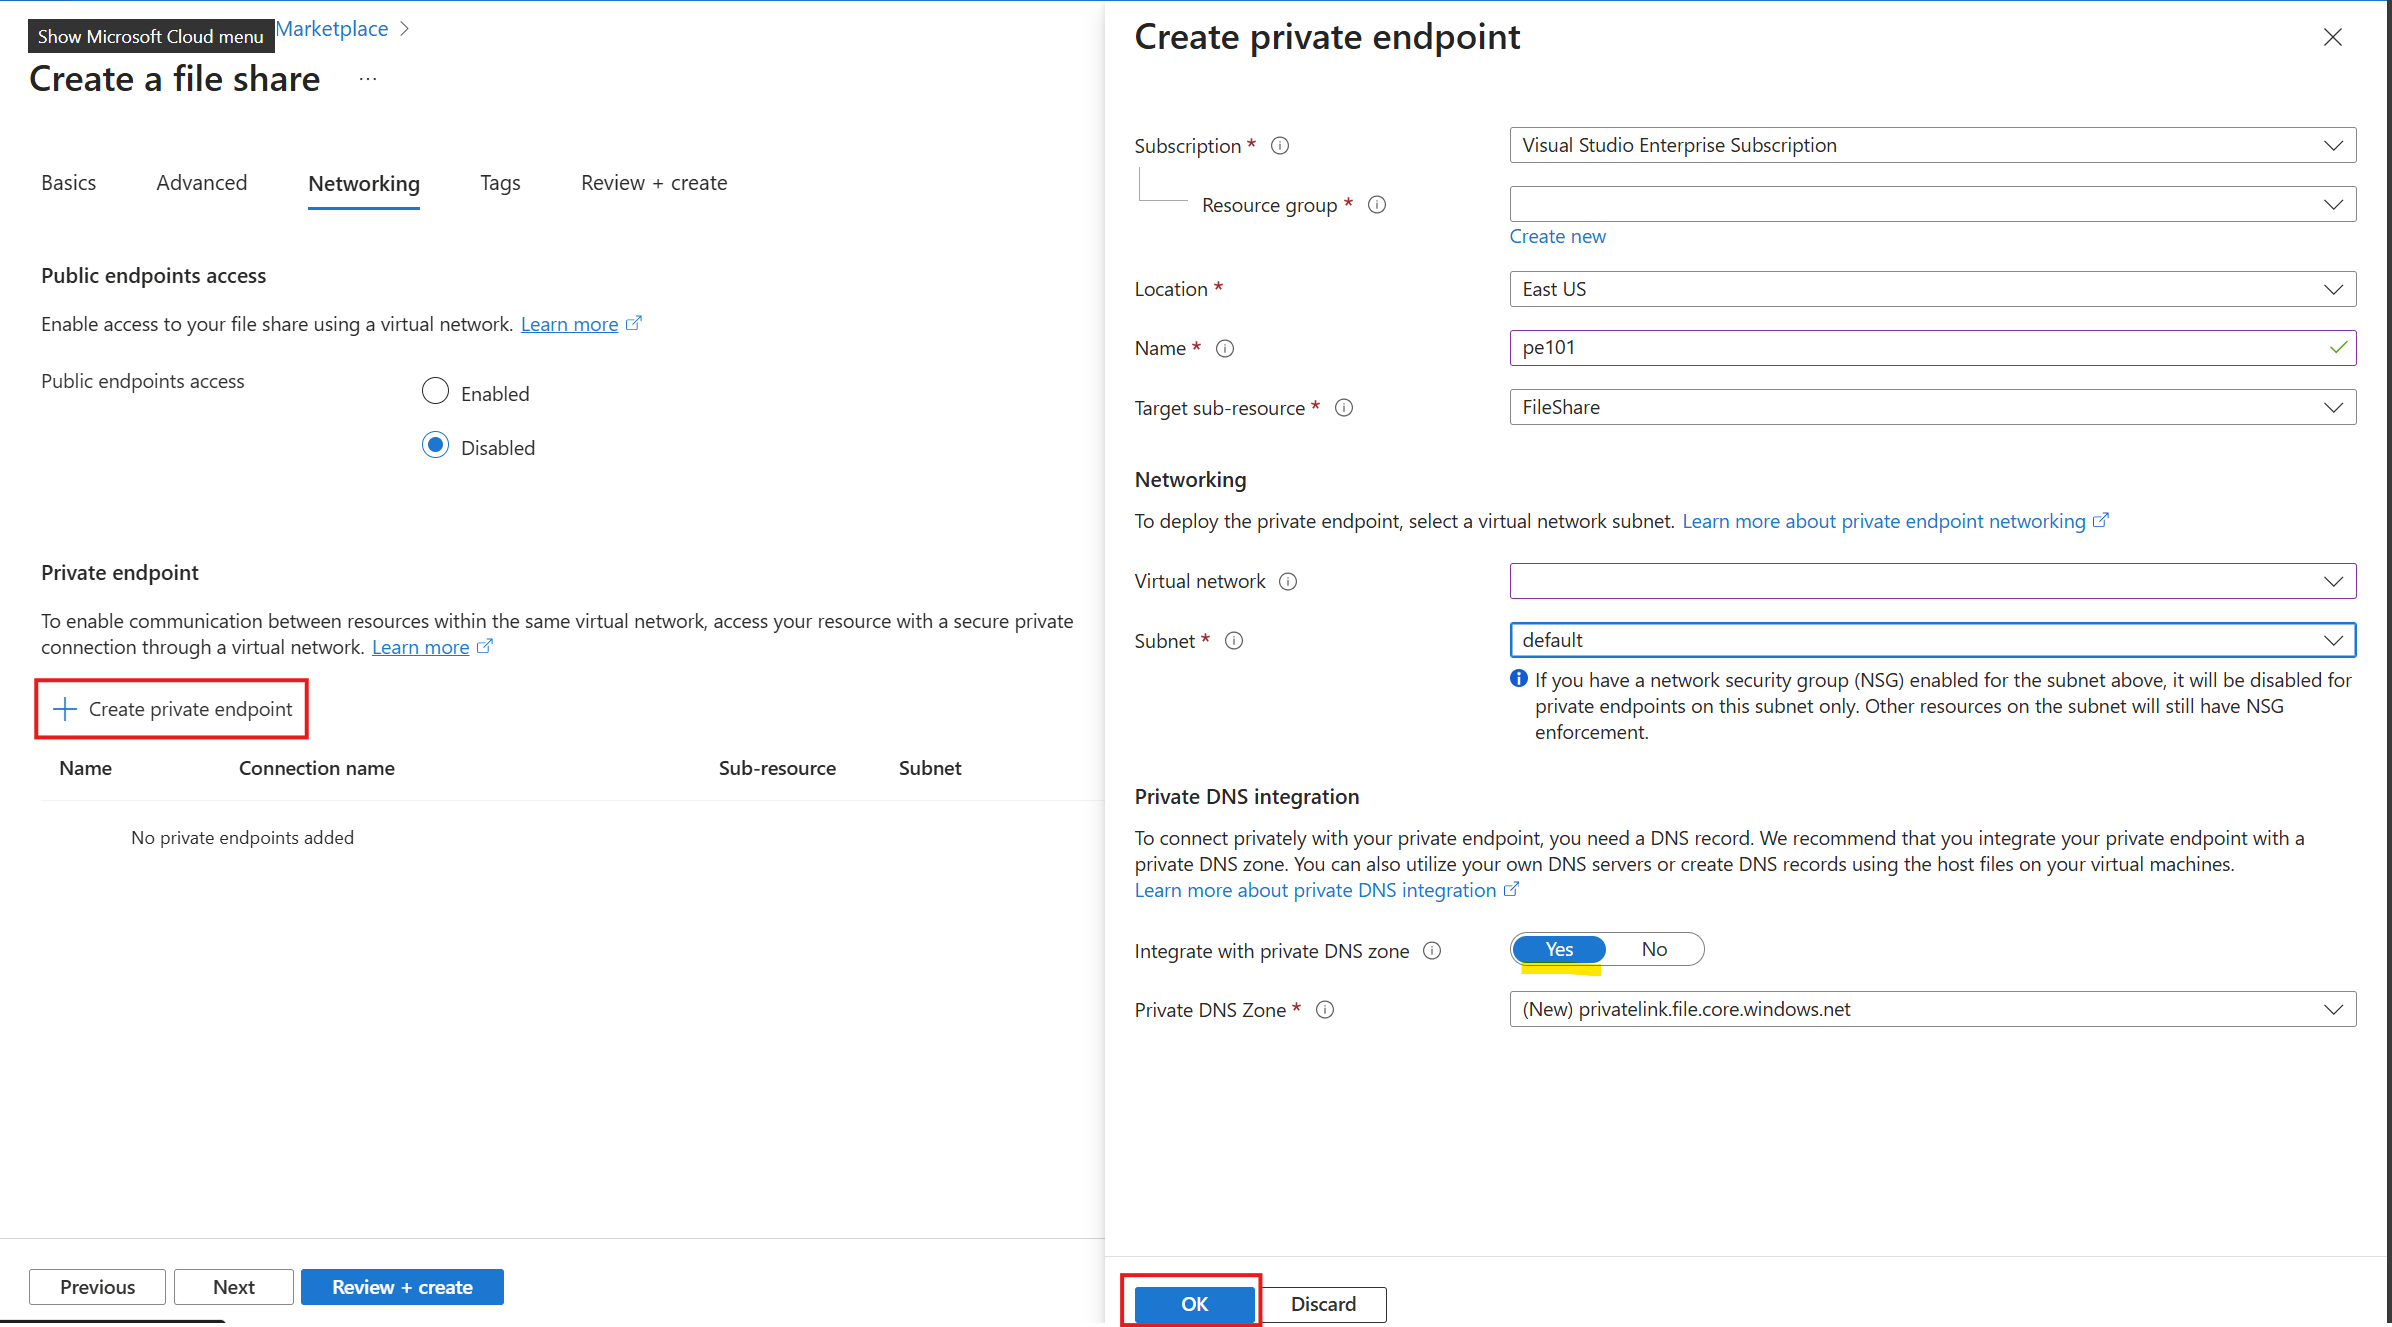
For private endpoint configurations, each file share has its own private endpoint. To get started, follow these steps:
- Select + Create private endpoint. Leave Subscription and Resource group the same. Choose the same location as the virtual network and desired name for the private endpoint. Choose FileShare for target sub-resource.
- Choose the desired virtual network and subnet setting. Make sure you select the Enable Private DNS Integration checkbox.
- Select Add.
Tags
Tags are name/value pairs that you use to categorize resources and view consolidated billing by applying the same tag to multiple resources and resource groups. These tags are optional, and you can apply them after you create the file share.
Review + create
The final step to create the file share is to select the Create button on the Review + create tab. This button isn't available until you complete all the required fields.