หมายเหตุ
การเข้าถึงหน้านี้ต้องได้รับการอนุญาต คุณสามารถลอง ลงชื่อเข้าใช้หรือเปลี่ยนไดเรกทอรีได้
การเข้าถึงหน้านี้ต้องได้รับการอนุญาต คุณสามารถลองเปลี่ยนไดเรกทอรีได้
A declarative agent provides a goal-directed conversational experience powered by Microsoft 365 Copilot. You define its purpose, instructions, knowledge, and actions. This guide provides information about how to build a declarative agent by using Microsoft 365 Agents Toolkit.
The agent that you build in this tutorial targets licensed Microsoft 365 Copilot users. You can also build agents for Microsoft 365 Copilot Chat users, with limited capabilities. For details, see Microsoft 365 Copilot developer licenses.
Note
Microsoft 365 Government tenants don't support publishing agents through Agents Toolkit.
Tip
Work IQ Dev Tools (preview) and Microsoft 365 Agents Toolkit provide related pro-code workflows. To choose based on your capability, package route, and target experience, see Choose development tools for your plugin.
For overview information, see Declarative agents for Microsoft 365 Copilot. To compare agent types, see Compare declarative and custom engine agents.
Note
Declarative agents based on Microsoft 365 Copilot are now supported in Word and PowerPoint.
Prerequisites
- A Microsoft 365 tenant where you can upload custom apps. Provision fails if custom app upload isn't enabled. To enable custom app upload, see Microsoft 365 Agents Toolkit requirements. For development environment and licensing options, see Copilot development environment.
The following resources are required to complete the steps described in this article:
Note
The screenshots and user-interface references in this article use a release version of Microsoft 365 Agents Toolkit. Prerelease versions might differ from the user interface shown.
You should be familiar with the following standards and guidelines for declarative agents for Microsoft 365 Copilot:
- Standards for compliance, performance, security, and user experience described in Microsoft Teams Store validation guidelines.
Create and provision a declarative agent with Microsoft 365 Agents Toolkit
Start by creating a basic declarative agent.
Open Visual Studio Code.
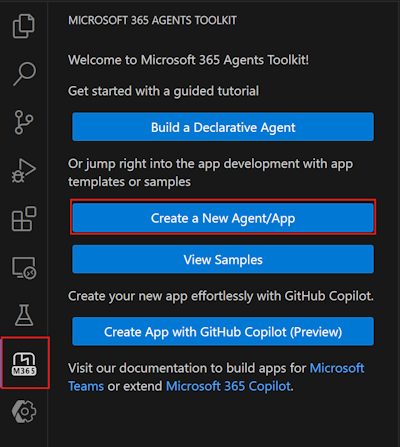
Select Microsoft 365 Agents Toolkit > Create a New Agent/App.
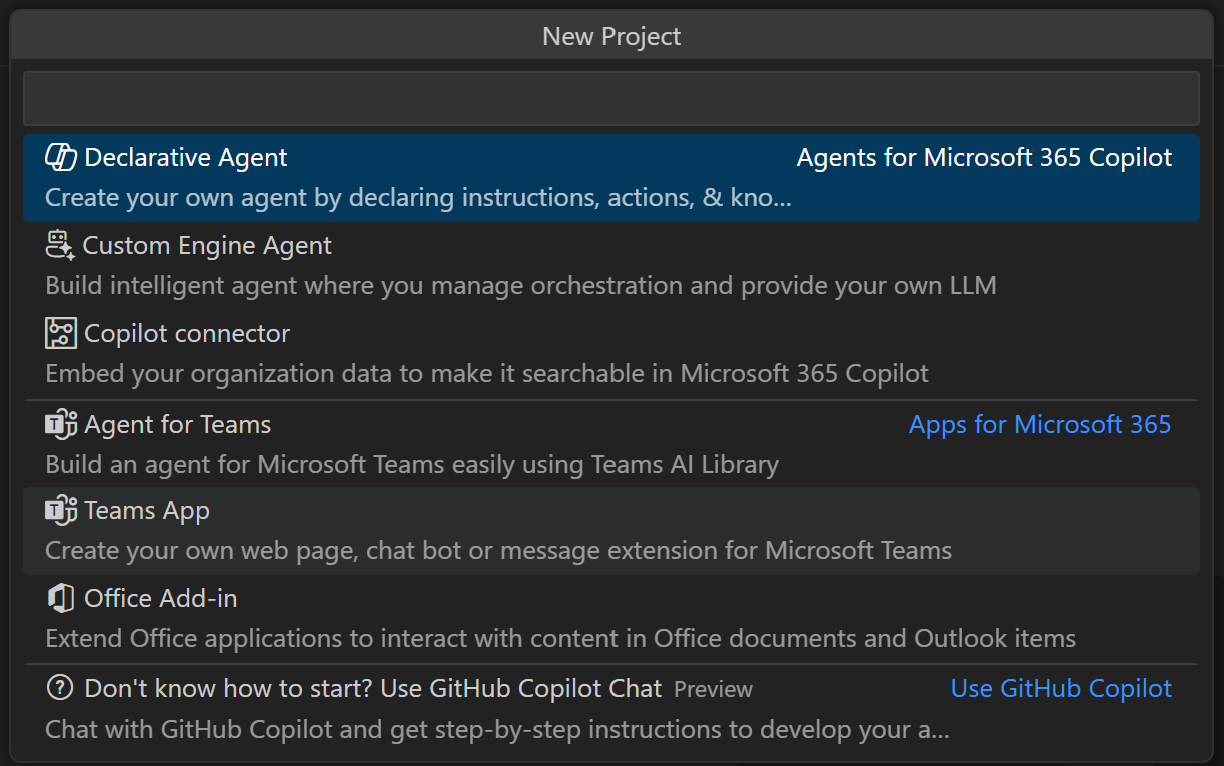
Select Declarative Agent.
Select No Action to create a basic declarative agent.
Select Default folder to store your project root folder in the default location.
Enter
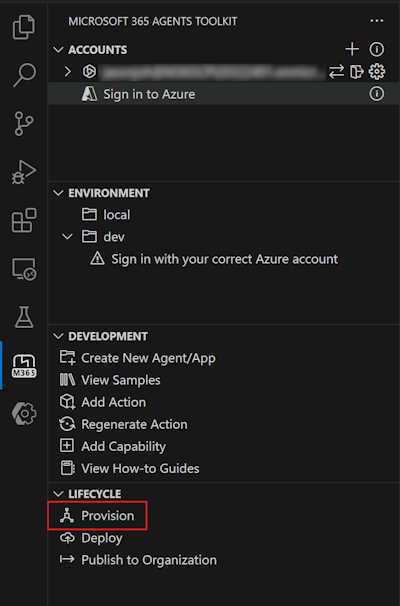
My Agentas the Application Name and press Enter.In the new Visual Studio Code window that opens, select Microsoft 365 Agents Toolkit, then select Provision in the Lifecycle pane.
Test the agent
Go to the Copilot application at https://m365.cloud.microsoft/chat.
Next to the New Chat button, select the conversation drawer icon.
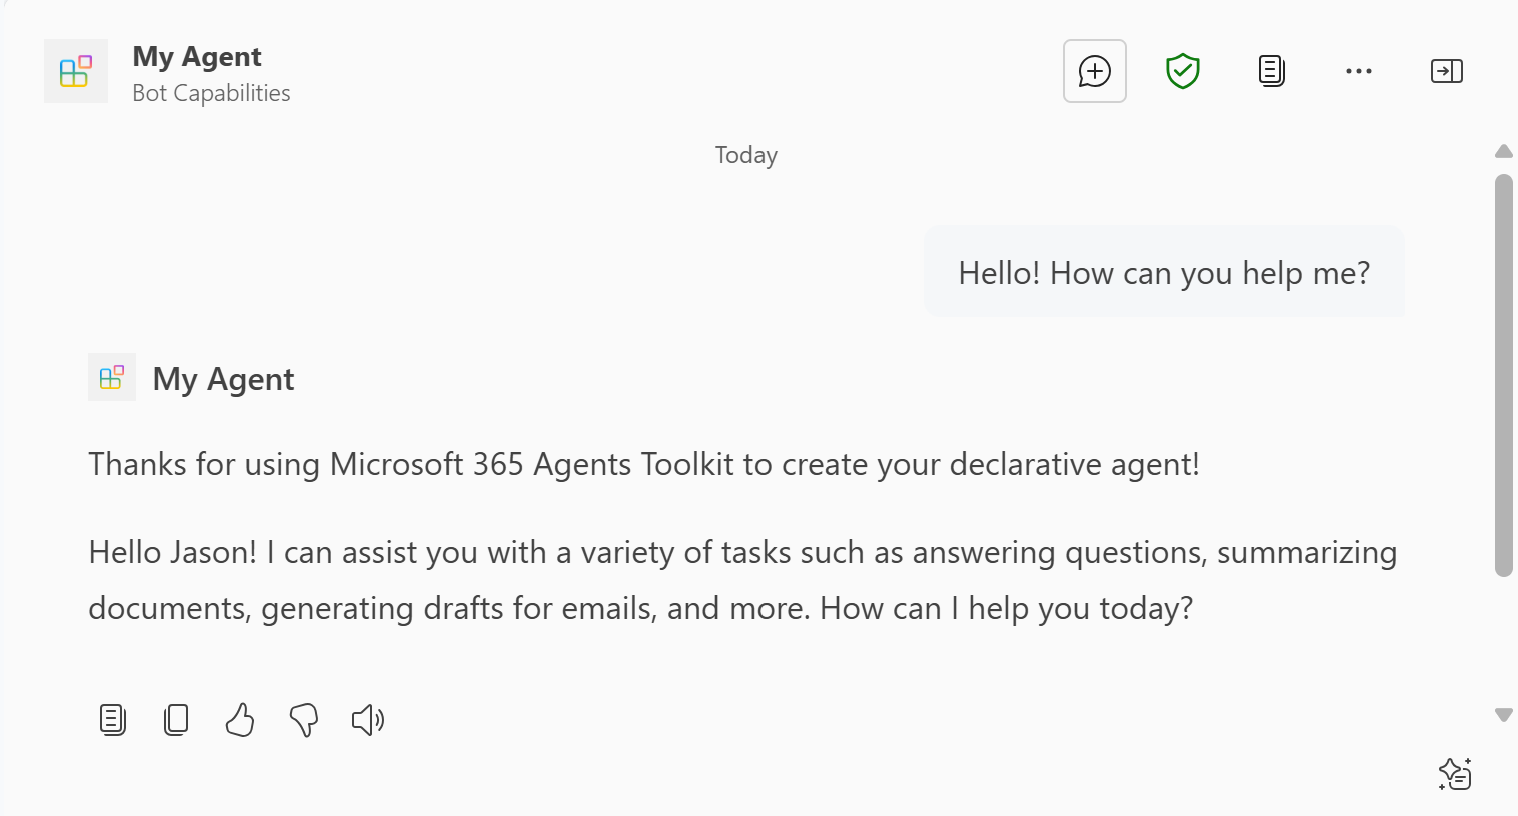
Select the declarative agent My Agent.
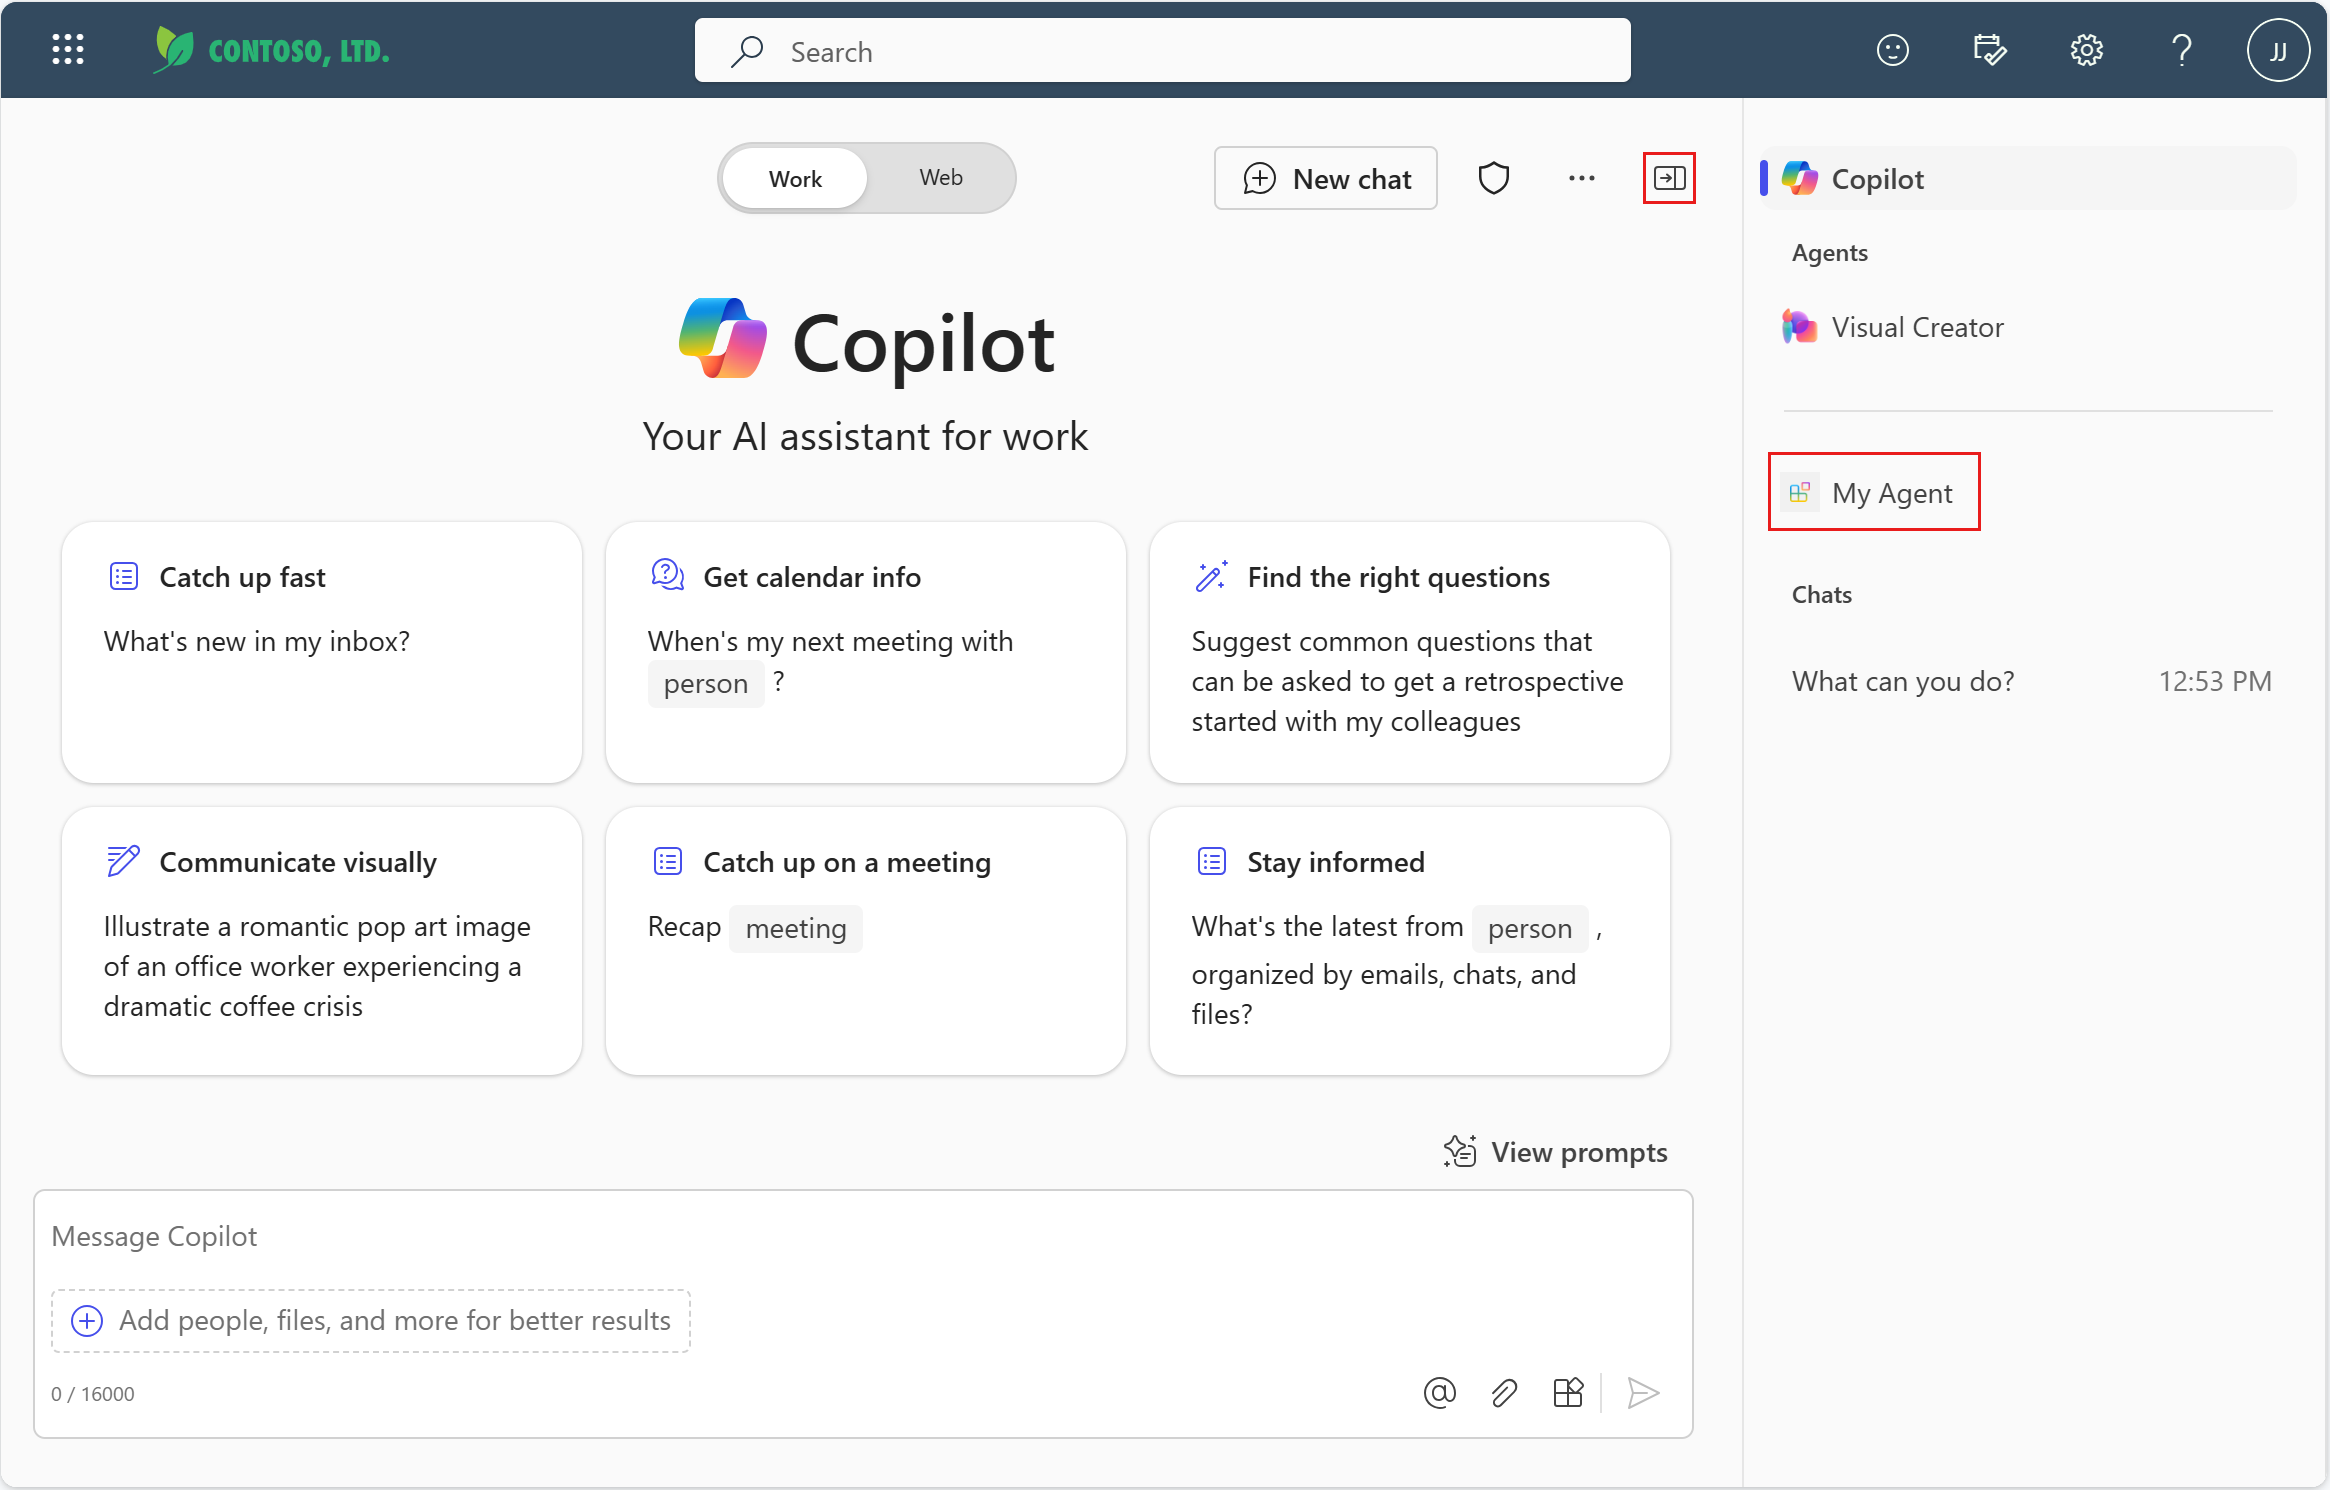
Enter a question for your declarative agent and make sure it replies with "Thanks for using Microsoft 365 Agents Toolkit to create your declarative agent!"