Set up the game project
Note
This topic is part of the Create a simple Universal Windows Platform (UWP) game with DirectX tutorial series. The topic at that link sets the context for the series.
The first step in developing your game is to create a project in Microsoft Visual Studio. After you've configured a project specifically for game development, you could later re-use it as a kind of template.
Objectives
- Create a new project in Visual Studio using a project template.
- Understand the game's entry point and initialization by examining the source file for the App class.
- Look at the game loop.
- Review the project's package.appxmanifest file.
Create a new project in Visual Studio
Note
For info about setting up Visual Studio for C++/WinRT development—including installing and using the C++/WinRT Visual Studio Extension (VSIX) and the NuGet package (which together provide project template and build support)—see Visual Studio support for C++/WinRT.
First install (or update to) the latest version of the C++/WinRT Visual Studio Extension (VSIX); see the note above. Then, in Visual Studio, create a new project based on the Core App (C++/WinRT) project template. Target the latest generally-available (that is, not preview) version of the Windows SDK.
Review the App class to understand IFrameworkViewSource and IFrameworkView
In your Core App project, open the source code file App.cpp. In there is the implementation of the App class, which represents the app and its lifecycle. In this case, of course, we know that the app is a game. But we'll refer to it as an app in order to talk more generally about how a Universal Windows Platform (UWP) app initializes.
The wWinMain function
The wWinMain function is the entry point for the app. Here's what wWinMain looks like (from App.cpp).
int __stdcall wWinMain(HINSTANCE, HINSTANCE, PWSTR, int)
{
    CoreApplication::Run(winrt::make<App>());
}
We make an instance of the App class (this is the one, and only, instance of App that's created), and we pass that to the static CoreApplication.Run method. Note that CoreApplication.Run expects an IFrameworkViewSource interface. So the App class needs to implement that interface.
The next two sections in this topic describe the IFrameworkViewSource and IFrameworkView interfaces. Those interfaces (as well as CoreApplication.Run) represent a way for your app to supply Windows with a view-provider. Windows uses that view-provider to connect your app with the Windows shell so that you can handle application lifecycle events.
The IFrameworkViewSource interface
The App class does indeed implement IFrameworkViewSource, as you can see in the listing below.
struct App : winrt::implements<App, IFrameworkViewSource, IFrameworkView>
{
    ...
    IFrameworkView CreateView()
    {
        return *this;
    }
    ...
}
An object that implements IFrameworkViewSource is a view-provider factory object. That object's job is to manufacture and return a view-provider object.
IFrameworkViewSource has the single method IFrameworkViewSource::CreateView. Windows calls that function on the object that you pass to CoreApplication.Run. As you can see above, the App::CreateView implementation of that method returns *this. In other words, the App object returns itself. Since IFrameworkViewSource::CreateView has a return value type of IFrameworkView, it follows that the App class needs to implement that interface, too. And you can see that it does in the listing above.
The IFrameworkView interface
An object that implements IFrameworkView is a view-provider object. And we've now supplied Windows with that view-provider. It's that same App object that we created in wWinMain. So the App class serves as both view-provider factory and view-provider.
Now Windows can call the App class's implementations of the methods of IFrameworkView. In the implementations of those methods, your app has a chance to perform tasks such as initialization, to begin to load the resources it'll need, to connect up the appropriate event handlers, and to receive the CoreWindow that your app will use to display its output.
Your implementations of the methods of IFrameworkView are called in the order shown below.
- Initialize
- SetWindow
- Load
- The CoreApplicationView::Activated event is raised. So if you've (optionally) registered to handle that event, then your OnActivated handler is called at this time.
- Run
- Uninitialize
And here's the skeleton of the App class (in App.cpp), showing the signatures of those methods.
struct App : winrt::implements<App, IFrameworkViewSource, IFrameworkView>
{
    ...
    void Initialize(Windows::ApplicationModel::Core::CoreApplicationView const& applicationView) { ... }
    void SetWindow(Windows::UI::Core::CoreWindow const& window) { ... }
    void Load(winrt::hstring const& entryPoint) { ... }
    void OnActivated(
        Windows::ApplicationModel::Core::CoreApplicationView const& applicationView,
        Windows::ApplicationModel::Activation::IActivatedEventArgs const& args) { ... }
    void Run() { ... }
    void Uninitialize() { ... }
    ...
}
This was just an introduction to IFrameworkView. We go into much more detail about these methods, and how to implement them, in Define the game's UWP app framework.
Tidy up the project
The Core App project that you created from the project template contains functionality that we should tidy up at this point. After that, we can use the project to recreate the shooting gallery game (Simple3DGameDX). Make the following changes to the App class in App.cpp.
- Delete its data members.
- Delete OnPointerPressed, OnPointerMoved, and AddVisual
- Delete the code from SetWindow.
The project will build and run, but it'll display only a solid color in the client area.
The game loop
To get an idea of what a game loop looks like, look in the source code for the Simple3DGameDX sample game that you downloaded.
The App class has a data member, named m_main, of type GameMain. And that member is used in App::Run like this.
void Run()
{
    m_main->Run();
}
You can find GameMain::Run in GameMain.cpp. It's the main loop of the game, and here's a very rough outline of it showing the most important features.
void GameMain::Run()
{
    while (!m_windowClosed)
    {
        if (m_visible)
        {
            CoreWindow::GetForCurrentThread().Dispatcher().ProcessEvents(CoreProcessEventsOption::ProcessAllIfPresent);
            Update();
            m_renderer->Render();
            m_deviceResources->Present();
        }
        else
        {
            CoreWindow::GetForCurrentThread().Dispatcher().ProcessEvents(CoreProcessEventsOption::ProcessOneAndAllPending);
        }
    }
}
And here's a brief description of what this main game loop does.
If the window for your game isn't closed, dispatch all events, update the timer, and then render and present the results of the graphics pipeline. There's a lot more to say about those concerns, and we'll do that in the topics Define the game's UWP app framework, Rendering framework I: Intro to rendering, and Rendering framework II: Game rendering. But this is the basic code structure of a UWP DirectX game.
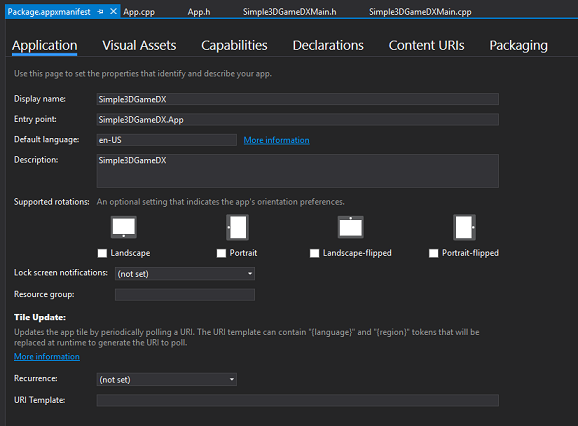
Review and update the package.appxmanifest file
The Package.appxmanifest file contains metadata about a UWP project. Those metadata are used for packaging and launching your game, and for submission to the Microsoft Store. The file also contains important info that the player's system uses to provide access to the system resources that the game needs to run.
Launch the manifest designer by double-clicking the Package.appxmanifest file in Solution Explorer.
For more info about the package.appxmanifest file and packaging, see Manifest Designer. For now, take a look at the Capabilities tab, and look at the options provided.
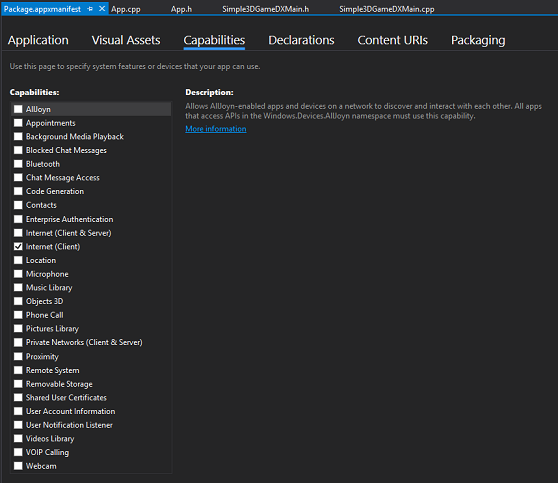
If you don't select the capabilities that your game uses, such as access to the Internet for global high score board, then you won't be able to access the corresponding resources nor features. When you create a new game, make sure that you select any capabilities needed by APIs that your game calls.
Now let's look at the rest of the files that come with the Simple3DGameDX sample game.
Review other important libraries and source code files
If you do intend to create a kind of game project template for yourself, so that you can re-use that as a starting-point for future projects, then you'll want to copy GameMain.h and GameMain.cpp out of the Simple3DGameDX project that you downloaded, and add those to your new Core App project. Study those files, learn what they do, and remove anything that's specific to Simple3DGameDX. Also comment out anything that depends on code that you've not yet copied. Just by way of an example, GameMain.h depends on GameRenderer.h. You'll be able to uncomment as you copy more files out of Simple3DGameDX.
Here's a brief survey of some of the files in Simple3DGameDX that you'll find useful to include in your template, if you're making one. In any case, these are equally important to understanding how Simple3DGameDX itself work.
| Source file | File folder | Description |
|---|---|---|
| DeviceResources.h/.cpp | Utilities | Defines the DeviceResources class, which controls all DirectX device resources. Also defines the IDeviceNotify interface, used to notify your application that the graphics adapter device has been lost or re-created. |
| DirectXSample.h | Utilities | Implements helper functions such as ConvertDipsToPixels. ConvertDipsToPixels converts a length in device-independent pixels (DIPs) to a length in physical pixels. |
| GameTimer.h/.cpp | Utilities | Defines a high-resolution timer useful for gaming or interactive rendering apps. |
| GameRenderer.h/.cpp | Rendering | Defines the GameRenderer class, which implements a basic rendering pipeline. |
| GameHud.h/.cpp | Rendering | Defines a class to render a heads up display (HUD) for the game, using Direct2D and DirectWrite. |
| VertexShader.hlsl and VertexShaderFlat.hlsl | Shaders | Contains the high-level shader language (HLSL) code for basic vertex shaders. |
| PixelShader.hlsl and PixelShaderFlat.hlsl | Shaders | Contains the high-level shader language (HLSL) code for basic pixel shaders. |
| ConstantBuffers.hlsli | Shaders | Contains data structure definitions for constant buffers and shader structures used to pass model-view-projection (MVP) matrices and per-vertex data to the vertex shader. |
| pch.h/.cpp | N/A | Contains common C++/WinRT, Windows, and DirectX includes. |
Next steps
At this point, we've shown how to create a new UWP project for a DirectX game, looked at some of the pieces in it, and started thinking about how to turn that project into a kind of re-usable template for games. We've also looked at some of the important pieces of the Simple3DGameDX sample game.
The next section is Define the game's UWP app framework. There we'll look more closely at how Simple3DGameDX works.
คำติชม
เร็วๆ นี้: ตลอดปี 2024 เราจะขจัดปัญหา GitHub เพื่อเป็นกลไกคำติชมสำหรับเนื้อหา และแทนที่ด้วยระบบคำติชมใหม่ สำหรับข้อมูลเพิ่มเติม ให้ดู: https://aka.ms/ContentUserFeedback
ส่งและดูข้อคิดเห็นสำหรับ