Not
Bu sayfaya erişim yetkilendirme gerektiriyor. Oturum açmayı veya dizinleri değiştirmeyi deneyebilirsiniz.
Bu sayfaya erişim yetkilendirme gerektiriyor. Dizinleri değiştirmeyi deneyebilirsiniz.
Şunlar için geçerlidir: ✔️ AKS Otomatik
Azure Kubernetes Service (AKS) Automatic AKS kümesi kurulumunu ve işlemlerini otomatik hale getiren ve en iyi uygulama yapılandırmalarını ekleyen yönetilen bir Kubernetes deneyimidir. AKS Automatic, uygulamalarınız için güvenilir ve kendi kendini iyileştiren bir altyapıyı garanti eden, 5 dakika içinde %99,9 oranında uygun pod hazır olma işleminin tamamlanmasını sağlayan [pod hazır olma SLA'sı][azure-sla] içerir. Bu hızlı başlangıçta şunları yapmayı öğrenirsiniz:
- AKS otomatik kümesini dağıtın.
- Mikroservis ve web ön uçlarından oluşan bir grupla perakende senaryosunu simüle eden örnek bir çok kapsayıcılı uygulama çalıştırın.
Başlamadan önce
- Bu hızlı başlangıç, Kubernetes kavramlarının temel olarak bilindiğini varsayar. Daha fazla bilgi için Azure Kubernetes Service (AKS) için Kubernetes temel kavramları sayfasına bakınız.
- AKS Otomatik, Azure Policy'yi AKS kümeniz üzerinde etkinleştirir, ancak aboneliğinizdeki kaynak sağlayıcısını önceden kaydetmeniz gerekir. Daha fazla bilgi için bkz. Azure kaynak sağlayıcıları ve türleri.
bash ortamını Azure Cloud Shell kullanın. Daha fazla bilgi için bkz. Azure Cloud Shell ile çalışmaya başlama.

CLI'yi yerel olarak çalıştırmayı tercih ediyorsanız Azure CLI'yi yükleyin. Windows veya macOS üzerinde çalıştırıyorsanız Azure CLI Docker kapsayıcısında çalıştırmayı göz önünde bulundurun. Daha fazla bilgi için bkz. Docker kapsayıcısında Azure CLI çalıştırma.
Yerel yükleme kullanıyorsanız az login komutunu kullanarak Azure CLI oturum açın. Kimlik doğrulama işlemini tamamlamak için terminalinizde görüntülenen adımları izleyin. Diğer oturum açma seçenekleri için bkz. Azure CLI kullanarak Azure'a Kimlik Doğrulama.
İstendiğinde, ilk kullanımda Azure CLI uzantısını yükleyin. Uzantılar hakkında daha fazla bilgi için bkz. Azure CLI ile uzantıları kullanma ve yönetme.
Sürümü ve yüklü bağımlı kütüphaneleri bulmak için az version komutunu çalıştırın. En son sürüme yükseltmek için az upgrade komutunu çalıştırın.
- Azure CLI sürüm 2.77.0 veya üzeri. komutunu kullanarak
az --versionsürümünüzü bulun. Yüklemek veya yükseltmek için bkz. Azure CLI yükleme. Azure Cloud Shell kullanıyorsanız en son sürüm zaten orada yüklüdür. - Birden çok Azure aboneliğiniz varsa,
az account setkomutunu kullanarak kaynakları faturalandıracak uygun abonelik kimliğini seçin.
- Bicep dosyası dağıtmak için, oluşturduğunuz kaynaklara yazma erişimine ve
Microsoft.Resources/deploymentskaynak türündeki tüm işlemlere erişmeniz gerekir. Örneğin, bir sanal makine (VM) oluşturmak içinMicrosoft.Compute/virtualMachines/writeveMicrosoft.Resources/deployments/*izinlerine sahip olmanız gerekir. Rollerin ve izinlerin listesi için bkz. Azure yerleşik roller.
Sınırlamalar
- AKS Otomatik kümelerinin sistem düğüm havuzu, en az üç kullanılabilirlik bölgesi, geçici işletim sistemi diski ve Azure Linux işletim sistemini destekleyen Azure bölgelerinde dağıtılmalıdır.
- AKS Otomatik şu bölgelerde kullanılabilir:
australiaeast,austriaeast,belgiumcentral,brazilsouth,canadacentral,centralindia,centralus,chilecentral,denmarkeast,eastasia,eastus,eastus2,francecentral,germanywestcentral,indonesiacentral,israelcentral,italynorth,japaneast,japanwest,koreacentral,malaysiawest,mexicocentral,newzealandnorth,northcentralus,northeurope,norwayeast,polandcentral,southafricanorth,southcentralus,southeastasia,spaincentral,swedencentral,switzerlandnorth,uaenorth,uksouth,westeurope,westus,westus2,westus3. - AKS Otomatik kümesinde node kaynak grubu kilitleme önceden yapılandırılmıştır, bu da MC_ kaynak grubunda değişikliklere izin vermez ve varsayılan Private DNS bölgesinde sanal ağ bağlantılarını engeller. Sanal ağlar arası veya özel DNS senaryoları için, Özel bir sanal ağda özel Azure Kubernetes Service (AKS) Otomatik kümesi oluşturun kısmındaki adımları takip ederek özel ağ ve özel DNS kullanın.
Önemli
AKS Otomatik, abonelikte kullanılabilir kapasiteye göre düğüm havuzu için system dinamik olarak bir sanal makine boyutu seçmeye çalışır. Aboneliğinizin, kümeyi dağıttığınız bölgede aşağıdaki boyutlardan herhangi biri için 16 vCPU kotası olduğundan emin olun: Standard_D4lds_v5, Standard_D4ads_v5, Standard_D4ds_v5, Standard_D4d_v5, Standard_D4d_v4, Standard_DS3_v2, Standard_DS12_v2, Standard_D4alds_v6, Standard_D4lds_v6 veya Standard_D4alds_v5. Azure portalı üzerinden belirli VM aileleri için kotaları görüntüleyebilir ve kota artış taleplerini gönderebilirsiniz.
Başka sorularınız varsa sorun giderme belgeleri aracılığıyla daha fazla bilgi edinin.
Kaynak grubu oluşturma
Azure kaynak grubu Azure kaynaklarının dağıtıldığı ve yönetildiği mantıksal bir grupdur.
az group create komutunu kullanarak bir kaynak grubu oluşturun. Aşağıdaki örnek eastus konumunda myResourceGroup adlı bir kaynak grubu oluşturur:
az group create --name myResourceGroup --location eastus
Aşağıdaki örnek çıktı, kaynak grubunun başarıyla oluşturulmasına benzer:
{
  "id": "/subscriptions/<guid>/resourceGroups/myResourceGroup",
  "location": "eastus",
  "managedBy": null,
  "name": "myResourceGroup",
  "properties": {
    "provisioningState": "Succeeded"
  },
  "tags": null
}
AKS Otomatik kümesi oluşturma
az aks create komutunu --sku parametresi olarak ayarlayarak bir AKS Otomatik kümesi oluşturun. Aşağıdaki örnek, Yönetilen Prometheus ve Container Insights tümleştirmesi etkinleştirilmiş myAKSAutomaticCluster adlı bir küme oluşturur:
az aks create \
    --resource-group myResourceGroup \
    --name myAKSAutomaticCluster \
    --sku automatic
Birkaç dakika sonra komut tamamlanıp kümeyle ilgili JSON biçimli bilgileri döndürür.
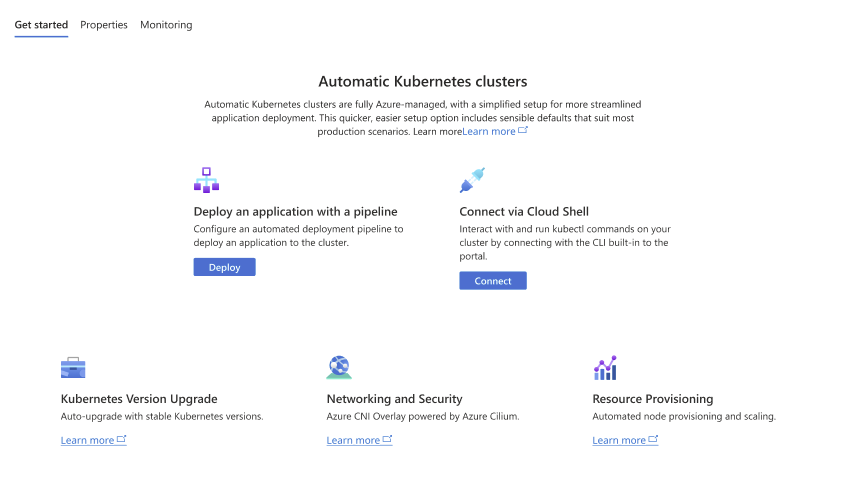
Otomatik Kubernetes kümesi oluşturma
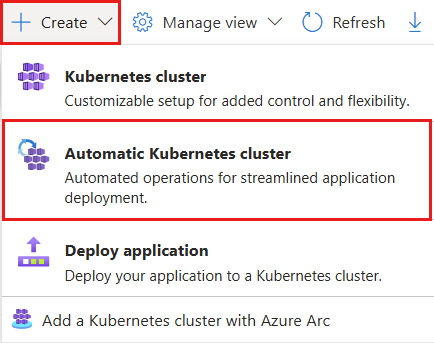
AKS Otomatik kümesi oluşturmak için Kubernetes hizmetlerini arayın ve seçin. Bu sizi Kubernetes merkezi (önizleme) sayfasına götürür.
Kubernetes center (önizleme) sayfasındaOtomatik Kubernetes kümesi> seçin.
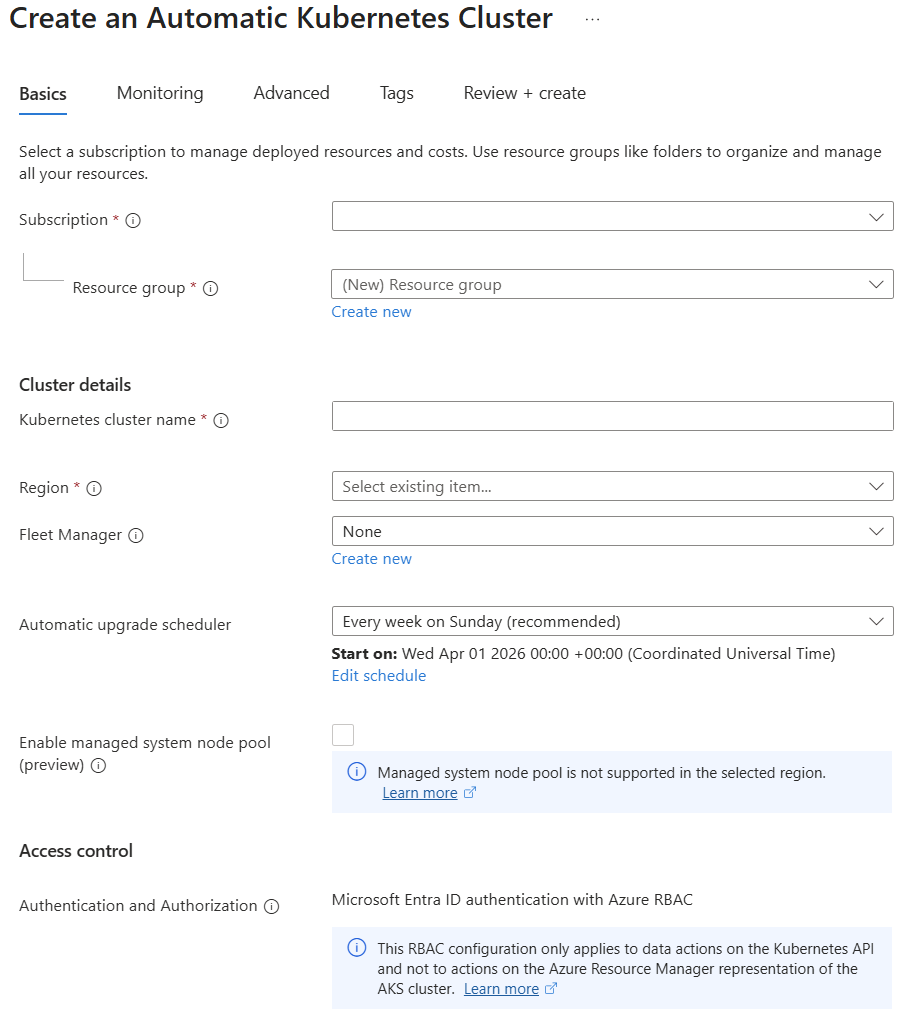
Temel Bilgiler sekmesinde tüm gerekli alanları (Abonelik, Kaynak grubu, Kubernetes küme adı ve Bölge) doldurun ve İleri'yi seçin.
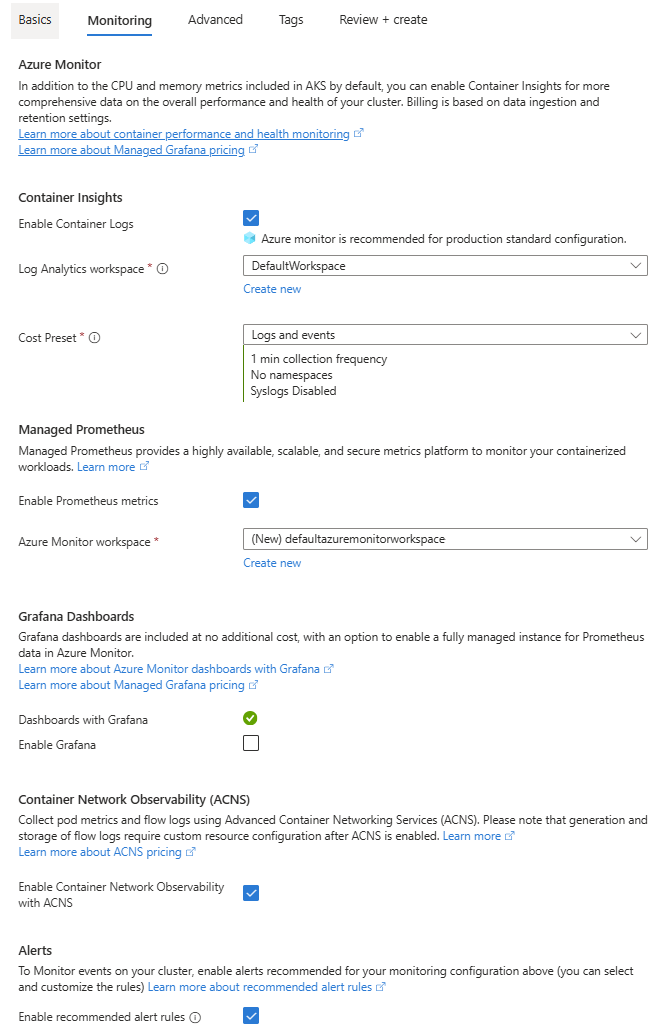
Monitoring sekmesinde, Azure Monitor (Container Insights), Yönetilen Prometheus, Grafana Panoları, Kapsayıcı Ağı Gözlemlenebilirliği (ACNS) ve Uyarılar'dan istediğiniz izleme yapılandırmalarını seçin ve ardından Next öğesini seçin.
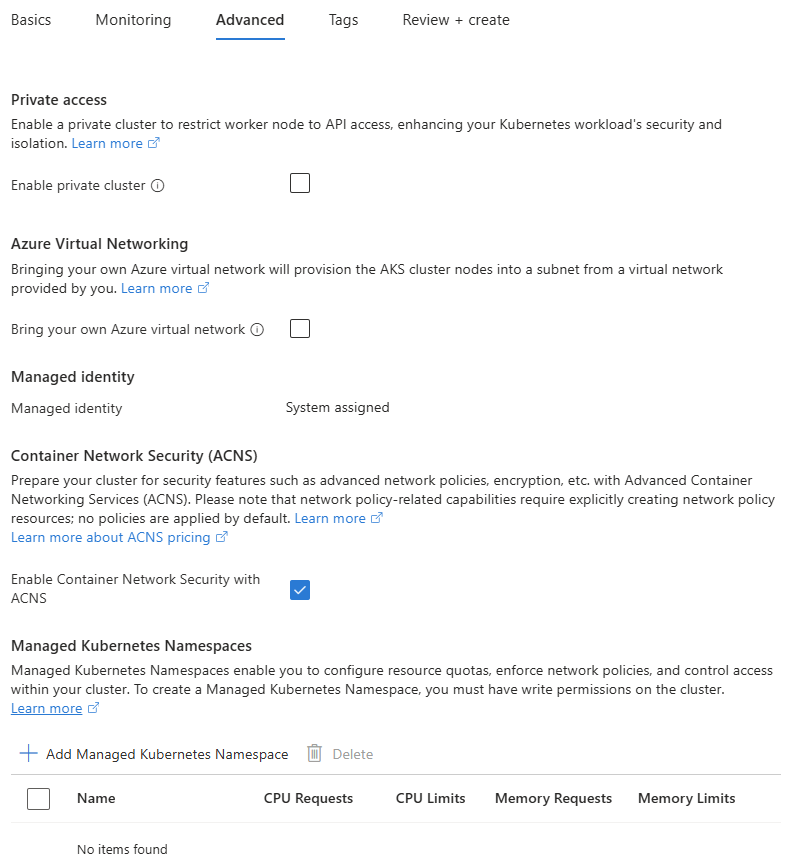
Gelişmiş sekmesinde, istediğiniz gelişmiş yapılandırmalar Özel erişim, Azure Sanal Ağ, Yönetilen kimlik, Kapsayıcı Ağ Güvenliği (ACNS) ve Yönetilen Kubernetes Ad Alanları'nı seçin ve ardından Review + create öğesini seçin.
Gözden Geçir ve oluştur sekmesinde yapılandırmaları gözden geçirin ve ardından AKS Otomatik kümesini dağıtmak için Oluştur'u seçin.
GitHub'den ilk uygulamanızı yapılandırmaya başlayın ve otomatik dağıtım işlem hattı ayarlayın.
Bicep dosyasını gözden geçirin
Aşağıdaki Bicep dosyası bir AKS Otomatik kümesini tanımlar:
@description('The name of the managed cluster resource.')
param clusterName string = 'myAKSAutomaticCluster'

@description('The location of the managed cluster resource.')
param location string = resourceGroup().location

resource aks 'Microsoft.ContainerService/managedClusters@2024-03-02-preview' = {
  name: clusterName
  location: location
  sku: {
  name: 'Automatic'
  }
  properties: {
    agentPoolProfiles: [
      {
        name: 'systempool'
        mode: 'System'
  count: 3
      }
    ]
  }
  identity: {
    type: 'SystemAssigned'
  }
}
Bicep dosyasında tanımlanan kaynak hakkında daha fazla bilgi için bkz. Microsoft. ContainerService/managedClusters başvurusu.
Bicep dosyasını dağıtın
Bicep dosyasını main.bicep olarak kaydedinyerel bilgisayarınıza .
Önemli
Bicep dosyası
clusterNameparametresini myAKSAutomaticCluster dizesine ayarlar. Farklı bir küme adı kullanmak istiyorsanız, dosyayı bilgisayarınıza kaydetmeden önce dizeyi tercih ettiğiniz küme adıyla güncelleştirdiğinizden emin olun.[
az deployment group create][az-deployment-group-create] komutunu kullanarak Bicep dosyasını dağıtın.az deployment group create --resource-group myResourceGroup --template-file main.bicepAKS kümesinin oluşturulması birkaç dakika sürer. Sonraki adıma geçmeden önce kümenin başarıyla dağıtılması için bekleyin.
Kümeye bağlanma
Kubernetes kümesini yönetmek için kubectl adlı Kubernetes komut satırı istemcisini kullanın. Azure Cloud Shell kullanıyorsanız kubectl zaten yüklüdür. komutunu kullanarak kubectl yerel olarak yükleyebilirsinizaz aks install-cli. AKS otomatik küme yapılandırmaları, Kubernetes rol tabanlı erişim denetimi (RBAC) için Microsoft Entra ID ile yapılandırılır.
Uyarı
Azure CLI kullanarak bir küme oluşturduğunuzda, kullanıcınıza yerleşik roller atanırAzure Kubernetes Service RBAC Cluster Admin.
Önce
kubectl'ü Kubernetes kümenize bağlanacak şekildeaz aks get-credentialskomutunu kullanarak yapılandırın. Bu komut kimlik bilgilerini indirir ve Kubernetes CLI'yi bunları kullanacak şekilde yapılandırmaktadır.az aks get-credentials --resource-group myResourceGroup --name myAKSAutomaticClusterKümelenize olan bağlantınızı
kubectl getkomutunu kullanarak doğrulayın. Bu komut, küme düğümlerinin listesini döndürür.kubectl get nodesAşağıdaki örnek çıktıda oturum açma işleminiz gösterilmektedir:
To sign in, use a web browser to open the page https://microsoft.com/devicelogin and enter the code AAAAAAAAA to authenticate.Oturum açtıktan sonra aşağıdaki örnek çıktı yönetilen sistem düğümü havuzlarını gösterir. Düğüm durumunun Hazır olduğundan emin olun.
NAME                                STATUS   ROLES   AGE     VERSION
aks-nodepool1-12345678-vmss000000   Ready    agent   2m26s   v1.28.5
aks-nodepool1-12345678-vmss000001   Ready    agent   2m26s   v1.28.5
aks-nodepool1-12345678-vmss000002   Ready    agent   2m26s   v1.28.5
Uygulamayı dağıt
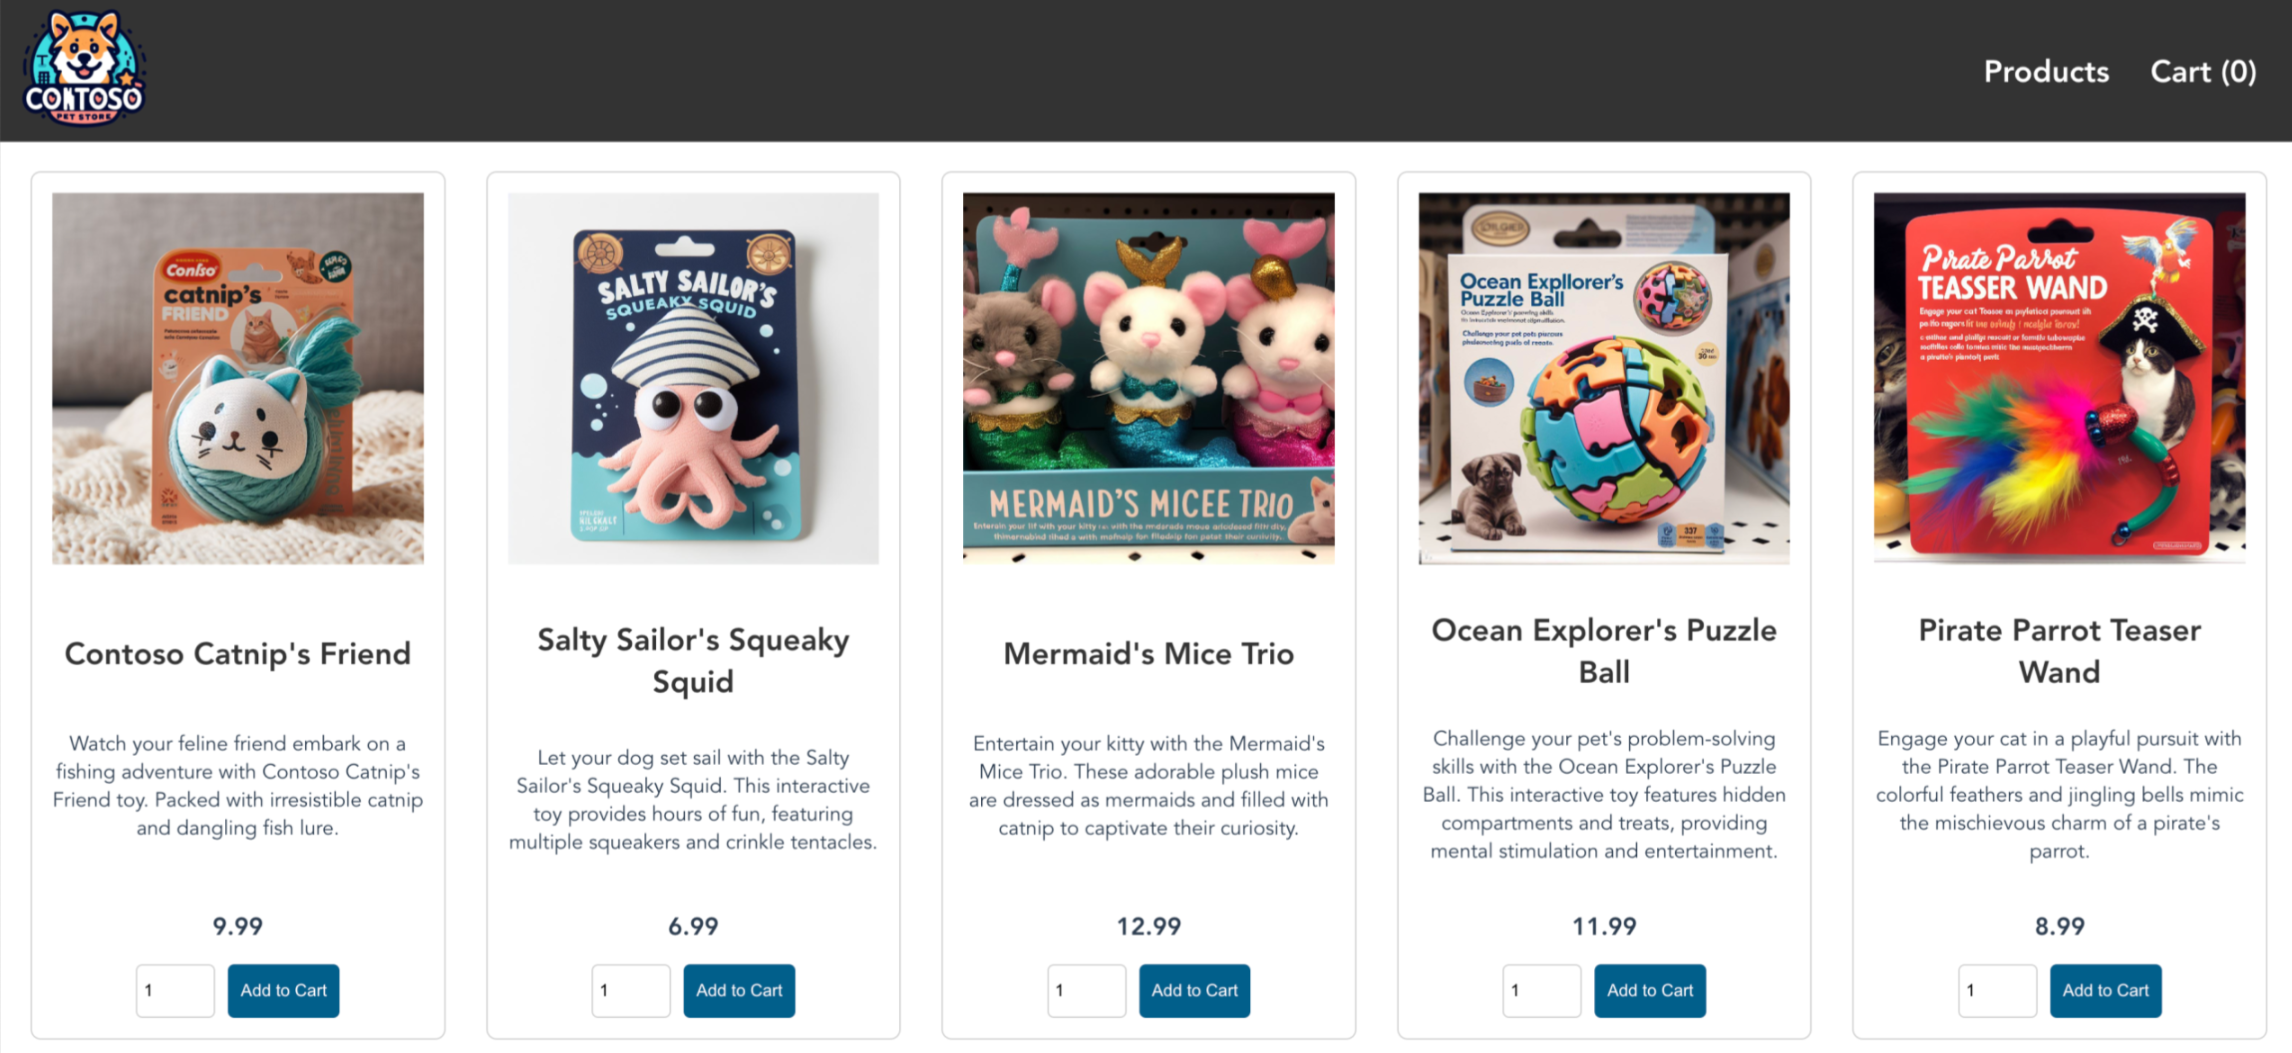
Uygulamayı dağıtmak için bir bildirim dosyası kullanarak AKS Store uygulamasını çalıştırmak için gereken tüm nesneleri oluşturursunuz. Kubernetes bildirim dosyası, hangi kapsayıcı görüntülerinin çalıştırıldığı gibi kümenin istenen durumunu tanımlar. Bildirim aşağıdaki Kubernetes dağıtımlarını ve hizmetlerini içerir:

- Mağaza ön: Müşterilerin ürünleri görüntülemesi ve sipariş vermesi için web uygulaması.
- Ürün hizmeti: Ürün bilgilerini gösterir.
- Sipariş hizmeti: Sipariş verir.
- Rabbit MQ: Sipariş kuyruğu için ileti kuyruğu.
Uyarı
Üretim için kalıcı depolama olmadan Rabbit MQ gibi durum bilgisi olan kapsayıcıları çalıştırmanızı önermiyoruz. Bunlar burada kolaylık sağlamak için kullanılır, ancak Azure Cosmos DB veya Azure Service Bus gibi yönetilen hizmetleri kullanmanızı öneririz.
Kubernetes kaynaklarını dağıtmak için bir ad alanı
aks-store-demooluşturun.kubectl create ns aks-store-demokubectl applykomutunu kullanarak uygulamayıaks-store-demoad alanına dağıtın. Dağıtımı tanımlayan YAML dosyası GitHub üzerindedir.kubectl apply -n aks-store-demo -f https://raw.githubusercontent.com/Azure-Samples/aks-store-demo/main/aks-store-ingress-quickstart.yamlAşağıdaki örnek çıktı dağıtımları ve hizmetleri gösterir:
statefulset.apps/rabbitmq created
configmap/rabbitmq-enabled-plugins created
service/rabbitmq created
deployment.apps/order-service created
service/order-service created
deployment.apps/product-service created
service/product-service created
deployment.apps/store-front created
service/store-front created
ingress/store-front created
Uygulamayı test edin
Uygulama çalıştırıldığında Kubernetes hizmeti, uygulamanın ön ucunu İnternet'te kullanıma sunar. Bu işlemin tamamlanması birkaç dakika sürebilir.
kubectl get pods komutunu kullanarak dağıtılan podların durumunu denetleyin. Devam etmeden önce tüm podların
Runningolduğundan emin olun. Dağıtacağınız ilk iş yükü buysa, düğüm otomatik sağlamanın podları çalıştırmak için bir düğüm havuzu oluşturması birkaç dakika sürebilir.kubectl get pods -n aks-store-demoMağaza ön uygulaması için genel IP adresi olup olmadığını denetleyin. Bağımsız değişkeniyle kubectl get service komutunu kullanarak ilerleme durumunu izleyin.
kubectl get ingress store-front -n aks-store-demo --watchHizmetin ADDRESS çıkışı
store-frontbaşlangıçta boş görünüyor:NAME CLASS HOSTS ADDRESS PORTS AGE store-front webapprouting.kubernetes.azure.com * 80 12mADRES boştan gerçek bir genel IP adresine geçtikten
CTRL-Csonra izleme işlemini durdurmak için kullanınkubectl.Aşağıdaki örnek çıktı hizmete atanmış geçerli bir genel IP adresini gösterir:
NAME          CLASS                                HOSTS   ADDRESS        PORTS   AGE
store-front   webapprouting.kubernetes.azure.com   *       4.255.22.196   80      12m
Azure Mağazası uygulamasının çalıştığını görmek için girişinizin dış IP adresine bir web tarayıcısı açın.

Kümeyi sil
AKS öğreticisi üzerinden geçmeyi planlamıyorsanız, Azure ücretlerinden kaçınmak için gereksiz kaynakları temizleyin.
komutunu kullanarak az group delete kaynak grubunu, kapsayıcı hizmetini ve tüm ilgili kaynakları kaldırın.
az group delete --name myResourceGroup --yes --no-wait
Uyarı
AKS kümesi, bu hızlı başlangıçta kullanılan varsayılan kimlik seçeneği olan sistem tarafından atanan yönetilen kimlikle oluşturulmuştur. Platform bu kimliği yönetir, bu nedenle el ile kaldırmanız gerekmez.
İlgili içerik
Bu hızlı başlangıçta, AKS Otomatik kullanarak bir Kubernetes kümesi dağıttınız ve bundan sonra basit birden fazla kapsayıcılı bir uygulama dağıttınız. Bu örnek uygulama yalnızca tanıtım amaçlıdır ve Kubernetes uygulamaları için en iyi yöntemlerin tümünü temsil etmez. Üretim için AKS ile tam çözüm oluşturma yönergeleri için bkz . AKS çözümü kılavuzu.
AKS Otomatik hakkında daha fazla bilgi edinmek için bkz: Azure Kubernetes Service (AKS) Otomatik Giriş