Not
Bu sayfaya erişim yetkilendirme gerektiriyor. Oturum açmayı veya dizinleri değiştirmeyi deneyebilirsiniz.
Bu sayfaya erişim yetkilendirme gerektiriyor. Dizinleri değiştirmeyi deneyebilirsiniz.
This article describes self-managed shipping tasks to order, pick up, and drop-off of an Azure Data Box device. You can manage the Data Box device using the Azure portal.
Uyarı
To get answers to frequently asked questions about Data Box orders and shipments, see Data Box FAQ.
Önkoşullar
Azure Data Box sipariş ettiğinizde, otomatik olarak yönetilen gönderim seçeneği sunulur.
Kendi kendine yönetilen gönderim yalnızca aşağıdaki bölgelerde kullanılabilir:
| Bölge | Bölge | Bölge | Bölge | Bölge |
|---|---|---|---|---|
| ABD Hükümeti | Amerika Birleşik Devletleri | Birleşik Krallık | Batı Avrupa | Japonya |
| Singapur | Güney Kore | Hindistan | Güney Afrika | Avustralya |
| Brezilya | Norveç |
Otomatik gönderimi kullanma
When you place a Data Box order, you can choose the self-managed shipping option.
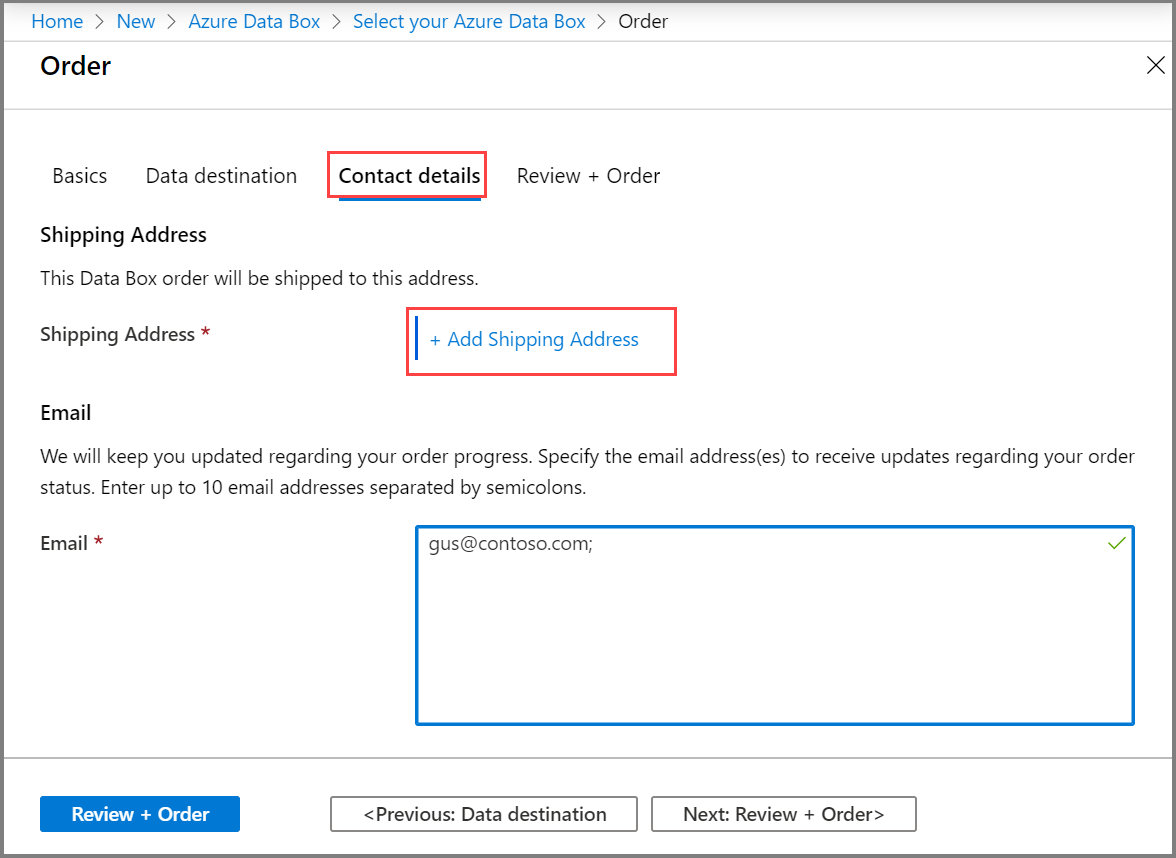
In your Azure Data Box order, under the Contact details, select + Add Shipping Address.
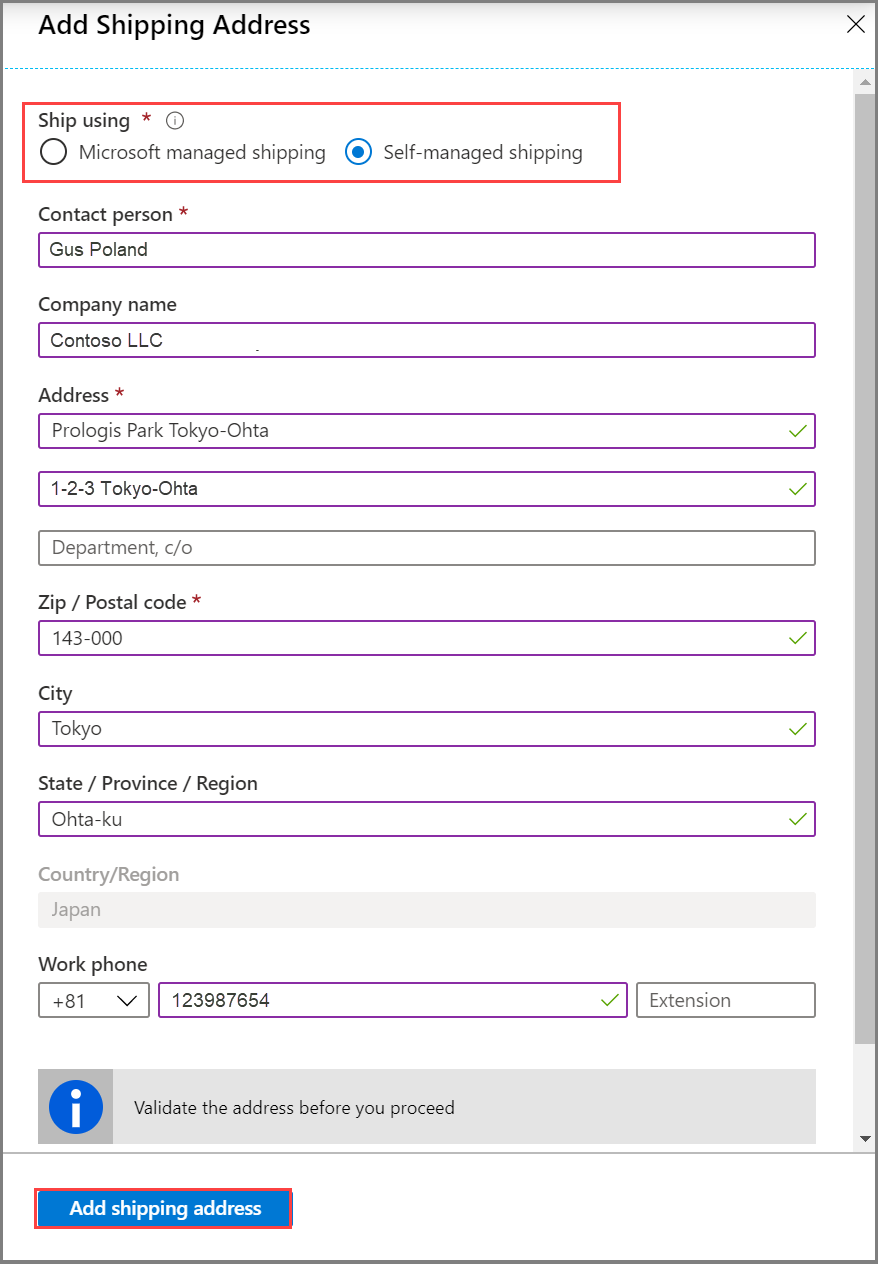
When choosing a shipping type, select the Self-managed shipping option. Bu seçenek yalnızca önkoşullarda açıklandığı gibi desteklenen bir bölgedeyseniz kullanılabilir.
Once you've provided your shipping address, you'll need to validate it and complete your order.
Once the device has been prepared and you receive an email notification for it, you can schedule a pickup.
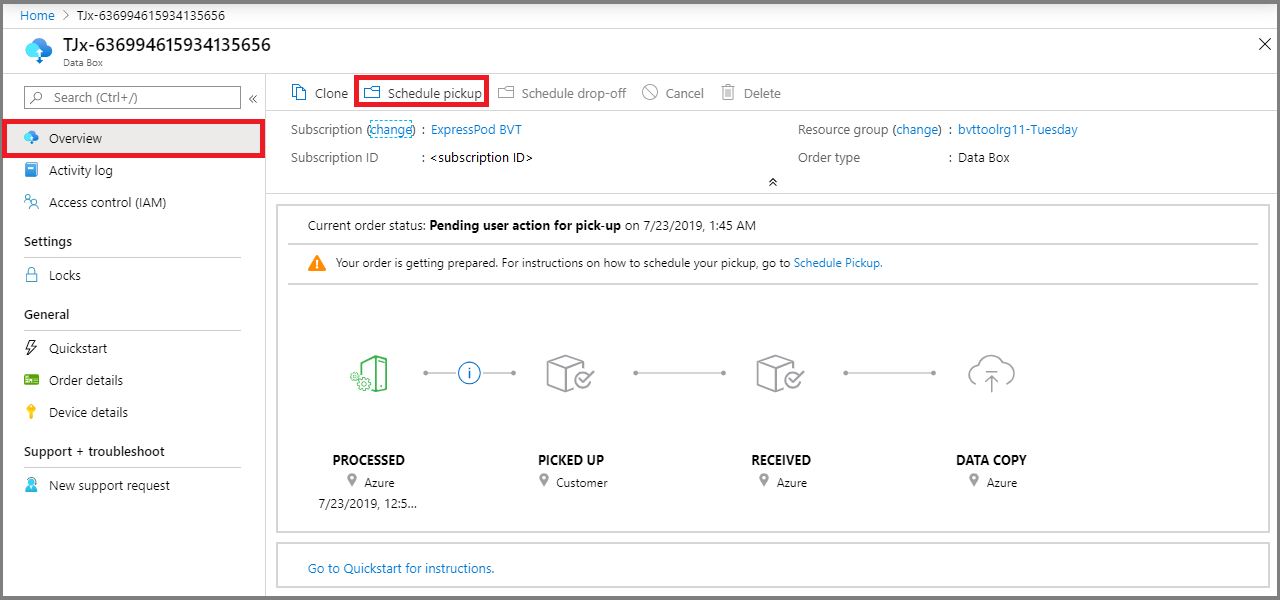
In your Azure Data Box order, go to Overview and then select Schedule pickup.
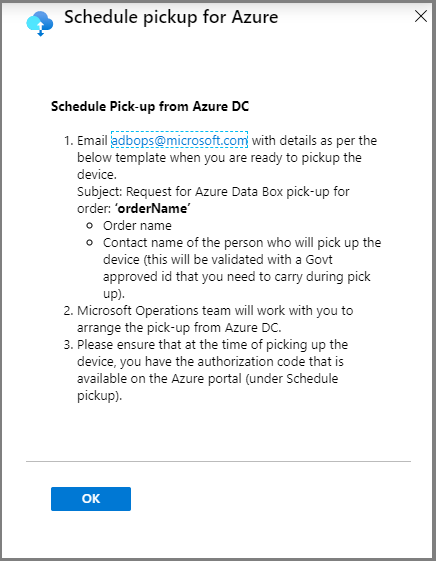
Follow the instructions in the Schedule pickup for Azure.
Yetkilendirme kodunuzu alabilmeniz için önce bölgenizin veri merkezinden cihaz teslim alma işlemini zamanlamak için e-posta adbops@microsoft.com göndermeniz gerekir.
If you're returning a Data Box in Brazil, see Return Azure Data Box for detailed instructions.
Subject: Request Azure Data Box Disk pickup for order: <ordername>

- Order name
- Company name
- Company legal name (if different)
- CNPJ (Business Tax ID, format: 00.000.000/0000-00) or CPF (Individual Tax ID, format: 000.000.000-00)
- Address
- Country
- Phone number
- Contact name of the person who will pick up the Data Box Disk (A government-issued photo ID will be required to validate the contact’s identity upon arrival.)
After you schedule your device pickup, you can view your device authorization code in the Schedule pickup for Azure pane.
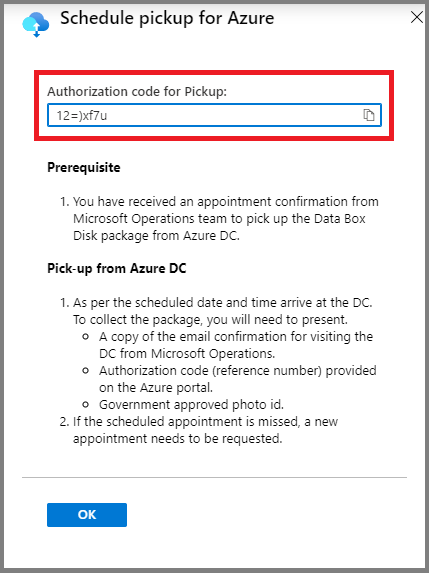
Make a note of this Authorization code. The person who picks up the device will need to provide it.
Güvenlik gereksinimlerine göre, teslim alma zamanlaması sırasında teslim alma için gelecek kişinin adını ve ayrıntılarını sağlamak gerekir. Siz veya iletişim noktası, veri merkezinde doğrulanacak resmi onaylı bir fotoğraflı kimlik taşımalısınız.
Pick up the Data Box from the datacenter at the scheduled time.
Cihazı alan kişinin aşağıdakileri sağlaması gerekir:
Microsoft İşlemleri'nden veri merkezini ziyaret için e-posta onayının bir kopyası.
Yetkilendirme kodu. Başvuru numarası, teslim alma veya bırakma için benzersizdir ve veri merkezinde doğrulanır.
Kamu onaylı fotoğraflı kimlik. Kimlik veri merkezinde doğrulanır ve teslim alma zamanlandığında cihazı alan kişinin adı ve ayrıntıları sağlanmalıdır.
Uyarı
Zamanlanmış bir randevu kaçırılırsa, yeni bir randevu zamanlamanız gerekir.
Your order automatically moves to the Picked up state once the device has been picked up from the datacenter.
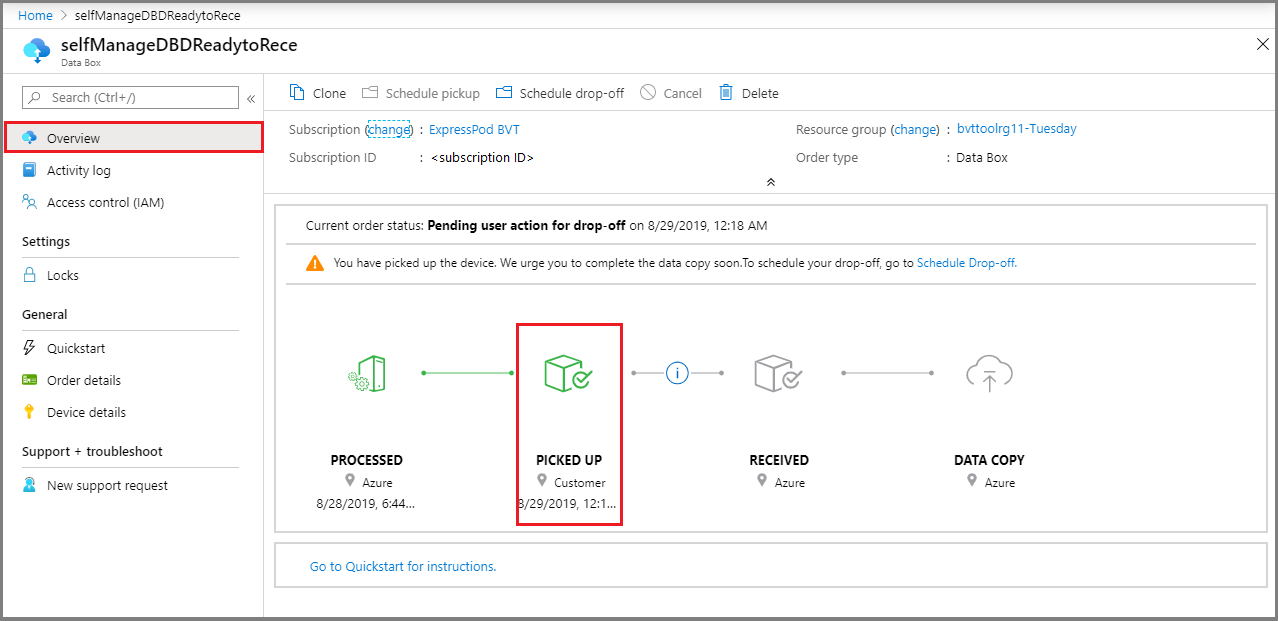
After the device is picked up, copy data to the Data Box at your site. After the data copy is complete, you can prepare to ship the Data Box. For more information, see Prepare to ship.
The Prepare to ship step needs to complete without any critical errors. Otherwise, you'll need to run this step again after making the necessary fixes. After the Prepare to ship step completes successfully, you can view the authorization code for the drop-off on the device local user interface.
Uyarı
Yetkilendirme kodunu e-posta üzerinden paylaşmayın. This is only to be verified at the datacenter during drop off.
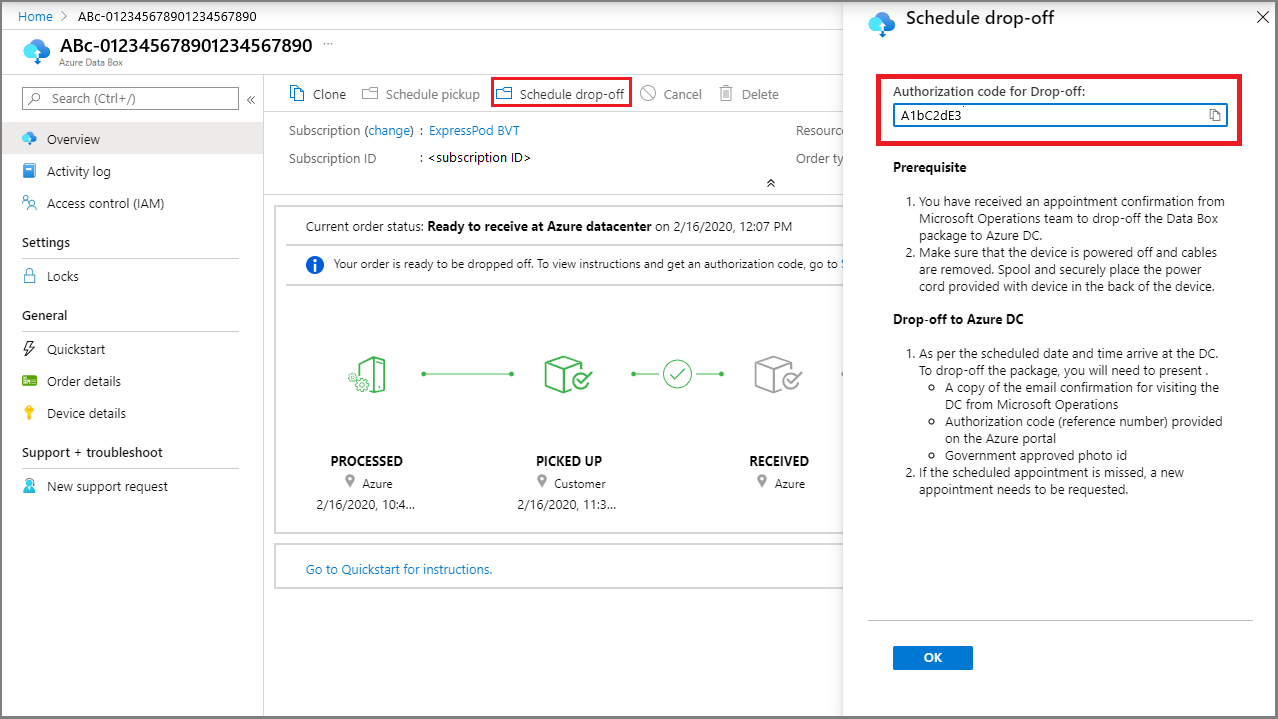
If you've received an appointment for drop-off, the order should have Ready to receive at Azure datacenter status in the Azure portal. Follow the instructions under Schedule drop-off to return the device.
After your ID and authorization code are verified, and you have dropped off the device at the datacenter, the order status should be Received.
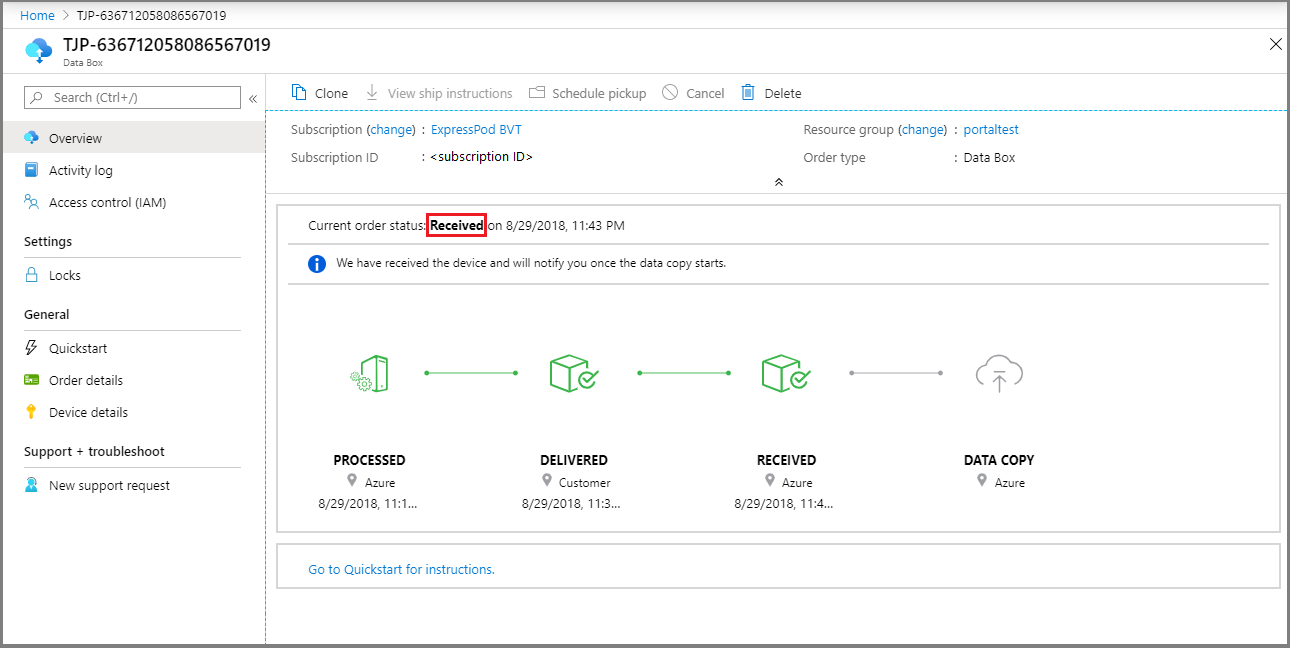
Cihaz alındıktan sonra veri kopyalama işlemi devam eder. Kopyalama tamamlandığında, sipariş tamamlanır.