Not
Bu sayfaya erişim yetkilendirme gerektiriyor. Oturum açmayı veya dizinleri değiştirmeyi deneyebilirsiniz.
Bu sayfaya erişim yetkilendirme gerektiriyor. Dizinleri değiştirmeyi deneyebilirsiniz.
Bu, paketlenmiş Windows uygulamalarında geleneksel kullanıcı adı ve parola kimlik doğrulama sistemlerine alternatif olarak Windows Hello kullanma hakkında tam bir kılavuzun ikinci bölümüdür. Bu makalede, 1. Bölüm Windows Hello oturum açma uygulaması kaldığı yerden devam eder ve Windows Hello mevcut uygulamanızla nasıl tümleştirebileceğinizi göstermek için işlevselliği genişletir.
Bu project oluşturmak için C# ve XAML konusunda biraz deneyime ihtiyacınız olacaktır. Ayrıca Bir Windows 10 veya Windows 11 makinesinde Visual Studio 2026 kullanmanız gerekir. Geliştirme ortamınızı ayarlamayla ilgili tüm yönergeler için bkz. Windows uygulamaları geliştirmeye başlama .
Alıştırma 1: Sunucu Tarafı Mantığı
Bu alıştırmada, ilk laboratuvarda oluşturulan Windows Hello uygulamasıyla başlayıp yerel bir sahte sunucu ve veritabanı oluşturacaksınız. Bu uygulamalı laboratuvar, Windows Hello mevcut bir sisteme nasıl entegre edilebileceğini öğretmek için tasarlanmıştır. Sahte sunucu ve sahte veritabanı kullanıldığında, ilgisiz birçok kurulum ortadan kalkar. Kendi uygulamalarınızda sahte nesneleri gerçek hizmetler ve veritabanlarıyla değiştirmeniz gerekir.
Başlamak için, ilk Windows Hello Hands On LabWindowsHelloLogin çözümünü açın.
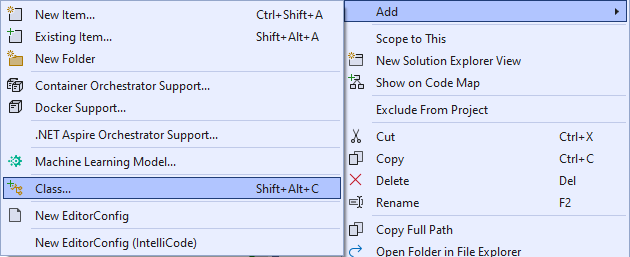
İlk olarak sahte sunucuyu ve sahte veritabanını uygulayacaksınız. "AuthService" adlı yeni bir klasör oluşturun. Solution Explorer'da WindowsHelloLogin project sağ tıklayın ve Add>Yeni Klasör öğesini seçin.
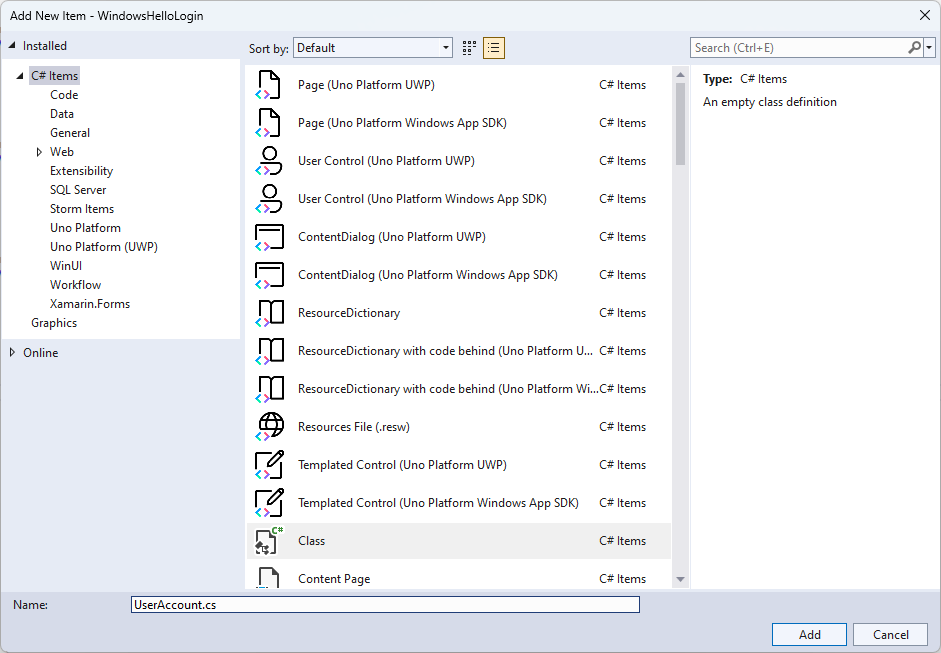
Sahte veritabanına kaydedilecek veriler için model görevi yapacak UserAccount ve WindowsHelloDevices sınıfları oluşturun. UserAccount, geleneksel bir kimlik doğrulama sunucusunda uygulanan kullanıcı modeline benzer olacaktır. AuthService klasörüne sağ tıklayın ve "UserAccount" adlı yeni bir sınıf ekleyin.
Sınıf kapsamını genel olacak şekilde değiştirin ve UserAccount sınıfı için aşağıdaki genel özellikleri ekleyin. Ad alanı için
System.ComponentModel.DataAnnotationsbir using ifadesi eklemeniz gerekir.using System; using System.ComponentModel.DataAnnotations; namespace WindowsHelloLogin.AuthService { public class UserAccount { [Key, Required] public Guid UserId { get; set; } [Required] public string Username { get; set; } public string Password { get; set; } // public List<WindowsHelloDevice> WindowsHelloDevices = new(); } }WindowsHelloDevices'in açıklamalı listesini fark etmiş olabilirsiniz. Bu, geçerli uygulamanızdaki mevcut bir kullanıcı modelinde yapmanız gereken bir değişikliktir. WindowsHelloDevices listesi bir deviceID, Windows Hello'dan türetilmiş ortak anahtar ve KeyCredentialAttestationResult içerir. Bu alıştırmada, TPM (Güvenilen Platform Modülleri) yongası olan cihazlarda yalnızca Windows Hello tarafından sağlandığı için keyAttestationResult'u uygulamanız gerekecektir. KeyCredentialAttestationResult, birden çok özelliğin birleşimidir ve bunları kaydedip bir veritabanına yüklemek için bölünmesi gerekir.
AuthService klasöründe "WindowsHelloDevice.cs" adlı yeni bir sınıf oluşturun. Bu, yukarıda açıklandığı gibi Windows Hello cihazlar için modeldir. Sınıf kapsamını genel olacak şekilde değiştirin ve aşağıdaki özellikleri ekleyin.
using System;

namespace WindowsHelloLogin.AuthService
{
    public class WindowsHelloDevice
    {
        // These are the new variables that will need to be added to the existing UserAccount in the Database
        // The DeviceName is used to support multiple devices for the one user.
        // This way the correct public key is easier to find as a new public key is made for each device.
        // The KeyAttestationResult is only used if the User device has a TPM (Trusted Platform Module) chip,
        // in most cases it will not. So will be left out for this hands on lab.
        public Guid DeviceId { get; set; }
        public byte[] PublicKey { get; set; }
        // public KeyCredentialAttestationResult KeyAttestationResult { get; set; }
    }
}
UserAccount.cs dosyasına geri dönün ve Windows Hello cihazları listesinin yorum satırını kaldırın.
using System.Collections.Generic;

namespace WindowsHelloLogin.AuthService
{
    public class UserAccount
    {
        [Key, Required]
        public Guid UserId { get; set; }
        [Required]
        public string Username { get; set; }
        public string Password { get; set; }
        public List<WindowsHelloDevice> WindowsHelloDevices = new();
    }
}
UserAccount ve WindowsHelloDevice modeli oluşturulduktan sonra, AuthService klasöründe sahte veritabanı görevi yapacak başka bir yeni sınıf oluşturmanız gerekir. Bu, kullanıcı hesaplarını yerel olarak kaydedip yükleyebileceğiniz sahte bir veritabanıdır. Gerçek dünyada bu sizin veritabanı uygulamanız olacaktır. AuthService klasöründe "MockStore.cs" adlı yeni bir sınıf oluşturun. Sınıf kapsamını public olarak değiştirin.
Sahte depo, kullanıcı hesaplarının listesini yerel olarak kaydedip yükleyeceği için, xmlserializer kullanarak bu listeyi kaydetmek ve yüklemek için mantığı uygulayabilirsiniz. Ayrıca dosya adını hatırlamanız ve konumu kaydetmeniz gerekir. MockStore.cs içinde aşağıdakileri uygulayın:
using System.Collections.Generic;
using System;
using System.IO;
using System.Linq;
using System.Text;
using System.Threading.Tasks;
using System.Xml.Serialization;
using Windows.Storage;

namespace WindowsHelloLogin.AuthService
{
    public class MockStore
    {
        private const string USER_ACCOUNT_LIST_FILE_NAME = "userAccountsList.txt";
        // This cannot be a const because the LocalFolder is accessed at runtime
        private string _userAccountListPath = Path.Combine(
            ApplicationData.Current.LocalFolder.Path, USER_ACCOUNT_LIST_FILE_NAME);
        private List<UserAccount> _mockDatabaseUserAccountsList;

#region Save and Load Helpers
        /// <summary>
        /// Create and save a useraccount list file. (Replacing the old one)
        /// </summary>
        private async Task SaveAccountListAsync()
        {
            string accountsXml = SerializeAccountListToXml();

            if (File.Exists(_userAccountListPath))
            {
                StorageFile accountsFile = await StorageFile.GetFileFromPathAsync(_userAccountListPath);
                await FileIO.WriteTextAsync(accountsFile, accountsXml);
            }
            else
            {
                StorageFile accountsFile = await ApplicationData.Current.LocalFolder.CreateFileAsync(USER_ACCOUNT_LIST_FILE_NAME);
                await FileIO.WriteTextAsync(accountsFile, accountsXml);
            }
        }

        /// <summary>
        /// Gets the useraccount list file and deserializes it from XML to a list of useraccount objects.
        /// </summary>
        /// <returns>List of useraccount objects</returns>
        private async Task LoadAccountListAsync()
        {
            if (File.Exists(_userAccountListPath))
            {
                StorageFile accountsFile = await StorageFile.GetFileFromPathAsync(_userAccountListPath);

                string accountsXml = await FileIO.ReadTextAsync(accountsFile);
                DeserializeXmlToAccountList(accountsXml);
            }

            // If the UserAccountList does not contain the sampleUser Initialize the sample users
            // This is only needed as it in a Hand on Lab to demonstrate a user being migrated.
            // In the real world, user accounts would just be in a database.
            if (!_mockDatabaseUserAccountsList.Any(f => f.Username.Equals("sampleUsername")))
            {
                //If the list is empty, call InitializeSampleAccounts and return the list
                //await InitializeSampleUserAccountsAsync();
            }
        }

        /// <summary>
        /// Uses the local list of accounts and returns an XML formatted string representing the list
        /// </summary>
        /// <returns>XML formatted list of accounts</returns>
        private string SerializeAccountListToXml()
        {
            var xmlizer = new XmlSerializer(typeof(List<UserAccount>));
            var writer = new StringWriter();
            xmlizer.Serialize(writer, _mockDatabaseUserAccountsList);
            return writer.ToString();
        }

        /// <summary>
        /// Takes an XML formatted string representing a list of accounts and returns a list object of accounts
        /// </summary>
        /// <param name="listAsXml">XML formatted list of accounts</param>
        /// <returns>List object of accounts</returns>
        private List<UserAccount> DeserializeXmlToAccountList(string listAsXml)
        {
            var xmlizer = new XmlSerializer(typeof(List<UserAccount>));
            TextReader textreader = new StreamReader(new MemoryStream(Encoding.UTF8.GetBytes(listAsXml)));
            return _mockDatabaseUserAccountsList = (xmlizer.Deserialize(textreader)) as List<UserAccount>;
        }
#endregion
    }
}
LoadAccountListAsync yönteminde InitializeSampleUserAccountsAsync yönteminin yorum satırı olarak çıkarıldığını fark etmiş olabilirsiniz. Bu yöntemi MockStore.cs dosyasında oluşturmanız gerekiyor. Bu yöntem, oturum açma işleminin gerçekleşebilmesi için kullanıcı hesapları listesini doldurur. Gerçek dünyada kullanıcı veritabanı zaten doldurulacaktı. Bu adımda, kullanıcı listesini başlatacak ve LoadAccountListAsync'i çağıracak bir oluşturucu da oluşturacaksınız.
namespace WindowsHelloLogin.AuthService
{
    public class MockStore
    {
        private const string USER_ACCOUNT_LIST_FILE_NAME = "userAccountsList.txt";
        // This cannot be a const because the LocalFolder is accessed at runtime
        private string _userAccountListPath = Path.Combine(
            ApplicationData.Current.LocalFolder.Path, USER_ACCOUNT_LIST_FILE_NAME);
        private List<UserAccount> _mockDatabaseUserAccountsList;

        public MockStore()
        {
            _mockDatabaseUserAccountsList = new List<UserAccount>();
            _ = LoadAccountListAsync();
        }

        private async Task InitializeSampleUserAccountsAsync()
        {
            // Create a sample Traditional User Account that only has a Username and Password
            // This will be used initially to demonstrate how to migrate to use Windows Hello

            var sampleUserAccount = new UserAccount()
            {
                UserId = Guid.NewGuid(),
                Username = "sampleUsername",
                Password = "samplePassword",
            };

            // Add the sampleUserAccount to the _mockDatabase
            _mockDatabaseUserAccountsList.Add(sampleUserAccount);
            await SaveAccountListAsync();
        }
    }
}
InitializeSampleUserAccountsAsync yöntemi mevcut olduğuna göre LoadAccountListAsync yöntemindeki yöntem çağrısının açıklamasını kaldırın.
private async Task LoadAccountListAsync()
{
    if (File.Exists(_userAccountListPath))
    {
        StorageFile accountsFile = await StorageFile.GetFileFromPathAsync(_userAccountListPath);

        string accountsXml = await FileIO.ReadTextAsync(accountsFile);
        DeserializeXmlToAccountList(accountsXml);
    }

    // If the UserAccountList does not contain the sampleUser Initialize the sample users
    // This is only needed as it in a Hand on Lab to demonstrate a user migrating
    // In the real world user accounts would just be in a database
    if (!_mockDatabaseUserAccountsList.Any(f = > f.Username.Equals("sampleUsername")))
            {
        //If the list is empty InitializeSampleUserAccountsAsync and return the list
        await InitializeSampleUserAccountsAsync();
    }
}
Sahte depodaki kullanıcı hesapları listesi artık kaydedilebilir ve yüklenebilir. Uygulamanın diğer bölümlerinin bu listeye erişim sağlaması gerekir, bu nedenle bu verileri almak için bazı yöntemler bulunmalıdır. InitializeSampleUserAccountsAsync yönteminin altına veri almak için aşağıdaki yöntemleri ekleyin. Bir kullanıcı kimliği, tek bir kullanıcı, belirli bir Windows Hello cihazın kullanıcı listesini almanıza ve ayrıca belirli bir cihazdaki kullanıcının ortak anahtarını almanıza olanak tanır.
public Guid GetUserId(string username)
{
    if (_mockDatabaseUserAccountsList.Any())
    {
        UserAccount account = _mockDatabaseUserAccountsList.FirstOrDefault(f => f.Username.Equals(username));
        if (account != null)
        {
            return account.UserId;
        }
    }
    return Guid.Empty;
}

public UserAccount GetUserAccount(Guid userId)
{
    return _mockDatabaseUserAccountsList.FirstOrDefault(f => f.UserId.Equals(userId));
}

public List<UserAccount> GetUserAccountsForDevice(Guid deviceId)
{
    var usersForDevice = new List<UserAccount>();

    foreach (UserAccount account in _mockDatabaseUserAccountsList)
    {
        if (account.WindowsHelloDevices.Any(f => f.DeviceId.Equals(deviceId)))
        {
            usersForDevice.Add(account);
        }
    }

    return usersForDevice;
}

public byte[] GetPublicKey(Guid userId, Guid deviceId)
{
    UserAccount account = _mockDatabaseUserAccountsList.FirstOrDefault(f => f.UserId.Equals(userId));
    if (account != null)
    {
        if (account.WindowsHelloDevices.Any())
        {
            return account.WindowsHelloDevices.FirstOrDefault(p => p.DeviceId.Equals(deviceId)).PublicKey;
        }
    }
    return null;
}
Uygulanacak sonraki yöntemler hesap eklemek, hesabı kaldırmak ve ayrıca bir cihazı kaldırmak için kullanılabilecek basit işlemleri işler. Windows Hello cihaza özgü olduğundan bir cihazı kaldırmanız gerekir. Oturum açtığınız her cihaz için, Windows Hello tarafından yeni bir ortak ve özel anahtar çifti oluşturulur. Bu, oturum açtığınızda her cihaz için farklı bir parolaya sahip olmak gibidir, tek şey tüm bu parolaları hatırlamanıza gerek olmamasıdır; sunucu bunu yapar. Aşağıdaki yöntemleri MockStore.cs dosyasına ekleyin.
public async Task<UserAccount> AddAccountAsync(string username)
{
    UserAccount newAccount = null;
    try
    {
        newAccount = new UserAccount()
        {
            UserId = Guid.NewGuid(),
            Username = username,
        };

        _mockDatabaseUserAccountsList.Add(newAccount);
        await SaveAccountListAsync();
    }
    catch (Exception)
    {
        throw;
    }
    return newAccount;
}

public async Task<bool> RemoveAccountAsync(Guid userId)
{
    UserAccount userAccount = GetUserAccount(userId);
    if (userAccount != null)
    {
        _mockDatabaseUserAccountsList.Remove(userAccount);
        await SaveAccountListAsync();
        return true;
    }
    return false;
}

public async Task<bool> RemoveDeviceAsync(Guid userId, Guid deviceId)
{
    UserAccount userAccount = GetUserAccount(userId);
    WindowsHelloDevice deviceToRemove = null;
    if (userAccount != null)
    {
        foreach (WindowsHelloDevice device in userAccount.WindowsHelloDevices)
        {
            if (device.DeviceId.Equals(deviceId))
            {
                deviceToRemove = device;
                break;
            }
        }
    }

    if (deviceToRemove != null)
    {
        //Remove the WindowsHelloDevice
        userAccount.WindowsHelloDevices.Remove(deviceToRemove);
        await SaveAccountListAsync();
    }

    return true;
}
MockStore sınıfında, mevcut UserAccount Windows Hello ilgili bilgileri ekleyecek bir yöntem ekleyin. Bu yöntem "WindowsHelloUpdateDetailsAsync" olarak adlandırılır ve kullanıcıyı ve Windows Hello ayrıntılarını tanımlamak için parametreler alır. KeyAttestationResult, bir WindowsHelloDevice oluştururken çıkarılmıştır; fakat gerçek bir uygulamada, bu gerekli olacaktır.
using System.Threading.Tasks;
using Windows.Security.Credentials;

public async Task WindowsHelloUpdateDetailsAsync(Guid userId, Guid deviceId, byte[] publicKey,
    KeyCredentialAttestationResult keyAttestationResult)
{
    UserAccount existingUserAccount = GetUserAccount(userId);
    if (existingUserAccount != null)
    {
        if (!existingUserAccount.WindowsHelloDevices.Any(f => f.DeviceId.Equals(deviceId)))
        {
            existingUserAccount.WindowsHelloDevices.Add(new WindowsHelloDevice()
            {
                DeviceId = deviceId,
                PublicKey = publicKey,
                // KeyAttestationResult = keyAttestationResult
            });
        }
    }
    await SaveAccountListAsync();
}
MockStore sınıfı artık tamamlandı, veritabanını temsil ettiği için özel olarak kabul edilmesi gerekir. MockStore'a erişmek için, veritabanı verilerini manipüle etmek için bir AuthService sınıfı gerekir. AuthService klasöründe "AuthService.cs" adlı yeni bir sınıf oluşturun. Yalnızca bir örneğin oluşturulduğundan emin olmak için sınıf kapsamını genel olarak değiştirin ve tek bir örnek düzeni ekleyin.
namespace WindowsHelloLogin.AuthService
{
    public class AuthService
    {
        // Singleton instance of the AuthService
        // The AuthService is a mock of what a real world server and service implementation would be
        private static AuthService _instance;
        public static AuthService Instance
        {
            get
            {
                if (null == _instance)
                {
                    _instance = new AuthService();
                }
                return _instance;
            }
        }

        private AuthService()
        { }
    }
}
AuthService sınıfının MockStore sınıfının bir örneğini oluşturması ve MockStore nesnesinin özelliklerine access sağlaması gerekir.
namespace WindowsHelloLogin.AuthService
{
    public class AuthService
    {
        //Singleton instance of the AuthService
        //The AuthService is a mock of what a real world server and database implementation would be
        private static AuthService _instance;
        public static AuthService Instance
        {
            get
            {
                if (null == _instance)
                {
                    _instance = new AuthService();
                }
                return _instance;
            }
        }

        private AuthService()
        { }

        private MockStore _mockStore = new();

        public Guid GetUserId(string username)
        {
            return _mockStore.GetUserId(username);
        }

        public UserAccount GetUserAccount(Guid userId)
        {
            return _mockStore.GetUserAccount(userId);
        }

        public List<UserAccount> GetUserAccountsForDevice(Guid deviceId)
        {
            return _mockStore.GetUserAccountsForDevice(deviceId);
        }
    }
}
Windows Hello ayrıntılarını eklemek, kaldırmak ve güncelleştirmek için AuthService sınıfında, MockStore nesnesine erişen yöntemlere ihtiyacınız var. AuthService sınıf tanımının sonuna aşağıdaki yöntemleri ekleyin.
using System.Threading.Tasks;
using Windows.Security.Credentials;

public async Task RegisterAsync(string username)
{
    await _mockStore.AddAccountAsync(username);
}

public async Task<bool> WindowsHelloRemoveUserAsync(Guid userId)
{
    return await _mockStore.RemoveAccountAsync(userId);
}

public async Task<bool> WindowsHelloRemoveDeviceAsync(Guid userId, Guid deviceId)
{
    return await _mockStore.RemoveDeviceAsync(userId, deviceId);
}

public async Task WindowsHelloUpdateDetailsAsync(Guid userId, Guid deviceId, byte[] publicKey,
    KeyCredentialAttestationResult keyAttestationResult)
{
    await _mockStore.WindowsHelloUpdateDetailsAsync(userId, deviceId, publicKey, keyAttestationResult);
}
AuthService sınıfının kimlik bilgilerini doğrulamak için bir yöntem sağlaması gerekir. Bu yöntem bir kullanıcı adı ve parola alır ve hesabın mevcut olduğundan ve parolanın geçerli olduğundan emin olur. Mevcut bir sistem, kullanıcının yetkilendirildiğini denetleen buna eşdeğer bir yönteme sahip olabilir. AuthService.cs dosyasına aşağıdaki ValidateCredentials yöntemini ekleyin.
public bool ValidateCredentials(string username, string password)
{
    if (!string.IsNullOrEmpty(username) && !string.IsNullOrEmpty(password))
    {
        // This would be used for existing accounts migrating to use Windows Hello
        Guid userId = GetUserId(username);
        if (userId != Guid.Empty)
        {
            UserAccount account = GetUserAccount(userId);
            if (account != null)
            {
                if (string.Equals(password, account.Password))
                {
                    return true;
                }
            }
        }
    }
    return false;
}
AuthService sınıfı, kullanıcının iddia ettikleri kişi olup olmadığını doğrulamak için istemciye bir sınama döndüren bir istek sınama yöntemine ihtiyaç duyar. Ardından, imzalı sınamayı istemciden geri almak için AuthService sınıfında başka bir yöntem gerekir. Bu uygulamalı laboratuvar için, imzalı sınamanın tamamlandığını belirleme yöntemi eksik bırakılmıştır. Windows Hello mevcut bir kimlik doğrulama sistemine uygulanması biraz farklı olacaktır. Sunucuda depolanan ortak anahtarın istemcinin sunucuya döndürmüş olduğu sonuçla eşleşmesi gerekir. bu iki yöntemi AuthService.cs ekleyin.
using Windows.Security.Cryptography;
using Windows.Storage.Streams;

public IBuffer WindowsHelloRequestChallenge()
{
    return CryptographicBuffer.ConvertStringToBinary("ServerChallenge", BinaryStringEncoding.Utf8);
}

public bool SendServerSignedChallenge(Guid userId, Guid deviceId, byte[] signedChallenge)
{
    // Depending on your company polices and procedures this step will be different
    // It is at this point you will need to validate the signedChallenge that is sent back from the client.
    // Validation is used to ensure the correct user is trying to access this account.
    // The validation process will use the signedChallenge and the stored PublicKey
    // for the username and the specific device signin is called from.
    // Based on the validation result you will return a bool value to allow access to continue or to block the account.

    // For this sample validation will not happen as a best practice solution does not apply and will need to
       // be configured for each company.
    // Simply just return true.

    // You could get the User's Public Key with something similar to the following:
    byte[] userPublicKey = _mockStore.GetPublicKey(userId, deviceId);
    return true;
}
Alıştırma 2: İstemci Tarafı Mantığı
Bu alıştırmada, ilk laboratuvardaki istemci tarafı görünümlerini ve yardımcı sınıflarını AuthService sınıfını kullanacak şekilde değiştireceksiniz. Gerçek dünyada kimlik doğrulama sunucusu AuthService olacaktır ve sunucudan veri gönderip almak için Web API'lerini kullanmanız gerekir. Bu uygulamalı laboratuvar için, işleri kolaylaştırmak amacıyla istemci ve sunucu yereldir. Amaç, Windows Hello API'lerini kullanmayı öğrenmektir.
MainPage.xaml.cs, AuthService sınıfı hesaplar listesini yüklemek için MockStore'un bir örneğini oluşturduğundan, yüklenen yöntemde AccountHelper.LoadAccountListAsync yöntemi çağrısını kaldırabilirsiniz. Yöntemi
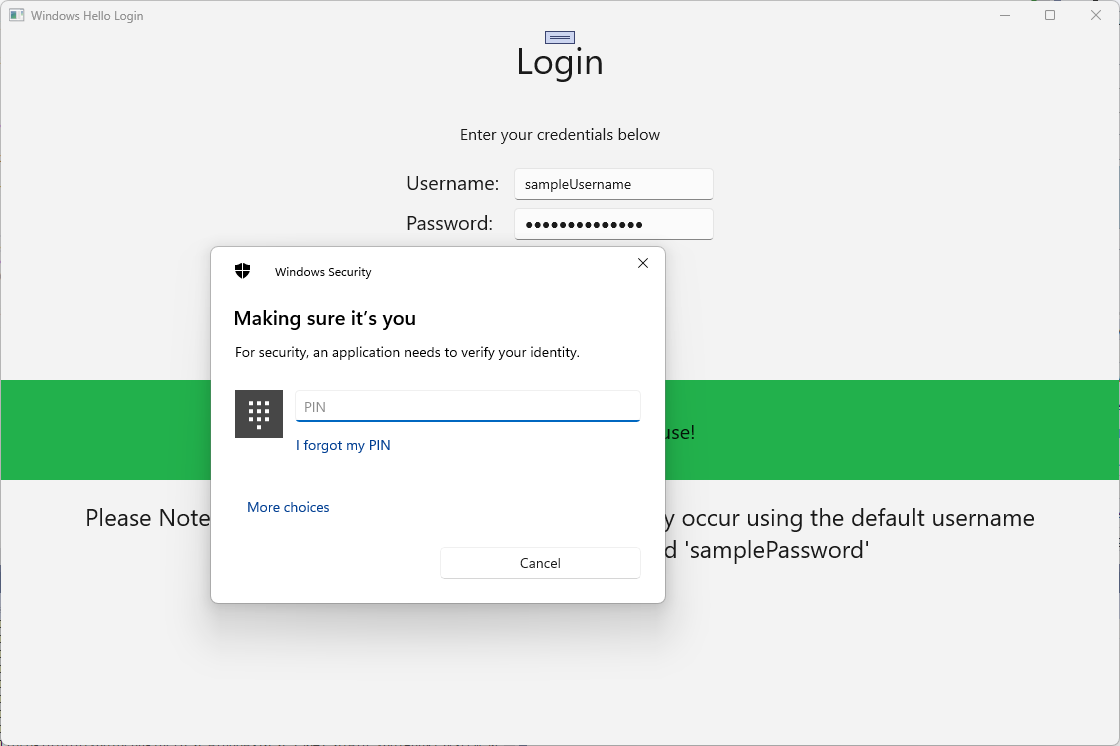
Loadedartık aşağıdaki kod parçacığı gibi görünmelidir. Not: Hiçbir şey beklenmediği için zaman uyumsuz yöntem tanımı kaldırıldı.private void MainPage_Loaded(object sender, RoutedEventArgs e) { Frame.Navigate(typeof(UserSelection)); }Oturum açma sayfası arabirimini parola girilmesi gerektirecek şekilde güncelleştirin. Bu uygulamalı laboratuvar, mevcut bir sistemin Windows Hello kullanmak üzere nasıl geçirilebileceğini ve mevcut hesapların kullanıcı adı ve parolaya sahip olacağını gösterir. Ayrıca XAML'nin altındaki açıklamayı varsayılan parolayı içerecek şekilde güncelleştirin. Login.xaml dosyasında aşağıdaki XAML'yi güncelleştirin.
<Grid>
  <StackPanel>
    <TextBlock Text="Login" FontSize="36" Margin="4" TextAlignment="Center"/>

    <TextBlock x:Name="ErrorMessage" Text="" FontSize="20" Margin="4" Foreground="Red" TextAlignment="Center"/>

    <TextBlock Text="Enter your credentials below" Margin="0,0,0,20"
               TextWrapping="Wrap" Width="300"
               TextAlignment="Center" VerticalAlignment="Center" FontSize="16"/>

    <StackPanel Orientation="Horizontal" HorizontalAlignment="Center">
      <!-- Username Input -->
      <TextBlock x:Name="UserNameTextBlock" Text="Username: "
                 FontSize="20" Margin="4" Width="100"/>
      <TextBox x:Name="UsernameTextBox" PlaceholderText="sampleUsername" Width="200" Margin="4"/>
    </StackPanel>

    <StackPanel Orientation="Horizontal" HorizontalAlignment="Center">
      <!-- Password Input -->
      <TextBlock x:Name="PasswordTextBlock" Text="Password: "
                 FontSize="20" Margin="4" Width="100"/>
      <PasswordBox x:Name="PasswordBox" PlaceholderText="samplePassword" Width="200" Margin="4"/>
    </StackPanel>

    <Button x:Name="LoginButton" Content="Login" Background="DodgerBlue" Foreground="White"
            Click="LoginButton_Click" Width="80" HorizontalAlignment="Center" Margin="0,20"/>

    <TextBlock Text="Don't have an account?"
               TextAlignment="Center" VerticalAlignment="Center" FontSize="16"/>
    <TextBlock x:Name="RegisterButtonTextBlock" Text="Register now"
               PointerPressed="RegisterButtonTextBlock_OnPointerPressed"
               Foreground="DodgerBlue"
               TextAlignment="Center" VerticalAlignment="Center" FontSize="16"/>

    <Border x:Name="WindowsHelloStatus" Background="#22B14C"
            Margin="0,20" Height="100">
      <TextBlock x:Name="WindowsHelloStatusText" Text="Windows Hello is ready to use!"
                 Margin="4" TextAlignment="Center" VerticalAlignment="Center" FontSize="20"/>
    </Border>

    <TextBlock x:Name="LoginExplanation" FontSize="24" TextAlignment="Center" TextWrapping="Wrap"
               Text="Please Note: To demonstrate a login, validation will only occur using the default username 'sampleUsername' and default password 'samplePassword'"/>
  </StackPanel>
</Grid>
Login sınıfının arka plan kod dosyasındaki sınıfın en üstündeki özel değişkeni
AccountileUserAccountolarak değiştirmeniz gerekir.OnNavigateToolayınıUserAccounttürüne dönüştürmek için değiştirin. Aşağıdaki kullanım deyimine de ihtiyacınız olacaktır.using WindowsHelloLogin.AuthService; namespace WindowsHelloLogin.Views { public sealed partial class Login : Page { private UserAccount _account; private bool _isExistingAccount; public Login() { this.InitializeComponent(); } protected override async void OnNavigatedTo(NavigationEventArgs e) { //Check Windows Hello is setup and available on this machine if (await WindowsHelloHelper.WindowsHelloAvailableCheckAsync()) { if (e.Parameter != null) { _isExistingAccount = true; //Set the account to the existing account being passed in _account = (UserAccount)e.Parameter; UsernameTextBox.Text = _account.Username; await SignInWindowsHelloAsync(); } } } private async void LoginButton_Click(object sender, RoutedEventArgs e) { ErrorMessage.Text = ""; await SignInWindowsHelloAsync(); } } }Oturum açma sayfası önceki
UserAccountnesne yerine birAccountnesne kullandığından, WindowsHelloHelper.cs bazı yöntemler için parametre türü olarak kullanılacakUserAccountşekilde güncelleştirilmiş olması gerekir. CreateWindowsHelloKeyAsync, RemoveWindowsHelloAccountAsync ve GetWindowsHelloAuthenticationMessageAsync yöntemleri için aşağıdaki parametreleri değiştirmeniz gerekir. SınıfınUserAccountGuidiçin bir değerine sahip olduğundan, daha kesin olmak adına kimliği daha farklı yerlerde kullanmaya başlayacaksınız.public static async Task<bool> CreateWindowsHelloKeyAsync(Guid userId, string username) { KeyCredentialRetrievalResult keyCreationResult = await KeyCredentialManager.RequestCreateAsync(username, KeyCredentialCreationOption.ReplaceExisting); return true; } public static async Task RemoveWindowsHelloAccountAsync(UserAccount account) { } public static async Task<bool> GetWindowsHelloAuthenticationMessageAsync(UserAccount account) { KeyCredentialRetrievalResult openKeyResult = await KeyCredentialManager.OpenAsync(account.Username); //Calling OpenAsync will allow the user access to what is available in the app and will not require user credentials again. //If you wanted to force the user to sign in again you can use the following: //var consentResult = await Windows.Security.Credentials.UI.UserConsentVerifier.RequestVerificationAsync(account.Username); //This will ask for the either the password of the currently signed in Microsoft Account or the PIN used for Windows Hello. if (openKeyResult.Status == KeyCredentialStatus.Success) { //If OpenAsync has succeeded, the next thing to think about is whether the client application requires access to backend services. //If it does here you would Request a challenge from the Server. The client would sign this challenge and the server //would check the signed challenge. If it is correct it would allow the user access to the backend. //You would likely make a new method called RequestSignAsync to handle all this //for example, RequestSignAsync(openKeyResult); //Refer to the second Windows Hello sample for information on how to do this. //For this sample there is not concept of a server implemented so just return true. return true; } else if (openKeyResult.Status == KeyCredentialStatus.NotFound) { //If the _account is not found at this stage. It could be one of two errors. //1. Windows Hello has been disabled //2. Windows Hello has been disabled and re-enabled cause the Windows Hello Key to change. //Calling CreateWindowsHelloKeyAsync and passing through the account will attempt to replace the existing Windows Hello Key for that account. //If the error really is that Windows Hello is disabled then the CreateWindowsHelloKeyAsync method will output that error. if (await CreateWindowsHelloKeyAsync(account.UserId, account.Username)) { //If the Windows Hello Key was again successfully created, Windows Hello has just been reset. //Now that the Windows Hello Key has been reset for the account retry sign in. return await GetWindowsHelloAuthenticationMessageAsync(account); } } // Can't use Windows Hello right now, try again later return false; }Login.xaml.cs dosyasındaki SignInWindowsHelloAsync yönteminin AccountHelper yerine AuthService'i kullanacak şekilde güncelleştirilmiş olması gerekir. Kimlik bilgilerinin doğrulanması AuthService aracılığıyla gerçekleşir. Bu uygulamalı laboratuvar için yapılandırılan tek hesap "sampleUsername" şeklindedir. Bu hesap, MockStore.cs InitializeSampleUserAccountsAsync yönteminde oluşturulur. Login.xaml.cs'daki SignInWindowsHelloAsync yöntemini aşağıdaki kod parçacığını yansıtacak şekilde güncelleştirin.
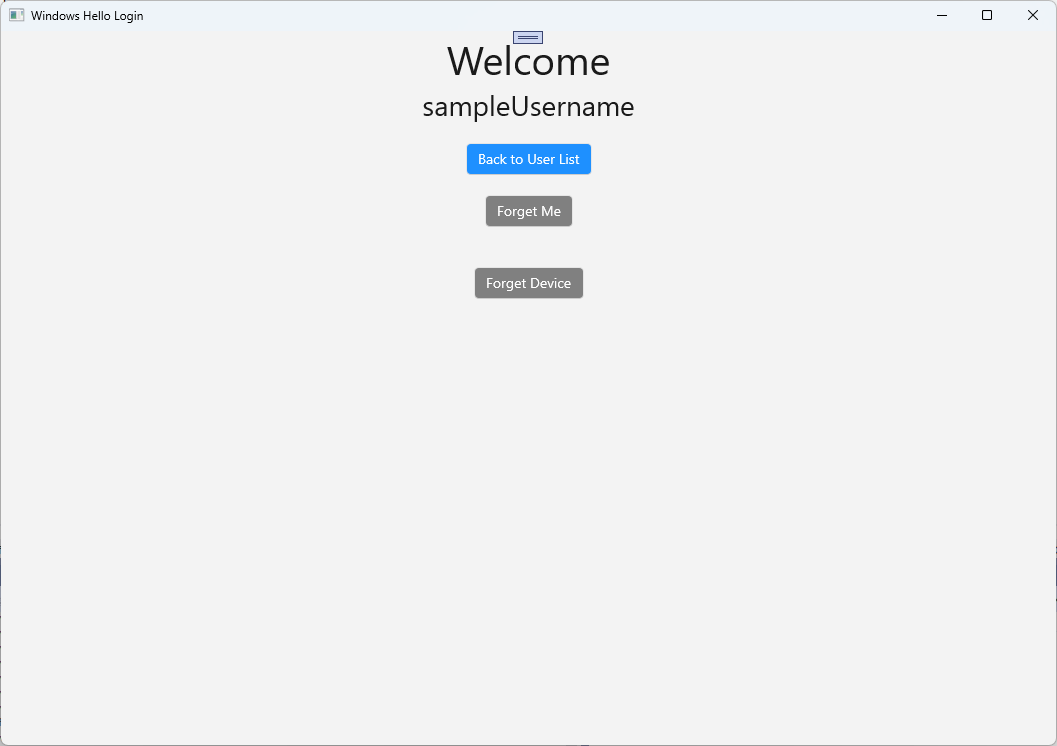
private async Task SignInWindowsHelloAsync()
{
    if (_isExistingAccount)
    {
        if (await WindowsHelloHelper.GetWindowsHelloAuthenticationMessageAsync(_account))
        {
            Frame.Navigate(typeof(Welcome), _account);
        }
    }
    else if (AuthService.AuthService.Instance.ValidateCredentials(UsernameTextBox.Text, PasswordBox.Password))
    {
        Guid userId = AuthService.AuthService.Instance.GetUserId(UsernameTextBox.Text);

        if (userId != Guid.Empty)
        {
            //Now that the account exists on server try and create the necessary details and add them to the account
            if (await WindowsHelloHelper.CreateWindowsHelloKeyAsync(userId, UsernameTextBox.Text))
            {
                Debug.WriteLine("Successfully signed in with Windows Hello!");
                //Navigate to the Welcome Screen.
                _account = AuthService.AuthService.Instance.GetUserAccount(userId);
                Frame.Navigate(typeof(Welcome), _account);
            }
            else
            {
                //The Windows Hello account creation failed.
                //Remove the account from the server as the details were not configured
                await AuthService.AuthService.Instance.WindowsHelloRemoveUserAsync(userId);

                ErrorMessage.Text = "Account Creation Failed";
            }
        }
    }
    else
    {
        ErrorMessage.Text = "Invalid Credentials";
    }
}
Windows Hello her cihazdaki her hesap için farklı bir ortak ve özel anahtar çifti oluşturacağı için Welcome sayfasının oturum açmış hesap için kayıtlı cihazların listesini görüntülemesi ve her birinin unutulmasına izin vermesi gerekir. Welcome.xaml dosyasında aşağıdaki XAML'yi altına
ForgetButtonekleyin. Bu işlem bir cihazı unut düğmesi, hata metin alanı ve tüm cihazları görüntülemek için bir liste uygular.<Grid> <StackPanel> <TextBlock x:Name="Title" Text="Welcome" FontSize="40" TextAlignment="Center"/> <TextBlock x:Name="UserNameText" FontSize="28" TextAlignment="Center"/> <Button x:Name="BackToUserListButton" Content="Back to User List" Click="Button_Restart_Click" HorizontalAlignment="Center" Margin="0,20" Foreground="White" Background="DodgerBlue"/> <Button x:Name="ForgetButton" Content="Forget Me" Click="Button_Forget_User_Click" Foreground="White" Background="Gray" HorizontalAlignment="Center"/> <Button x:Name="ForgetDeviceButton" Content="Forget Device" Click="Button_Forget_Device_Click" Foreground="White" Background="Gray" Margin="0,40,0,20" HorizontalAlignment="Center"/> <TextBlock x:Name="ForgetDeviceErrorTextBlock" Text="Select a device first" TextWrapping="Wrap" Width="300" Foreground="Red" TextAlignment="Center" VerticalAlignment="Center" FontSize="16" Visibility="Collapsed"/> <ListView x:Name="UserListView" MaxHeight="500" MinWidth="350" Width="350" HorizontalAlignment="Center"> <ListView.ItemTemplate> <DataTemplate> <Grid Background="Gray" Height="50" Width="350" HorizontalAlignment="Center" VerticalAlignment="Stretch" > <TextBlock Text="{Binding DeviceId}" HorizontalAlignment="Center" TextAlignment="Center" VerticalAlignment="Center" Foreground="White"/> </Grid> </DataTemplate> </ListView.ItemTemplate> </ListView> </StackPanel> </Grid>Welcome.xaml.cs dosyasında, sınıfın en üstündeki özel
Accountdeğişkeni özelUserAccountdeğişken olacak şekilde değiştirmeniz gerekir. ArdındanOnNavigatedTokullanmak ve geçerli hesap bilgilerini almak için yöntemini güncelleştirin. Hesap bilgilerine sahip olduğunuzda, cihazların görüntülenmesi için listenin değerini ayarlayabilirsinizItemsSource. AuthService ad alanına bir başvuru eklemeniz gerekir.using WindowsHelloLogin.AuthService; namespace WindowsHelloLogin.Views { public sealed partial class Welcome : Page { private UserAccount _activeAccount; public Welcome() { InitializeComponent(); } protected override void OnNavigatedTo(NavigationEventArgs e) { _activeAccount = (UserAccount)e.Parameter; if (_activeAccount != null) { UserAccount account = AuthService.AuthService.Instance.GetUserAccount(_activeAccount.UserId); if (account != null) { UserListView.ItemsSource = account.WindowsHelloDevices; UserNameText.Text = account.Username; } } } } }Bir hesabı kaldırırken AuthService kullanacağınız için yöntemindeki
Button_Forget_User_Clickbaşvurusu kaldırılabilir. Yöntemi şimdi aşağıdaki gibi görünmelidir.private async void Button_Forget_User_Click(object sender, RoutedEventArgs e) { //Remove it from Windows Hello await WindowsHelloHelper.RemoveWindowsHelloAccountAsync(_activeAccount); Debug.WriteLine($"User {_activeAccount.Username} deleted."); //Navigate back to UserSelection page. Frame.Navigate(typeof(UserSelection)); }WindowsHelloHelper yöntemi hesabı kaldırmak için AuthService kullanmıyor. AuthService'e bir çağrı yapmanız ve userId değerini geçirmeniz gerekir.
public static async Task RemoveWindowsHelloAccountAsync(UserAccount account)
{
    //Open the account with Windows Hello
    KeyCredentialRetrievalResult keyOpenResult = await KeyCredentialManager.OpenAsync(account.Username);

    if (keyOpenResult.Status == KeyCredentialStatus.Success)
    {
        // In the real world you would send key information to server to unregister
        await AuthService.AuthService.Instance.WindowsHelloRemoveUserAsync(account.UserId);
    }

    //Then delete the account from the machines list of Windows Hello Accounts
    await KeyCredentialManager.DeleteAsync(account.Username);
}
Hoş Geldiniz sayfasını uygulamayı tamamlamadan önce, WindowsHelloHelper.cs bir cihazın kaldırılmasına izin verecek bir yöntem oluşturmanız gerekir. AuthService'teWindowsHelloRemoveDeviceAsync'i çağıracak yeni bir yöntem oluşturun.
public static async Task RemoveWindowsHelloDeviceAsync(UserAccount account, Guid deviceId)
{
    await AuthService.AuthService.Instance.WindowsHelloRemoveDeviceAsync(account.UserId, deviceId);
}
Welcome.xaml.cs dosyasında Button_Forget_Device_Click olay işleyicisini uygulayın. Bu işlem, cihaz listesinden seçilen cihazı kullanır ve kaldırma cihazını çağırmak için Windows Hello yardımcısını kullanır. Olay işleyicisini asenkron yapmayı unutmayın.
private async void Button_Forget_Device_Click(object sender, RoutedEventArgs e)
{
    WindowsHelloDevice selectedDevice = UserListView.SelectedItem as WindowsHelloDevice;
    if (selectedDevice != null)
    {
        //Remove it from Windows Hello
        await WindowsHelloHelper.RemoveWindowsHelloDeviceAsync(_activeAccount, selectedDevice.DeviceId);

        Debug.WriteLine($"User {_activeAccount.Username} deleted.");

        if (!UserListView.Items.Any())
        {
            //Navigate back to UserSelection page.
            Frame.Navigate(typeof(UserSelection));
        }
    }
    else
    {
        ForgetDeviceErrorTextBlock.Visibility = Visibility.Visible;
    }
}
Güncelleştireceğin bir sonraki sayfa UserSelection sayfasıdır. UserSelection sayfasının geçerli cihazın tüm kullanıcı hesaplarını almak için AuthService'i kullanması gerekir. Şu anda AuthService'e geçirebileceğiniz bir cihaz kimliği almanız ve bu cihazın kullanıcı hesaplarını döndürmenizin bir yolu yoktur. Utils klasöründe "Helpers.cs" adlı yeni bir sınıf oluşturun. Sınıf kapsamını genel statik olacak şekilde değiştirin ve ardından geçerli cihaz kimliğini almanıza olanak sağlayacak aşağıdaki yöntemi ekleyin.
using System;
using Windows.Security.ExchangeActiveSyncProvisioning;

namespace WindowsHelloLogin.Utils
{
    public static class Helpers
    {
        public static Guid GetDeviceId()
        {
            //Get the Device ID to pass to the server
            var deviceInformation = new EasClientDeviceInformation();
            return deviceInformation.Id;
        }
    }
}
UserSelection sayfa sınıfında yalnızca arka plandaki kodun değişmesi gerekir, kullanıcı arayüzü değil. UserSelection.xaml.cs dosyasındaki UserSelection_Loaded metodunu ve UserSelectionChanged metodunu,
UserAccountsınıfı yerineAccountsınıfını kullanacak şekilde güncelleyin. Ayrıca AuthService aracılığıyla bu cihaz için tüm kullanıcıları almanız gerekir.using System.Linq; using WindowsHelloLogin.AuthService; namespace WindowsHelloLogin.Views { public sealed partial class UserSelection : Page { public UserSelection() { InitializeComponent(); Loaded += UserSelection_Loaded; } private void UserSelection_Loaded(object sender, RoutedEventArgs e) { List<UserAccount> accounts = AuthService.AuthService.Instance.GetUserAccountsForDevice(Helpers.GetDeviceId()); if (accounts.Any()) { UserListView.ItemsSource = accounts; UserListView.SelectionChanged += UserSelectionChanged; } else { //If there are no accounts navigate to the Login page Frame.Navigate(typeof(Login)); } } /// <summary> /// Function called when an account is selected in the list of accounts /// Navigates to the Login page and passes the chosen account /// </summary> private void UserSelectionChanged(object sender, RoutedEventArgs e) { if (((ListView)sender).SelectedValue != null) { UserAccount account = (UserAccount)((ListView)sender).SelectedValue; if (account != null) { Debug.WriteLine($"Account {account.Username} selected!"); } Frame.Navigate(typeof(Login), account); } } } }WindowsHelloRegister sayfasında arka planda kod dosyasının güncelleştirilmesi gerekir. Kullanıcı arabiriminin herhangi bir değişikliğe ihtiyacı yoktur. WindowsHelloRegister.xaml.cs,artık gerekli olmadığından sınıfın en üstündeki özel
Accountdeğişkeni kaldırın. AuthService'i kullanmak için RegisterButton_Click_Async olay işleyicisini güncelleştirin. Bu yöntem yeni bir UserAccount oluşturur ve ardından hesap ayrıntılarını güncelleştirmeye çalışır. Windows Hello anahtar oluşturamazsa kayıt işlemi başarısız olduğundan hesap kaldırılır.private async void RegisterButton_Click_Async(object sender, RoutedEventArgs e) { ErrorMessage.Text = ""; //Validate entered credentials are acceptable if (!string.IsNullOrEmpty(UsernameTextBox.Text)) { //Register an Account on the AuthService so that we can get back a userId await AuthService.AuthService.Instance.RegisterAsync(UsernameTextBox.Text); Guid userId = AuthService.AuthService.Instance.GetUserId(UsernameTextBox.Text); if (userId != Guid.Empty) { //Now that the account exists on server try and create the necessary details and add them to the account if (await WindowsHelloHelper.CreateWindowsHelloKeyAsync(userId, UsernameTextBox.Text)) { //Navigate to the Welcome Screen. Frame.Navigate(typeof(Welcome), AuthService.AuthService.Instance.GetUserAccount(userId)); } else { //The Windows Hello account creation failed. //Remove the account from the server as the details were not configured await AuthService.AuthService.Instance.WindowsHelloRemoveUserAsync(userId); ErrorMessage.Text = "Account Creation Failed"; } } } else { ErrorMessage.Text = "Please enter a username"; } }Uygulamayı derleyin ve çalıştırın. Örnek kullanıcı hesabında "sampleUsername" ve "samplePassword" kimlik bilgileriyle oturum açın. Hoş geldiniz ekranında Cihazları unut düğmesinin görüntülendiğini ancak cihaz olmadığını fark edebilirsiniz. Windows Hello ile çalışmak üzere bir kullanıcı oluştururken veya bir kullanıcıyı transfer ederken hesap bilgileri AuthService sistemine aktarılmıyor.
AuthService Windows Hello hesap bilgilerini almak için WindowsHelloHelper.cs güncelleştirilmiş olması gerekir. CreateWindowsHelloKeyAsync yönteminde, yalnızca başarılı olan durumlarda döndürmek yerine,
truealmaya çalışacak yeni bir yöntemi çağırmanız gerekir. Bu uygulamalı laboratuvar bu bilgileri AuthService'e kaydetmese de, bu bilgileri istemci tarafında nasıl alacağınızı öğreneceksiniz. CreateWindowsHelloKeyAsync yöntemini aşağıdaki gibi güncelleştirin:public static async Task<bool> CreateWindowsHelloKeyAsync(Guid userId, string username) { KeyCredentialRetrievalResult keyCreationResult = await KeyCredentialManager.RequestCreateAsync(username, KeyCredentialCreationOption.ReplaceExisting); switch (keyCreationResult.Status) { case KeyCredentialStatus.Success: Debug.WriteLine("Successfully made key"); await GetKeyAttestationAsync(userId, keyCreationResult); return true; case KeyCredentialStatus.UserCanceled: Debug.WriteLine("User cancelled sign-in process."); break; case KeyCredentialStatus.NotFound: // User needs to setup Windows Hello Debug.WriteLine($"Windows Hello is not set up!{Environment.NewLine}Please go to Windows Settings and set up a PIN to use it."); break; default: break; } return false; }WindowsHelloHelper.cs içinde bir GetKeyAttestationAsync yöntemi oluşturun. Bu yöntem, belirli bir cihazdaki her hesap için Windows Hello tarafından sağlanacak tüm gerekli bilgilerin nasıl alınacağını gösterir.
using Windows.Storage.Streams;

private static async Task GetKeyAttestationAsync(Guid userId, KeyCredentialRetrievalResult keyCreationResult)
{
    KeyCredential userKey = keyCreationResult.Credential;
    IBuffer publicKey = userKey.RetrievePublicKey();
    KeyCredentialAttestationResult keyAttestationResult = await userKey.GetAttestationAsync();
    IBuffer keyAttestation = null;
    IBuffer certificateChain = null;
    bool keyAttestationIncluded = false;
    bool keyAttestationCanBeRetrievedLater = false;
    KeyCredentialAttestationStatus keyAttestationRetryType = 0;

    if (keyAttestationResult.Status == KeyCredentialAttestationStatus.Success)
    {
        keyAttestationIncluded = true;
        keyAttestation = keyAttestationResult.AttestationBuffer;
        certificateChain = keyAttestationResult.CertificateChainBuffer;
        Debug.WriteLine("Successfully made key and attestation");
    }
    else if (keyAttestationResult.Status == KeyCredentialAttestationStatus.TemporaryFailure)
    {
        keyAttestationRetryType = KeyCredentialAttestationStatus.TemporaryFailure;
        keyAttestationCanBeRetrievedLater = true;
        Debug.WriteLine("Successfully made key but not attestation");
    }
    else if (keyAttestationResult.Status == KeyCredentialAttestationStatus.NotSupported)
    {
        keyAttestationRetryType = KeyCredentialAttestationStatus.NotSupported;
        keyAttestationCanBeRetrievedLater = false;
        Debug.WriteLine("Key created, but key attestation not supported");
    }

    Guid deviceId = Helpers.GetDeviceId();

    //Update the Windows Hello details with the information we have just fetched above.
    //await UpdateWindowsHelloDetailsAsync(userId, deviceId, publicKey.ToArray(), keyAttestationResult);
}
GetKeyAttestationAsync yönteminde son satıra açıklama eklendiğini fark etmiş olabilirsiniz. Bu son satır, tüm Windows Hello bilgilerini AuthService gönderecek yeni bir yöntem olacaktır. Gerçek dünyada bunu bir Web API'si aracılığıyla gerçek bir sunucuya göndermeniz gerekir.
using System.Runtime.InteropServices.WindowsRuntime;
using System.Threading.Tasks;

public static async Task<bool> UpdateWindowsHelloDetailsAsync(Guid userId, Guid deviceId, byte[] publicKey, KeyCredentialAttestationResult keyAttestationResult)
{
    //In the real world, you would use an API to add Windows Hello signing info to server for the signed in account.
    //For this tutorial, we do not implement a Web API for our server and simply mock the server locally.
    //The CreateWindowsHelloKey method handles adding the Windows Hello account locally to the device using the KeyCredential Manager

    //Using the userId the existing account should be found and updated.
    await AuthService.AuthService.Instance.WindowsHelloUpdateDetailsAsync(userId, deviceId, publicKey, keyAttestationResult);
    return true;
}
Windows Hello bilgilerinin AuthService adresine gönderilmesi için GetKeyAttestationAsync yöntemindeki son satırın açıklamasını kaldırın.
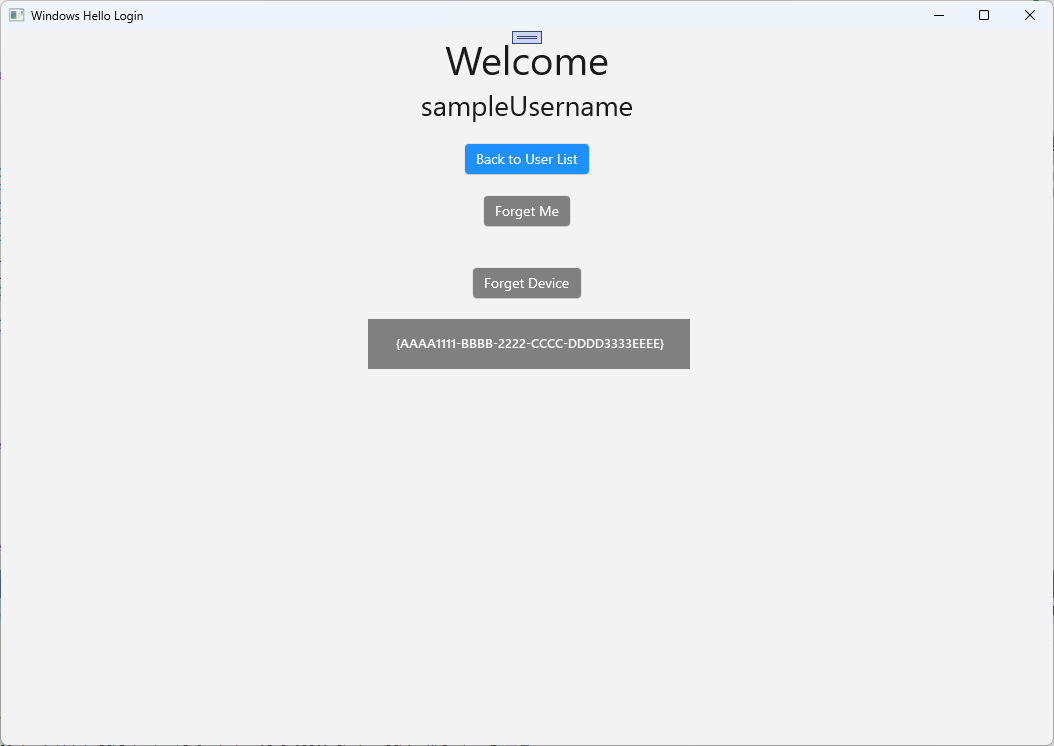
Uygulamayı derleyip çalıştırın ve daha önce olduğu gibi varsayılan kimlik bilgileriyle oturum açın. Hoş Geldiniz sayfasında artık cihaz kimliğinin görüntülendiğini göreceksiniz. Burada da görüntülenecek başka bir cihazda oturum açtıysanız (bulutta barındırılan bir kimlik doğrulama hizmetiniz varsa). Bu uygulamalı laboratuvar için cihazın gerçek Id'si görüntüleniyor. Gerçek bir uygulamada, bir kişinin anlayabileceği ve her cihazı tanımlamak için kullanabileceği kolay bir ad görüntülemek istersiniz.
Bu uygulamalı laboratuvarı tamamlamak için, kullanıcı seçim sayfasından seçim yapıp yeniden oturum açtığında kullanıcı için bir istek ve sınama gerekir. AuthService, sınama istemek için oluşturduğunuz ve imzalı sınama kullanan iki yönteme sahiptir. WindowsHelloHelper.cs'da RequestSignAsync adlı yeni bir yöntem oluşturun. Bu, AuthService'dan sınama isteğinde bulunur, Windows Hello API kullanarak bu sınamayı yerel olarak imzalar ve imzalı sınamayı AuthService adresine gönderir. Bu uygulamalı laboratuvarda, AuthService imzalı sınamayı alır ve
truedeğerini döndürür. Gerçek bir uygulamada, sınamanın doğru cihazda doğru kullanıcı tarafından imzalandığını belirlemek için bir doğrulama mekanizması uygulamanız gerekir. Aşağıdaki yöntemi WindowsHelloHelper.cs ekleyinprivate static async Task<bool> RequestSignAsync(Guid userId, KeyCredentialRetrievalResult openKeyResult) { // Calling userKey.RequestSignAsync() prompts the uses to enter the PIN or use Biometrics (Windows Hello). // The app would use the private key from the user account to sign the sign-in request (challenge) // The client would then send it back to the server and await the servers response. IBuffer challengeMessage = AuthService.AuthService.Instance.WindowsHelloRequestChallenge(); KeyCredential userKey = openKeyResult.Credential; KeyCredentialOperationResult signResult = await userKey.RequestSignAsync(challengeMessage); if (signResult.Status == KeyCredentialStatus.Success) { // If the challenge from the server is signed successfully // send the signed challenge back to the server and await the servers response return AuthService.AuthService.Instance.SendServerSignedChallenge( userId, Helpers.GetDeviceId(), signResult.Result.ToArray()); } else if (signResult.Status == KeyCredentialStatus.UserCanceled) { // User cancelled the Windows Hello PIN entry. } else if (signResult.Status == KeyCredentialStatus.NotFound) { // Must recreate Windows Hello key } else if (signResult.Status == KeyCredentialStatus.SecurityDeviceLocked) { // Can't use Windows Hello right now, remember that hardware failed and suggest restart } else if (signResult.Status == KeyCredentialStatus.UnknownError) { // Can't use Windows Hello right now, try again later } return false; }WindowsHelloHelper sınıfında GetWindowsHelloAuthenticationMessageAsync yönteminden RequestSignAsync yöntemini çağırın.
public static async Task<bool> GetWindowsHelloAuthenticationMessageAsync(UserAccount account)
{
    KeyCredentialRetrievalResult openKeyResult = await KeyCredentialManager.OpenAsync(account.Username);
    // Calling OpenAsync will allow the user access to what is available in the app and will not require user credentials again.
    // If you wanted to force the user to sign in again you can use the following:
    // var consentResult = await Windows.Security.Credentials.UI.UserConsentVerifier.RequestVerificationAsync(account.Username);
    // This will ask for the either the password of the currently signed in Microsoft Account or the PIN used for Windows Hello.

    if (openKeyResult.Status == KeyCredentialStatus.Success)
    {
        //If OpenAsync has succeeded, the next thing to think about is whether the client application requires access to backend services.
        //If it does here you would Request a challenge from the Server. The client would sign this challenge and the server
        //would check the signed challenge. If it is correct it would allow the user access to the backend.
        //You would likely make a new method called RequestSignAsync to handle all this
        //for example, RequestSignAsync(openKeyResult);
        //Refer to the second Windows Hello sample for information on how to do this.

        return await RequestSignAsync(account.UserId, openKeyResult);
    }
    else if (openKeyResult.Status == KeyCredentialStatus.NotFound)
    {
        //If the _account is not found at this stage. It could be one of two errors.
        //1. Windows Hello has been disabled
        //2. Windows Hello has been disabled and re-enabled cause the Windows Hello Key to change.
        //Calling CreateWindowsHelloKeyAsync and passing through the account will attempt to replace the existing Windows Hello Key for that account.
        //If the error really is that Windows Hello is disabled then the CreateWindowsHelloKeyAsync method will output that error.
        if (await CreateWindowsHelloKeyAsync(account.UserId, account.Username))
        {
            //If the Windows Hello Key was again successfully created, Windows Hello has just been reset.
            //Now that the Windows Hello Key has been reset for the _account retry sign in.
            return await GetWindowsHelloAuthenticationMessageAsync(account);
        }
    }

    // Can't use Windows Hello right now, try again later
    return false;
}
Bu alıştırma boyunca, istemci tarafı uygulamasını AuthService kullanacak şekilde güncelleştirdiniz. Bunu yaparak Account sınıfı ve AccountHelper sınıfı gereksinimini ortadan kaldırabildiniz. Utils klasöründe account sınıfını, Models klasörünü ve AccountHelper sınıfını silin. Çözümün başarıyla derlenebilmesi için önce
WindowsHelloLogin.Modelsad alanından uygulama genelinde yapılan tüm başvuruları kaldırmanız gerekir.Uygulamayı derleyip çalıştırın ve sahte hizmet ve veritabanıyla Windows Hello kullanmanın keyfini çıkarın.
Bu uygulamalı laboratuvarda, Windows makinesinden kimlik doğrulaması kullanırken parola gereksinimini değiştirmek için Windows Hello API'lerini kullanmayı öğrendiniz. Mevcut sistemlerde parolaları koruyan ve kaybolan parolaları destekleyen kişilerin ne kadar enerji harcandığı düşünüldüğünde, bu yeni Windows Hello kimlik doğrulama sistemine geçmenin avantajını görmeniz gerekir.
Hizmet ve sunucu tarafında kimlik doğrulamasını nasıl uygulayabileceğinizin ayrıntılarını size alıştırma olarak bıraktık. Windows Hello ile çalışmaya başlamak için çoğu geliştiricinin mevcut sistemlerinin taşınması gerekeceği beklenmektedir. Bu sistemlerden her birinin ayrıntıları farklılık gösterir.
İlgili konular
GitHub'da bizimle işbirliği yapın
Bu içeriğin kaynağı GitHub'da bulunabilir; burada ayrıca sorunları ve çekme isteklerini oluşturup gözden geçirebilirsiniz. Daha fazla bilgi için katkıda bulunan kılavuzumuzu inceleyin.

Windows developer