Not
Bu sayfaya erişim yetkilendirme gerektiriyor. Oturum açmayı veya dizinleri değiştirmeyi deneyebilirsiniz.
Bu sayfaya erişim yetkilendirme gerektiriyor. Dizinleri değiştirmeyi deneyebilirsiniz.
Önceki öğreticide, tam 88 tuşlu piyano klavye modelini başarıyla oluşturduk. Şimdi XR alanında oynatılabilir hale getirelim.
Bu öğreticide şunların nasıl yapıldığını öğrenirsiniz:
- İşaretçi olaylarını kullanarak etkileşimli piyano özellikleri ekleme
- Çizgileri farklı bir boyuta ölçeklendirme
- XR'de ışınlamayı ve çok işaretçili desteği etkinleştirme
Başlamadan önce
Serideki önceki öğreticiyi tamamladığınızdan emin olun ve koda eklemeye devam etmeye hazır olun.
index.html
<html>
    <head>
        <title>Piano in BabylonJS</title>
        <script src="https://cdn.babylonjs.com/babylon.js"></script>
        <script src="scene.js"></script>
        <style>
            body,#renderCanvas { width: 100%; height: 100%;}
        </style>
    </head>
    <body>
        <canvas id="renderCanvas"></canvas>
        <script type="text/javascript">
            const canvas = document.getElementById("renderCanvas");
            const engine = new BABYLON.Engine(canvas, true);

            createScene(engine).then(sceneToRender => {
                engine.runRenderLoop(() => sceneToRender.render());
            });

            // Watch for browser/canvas resize events
            window.addEventListener("resize", function () {
                engine.resize();
            });
        </script>
    </body>
</html>
scene.js
const buildKey = function (scene, parent, props) {
    if (props.type === "white") {
        /*
        Props for building a white key should contain:
        note, topWidth, bottomWidth, topPositionX, wholePositionX, register, referencePositionX

        As an example, the props for building the middle C white key would be
        {type: "white", note: "C", topWidth: 1.4, bottomWidth: 2.3, topPositionX: -0.45, wholePositionX: -14.4, register: 4, referencePositionX: 0}
        */

        // Create bottom part
        const bottom = BABYLON.MeshBuilder.CreateBox("whiteKeyBottom", {width: props.bottomWidth, height: 1.5, depth: 4.5}, scene);

        // Create top part
        const top = BABYLON.MeshBuilder.CreateBox("whiteKeyTop", {width: props.topWidth, height: 1.5, depth: 5}, scene);
        top.position.z =  4.75;
        top.position.x += props.topPositionX;

        // Merge bottom and top parts
        // Parameters of BABYLON.Mesh.MergeMeshes: (arrayOfMeshes, disposeSource, allow32BitsIndices, meshSubclass, subdivideWithSubMeshes, multiMultiMaterials)
        const key = BABYLON.Mesh.MergeMeshes([bottom, top], true, false, null, false, false);
        key.position.x = props.referencePositionX + props.wholePositionX;
        key.name = props.note + props.register;
        key.parent = parent;

        return key;
    }
    else if (props.type === "black") {
        /*
        Props for building a black key should contain:
        note, wholePositionX, register, referencePositionX

        As an example, the props for building the C#4 black key would be
        {type: "black", note: "C#", wholePositionX: -13.45, register: 4, referencePositionX: 0}
        */

        // Create black color material
        const blackMat = new BABYLON.StandardMaterial("black");
        blackMat.diffuseColor = new BABYLON.Color3(0, 0, 0);

        // Create black key
        const key = BABYLON.MeshBuilder.CreateBox(props.note + props.register, {width: 1.4, height: 2, depth: 5}, scene);
        key.position.z += 4.75;
        key.position.y += 0.25;
        key.position.x = props.referencePositionX + props.wholePositionX;
        key.material = blackMat;
        key.parent = parent;

        return key;
    }
}

const createScene = async function(engine) {
    const scene = new BABYLON.Scene(engine);

    const alpha =  3*Math.PI/2;
    const beta = Math.PI/50;
    const radius = 220;
    const target = new BABYLON.Vector3(0, 0, 0);

    const camera = new BABYLON.ArcRotateCamera("Camera", alpha, beta, radius, target, scene);
    camera.attachControl(canvas, true);

    const light = new BABYLON.HemisphericLight("light", new BABYLON.Vector3(0, 1, 0), scene);
    light.intensity = 0.6;

    const keyParams = [
        {type: "white", note: "C", topWidth: 1.4, bottomWidth: 2.3, topPositionX: -0.45, wholePositionX: -14.4},
        {type: "black", note: "C#", wholePositionX: -13.45},
        {type: "white", note: "D", topWidth: 1.4, bottomWidth: 2.4, topPositionX: 0, wholePositionX: -12},
        {type: "black", note: "D#", wholePositionX: -10.6},
        {type: "white", note: "E", topWidth: 1.4, bottomWidth: 2.3, topPositionX: 0.45, wholePositionX: -9.6},
        {type: "white", note: "F", topWidth: 1.3, bottomWidth: 2.4, topPositionX: -0.55, wholePositionX: -7.2},
        {type: "black", note: "F#", wholePositionX: -6.35},
        {type: "white", note: "G", topWidth: 1.3, bottomWidth: 2.3, topPositionX: -0.2, wholePositionX: -4.8},
        {type: "black", note: "G#", wholePositionX: -3.6},
        {type: "white", note: "A", topWidth: 1.3, bottomWidth: 2.3, topPositionX: 0.2, wholePositionX: -2.4},
        {type: "black", note: "A#", wholePositionX: -0.85},
        {type: "white", note: "B", topWidth: 1.3, bottomWidth: 2.4, topPositionX: 0.55, wholePositionX: 0},
    ]

    // Transform Node that acts as the parent of all piano keys
    const keyboard = new BABYLON.TransformNode("keyboard");

    // Register 1 through 7
    var referencePositionX = -2.4*14;
    for (let register = 1; register <= 7; register++) {
        keyParams.forEach(key => {
            buildKey(scene, keyboard, Object.assign({register: register, referencePositionX: referencePositionX}, key));
        })
        referencePositionX += 2.4*7;
    }

    // Register 0
    buildKey(scene, keyboard, {type: "white", note: "A", topWidth: 1.9, bottomWidth: 2.3, topPositionX: -0.20, wholePositionX: -2.4, register: 0, referencePositionX: -2.4*21});
    keyParams.slice(10, 12).forEach(key => {
        buildKey(scene, keyboard, Object.assign({register: 0, referencePositionX: -2.4*21}, key));
    })

    // Register 8
    buildKey(scene, keyboard, {type: "white", note: "C", topWidth: 2.3, bottomWidth: 2.3, topPositionX: 0, wholePositionX: -2.4*6, register: 8, referencePositionX: 84});

    // Transform node that acts as the parent of all piano components
    const piano = new BABYLON.TransformNode("piano");
    keyboard.parent = piano;

    // Import and scale piano frame
    BABYLON.SceneLoader.ImportMesh("frame", "https://raw.githubusercontent.com/MicrosoftDocs/mixed-reality/docs/mixed-reality-docs/mr-dev-docs/develop/javascript/tutorials/babylonjs-webxr-piano/files/", "pianoFrame.babylon", scene, function(meshes) {
        const frame = meshes[0];
        frame.parent = piano;
    });

    // Lift the piano keyboard
    keyboard.position.y += 80;

    const xrHelper = await scene.createDefaultXRExperienceAsync();

    return scene;
}
Piyano klavyesini çalınabilir hale getirme
Şu anda oluşturduğumuz piyano klavyesi, kullanıcı etkileşimlerine yanıt vermeyen statik bir modeldir. Bu bölümde, biri üzerine bastığında aşağı doğru hareket etmek ve bir ses çalmak için tuşları programlayacağız.
Babylon.js etkileşim kurabildiğimiz farklı türde olaylar veya gözlemlenebilir öğeler sağlar. Bizim örneğimizde, tuşları bir işaretçi aracılığıyla üzerine basıldığında eylem gerçekleştirmek üzere programlamak istediğimiz için ile ilgileneceğiz
onPointerObservable, bu da fare tıklaması, dokunma, XR denetleyici düğmesi tıklaması vb. olabilir.Bir davranışa nasıl davranış
onPointerObservableekleyebileceğimizin temel yapısı aşağıdadır:scene.onPointerObservable.add((pointerInfo) => { // do something });Babylon.js birçok farklı tür işaretçi olayı sağlasa da, aşağıdaki yapıyı
POINTERDOWNkullanarak yalnızca piyano tuşlarının davranışını programlamak için vePOINTERUPolaylarını kullanacağız:scene.onPointerObservable.add((pointerInfo) => { switch (pointerInfo.type) { case BABYLON.PointerEventTypes.POINTERDOWN: // When the pointer is down on a piano key, // move the piano key downward (to show that it is pressed) // and play the sound of the note break; case BABYLON.PointerEventTypes.POINTERUP: // When the pointer is released, // move the piano key upward to its original position // and stop the sound of the note of the key that is released break; } });Önce tuşa basıp bıraktığımızda piyano tuşunu aşağı ve yukarı hareket ettirmeye çalışalım.
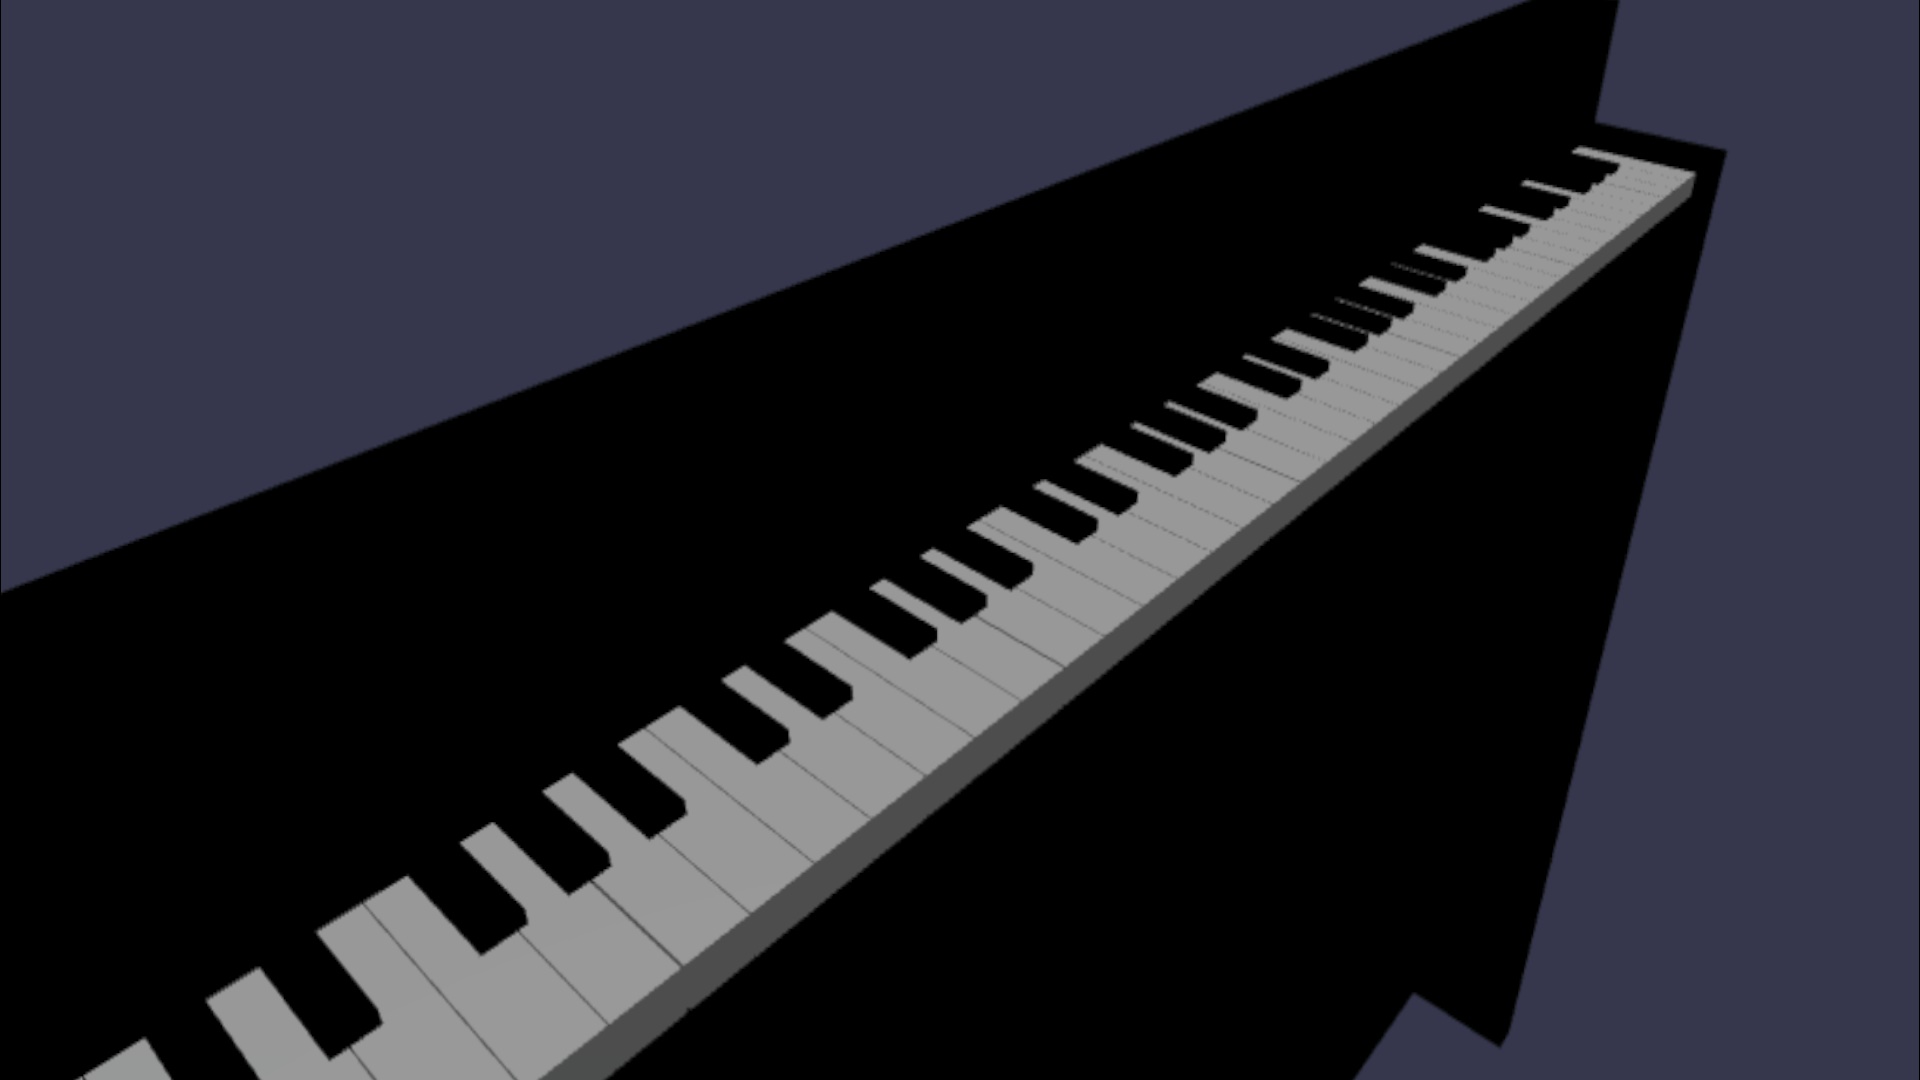
İşaretçi aşağı olayında tıklanan ağı algılamamız, bir piyano tuşu olduğundan emin olmamız ve ağın y koordinatını küçük bir miktar negatif olarak değiştirerek tuşa basılmış gibi görünmesini sağlamamız gerekir.
İşaretçi yukarı olayı için, tuşa basılan işaretçi tuş üzerinde serbest bırakılmayabileceği için biraz daha karmaşıktır. Örneğin, birisi C4 tuşuna tıklayıp faresini E4'e sürükleyip tıklamalarını serbest bırakabilir. Bu durumda, yine de olayın gerçekleştiği yer
pointerUp(E4) yerine basılan anahtarı (C4) serbest bırakmak istiyoruz.Şimdi aşağıdaki kodun istediğimizi nasıl elde ettiğine bakalım:
const pointerToKey = new Map(); scene.onPointerObservable.add((pointerInfo) => { switch (pointerInfo.type) { case BABYLON.PointerEventTypes.POINTERDOWN: if(pointerInfo.pickInfo.hit) { const pickedMesh = pointerInfo.pickInfo.pickedMesh; const pointerId = pointerInfo.event.pointerId; if (pickedMesh.parent === keyboard) { pickedMesh.position.y -= 0.5; // play the sound of the note pointerToKey.set(pointerId, { mesh: pickedMesh }); } } break; case BABYLON.PointerEventTypes.POINTERUP: const pointerId = pointerInfo.event.pointerId; if (pointerToKey.has(pointerId)) { pointerToKey.get(pointerId).mesh.position.y += 0.5; // stop the sound of the note of the key that is released pointerToKey.delete(pointerId); } break; } });pointerIdher işaretçi için benzersizdir ve birden çok denetleyicimiz olduğunda veya dokunmatik ekran kullanıyorsak bir işaretçiyi tanımlamamıza yardımcı olabilir. Burada, hangi işaretçinin hangi tuşa basıldığını depolamak için adlıpointerToKeybirMapnesne başlatarak, yayının nerede olduğuna bakılmaksızın işaretçi serbest bırakıldığında hangi tuşu serbest bırakacağımızı biliyoruz.Yukarıdaki kodla etkileşim aşağıdaki gibi görünür:
Şimdi bir tuşa basılıp serbest bırakıldığında sesi çalma ve durdurma üzerinde çalışalım. Bunu başarmak için, seçtiğimiz bir enstrümanın MIDI seslerini kolayca çalmamıza olanak tanıyan soundfont-player adlı bir Javascript kitaplığı kullanacağız.
Kitaplığın küçültüldü kodunu indirin, index.htmlile aynı klasöre kaydedin ve index.htmletiketine ekleyin
<header>:<head> <title>Babylon Template</title> <script src="https://cdn.babylonjs.com/babylon.js"></script> <script src="scene.js"></script> <script src="soundfont-player.min.js"></script> <style> body,#renderCanvas { width: 100%; height: 100%;} </style> </head>Kitaplık içeri aktarıldıktan sonra, kitaplığı kullanarak bir enstrüman başlatmayı ve MIDI seslerini yürütmeyi/durdurmayı aşağıda bulabilirsiniz:
const pianoSound = await Soundfont.instrument(new AudioContext(), 'acoustic_grand_piano'); const C4 = piano.play("C4"); // Play note C4 C4.stop(); // Stop note C4Şimdi bunu işaretçi olaylarına ekleyelim ve bu bölümün kodunu sonlandıralım:
const pointerToKey = new Map() const piano = await Soundfont.instrument(new AudioContext(), 'acoustic_grand_piano'); scene.onPointerObservable.add((pointerInfo) => { switch (pointerInfo.type) { case BABYLON.PointerEventTypes.POINTERDOWN: if(pointerInfo.pickInfo.hit) { let pickedMesh = pointerInfo.pickInfo.pickedMesh; let pointerId = pointerInfo.event.pointerId; if (keys.has(pickedMesh)) { pickedMesh.position.y -= 0.5; // Move the key downward pointerToKey.set(pointerId, { mesh: pickedMesh, note: pianoSound.play(pointerInfo.pickInfo.pickedMesh.name) // Play the sound of the note }); } } break; case BABYLON.PointerEventTypes.POINTERUP: let pointerId = pointerInfo.event.pointerId; if (pointerToKey.has(pointerId)) { pointerToKey.get(pointerId).mesh.position.y += 0.5; // Move the key upward pointerToKey.get(pointerId).note.stop(); // Stop the sound of the note pointerToKey.delete(pointerId); } break; } });Her bir anahtarın mesh'ini temsil ettiği notla adlandırdığımız için, ağın adını
pianoSound.play()işleve geçirerek hangi notu oynayacağımızı kolayca belirtebiliriz. Ayrıca, bir anahtar yayınlandığında hangi sesin durdurulacağını bilmemiz için sesi haritayapointerToKeydepolayacağız.
Modern VR modu için piyanoyu ölçeklendirme
Şimdiye kadar, etkileşimli işlevleri eklediğinizde muhtemelen piyanoyla farenizle (hatta dokunmatik ekranla) çaldınız. Bu bölümde, çevreleyici VR alanına geçeceğiz.
Sayfayı çevreleyici VR başlığınızda açmak için önce mikrofonlu kulaklığınızı geliştirici makinenize bağlamanız ve Windows Mixed Reality Uygulamasında kullanılmak üzere ayarlandığından emin olmanız gerekir. Windows Mixed Reality Simülatörünü kullanıyorsanız etkinleştirildiğinden emin olun.
Şimdi web sayfasının sağ alt kısmında Tam Ekran VR düğmesini göreceksiniz. Üzerine tıkladığınızda bağlı olduğunuz XR cihazında piyanoyu görebilirsiniz.

Sanal alana girdikten sonra, inşa ettiğimiz piyanonun son derece büyük olduğunu fark edebilirsiniz. VR dünyasında, sadece alt kısmında durabilir ve işaretçiyi uzaklardaki tuşlara işaret ederek oynatabiliriz.
Şimdi piyanonun ölçeğini azaltalım, böylece boyutu gerçek hayatta normal bir standup piyano gibi olur. Bunu yapmak için, alanda bir noktaya göre bir ağı ölçeklendirmemizi sağlayan bir yardımcı program işlevi kullanmamız gerekir. Bu işlevi scene.js ekleyin (dışında
createScene()):const scaleFromPivot = function(transformNode, pivotPoint, scale) { const _sx = scale / transformNode.scaling.x; const _sy = scale / transformNode.scaling.y; const _sz = scale / transformNode.scaling.z; transformNode.scaling = new BABYLON.Vector3(_sx, _sy, _sz); transformNode.position = new BABYLON.Vector3(pivotPoint.x + _sx * (transformNode.position.x - pivotPoint.x), pivotPoint.y + _sy * (transformNode.position.y - pivotPoint.y), pivotPoint.z + _sz * (transformNode.position.z - pivotPoint.z)); }Bu işlev 3 parametre alır:
-
transformNode:
TransformNodeölçeklendirilecek -
pivotPoint: Ölçeklendirmenin göreli olduğu noktayı gösteren nesne
Vector3 - ölçek: ölçek faktörü
-
transformNode:
Piyano çerçevesini ve tuşlarını 0,015 faktörüne göre ölçeklendirmek için bu işlevi kullanacağız ve çıkış noktasında bir pivot noktası olacak. işlevinin sonuna yerleştirerek
keyboard.position.y += 80;işlev çağrısınıcreateScene()işleve ekleme:// Put this line at the beginning of createScene() const scale = 0.015;// Put this function call after keyboard.position.y += 80; // Scale the entire piano scaleFromPivot(piano, new BABYLON.Vector3(0, 0, 0), scale);Kamera konumunu ölçeklendirmeyi de unutmayalım:
const alpha = 3*Math.PI/2; const beta = Math.PI/50; const radius = 220*scale; // scale the radius const target = new BABYLON.Vector3(0, 0, 0); const camera = new BABYLON.ArcRotateCamera("Camera", alpha, beta, radius, target, scene); camera.attachControl(canvas, true);Şimdi VR alanına tekrar girdiğimizde, piyano sıradan bir standup piyano boyutunda olacak.
WebXR özelliklerini etkinleştirme
Artık piyanoyu VR alanında doğru boyuta ölçeklendirdiğimize göre, alanda piyano çalma deneyimimizi geliştirmek için bazı harika WebXR özelliklerini etkinleştirelim.
Çevreleyici VR denetleyicilerinizi kullanarak piyano çalıyorsanız, aynı anda yalnızca bir oyun kumandası kullanabileceğinizi fark etmiş olabilirsiniz. şimdi Babylon.js WebXR özellik yöneticisini kullanarak XR alanında çok işaretçili desteği etkinleştirelim.
Başlatma satırından sonra
xrHelperişlevinecreateScene()aşağıdaki kodu ekleyin:const featuresManager = xrHelper.baseExperience.featuresManager; const pointerSelection = featuresManager.enableFeature(BABYLON.WebXRFeatureName.POINTER_SELECTION, "stable", { xrInput: xrHelper.input, enablePointerSelectionOnAllControllers: true });Buna ek olarak, başlangıç noktanızın bulunduğu yere bağlı olarak, kendinizi piyanonun önüne konumlandırmayı biraz zor bulabilirsiniz. Çevreleyici VR ortamını biliyorsanız, ışınlanma hakkında zaten bilgi sahibi olabilirsiniz. Bu özellik, uzaydaki başka bir noktaya işaret ederek anında geçiş yapmanızı sağlayan bir özelliktir.
Babylon.js ışınlanma özelliğini kullanabilmek için öncelikle VR alanında "üzerinde durabildiğimiz" bir zemin ağımız olması gerekir. Bir zemin oluşturmak için işleve
createScene()aşağıdaki kodu ekleyin:const ground = BABYLON.MeshBuilder.CreateGround("ground", {width: 400, height: 400});ışınlanma desteği, tutturma konumları olarak adlandırılan çok kullanışlı bir özellik ile birlikte gelir. Kısacası, tutturma konumları, kullanıcıların inmesini istediğimiz belirli konumlardır.
Örneğin, kullanıcıların işaretçilerini piyanoya yaklaştırdıklarında kolayca bu konuma ışın olabilmeleri için piyanonun önünde bir tutturma konumu ayarlayabiliriz.
ışınlanma özelliğini etkinleştirmek için aşağıdaki kodu ekleyin ve bir tutturma noktası belirtin:
const teleportation = featuresManager.enableFeature(BABYLON.WebXRFeatureName.TELEPORTATION, "stable", { xrInput: xrHelper.input, floorMeshes: [ground], snapPositions: [new BABYLON.Vector3(2.4*3.5*scale, 0, -10*scale)], });Şimdi, piyanonun önündeki tutturma noktasına ışınlayarak kendinizi piyanonun önüne kolayca yerleştirebilmeli ve her iki kumandayı kullanarak aynı anda iki tuş çalabilmelisiniz.
Özet
Tebrikler! piyano oluşturma öğreticisi Babylon.js serimizi tamamladınız ve şunları yapmayı öğrendiniz:
- Piyano klavyesi modeli oluşturmak için tire oluşturma, konumlandırma ve birleştirme
- Standup piyano çerçevesinin Babylon.js modelini içeri aktarma
- Her piyano tuşuna işaretçi etkileşimleri ekleme
- Özet noktasına göre tire boyutunu ölçeklendirme
- ışınlanma ve çok noktalı destek gibi önemli WebXR özelliklerini etkinleştirme
scene.js ve index.html için son kod aşağıdadır:
scene.js
const buildKey = function (scene, parent, props) {
if (props.type === "white") {
/*
Props for building a white key should contain:
note, topWidth, bottomWidth, topPositionX, wholePositionX, register, referencePositionX
As an example, the props for building the middle C white key would be
{type: "white", note: "C", topWidth: 1.4, bottomWidth: 2.3, topPositionX: -0.45, wholePositionX: -14.4, register: 4, referencePositionX: 0}
*/
// Create bottom part
const bottom = BABYLON.MeshBuilder.CreateBox("whiteKeyBottom", {width: props.bottomWidth, height: 1.5, depth: 4.5}, scene);
// Create top part
const top = BABYLON.MeshBuilder.CreateBox("whiteKeyTop", {width: props.topWidth, height: 1.5, depth: 5}, scene);
top.position.z = 4.75;
top.position.x += props.topPositionX;
// Merge bottom and top parts
// Parameters of BABYLON.Mesh.MergeMeshes: (arrayOfMeshes, disposeSource, allow32BitsIndices, meshSubclass, subdivideWithSubMeshes, multiMultiMaterials)
const key = BABYLON.Mesh.MergeMeshes([bottom, top], true, false, null, false, false);
key.position.x = props.referencePositionX + props.wholePositionX;
key.name = props.note + props.register;
key.parent = parent;
return key;
}
else if (props.type === "black") {
/*
Props for building a black key should contain:
note, wholePositionX, register, referencePositionX
As an example, the props for building the C#4 black key would be
{type: "black", note: "C#", wholePositionX: -13.45, register: 4, referencePositionX: 0}
*/
// Create black color material
const blackMat = new BABYLON.StandardMaterial("black");
blackMat.diffuseColor = new BABYLON.Color3(0, 0, 0);
// Create black key
const key = BABYLON.MeshBuilder.CreateBox(props.note + props.register, {width: 1.4, height: 2, depth: 5}, scene);
key.position.z += 4.75;
key.position.y += 0.25;
key.position.x = props.referencePositionX + props.wholePositionX;
key.material = blackMat;
key.parent = parent;
return key;
}
}
const scaleFromPivot = function(transformNode, pivotPoint, scale) {
const _sx = scale / transformNode.scaling.x;
const _sy = scale / transformNode.scaling.y;
const _sz = scale / transformNode.scaling.z;
transformNode.scaling = new BABYLON.Vector3(_sx, _sy, _sz);
transformNode.position = new BABYLON.Vector3(pivotPoint.x + _sx * (transformNode.position.x - pivotPoint.x), pivotPoint.y + _sy * (transformNode.position.y - pivotPoint.y), pivotPoint.z + _sz * (transformNode.position.z - pivotPoint.z));
}
const createScene = async function(engine) {
const scale = 0.015;
const scene = new BABYLON.Scene(engine);
const alpha = 3*Math.PI/2;
const beta = Math.PI/50;
const radius = 220*scale;
const target = new BABYLON.Vector3(0, 0, 0);
const camera = new BABYLON.ArcRotateCamera("Camera", alpha, beta, radius, target, scene);
camera.attachControl(canvas, true);
const light = new BABYLON.HemisphericLight("light", new BABYLON.Vector3(0, 1, 0), scene);
light.intensity = 0.6;
const keyParams = [
{type: "white", note: "C", topWidth: 1.4, bottomWidth: 2.3, topPositionX: -0.45, wholePositionX: -14.4},
{type: "black", note: "C#", wholePositionX: -13.45},
{type: "white", note: "D", topWidth: 1.4, bottomWidth: 2.4, topPositionX: 0, wholePositionX: -12},
{type: "black", note: "D#", wholePositionX: -10.6},
{type: "white", note: "E", topWidth: 1.4, bottomWidth: 2.3, topPositionX: 0.45, wholePositionX: -9.6},
{type: "white", note: "F", topWidth: 1.3, bottomWidth: 2.4, topPositionX: -0.55, wholePositionX: -7.2},
{type: "black", note: "F#", wholePositionX: -6.35},
{type: "white", note: "G", topWidth: 1.3, bottomWidth: 2.3, topPositionX: -0.2, wholePositionX: -4.8},
{type: "black", note: "G#", wholePositionX: -3.6},
{type: "white", note: "A", topWidth: 1.3, bottomWidth: 2.3, topPositionX: 0.2, wholePositionX: -2.4},
{type: "black", note: "A#", wholePositionX: -0.85},
{type: "white", note: "B", topWidth: 1.3, bottomWidth: 2.4, topPositionX: 0.55, wholePositionX: 0},
]
// Transform Node that acts as the parent of all piano keys
const keyboard = new BABYLON.TransformNode("keyboard");
// Register 1 through 7
var referencePositionX = -2.4*14;
for (let register = 1; register <= 7; register++) {
keyParams.forEach(key => {
buildKey(scene, keyboard, Object.assign({register: register, referencePositionX: referencePositionX}, key));
})
referencePositionX += 2.4*7;
}
// Register 0
buildKey(scene, keyboard, {type: "white", note: "A", topWidth: 1.9, bottomWidth: 2.3, topPositionX: -0.20, wholePositionX: -2.4, register: 0, referencePositionX: -2.4*21});
keyParams.slice(10, 12).forEach(key => {
buildKey(scene, keyboard, Object.assign({register: 0, referencePositionX: -2.4*21}, key));
})
// Register 8
buildKey(scene, keyboard, {type: "white", note: "C", topWidth: 2.3, bottomWidth: 2.3, topPositionX: 0, wholePositionX: -2.4*6, register: 8, referencePositionX: 84});
// Transform node that acts as the parent of all piano components
const piano = new BABYLON.TransformNode("piano");
keyboard.parent = piano;
// Import and scale piano frame
BABYLON.SceneLoader.ImportMesh("frame", "https://raw.githubusercontent.com/MicrosoftDocs/mixed-reality/docs/mixed-reality-docs/mr-dev-docs/develop/javascript/tutorials/babylonjs-webxr-piano/files/", "pianoFrame.babylon", scene, function(meshes) {
const frame = meshes[0];
frame.parent = piano;
});
// Lift the piano keyboard
keyboard.position.y += 80;
// Scale the entire piano
scaleFromPivot(piano, new BABYLON.Vector3(0, 0, 0), scale);
const pointerToKey = new Map()
const pianoSound = await Soundfont.instrument(new AudioContext(), 'acoustic_grand_piano');
scene.onPointerObservable.add((pointerInfo) => {
switch (pointerInfo.type) {
case BABYLON.PointerEventTypes.POINTERDOWN:
// Only take action if the pointer is down on a mesh
if(pointerInfo.pickInfo.hit) {
let pickedMesh = pointerInfo.pickInfo.pickedMesh;
let pointerId = pointerInfo.event.pointerId;
if (pickedMesh.parent === keyboard) {
pickedMesh.position.y -= 0.5; // Move the key downward
pointerToKey.set(pointerId, {
mesh: pickedMesh,
note: pianoSound.play(pointerInfo.pickInfo.pickedMesh.name) // Play the sound of the note
});
}
}
break;
case BABYLON.PointerEventTypes.POINTERUP:
let pointerId = pointerInfo.event.pointerId;
// Only take action if the released pointer was recorded in pointerToKey
if (pointerToKey.has(pointerId)) {
pointerToKey.get(pointerId).mesh.position.y += 0.5; // Move the key upward
pointerToKey.get(pointerId).note.stop(); // Stop the sound of the note
pointerToKey.delete(pointerId);
}
break;
}
});
const xrHelper = await scene.createDefaultXRExperienceAsync();
const featuresManager = xrHelper.baseExperience.featuresManager;
featuresManager.enableFeature(BABYLON.WebXRFeatureName.POINTER_SELECTION, "stable", {
xrInput: xrHelper.input,
enablePointerSelectionOnAllControllers: true
});
const ground = BABYLON.MeshBuilder.CreateGround("ground", {width: 400, height: 400});
featuresManager.enableFeature(BABYLON.WebXRFeatureName.TELEPORTATION, "stable", {
xrInput: xrHelper.input,
floorMeshes: [ground],
snapPositions: [new BABYLON.Vector3(2.4*3.5*scale, 0, -10*scale)],
});
return scene;
}
index.html
<html>
<head>
    <title>Babylon Template</title>
    <script src="https://cdn.babylonjs.com/babylon.js"></script>
    <script src="scene.js"></script>
    <script src="soundfont-player.min.js"></script>
    <style>
            body,#renderCanvas { width: 100%; height: 100%;}
    </style>
</head>
<body>
<canvas id="renderCanvas"></canvas>
<script>
const canvas = document.getElementById("renderCanvas"); // Get the canvas element
const engine = new BABYLON.Engine(canvas, true); // Generate the BABYLON 3D engine
// Register a render loop to repeatedly render the scene
createScene(engine).then(sceneToRender => {
engine.runRenderLoop(() => sceneToRender.render());
});
// Watch for browser/canvas resize events
window.addEventListener("resize", function () {
engine.resize();
});
</script>
</body>
</html>
Sonraki adımlar
JavaScript geliştirme Karma Gerçeklik hakkında daha fazla bilgi için bkz. JavaScript geliştirmeye genel bakış.