Edit a documentation article in your browser
Now that you have an overview of the general tools and moving parts behind the scenes of a contribution, let’s look at the specific steps to make a minor contribution to Microsoft documentation. When you want to make a small change to an article, first make sure you have the appropriate tools set up. Then, you’re ready to start editing and sharing your knowledge with other members of the Microsoft Learn community.
Step 1: Set up your GitHub account
Since Microsoft Learn integrates GitHub workflows to update content, you need a GitHub account to contribute. If you already have a GitHub account, make sure you’re signed in.
If you don’t have a GitHub account yet, use the following steps to create one:
- Navigate to www.github.com
- Select Sign up.
- Follow the prompts to set up your account.
Step 2: Make your changes
Remember, not all Microsoft Learn content is stored in a public repository. Before you make any changes, first check if the content you’d like to contribute to is available for public contribution. If so, you can make changes directly in your browser.
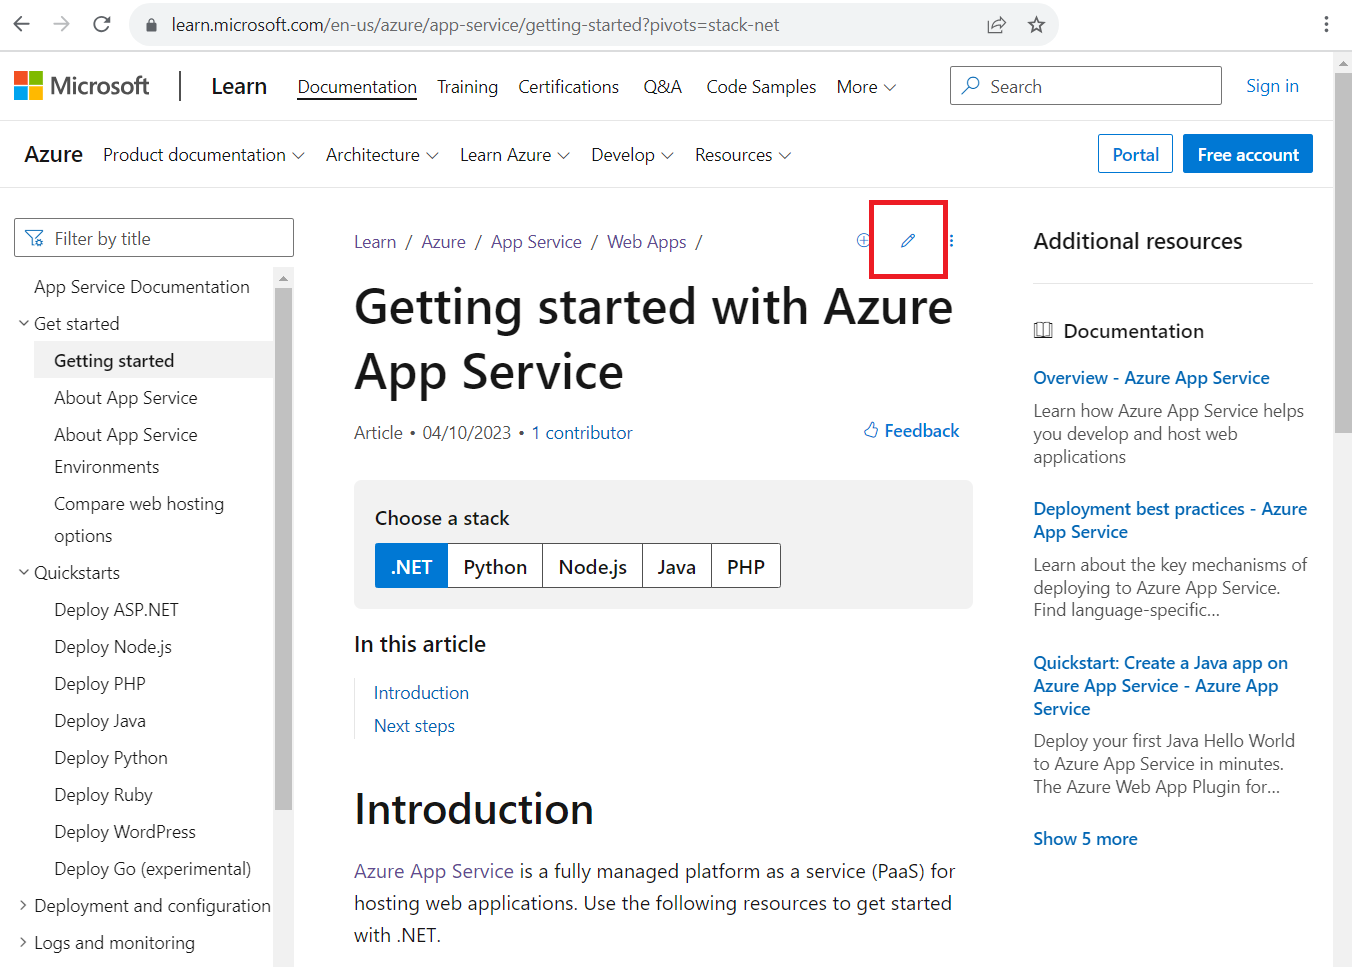
Navigate to the documentation article on learn.microsoft.com that you wish to edit. Check if the article is stored in a public repository by looking for the pencil-shaped Edit icon at the top of the article. If you see the icon, it’s eligible for public contribution!
Select the Edit pencil icon. This takes you to the source file in the public GitHub repository that the article is stored in.
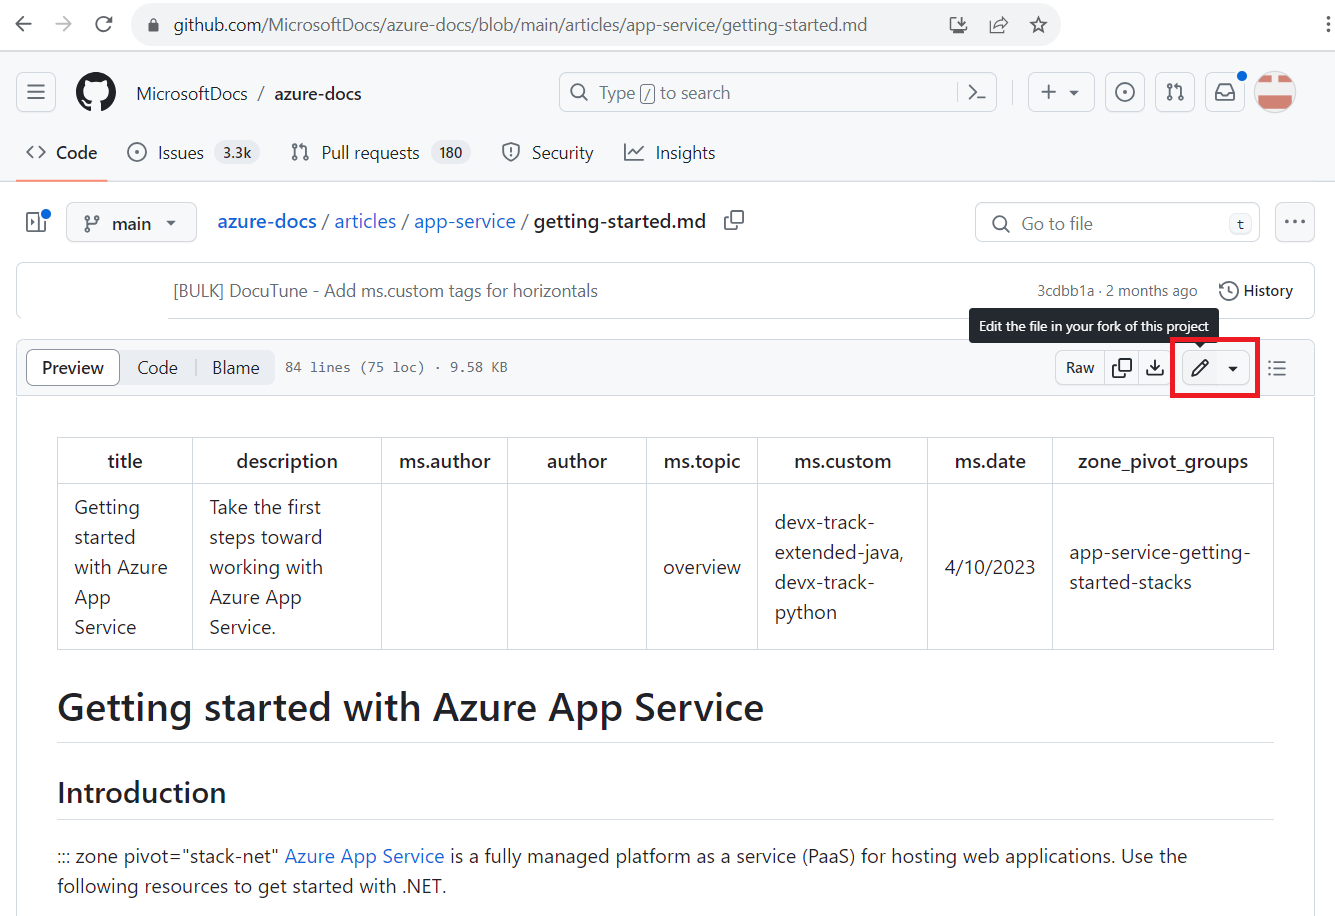
Select the pencil icon at the top of the GitHub file page. This icon is either labeled Edit this file in your fork of this project or Fork this repository and edit the file depending on whether you’ve already forked the repository where the file is stored.
You need to be signed into your GitHub account at this point to select this Edit icon. If you’re not signed in, this option won’t be available.
At the top of the article, you’ll notice the article’s metadata. Metadata is applied to articles for reporting, discoverability via search, and driving aspects of the site experience. If you’re making minor updates to a published article, you probably won’t need to change the metadata.
If this is your first time working in this repository, you're prompted to fork the repo before you propose changes. If so, select Fork this repository.
You’ll see the editing interface, or the Edit pane, in your browser. You can see the article written in Markdown, a formatting syntax. Make your changes in the pane.
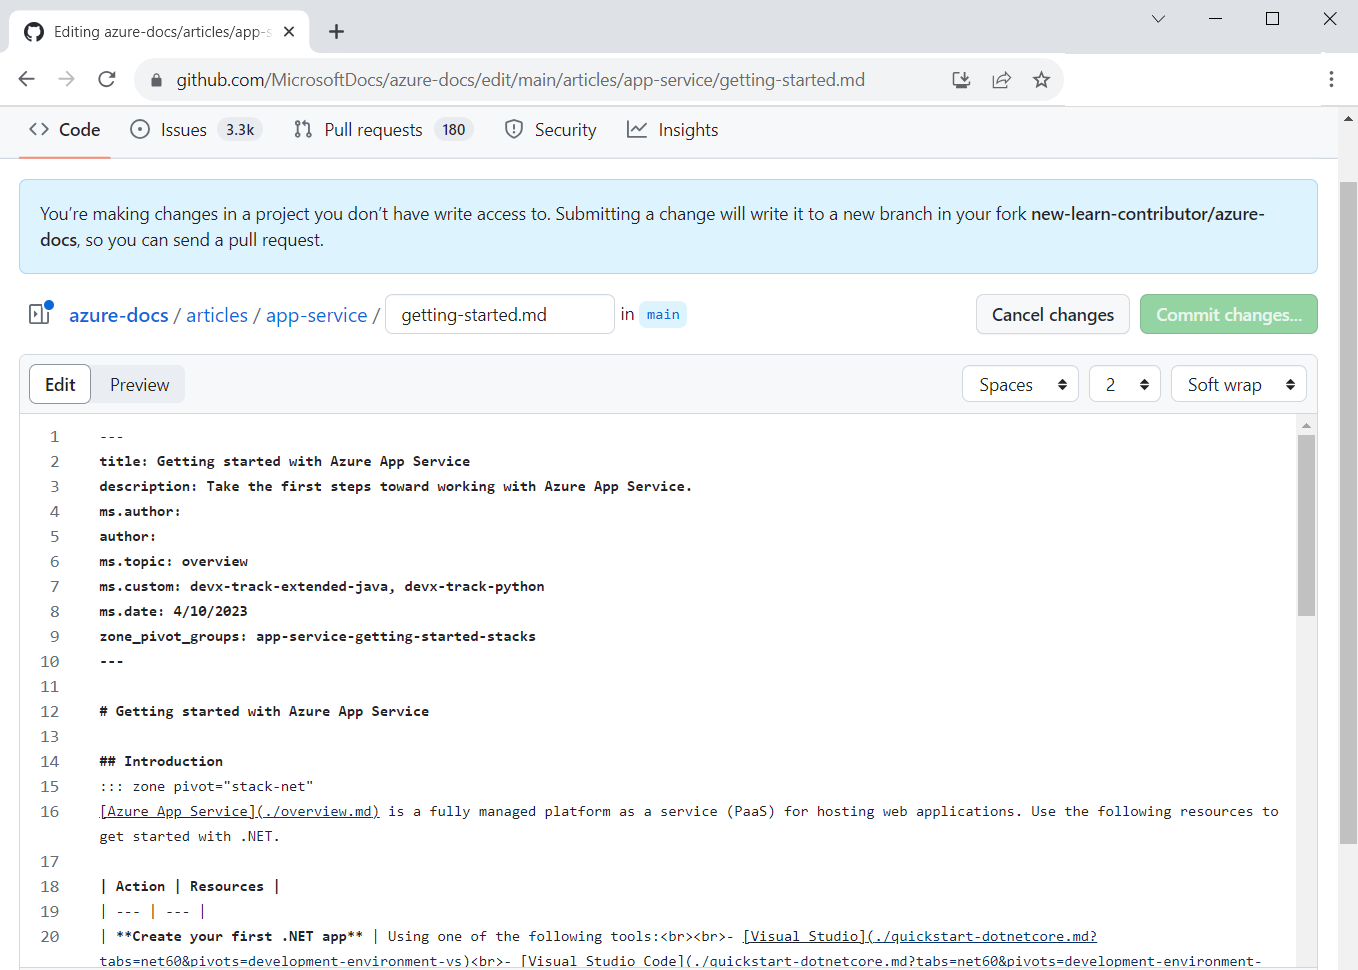
At the top of the editing pane, select the Preview tab. This allows you to validate your changes by viewing them in their published form.
Step 3: Create your pull request
When you’re finished making and previewing your changes, it’s time to create your pull request (PR). Remember that a PR is your way of proposing that your changes be merged to the main branch of the live repository to become visible on Microsoft Learn. A PR enables GitHub's collaboration model by asking for the changes from your working branch to be pulled and merged into another branch. In most cases, this other branch is the default branch in the main repository.
Find and select the Commit changes or Propose changes button, usually at the top of the page.
Add a Commit message. This becomes the title of your PR. The commit message should be a brief summary of your changes. Optionally, add an Extended description to give further details about your changes.

Select Propose changes.
The next page asks you to verify where you want to merge your changes to, called the base. Confirm that the base is
main.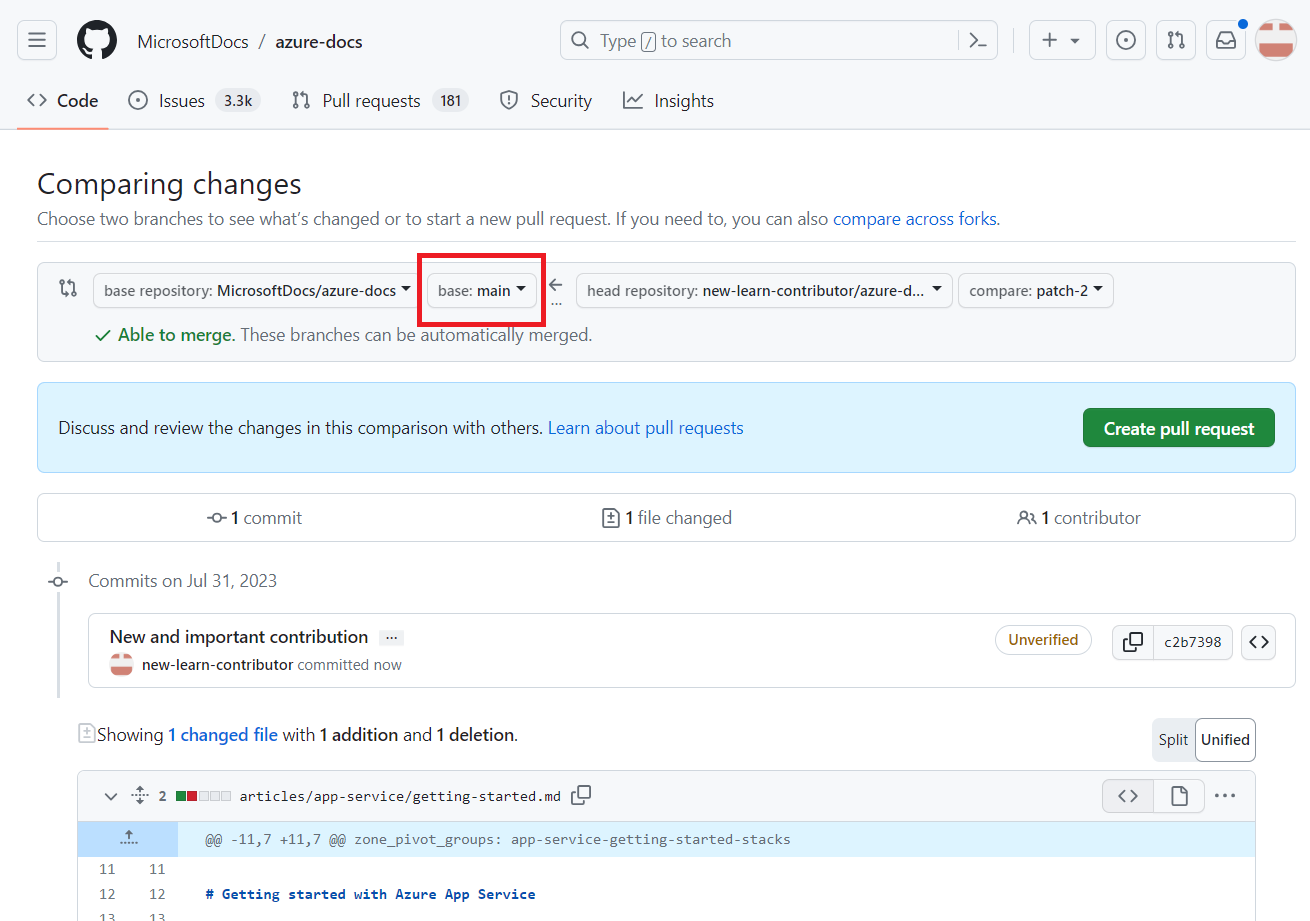
Select Create pull request.
Preview your PR. Make any changes to the title or description fields.
Select the Create pull request button. This will open your pull request.
Your PR has been created, but it hasn’t been submitted yet. In the next step, you’ll complete the final verification steps in your PR to merge it.
Scenario: Edit an Azure Apps Service article
Recall that you're a software engineer with special expertise in Azure App Service. When reviewing a documentation article about App Service, you notice a detail you’d like to add that would help others use the service. You decide to share your knowledge by making your first contribution to Microsoft Learn! After signing into your GitHub account, you begin the contribution process: