Exercise - Create and configure Front Door
Front Door listens on an endpoint and matches incoming requests to a route. Then, it forwards these requests to the best available origin. The routing configuration you define, determines how Front Door processes a request at the edge before it's forwarded to the origin.
Information that is processed at the edge includes:
- Protocols that the route accepts.
- Paths to match.
- Redirecting traffic to HTTPS.
- Determining the origin group that serves the request.
- Setting the protocol used to forward the request.
- Using the cache if it's enabled.
- Using rule sets to process a request further before forwarding to the origin.
In the motor vehicle department system, you need to configure Front Door to access the web servers hosting the Vehicle registration application privately using Private Link. You also need to configure Front Door to access the App service hosting the License renewal website using Private Link. The Azure Front Door profile has an endpoint with two routes, each configured to route traffic to the correct website. Lastly, you configure a security policy containing a WAF policy to protect your web applications from malicious attacks and intruders.
This exercise walks you through creating a Front Door profile, configuring origins in an origin group, setting up routes and applying a security policy. Then, you test each route to verify Front Door is handling each request correctly.
Create an Azure Front Door
In this unit, you create a Front Door named vehicleFrontDoor with the following configuration:
- Two origin groups. The first origin group contains the service endpoint IP of the web servers virtual machines. The second origin group contains the App service. You also enable private link access to these origins.
- Approve private endpoint connections for the web servers and App service.
- Create an endpoint in the Front Door profile with two routes configured to direct requests to a Vehicle registration website and a License renewal website.
- A security policy containing a WAF policy to block malicious requests.
Create the Azure Front Door profile with the following command:
az afd profile create \
    --profile-name vehicleFrontDoor \
    --resource-group $RG \
    --sku Premium_AzureFrontDoor
Create the first endpoint within the profile with the following command:
endpoint="vehicle-$RANDOM"
az afd endpoint create \
    --endpoint-name $endpoint \
    --profile-name vehicleFrontDoor \
    --resource-group $RG
Create origin groups and add origins
Sign into the Azure portal to complete the setup of the Front Door profile. Make sure to use the same account you activated the sandbox with.
Go to the
vehicleFrontDoorFront Door profile you created and select Origin Groups from under Settings in the left menu pane.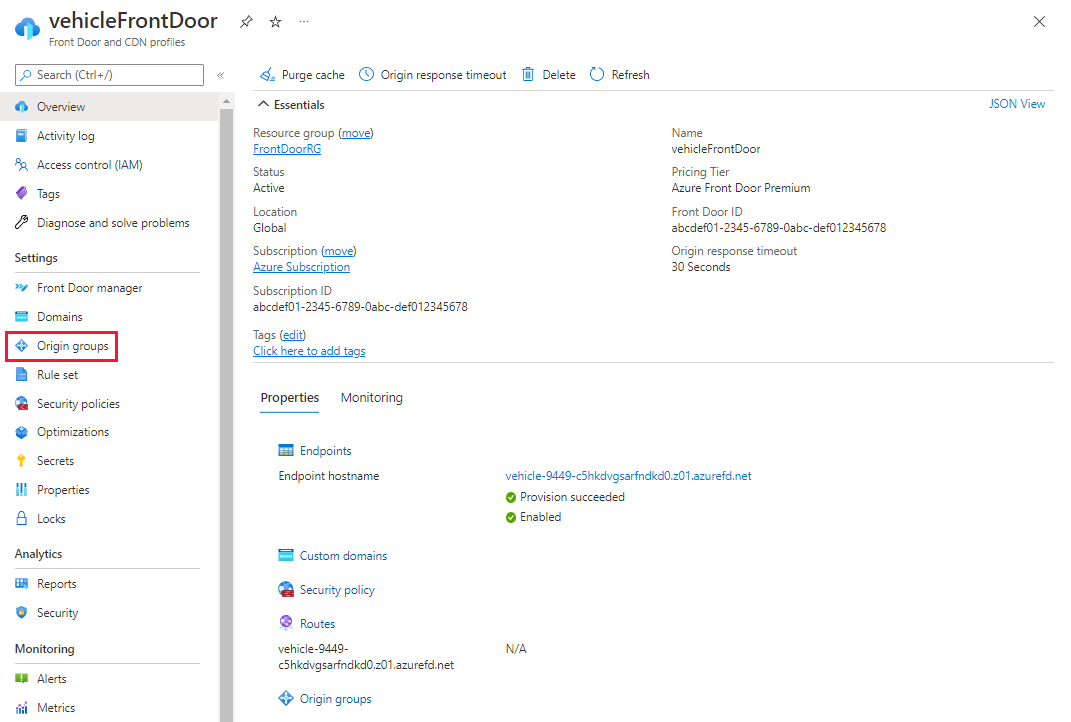
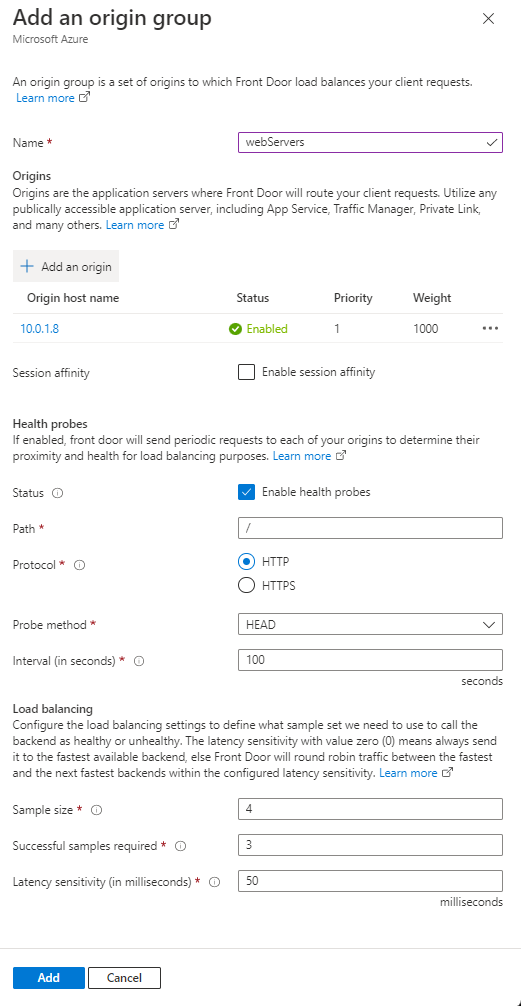
Select + Add to create the first origin group. For the name, enter webServers. Then select + Add an origin. Enter or select the following information to add the webserver origin:
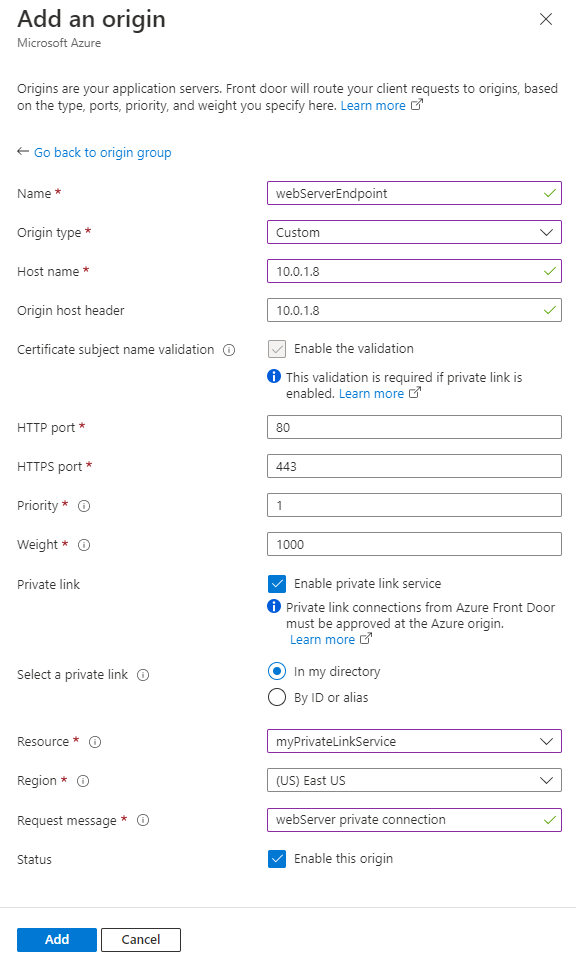
Settings Value Name Enter webServerEndpoint. Origin type Select Custom. Host name Enter 10.0.1.8 Origin host header This field is the same as host name for this example. Certificate subject name validation Leave as checked. Required for private link service. HTTP port Leave as default. 80. HTTPS port Leave as default. 443. Priority Leave as default. 1. Weight Leave as default. 1000. Private link Select the checkbox for Enable private link service. Select a private link Select In my directory. Resource Select myPrivateLinkService. Region Region is selected when you select the resource. Request message Enter webServer private connection. Status Enable this origin. Select Add to add the origin to the origin group. Leave the rest of the origin group settings as default. Then select Add to create the origin group.
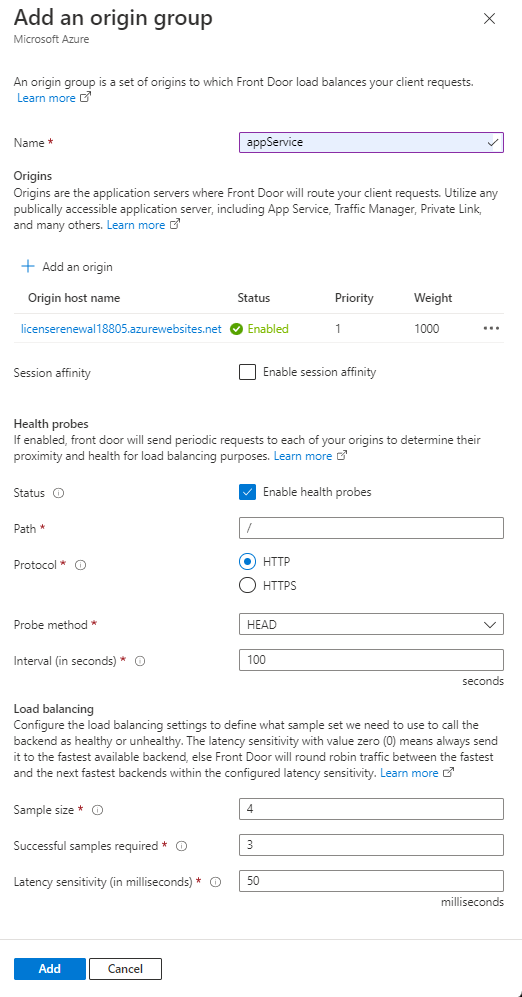
Select + Add again to create the second origin group. For the name, enter appService. Then select + Add an origin. Enter or select the following information.
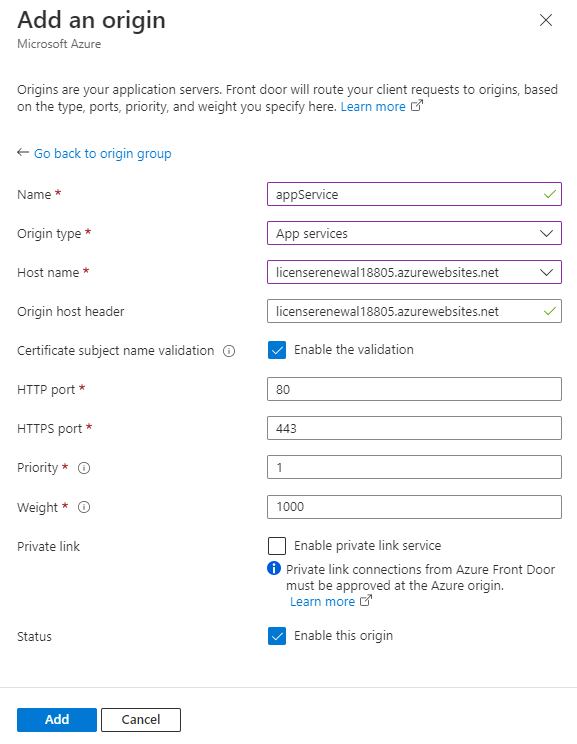
Settings Value Name Enter appService. Origin type Select App services. Host name Select the Azure website in the drop-down menu that begins with licenserenewal.Origin host header This field is the same as host name for this example. Certificate subject name validation Leave as checked. Required for private link service. HTTP port Leave as default. 80. HTTPS port Leave as default. 443. Priority Leave as default. 1. Weight Leave as default. 1000. Private link Leave as default. Status Enable this origin. Select Add to add the origin to the origin group. Leave the rest of the origin group settings as default. Then select Add to create the second origin group.
Approve private endpoint connections
After enabling private link service for the origin resources, you'll need to approve the private endpoint connection request before the private connection can be established. To approve connectivity for the web servers, locate the Private link service resource you created in an earlier unit named myPrivateLinkService. Select Private endpoint connections from under Settings on the left side menu pane.
Select the pending connection with the description of webServer private connection and select Approve. Then select Yes to confirm approval to establish the connection.
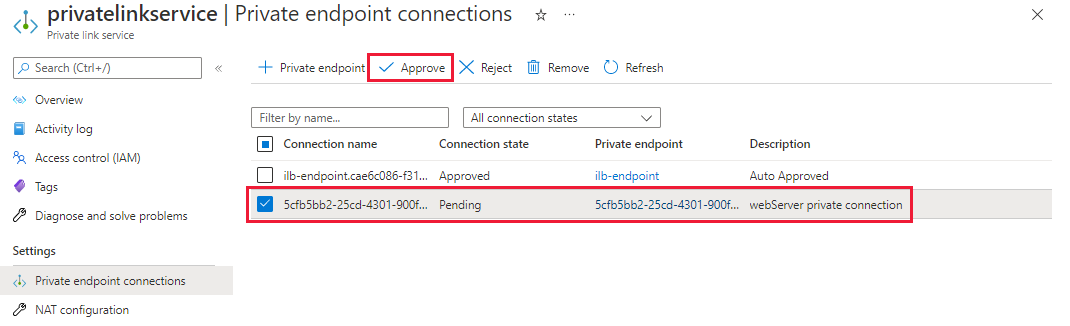
You don't need to approve private endpoint for the App Service since the connectivity is over the public internet.
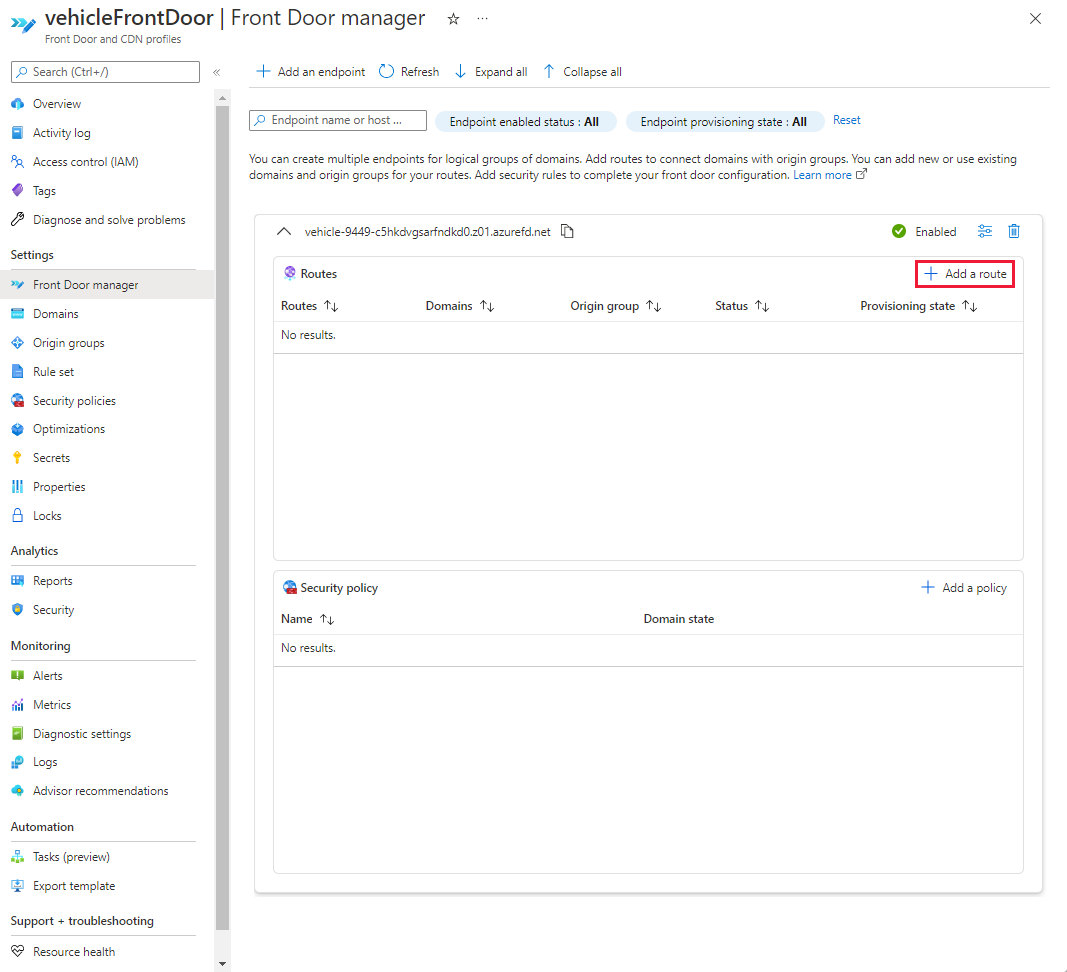
Add routes
Here you add two routes to direct traffic to the Vehicle registration web site and the License renewal website.
Go to the Front Door manager for the vehicleFrontDoor profile. Select + Add a route from the endpoint you created in step 2.
Select or enter the following information, then select Add to create the first route for the Vehicle registration website.
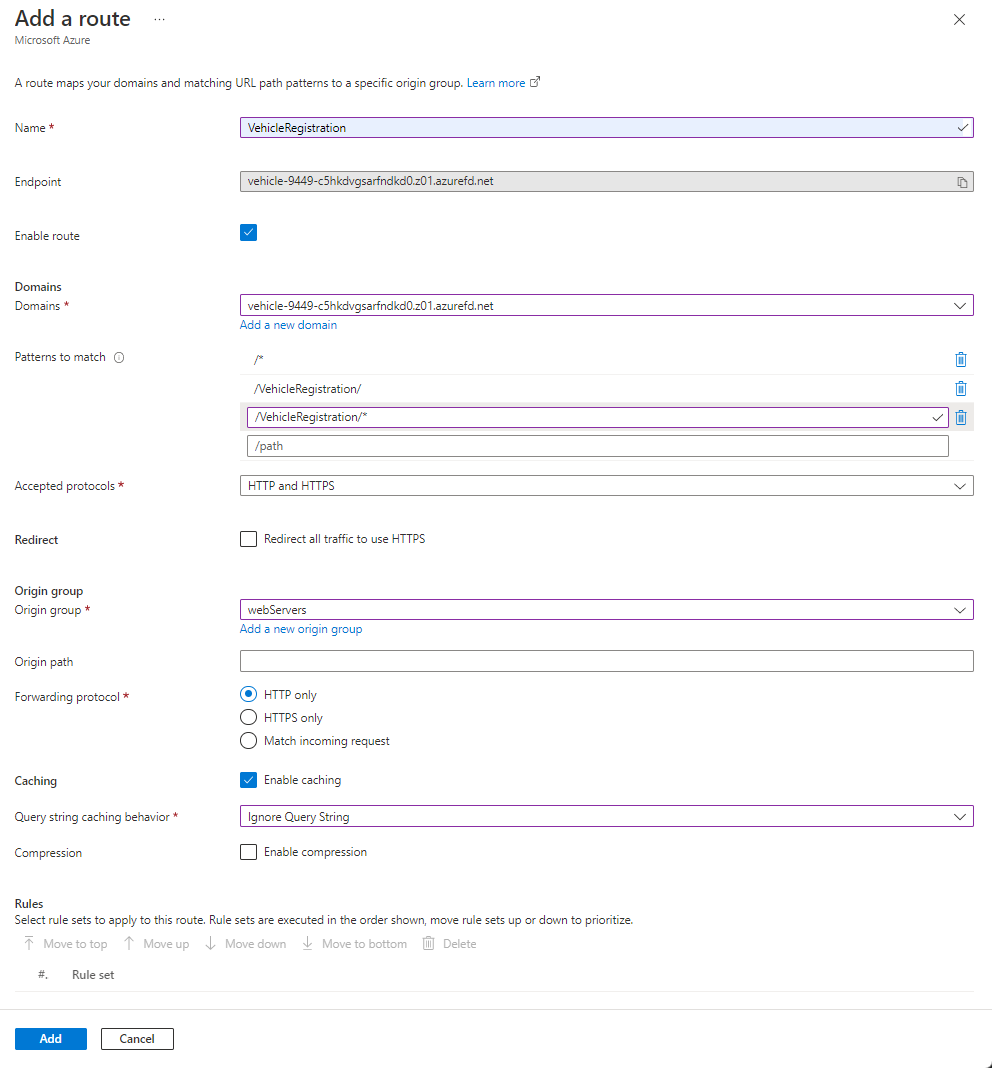
Settings Value Name Enter VehicleRegistration Enabled route Leave as checked. Domains Select the only available domain in the drop-down menu. Patterns to match Enter /VehicleRegistration,/VehicleRegistration/*and/*for paths to match.Accepted protocols Select HTTP and HTTPS from the drop-down menu. Redirect Uncheck Redirect all traffic to use HTTPS Origin group Select webServers from the drop-down menu. Origin path Leave blank. Forwarding protocol Select HTTP only. Caching Select the checkbox to enable caching. Query string caching behavior Select Ignore Query String from the drop-down menu. Select + Add a route again to create a route for the License renewal website. Select or enter the following information, then select Add to create the second route.
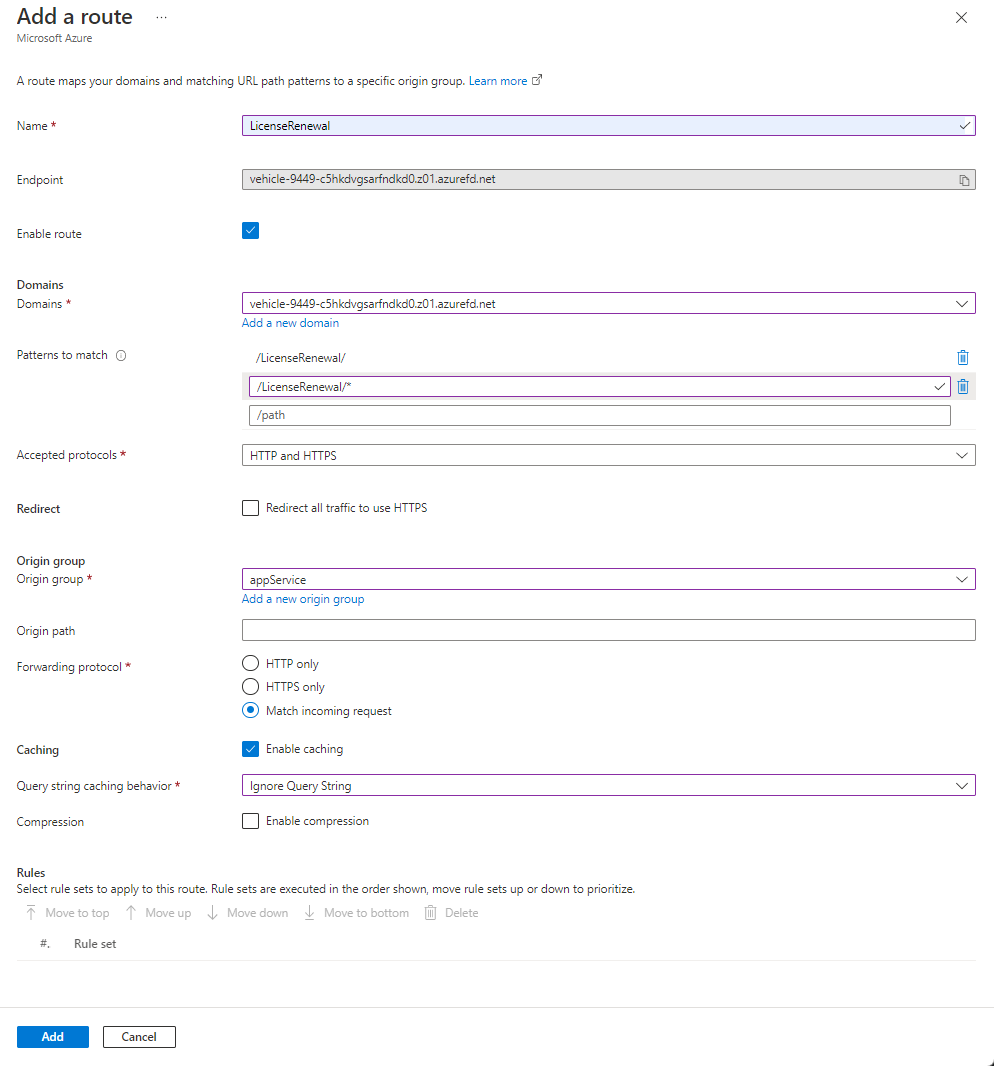
Settings Value Name Enter LicenseRenewal Enabled route Leave as checked. Domains Select the only available domain in the drop-down menu. Patterns to match Enter /LicenseRenewaland/LicenseRenewal/*for paths to match.Accepted protocols Select HTTP and HTTPS from the drop-down menu. Redirect Uncheck Redirect all traffic to use HTTPS Origin group Select appService from the drop-down menu. Origin path Leave blank. Forwarding protocol Select Match incoming request. Caching Select the checkbox to enable caching. Query string caching behavior Select Ignore Query String from the drop-down menu.
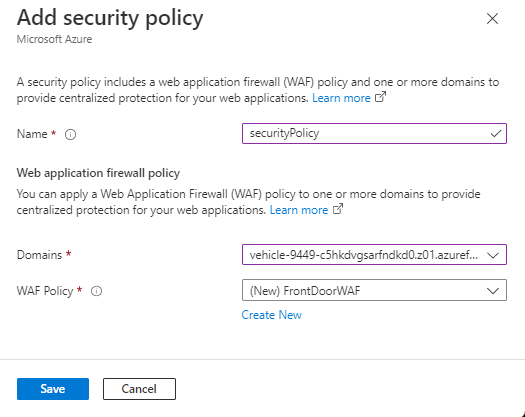
Create a security policy
To protect the motor vehicle websites, you configure a Web Application Firewall (WAF) policy on the endpoint by applying a security policy.
From the Front Door manager, select + Add a policy for the endpoint. Enter securityPolicy for the name and then from the drop-down, select the domain.
Select Create New to create a new WAF Policy. Name the WAF policy frontdoorWAF, then select Save to apply the WAF policy to the endpoint.
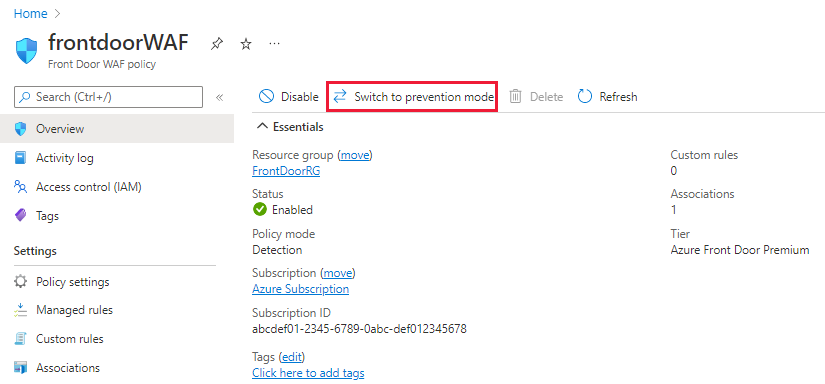
Configure WAF policy
Go to the frontdoorWAF resource you created in the last step. From the Overview, select Switch to prevention mode to start blocking malicious traffic.
Select Policy settings under Settings from the left side pane to configure the policy settings for this WAF policy.
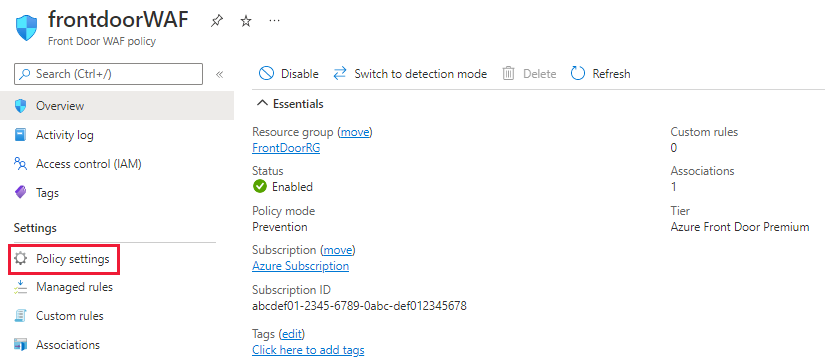
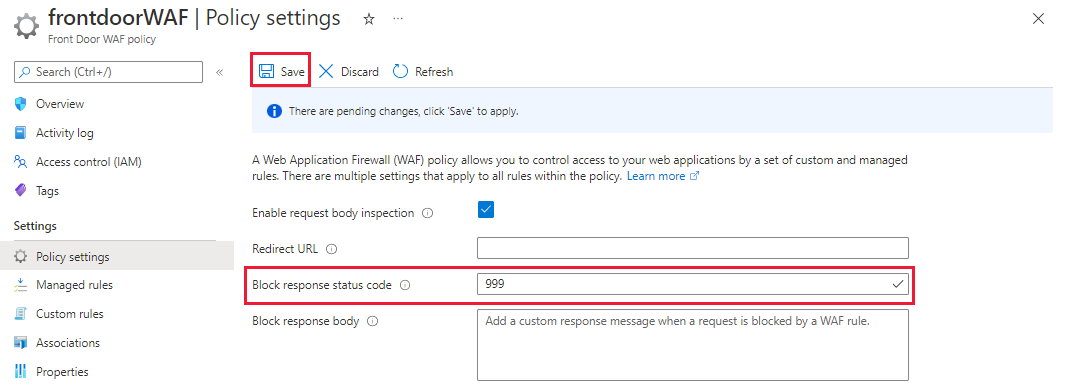
To quickly determine if the WAF policy is working, set the Block response status code to 999, and then select Save to apply the new policy settings.
With the Front Door profile all configured, it's time to test by sending requests to it.