Manage corporate enrollment policy
When your organization signs up for a Microsoft cloud-based service like Intune, you're given an initial domain name hosted in Microsoft Entra ID that follows this model: your-domain.onmicrosoft.com. In this example, your-domain is the domain name that you chose when you signed up. onmicrosoft.com is the suffix assigned to the accounts you add to your subscription. You can configure your organization's custom domain to access Intune instead of the domain name provided with your subscription.
Before you create user accounts or synchronize your on-premises Active Directory, we strongly recommend that you add one or more of your custom domain names. This will simplify user management and lets users sign in with the credentials they use to access other domain resources.
You can decide to use only the .onmicrosoft.com domain if you want to, but it should really only be used for the initial setup or when you are testing. You cannot rename or remove the initial onmicrosoft.com domain name. You can add, verify or remove custom domain names used with Intune to keep your business identity clear.
To add and verify your custom domain
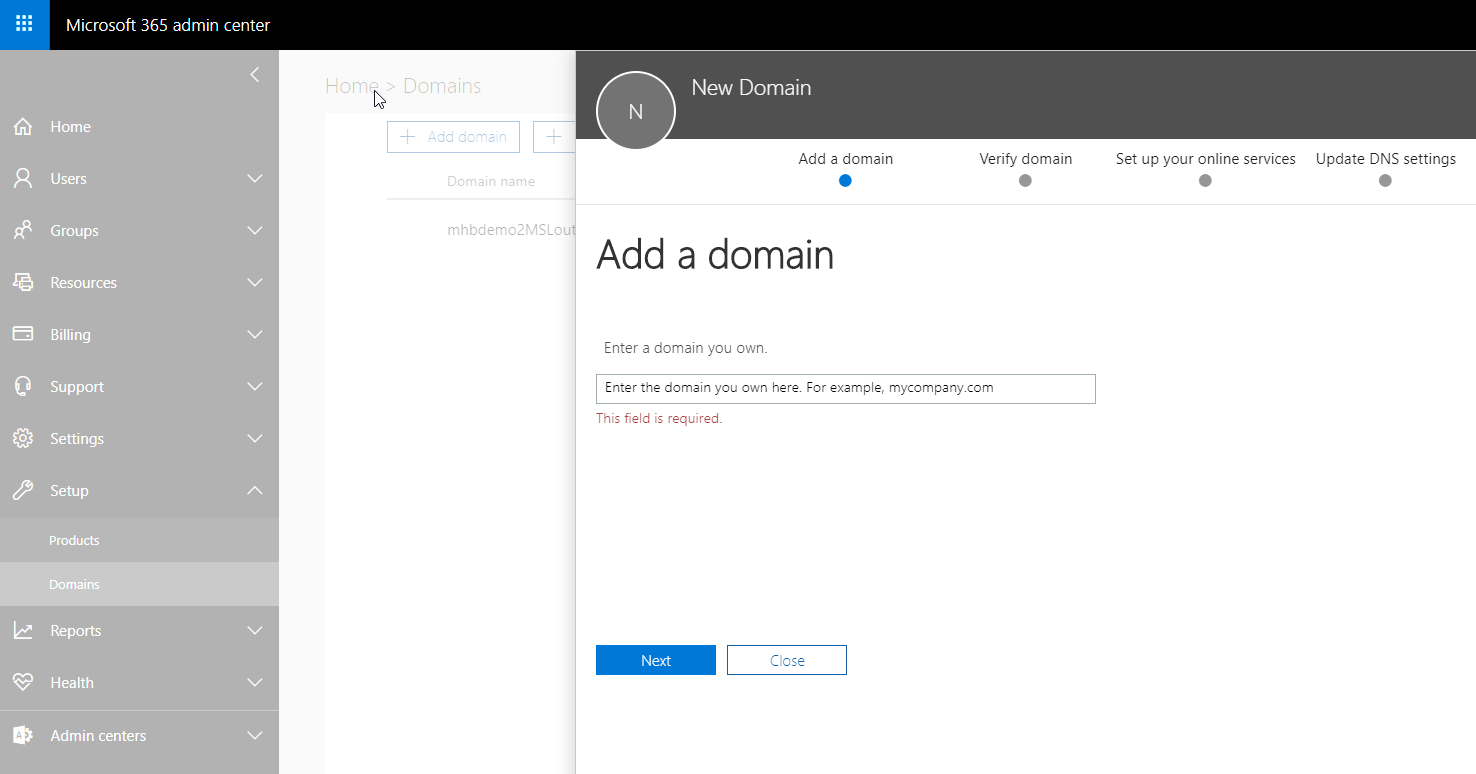
Go to the Microsoft 365 admin center and sign into your administrator account.
In the navigation pane, choose Setup - Domains.
Choose Add domain, and type your custom domain name. Select Next.
The Verify domain dialog box opens giving you the values to create the TXT record in your DNS hosting provider.
- GoDaddy users: Microsoft 365 admin center redirects you to GoDaddy's login page. After you enter your credentials and accept the domain change permission agreement, the TXT record is created automatically. Alternatively, you can create the TXT record.
- Register.com users: Follow the step-by-step instructions to create the TXT record.
Once you've set up Intune, users enroll Windows devices by signing in with their work or school account.
As an Intune admin, you can simplify enrollment in the following ways:
- Enable automatic enrollment (Microsoft Entra ID P1 or P2 required)
- CNAME registration
- Enable bulk enrollment (Microsoft Entra ID P1 or P2 and Windows Configuration Designer required)
Configure automatic MDM enrollment
Automatic enrollment lets users enroll their Windows devices in Intune. To enroll, users add their work account to their personally owned devices or join corporate-owned devices to Microsoft Entra ID. In the background, the device registers and joins Microsoft Entra ID. Once registered, the device is managed with Intune.
Sign in to Endpoint Manager admin center located at https://endpoint.microsoft.com.
Select Devices - Enroll devices - Automatic enrollment.
Configure the MDM User scope. Specify which users’ devices should be managed by Microsoft Intune. These Windows devices can automatically enroll in Microsoft Intune.
- None - MDM automatic enrollment is disabled
- Some - Select the Groups that can automatically enroll their Windows devices
- All - All users can automatically enroll their Windows devices
Use the default values for the following URLs:
- MDM Terms of use URL
- MDM Discovery URL
- MDM Compliance URL
Select Save.
Simplify Manual Enrollment (Optional)
If you do not have Microsoft Entra ID P1 or P2, you can create a domain name server (DNS) alias (CNAME record type) that redirects enrollment requests to Intune servers. While optional, if no CNAME record is found, users are prompted to manually enter the MDM server name, enrollment.manage.microsoft.com.
Step 1: Create CNAME records
Create CNAME DNS resource records for your company’s domain. For example, if your company’s website is contoso.com, you would create a CNAME in DNS that redirects EnterpriseEnrollment.contoso.com to enterpriseenrollment-s.manage.microsoft.com.
Microsoft Entra ID has a different CNAME that it uses for device registration for iOS, Android, and Windows devices. If you plan to use conditional access, you should also configure the EnterpriseRegistration CNAME for each company name you have.
We recommend that you create both CNAME records for all DNS names that you own.
Type
Host name
Points to
TTL (Time-To-Live)
CNAME
EnterpriseEnrollment.contoso.com
EnterpriseEnrollment-s.manage.microsoft.com
1 hour
CNAME
EnterpriseRegistration.contoso.com
EnterpriseRegistration.windows.net
1 hour
If the company uses more than one UPN suffix, you need to create two CNAME records for each domain name and point each one to EnterpriseEnrollment-s.manage.microsoft.com and EnterpriseRegistration.windows.net respectively.
Step 2: Verify CNAME
- Sign in to Endpoint Manager admin center located at https://endpoint.microsoft.com.
- In the left navigation, select Devices then select Enroll devices.
- On the Windows enrollment page, select CNAME Validation.
- In the Domain box, enter the company website and then select Test.
Changes to DNS records might take up to 72 hours to propagate. You can't verify the DNS change in Intune until the DNS record propagates.