Exercise - Work with the web part property pane
- 15 minutes
In this exercise, you'll manipulate the property pane for a SharePoint Framework client-side web part with controls, groups, and pages.
Prerequisites
Important
In most cases, installing the latest version of the following tools is the best option. The versions listed here were used when this module was published and last tested.
- Node.js v22.*
- Gulp-cli v3.*
- Yeoman v5.*
- Yeoman Generator for SharePoint v1.21.1
- Visual Studio Code
Create a new SharePoint Framework solution and web part
Run the SharePoint Framework Yeoman generator by executing the following command:
yo @microsoft/sharepoint
Use the following to complete the prompt that is displayed (if more options are presented, accept the default answer):
- What is your solution name?: HelloPropertyPane
- Which type of client-side component to create?: WebPart
- What is your Web part name?: HelloPropertyPane
- Which template would you like to use?: No framework
After provisioning the folders required for the project, the generator will install all the dependency packages using npm.
When npm completes downloading all dependencies, ensure the developer certificate is installed by executing the following command:
gulp trust-dev-cert
Next, verify everything is working.
Open the project folder in Visual Studio Code.
Locate and open the file config/serve.json
In the serve.json file, locate the initialPage setting. It's currently configured with a placeholder URL.
"initialPage": "https://{tenantDomain}/_layouts/workbench.aspx",
The {tenantDomain} string is replaced automatically by the gulp serve task using an environment variable on your workstation. Set the environment variable SPFX_SERVE_TENANT_DOMAIN to the domain of your hosted SharePoint Online site you want to use for testing.
Tip
Learn more how to set environment variables on your development platform of choice:
Windows: set (environment variable) macOS: Use environment variables in Terminal on Mac Setting the SharePoint Framework Hosted Workbench Test Site
Start the local web server using the provided gulp serve task without the nobrowser switch. This will build the project, start a local web server, and load the hosted workbench at the URL configured in serve.json in combination with your environment variable.
gulp serve
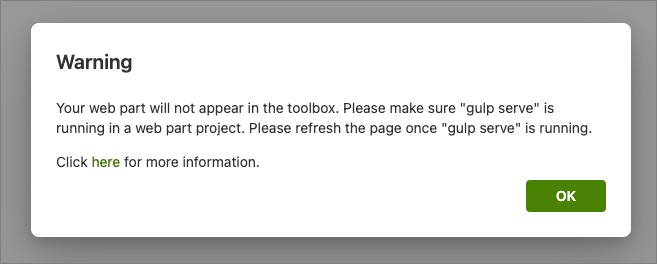
If you see a warning dialog in the hosted workbench, switch back to the command prompt, wait for the reload subtask to finish executing, and then refresh the hosted workbench.
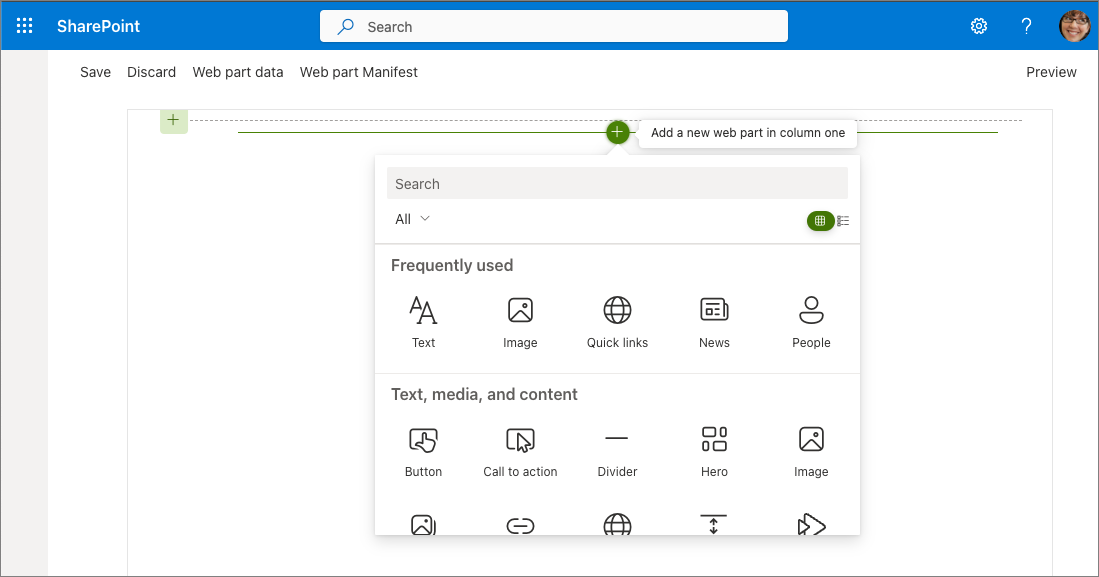
Select the Add a new web part icon:
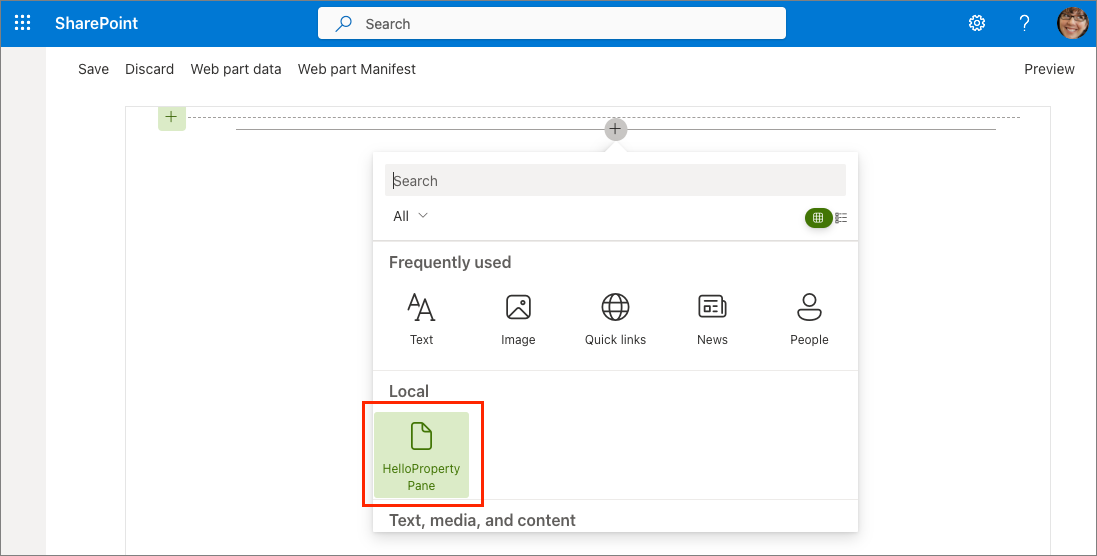
Select the HelloPropertyPane web part to add the web part to the page:
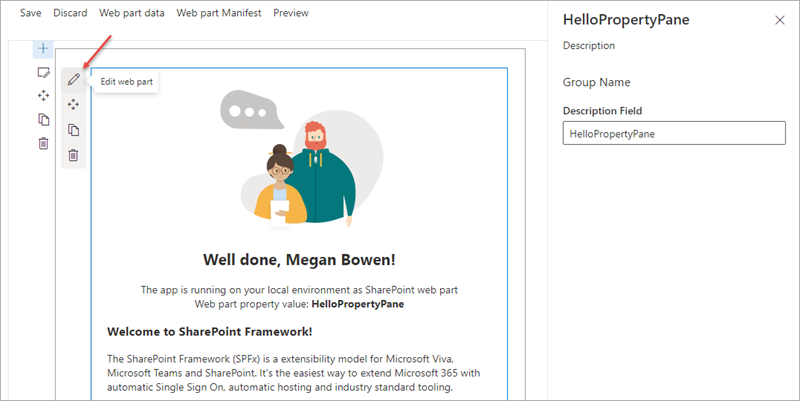
You can access the web part property pane by selecting the pencil (edit) icon in the toolbar to the left of the web part:
Add New Properties to the web part
With a working web part, the next step is to customize the property pane experience. Create two new properties that will be used in the web part and property pane.
Open the file .\src\webparts\helloPropertyPane\HelloPropertyPaneWebPart.ts. Locate the interface IHelloPropertyPaneWebPartProps after the import statements. Add the following two properties to the interface:
myContinent: string;
numContinentsVisited: number;
Update the web part rendering to display the values of these two properties. Within the HelloPropertyPaneWebPart class, locate the render() method and find the following line in the HTML output:
<div>Web part property value: <strong>${escape(this.properties.description)}</strong></div>
Add the following two lines after the line you located:
<div>Continent where I reside: <strong>${escape(this.properties.myContinent)}</strong></div>
<div>Number of continents I've visited: <strong>${this.properties.numContinentsVisited}</strong></div>
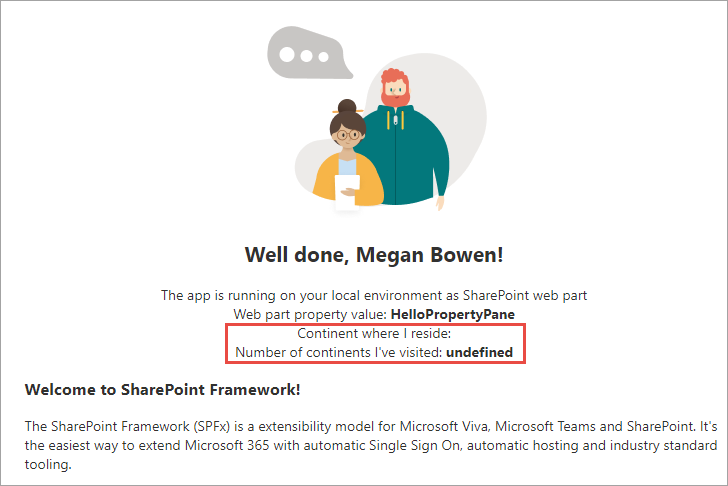
Wait a few seconds for the project to rebuild, and then refresh the hosted workbench. The web part will render a blank string and undefined for these two properties as neither has been assigned a value:
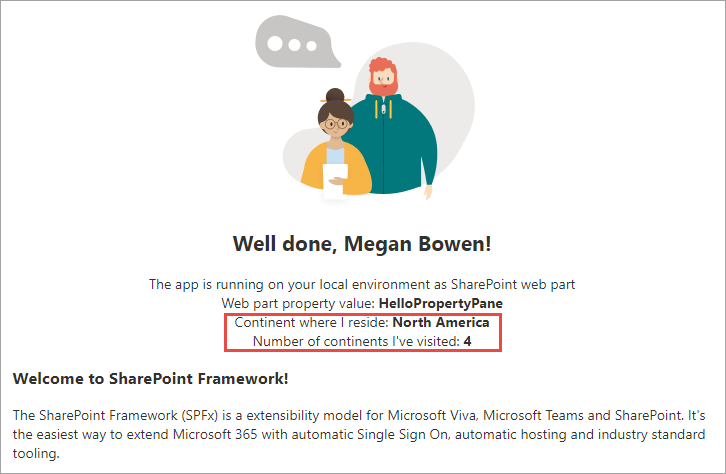
This can be addressed by setting the default values of properties when a web part is added to the page. Open the file .\src\webparts\helloPropertyPane\HelloPropertyPaneWebPart.manifest.json.
Locate the following section in the file: preconfiguredEntries[0].properties.description. Add a comma after the description property's value and add the following two lines after the description property:
"myContinent": "North America",
"numContinentsVisited": 4
Tip
Changes to the manifest and configuration files won't be reflected in the workbench until you restart the local web server.
Close the browser tab containing the hosted workbench and stop the local web server by pressing CTRL+C in the command prompt. Rebuild and restart the local web server by executing the command gulp serve. When the hosted workbench loads, add the web part back to the page to see the properties.
Extend the property pane
Now that the web part has two new custom properties, the next step is to extend the property pane to allow users to edit the values.
Add a new text control to the property pane, connected to the myContinent property. Open the file .\src\webparts\helloPropertyPane\HelloPropertyPaneWebPart.ts. Locate the method getPropertyPaneConfiguration() and within it, locate the groupFields array. Add a comma after the existing PropertyPaneTextField() and add the following code to add a second text field control:
PropertyPaneTextField('myContinent', {
  label: 'Continent where I currently reside'
})
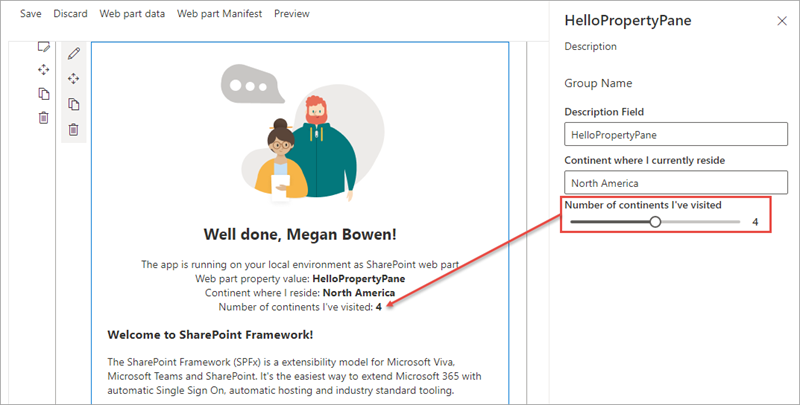
If the local web server isn't running, start it by executing gulp serve. Once the SharePoint workbench is running again, add the web part to the page and open the property pane. Notice you can see the property and text box in the property pane. Any edits to the field will automatically update the web part:

Next, add a slider control to the property pane, connected to the numContinentsVisited property. In the HelloPropertyPaneWebPart.ts, at the top of the file, add a PropertyPaneSlider reference to the existing import statement for the @microsoft/sp-property-pane package.
Scroll down to the method getPropertyPaneConfiguration() and within it, locate the groupFields array.
Add a comma after the last PropertyPaneTextField() call, and add the following code:
PropertyPaneSlider('numContinentsVisited', {
  label: 'Number of continents I\'ve visited',
  min: 1, max: 7, showValue: true,
})
Notice the property pane now has a slider control to control the number of continents you've visited:
Add control validation
In a previous step, the user was presented a property where they could enter the name of the continent in which they live. Now add validation logic to ensure they enter a valid continent name.
In the HelloPropertyPaneWebPart.ts, add the following method to the HelloPropertyPaneWebPart class. This method takes a string as an input and returns a string. This allows you to do custom validation logic. If this method returns an empty string, the value is considered valid; otherwise, the returned string is used as the error message.
private validateContinents(textboxValue: string): string {
  const validContinentOptions: string[] = ['africa', 'antarctica', 'asia', 'australia', 'europe', 'north america', 'south america'];
  const inputToValidate: string = textboxValue.toLowerCase();

  return (validContinentOptions.indexOf(inputToValidate) === -1)
    ? 'Invalid continent entry; valid options are "Africa", "Antarctica", "Asia", "Australia", "Europe", "North America", and "South America"'
    : '';
}
Now you can connect the validation method to the text field control you previously added. Locate the text field that is associated with the myContinent property.
Add the following code to the options object passed into the PropertyPaneTextField() call as the second parameter: onGetErrorMessage: this.validateContinents.bind(this). The text field control should now look like the following code:
PropertyPaneTextField('myContinent', {
  label: 'Continent where I currently reside',
  onGetErrorMessage: this.validateContinents.bind(this)
}),
If the local web server isn't running, start it by executing gulp serve. Once the SharePoint Workbench is running again, add the web part to the page and open the property pane. Enter the name of a non-existent continent to test the validation logic:
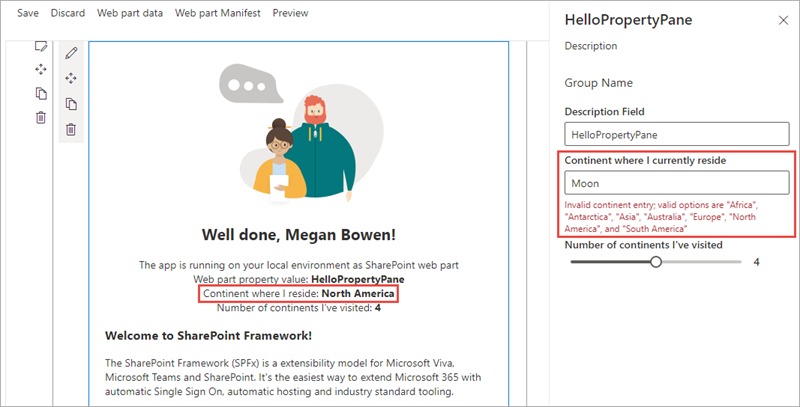
Notice the property value isn't updated when the control's input is invalid.
Summary
In this exercise, you manipulated the property pane for a SharePoint Framework client-side web part with controls, groups, and pages.