Set up the Microsoft Learn Organizational Reporting service
This article will assist you in getting started using the Microsoft Learn Organizational Reporting Service. If you aren't familiar with the details of the Learn Organizational Reporting service or the use cases for it, we recommend that you review the feature overview article first.
In detail, the service allows organizations to extract, transform, and load (ETL) user's Learn training and certification data from data sets, which can then be processed further or displayed in visualization tools such as Power BI. Data sets can be stored to either Azure Data Lake, Azure Blob storage, Azure SQL database, or Azure Synapse SQL Pool. Organizations can create and manage their data share using Azure Data Share’s no-code UI.
The Organizational Reporting service includes the following progress information for each user: Learn activity completion is provided for each user including:
- Training units
- Training modules
- Training learning paths completed
- Achievements earned (badges, trophies, certifications, XP)
In the dataset, each user is assigned a unique object ID and no personally identifiable information (PII) is stored in the dataset. Individuals can be identified by sending the object ID to the Microsoft Identity service for their organization. View the Tenant-specific datasets and Microsoft Learn datasets sections for more details.
Requirements
- Organizations must have an Azure subscription to create an Azure Data Share.
- A user requesting this service on behalf of the organization must have a Microsoft Entra account attached to the tenant of the organization.
- A user’s Microsoft Entra account will need access to the tenant’s Azure portal.
Note
Upon using this data sharing service, you are acknowledging and accepting the Microsoft Learn Data Access and Sharing Agreement to enable Microsoft to share Learn data with your organization for Learn users signing in with your organization’s tenant ID.
Accept Learn Organizational Reporting service data share
Creating a Learn Organizational Reporting instance for your organization requires several steps:
- Select the blue ‘Get Started’ button below.
- Authenticate with your work account, if you're not authenticated already.
- Accept license agreement.
- Select target data type (SQL, data lake, or blob).
- Set a syncing schedule.
Once created, you can view the Azure Data Share from the Azure portal.
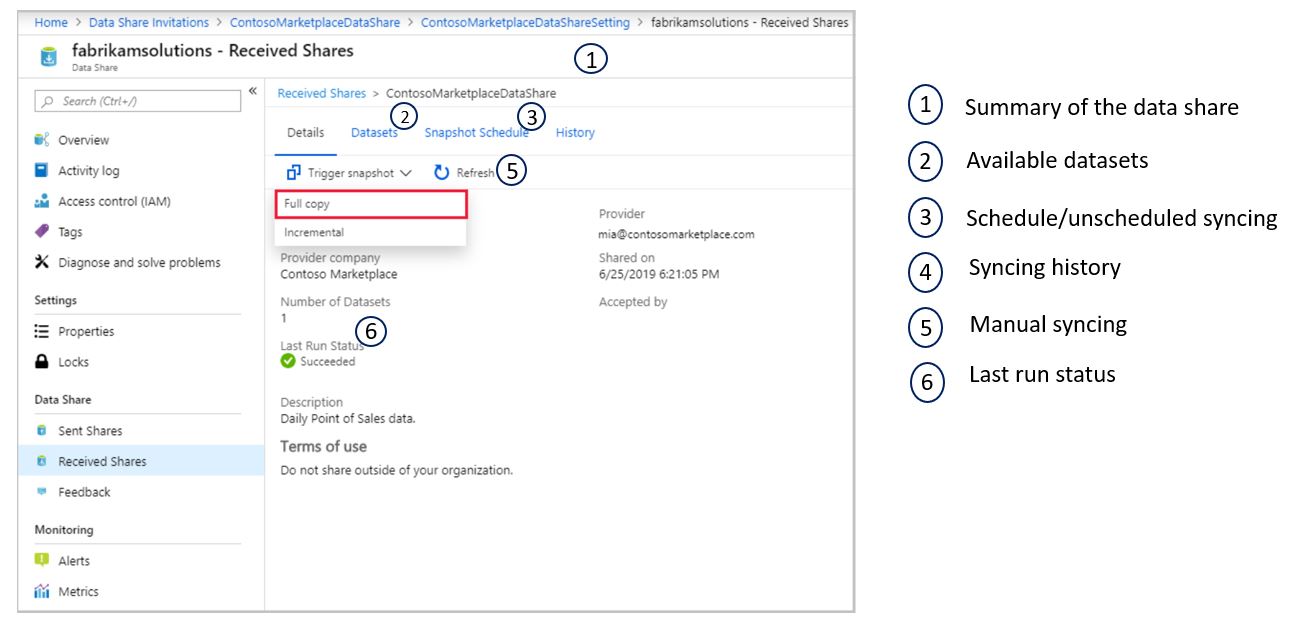
Manage your data share
A data share is a group of datasets that are shared as a single entity. Datasets can be from many Azure data sources that are supported by Azure Data Share. Currently, Azure Data Share supports Azure Blob Storage and Azure Data Lake Store. Visit the Azure Data Share terminology page regarding the elements of this service.
Within the data share you'll have controls to update your syncing schedule, manually sync, and review your last run status and history.
Important
If you choose to sync to a SQL Database and want to use our Power BI template below without additional configuration in Power BI, do not let your Azure Data Share create tables with tenant IDs in the names. You should be able to remove the tenant IDs from the table names as a part of the Azure Data Share syncing process. If you choose to use a custom naming convention you can still use the Power BI template, you will just have to edit the queries in Power BI to use the correct table names.
Additionally, you can add a recipient to your existing data share.
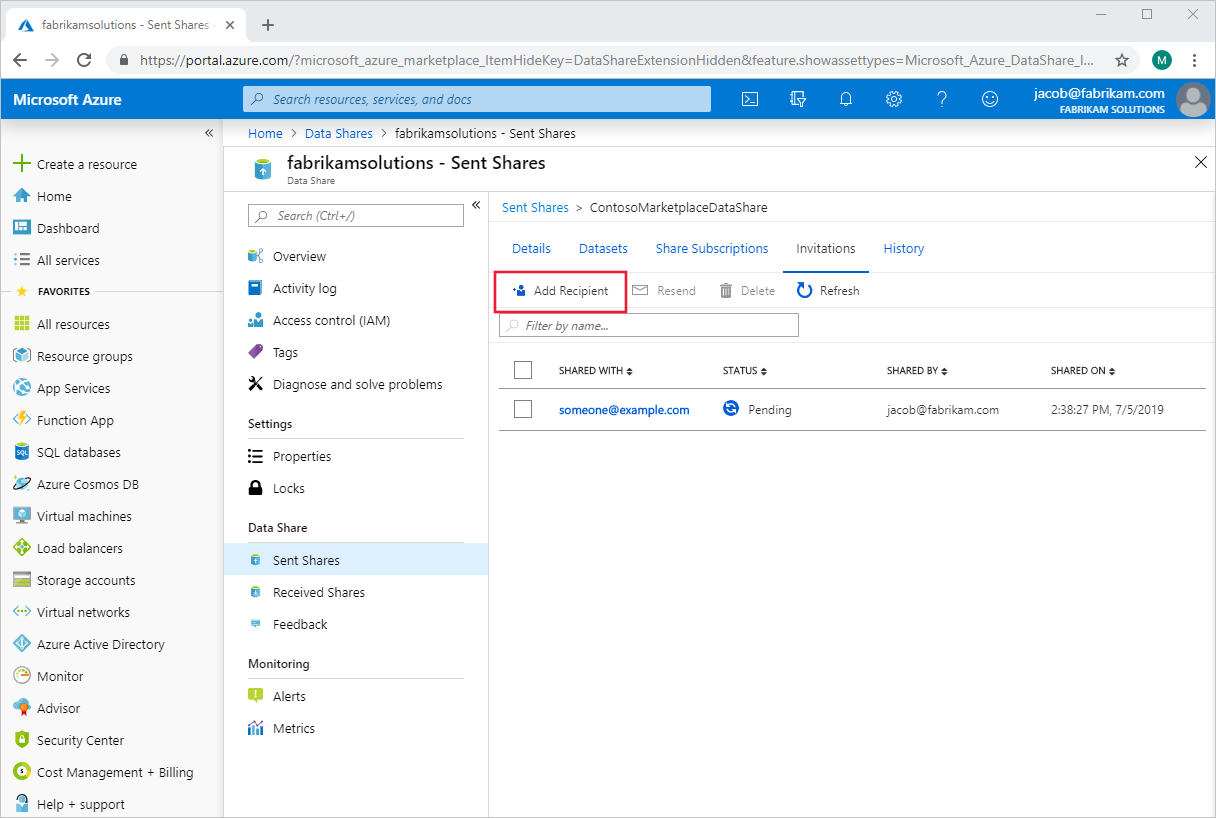
Navigate to a sent data share.
In Azure Data Share, navigate to your sent share and select the Invitations tab. Listed here are all of the recipients of invitations to this data share. To add a new one, select Add Recipient.
A panel will pop out on the right side of the page. Select Add Recipient and then fill in the email of your new recipient on the blank line. Add as many recipients as you would like.
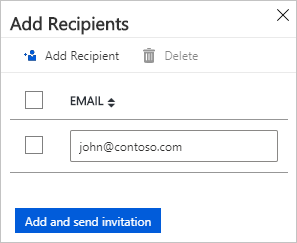
Select Add and send invitation. The new recipient(s) will be sent invitation emails to this data share.
Download user details in Microsoft Entra admin center
In order to see expanded information about the users listed in the progress and completion datasets, you'll need to join the Microsoft Learn datasets with the user information from your Microsoft Entra ID. You can get the list of users and their information by downloading it from the Microsoft Entra admin center.
Important
To download the list of users from the Microsoft Entra admin center, you must be signed in with a user assigned to one or more organization-level administrator roles in Microsoft Entra ID (User Administrator is the minimum role required). Guest Inviter and Application Developer are not considered administrator roles.
To download a list of users:
Sign in to your Microsoft Entra organization with a User administrator account in the organization.
Navigate to Microsoft Entra ID > Users.
Select the users you wish to include in the download by selecting the box in the left column next to each user. Note: At this time, there's no way to select all users for export. Each user must be individually selected.
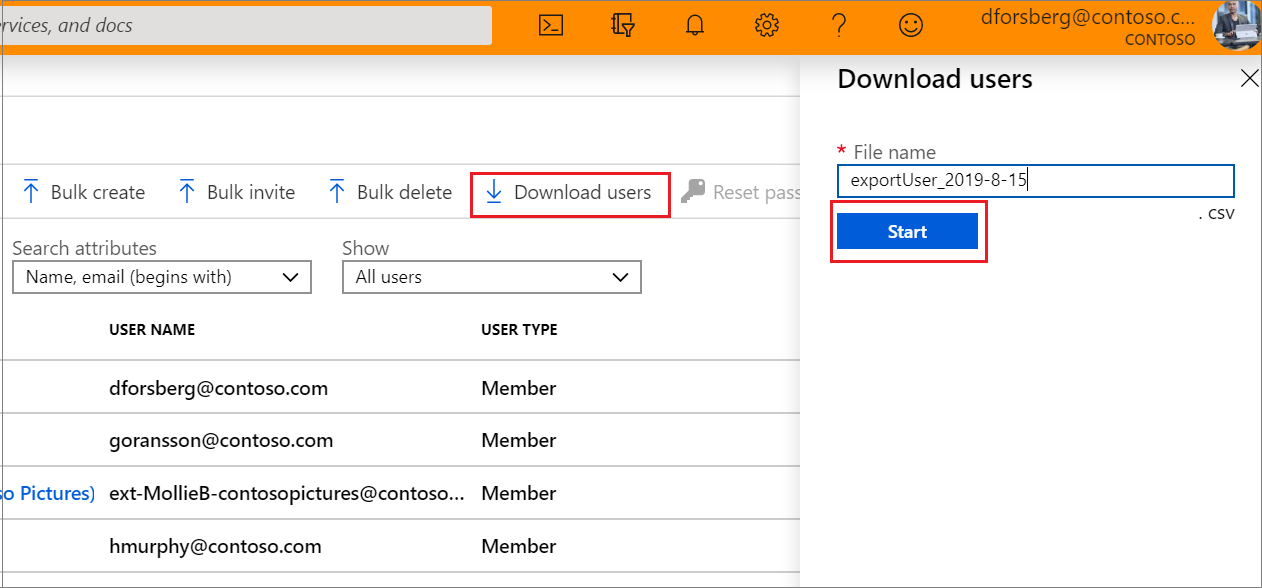
In Microsoft Entra ID, select Users > Download users.
On the Download users page, select Start to receive a CSV file listing user profile properties. If there are errors, you can download and view the results file on the Bulk operation results page. The file contains the reason for each error.
The download file will contain the filtered list of users.
The following user attributes are included:
- userPrincipalName
- displayName
- surname
- givenName
- objectId
- userType
- jobTitle
- department
- accountEnabled
- usageLocation
- streetAddress
- state
- country
- physicalDeliveryOfficeName
- city
- postalCode
- telephoneNumber
- mobile
- authenticationAlternativePhoneNumber
- authenticationEmail
- alternateEmailAddress
- ageGroup
- consentProvidedForMinor
- legalAgeGroupClassification
Steps and more details can the article Download a list of users in Microsoft Entra admin center.
Power BI template for SQL DB storage
We've created a Power BI template based off the standard SQL Server and DB configuration from Azure Data Share (i.e. 1:1 mapping between the dataset and the DB). It's a starting point to visualize and report on the organizational reporting datasets, including high-level views as well as user-level training progress of individuals in your organizations, but can also be extended to build out further reporting and join to other data.
If you're interested in using this template for your reporting solution, view the Set up the Microsoft Learn Organizational Reporting service Power BI template for SQL DB storage article.
Next steps
Review the resources below to help you on your development journey: