Create verifiable credentials with multiple attestations
A rules definition that uses multiple attestations types produces an issuance flow where claims come from more than one source. For instance you may be required to present an existing credential and also manually enter values for claims in Microsoft Authenticator.
In this how-to guide, we will extend the ID token hint attestation example by adding a self attested claim that the user has to enter in the Authenticator during issuance. The issuance request to Verified ID will contain an ID token hint with the claim values for given_name and family_name and a self issued attestation type for claim displayName that the user enters themselves.
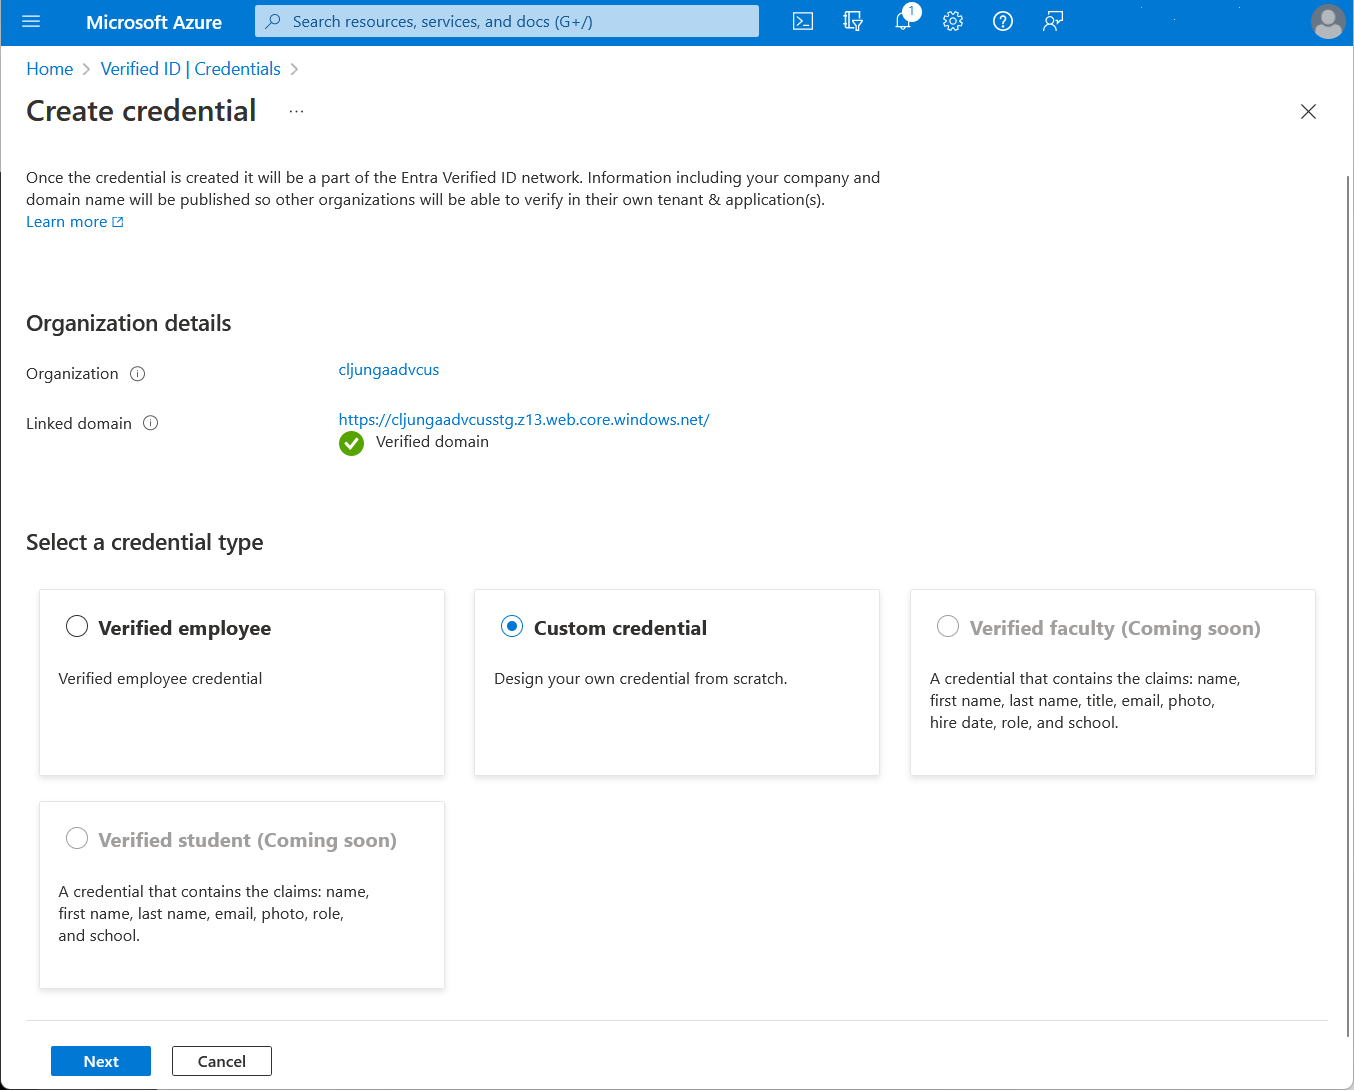
Create a custom credential with multiple attestation types
In the Azure portal, when you select Add credential, you get the option to launch two quickstarts. Select custom credential, and then select Next.
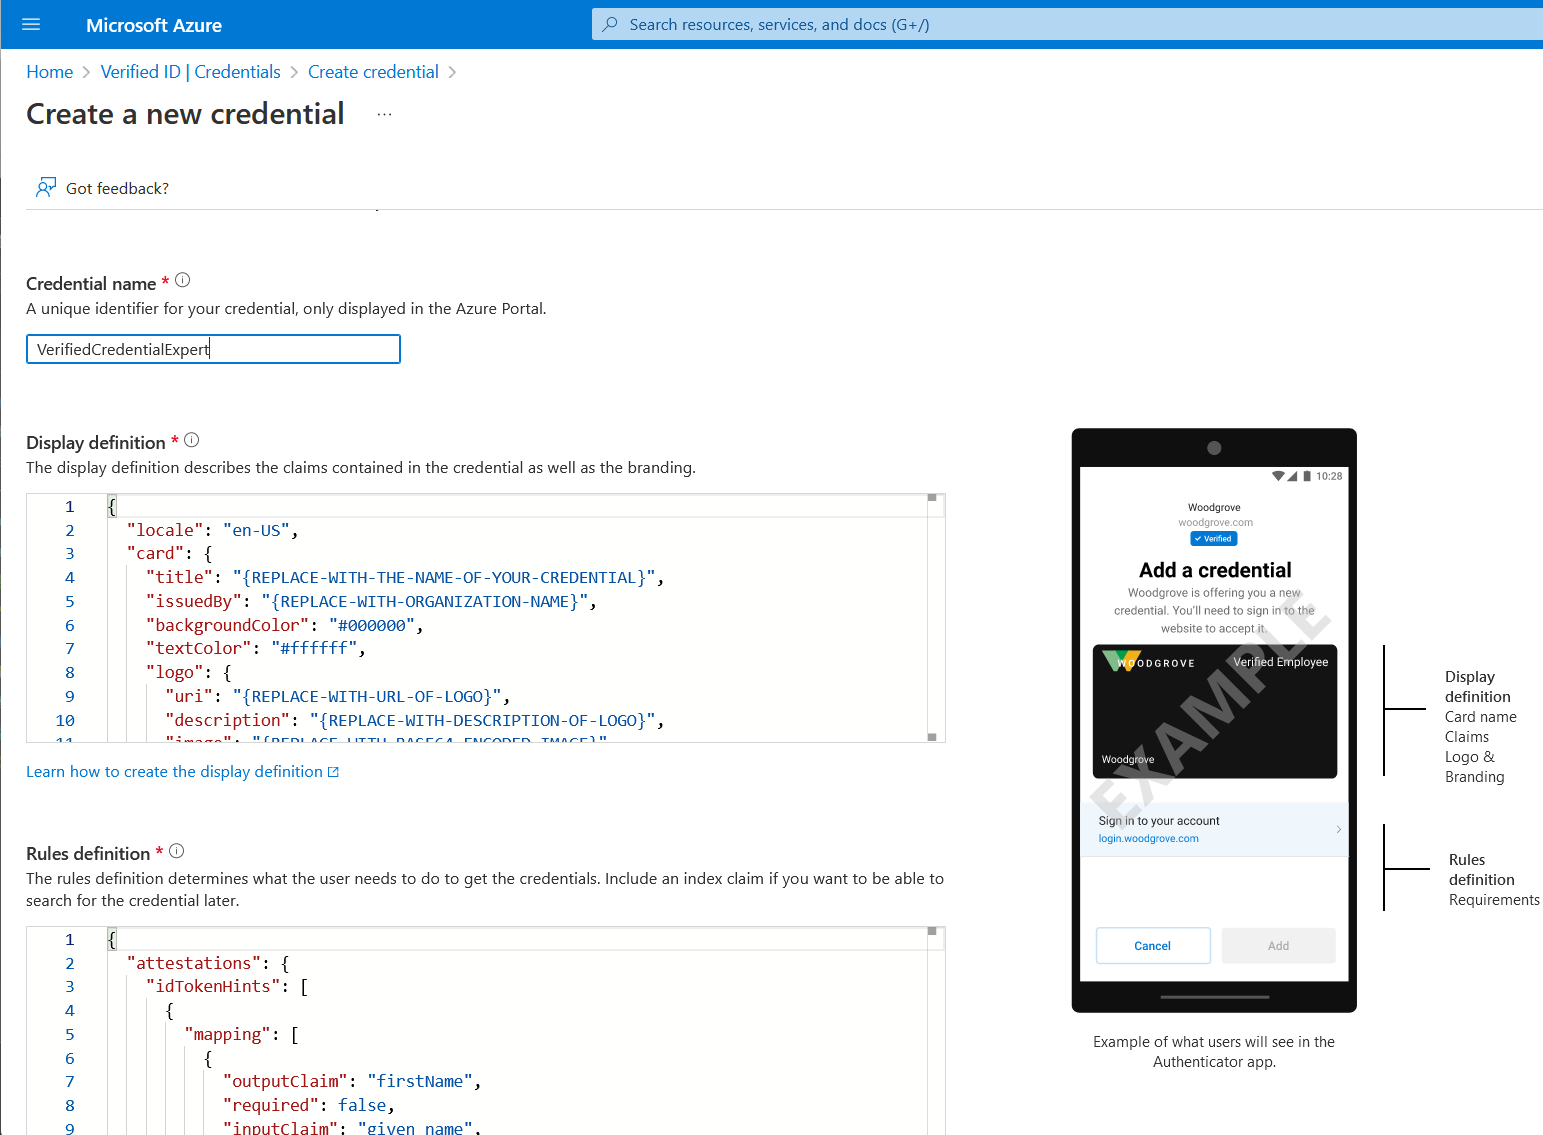
On the Create a new credential page, enter the JSON code for the display and the rules definitions. In the Credential name box, give the credential a type name. To create the credential, select Create.
Sample JSON display definitions
The JSON display definition has one extra claim named displayName compared to the ID token hint display definition.
{
    "locale": "en-US",
    "card": {
      "title": "Verified Credential Expert",
      "issuedBy": "Microsoft",
      "backgroundColor": "#507090",
      "textColor": "#ffffff",
      "logo": {
        "uri": "https://didcustomerplayground.blob.core.windows.net/public/VerifiedCredentialExpert_icon.png",
        "description": "Verified Credential Expert Logo"
      },
      "description": "Use your verified credential to prove to anyone that you know all about verifiable credentials."
    },
    "consent": {
      "title": "Do you want to get your Verified Credential?",
      "instructions": "Sign in with your account to get your card."
    },
    "claims": [
      {
        "claim": "vc.credentialSubject.displayName",
        "label": "Name",
        "type": "String"
      },
      {
        "claim": "vc.credentialSubject.firstName",
        "label": "First name",
        "type": "String"
      },
      {
        "claim": "vc.credentialSubject.lastName",
        "label": "Last name",
        "type": "String"
      }
    ]
}
Sample JSON rules definitions
The JSON rules definition contains two different attestations that instruct the Authenticator to get claim values from two different sources. The issuance request to the Request Service API provides the values for the claims given_name and family_name to satisfy the idTokenHints attestation. The user will be requested to enter the claim value for displayName in the Authenticator during issuance.
{
  "attestations": {
    "idTokenHints": [
        {
        "mapping": [
            {
            "outputClaim": "firstName",
            "required": true,
            "inputClaim": "$.given_name",
            "indexed": false
            },
            {
            "outputClaim": "lastName",
            "required": true,
            "inputClaim": "$.family_name",
            "indexed": false
            }
        ],
        "required": false
        }
    ],
    "selfIssued": {
      "mapping": [
        {
          "outputClaim": "displayName",
          "required": true,
          "inputClaim": "displayName",
          "indexed": false
        }
      ],
      "required": false
    }
  },
  "validityInterval": 2592000,
  "vc": {
    "type": [
      "VerifiedCredentialExpert"
    ]
  }
}
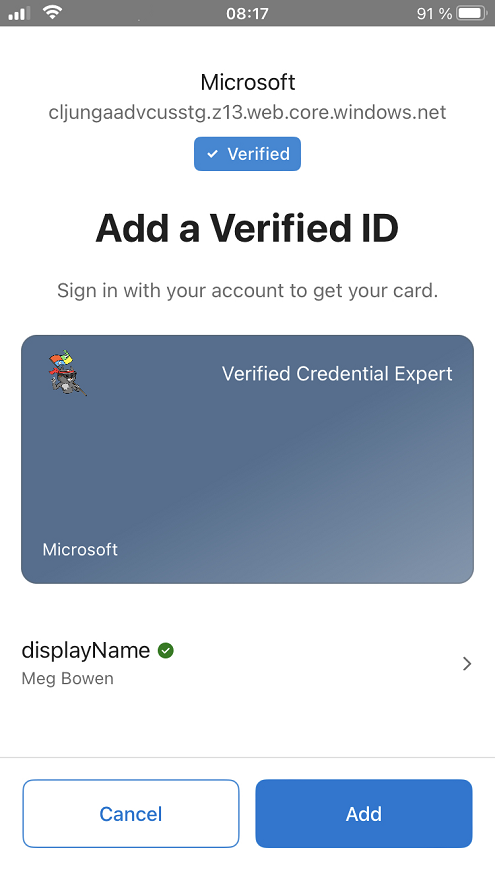
Claims input during issuance
During issuance, Authenticator prompts the user to enter values for the specified claims. User input isn't validated.
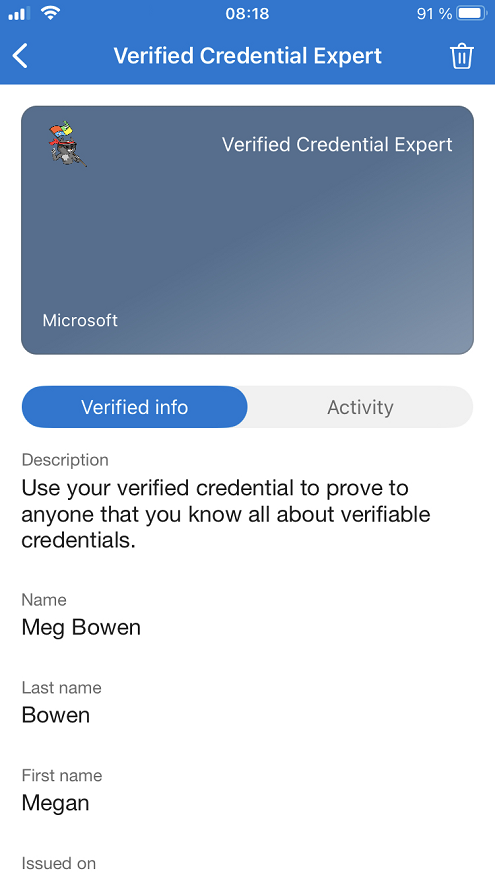
Claims in issued credential
The issued credential will have three claims in total, where the First and Last name came from the id token hint attestation and the Name came from the self issued attestation.
Configure the samples to issue and verify your custom credential
To configure your sample code to issue and verify your custom credential, you need:
- Your tenant's issuer decentralized identifier (DID)
- The credential type
- The manifest URL to your credential
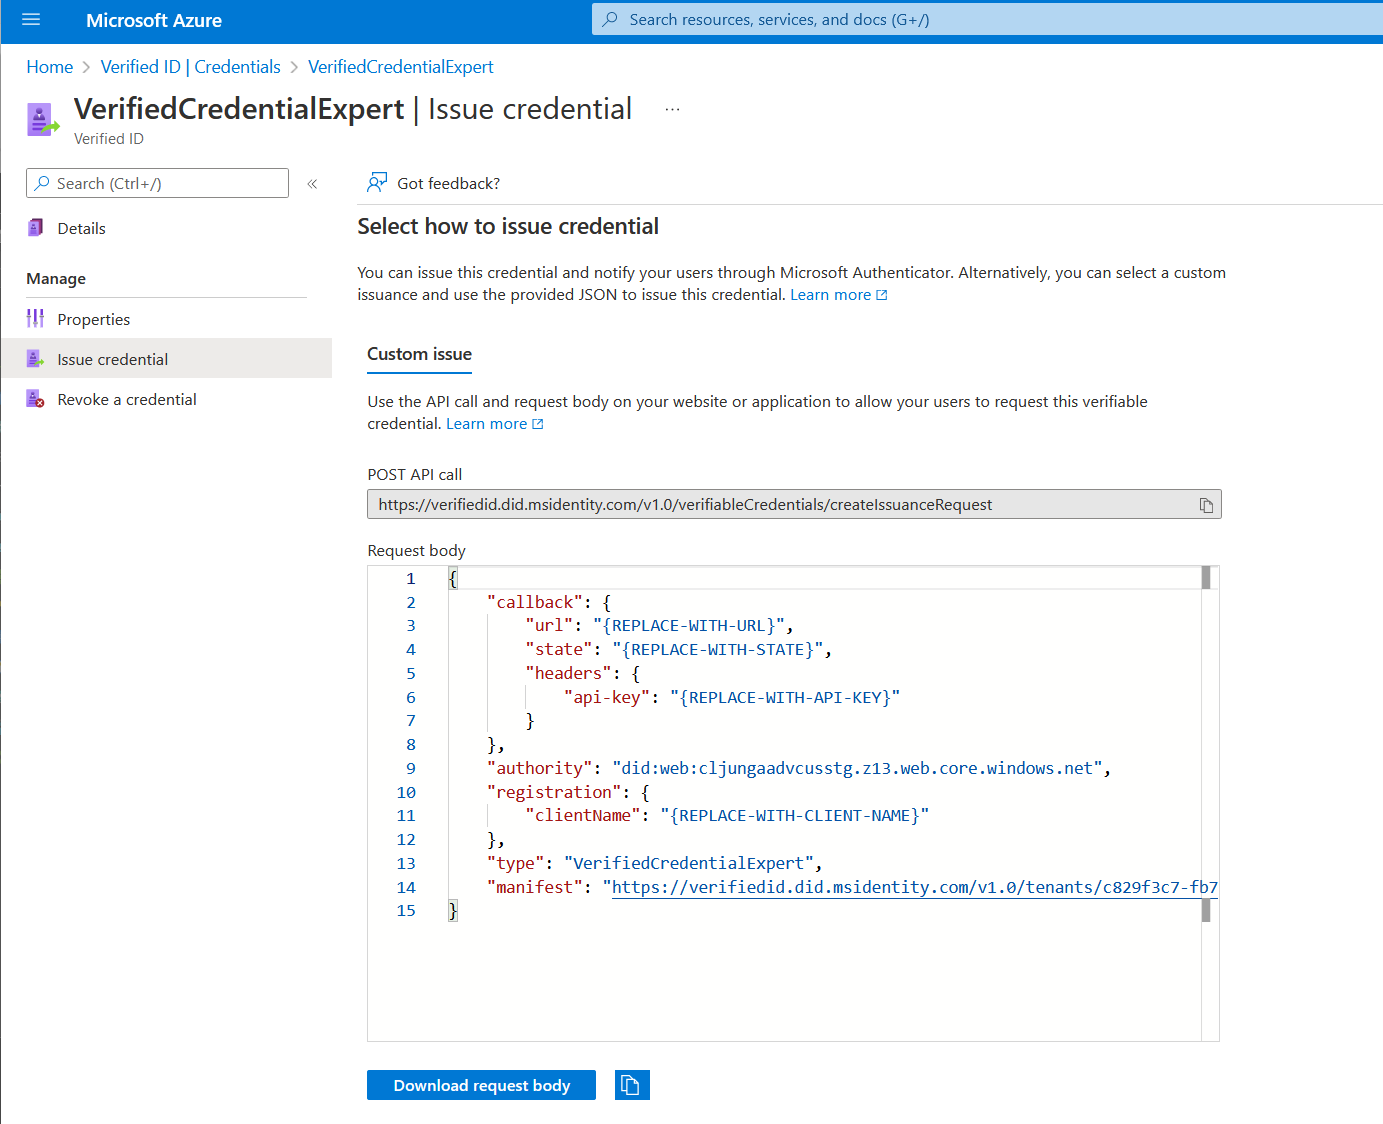
The easiest way to find this information for a custom credential is to go to your credential in the Azure portal. Select Issue credential. Then you have access to a text box with a JSON payload for the Request Service API. Replace the placeholder values with your environment's information. The issuer’s DID is the authority value.
Next steps
Phản hồi
Sắp ra mắt: Trong năm 2024, chúng tôi sẽ dần gỡ bỏ Sự cố với GitHub dưới dạng cơ chế phản hồi cho nội dung và thay thế bằng hệ thống phản hồi mới. Để biết thêm thông tin, hãy xem: https://aka.ms/ContentUserFeedback.
Gửi và xem ý kiến phản hồi dành cho