Academic session transition
Caution
If you are transitioning from School Data Sync (Classic) experience to the new School Data Sync experience, you will need to prepare and follow Transition from SDS (Classic) for your next academic transition experience.
When it's time to transition, to the next academic session or next academic year, you need to prepare for the transition process in School Data Sync (SDS). An academic session can sometimes be referred to as Fall Semester or Spring Semester, or as 2024 academic year.
Class / Section group cleanup
We recommend that you perform Class / Section group cleanup. The steps allow you to target those classes / sections that need to be archived.
School security group and administrative units membership cleanup
We also recommend that you perform school Security Groups and Administrative Units cleanup.
Important
When prepairing for the next academic session or year, and for proper data hygene and security, it is recommended that you remove any accounts in Microsoft Entra ID that are no longer associated with your instituion(s).
Prepping your connected data
Tip
When prepping for the next academic year, make sure your Student Information System (SIS) has completed its rollover before making data available to SDS. Don't make data available before your SIS has completed its rollover for the new academic year.
Prep CSV
- Recommend that you perform an initial inspection to ensure all the files are provided. Review that the expected files and columns are present and named correctly.
- If you're using Power Automate to upload CSV data, you should set the Power Automate flow to pause.
- If you're using Power Automate to upload CSV data, after the transition steps are completed, you'll need to edit the Power Automate flow configuration to update the 'Id' value before setting the Power Automate flow to resume.
Prep OneRoster API
- Validate that the connection is available.
- If you updated your Client ID, make sure you have it available to update the connection credentials.
- You need to supply your Client Secret.
Begin Academic session transition
Note
The following process doesn't require you to re-create new Manage data to Microsoft 365 configuations. The existing provision types selections and configurations will persist after the Academic Session transition steps have been completed.
The subsequent run will send an automated Reset command to preserve existing data synced with Microsoft 365, then start processing the new data based on your defined managed data configurations.
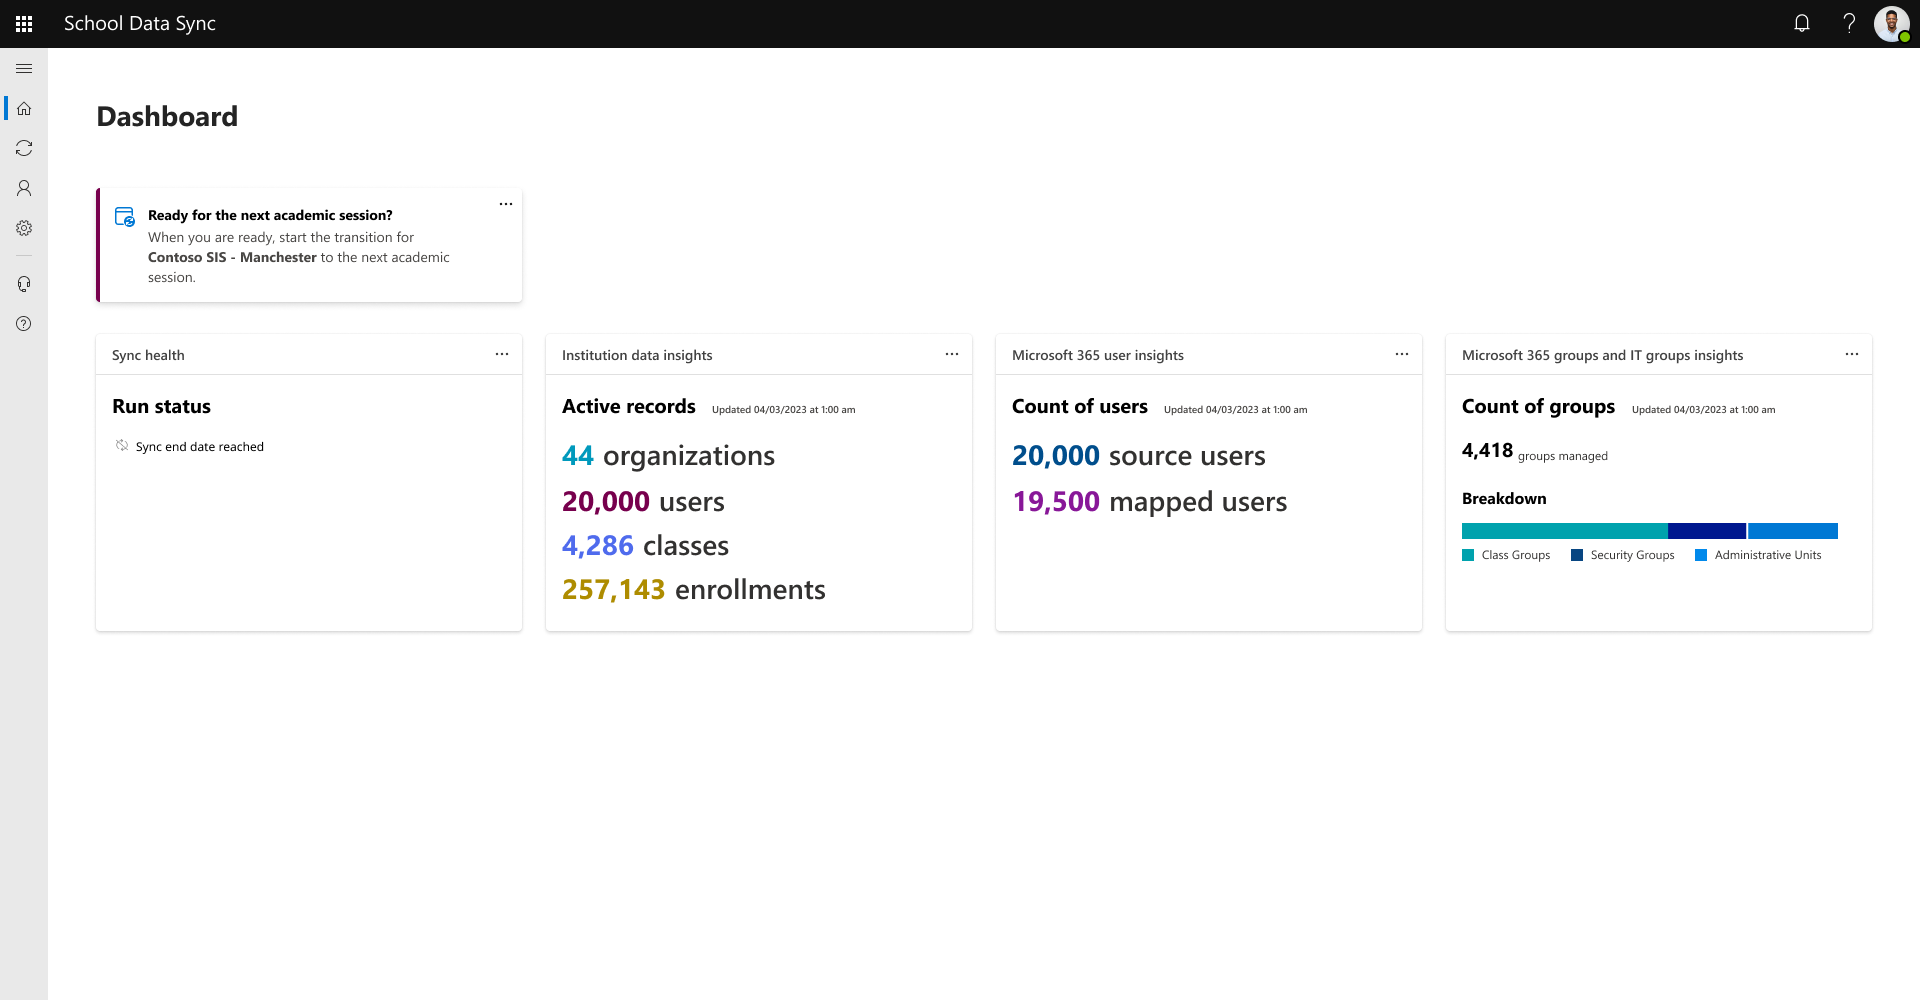
To begin, select Ready for next academic session? on the home Dashboard page.

Keeping same data format
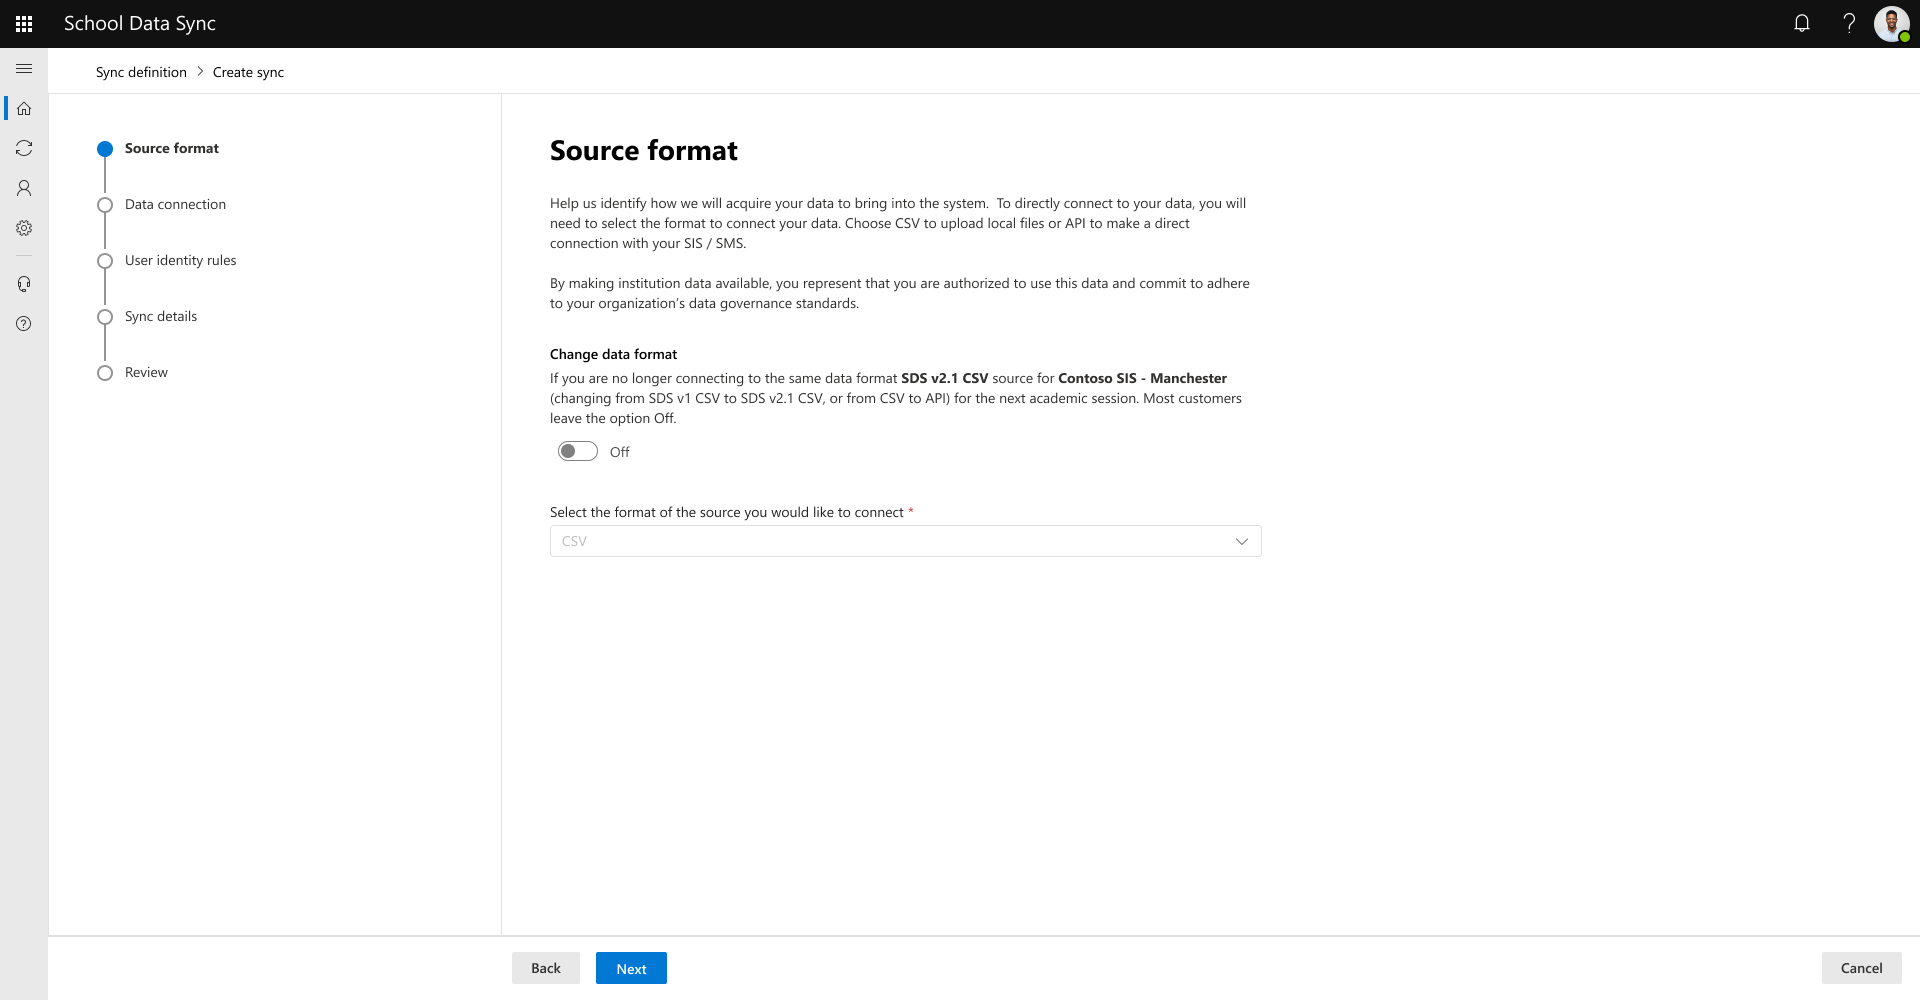
- On Source format, if you're keeping the same data format and SIS source from the prior academic session, leave the option to Change data format to Off. Most customers leave the option Off.
Review the Source format and select Next.
Review the CSV sync details and select Next.
Select Browse device to present the browse and selection dialog.
Navigate to the file location and select the files.
After the file schema is validated, SDS will perform a quick data validation from the files uploaded. The uploaded data passes through some of the SDS data matching and validation rules to help identify the good required and provided optional data. It isn't all the validation rules but the ones most encountered.
- For more information on the data that was flagged for investigation, select view details for the file name from the list to drill into specific items.
- When your investigation is complete, close the dialogs then select Next.


Review the user identity rule options.
Enter the date when SDS should prevent synching updates to the data from the connected data source. Most typically stop syncing data around when the academic year ends. The maximum is 18 months from sync start date.
Review the information presented. If everything looks correct, select the Connect data button. If not, you can navigate back to correct.
Your connect data configuration is updated, and the first run is pending, select Finished button.
To check on the status of the sync run, navigate back to the Home dashboard page.
If there are no issues with your data, the Home dashboard will state, No Data Errors or Warnings Found. and We didn't encounter any data errors or warnings during your last run. Keep up the great work!
If there are issues found with your data, the Home dashboard informs that We found some issues with your data. and encourage you to Investigate sync health.
Tip
To provide updates to your data after the initial CSV upload refer to Manual SDS CSV Upload.
Tip
You can automate your CSV upload using Power Automate. For more information, see Automate SDS CSV Uploads.
Change data format
If you aren't connecting to the same data format or SIS source for the next academic session, for example changing from SDS v1 CSV to SDS v2.1 CSV, or from CSV to API, or from one SIS to a new SIS, set the Change data format option to On.
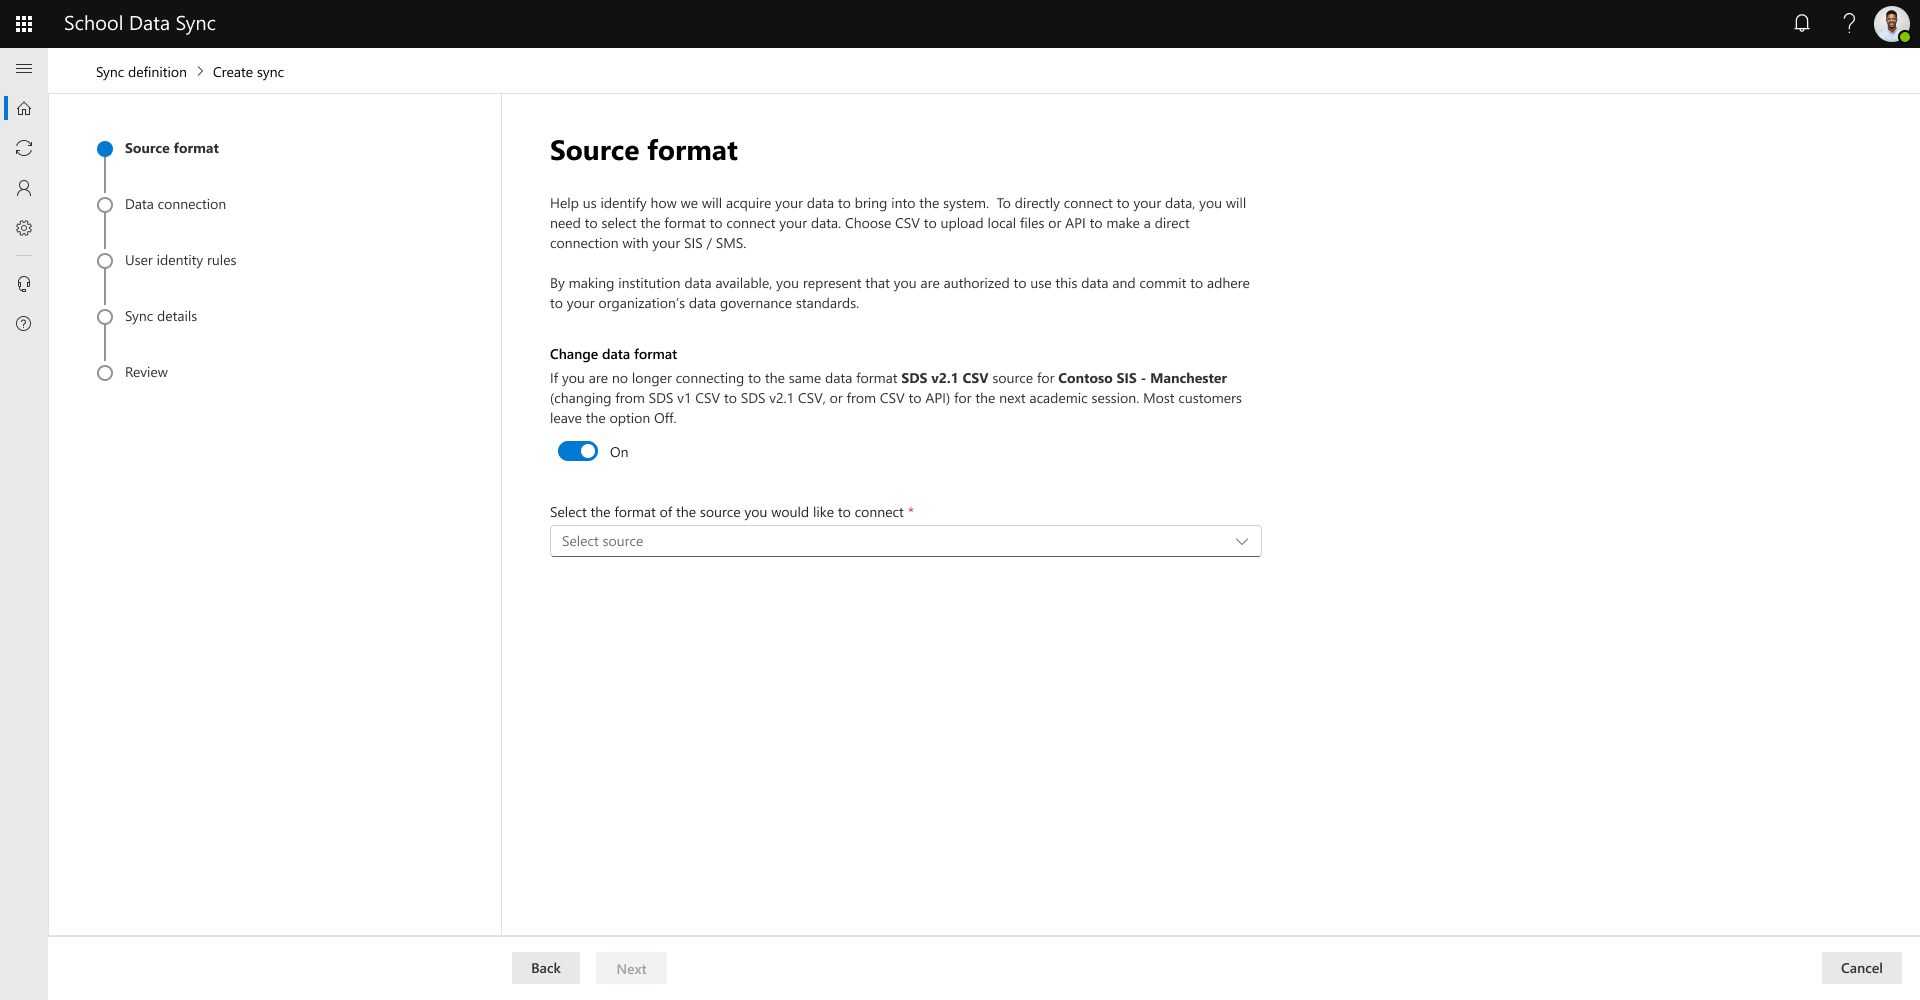
Select the format of the source you're connecting. For data supplied through SDS v2.1 CSV or SDS v1 CSV, select CSV. For data supplied through OneRoster API, select API. After you make your choice, select Next.
Follow the remainder of the steps, to connect data, based on your selected source format as outlined in Connect data to School Data Sync.

Questions
What are scenarios I would leave to option for Change data format to Off on the Source format screen?
- Previously used SDS v1 CSV format from the same SIS for the last academic session, and are using SDS v1 CSV format from the same SIS for the next academic session
- Previously used SDS v2.1 CSV format from the same SIS for the last academic session, and are using SDS v2.1 CSV format from the same SIS for the next academic session
- Previously used OneRoster API format from the same SIS for the last academic session, and are using OneRoster API format from the same SIS for the next academic session
What are some scenarios I would set the option for Change data format to On on the Source format screen?
- Previously used SDS v1 CSV format from the same SIS for the last academic session, and are using SDS v2.1 CSV format from the same SIS for the next academic session
- Previously used SDS v1 CSV format from a prior SIS for the last academic session, and are using SDS v2.1 CSV format from a new SIS for the next academic session
- Previously used SDS v2.1 CSV format from a prior SIS for the last academic session, and are using SDS v2.1 CSV format from a new SIS for the next academic session
- Previously used SDS v2.1 CSV format from the same SIS for the last academic session, and are using OneRoster API format from the same SIS for the next academic session
- Previously used OneRoster API format from a prior SIS for the last academic session, and are using OneRoster API format from a new SIS for the next academic session