Email Phishing Protection Guide - Part 11: Monitoring for Phishing and Other Cyber Attacks
The Email Phishing Protection Guide is a multi-part blog series written to walk you through the setup of many security focused features you may already own in Microsoft Windows, Microsoft Office 365, and Microsoft Azure. By implementing some or all of these items, an organization will increase their security posture against phishing email attacks designed to steal user identities. This guide is written for system administrators with skills ranging from beginner to expert.
Email Phishing Protection Guide Index: Introduction: Email Phishing Protection Guide - Enhancing Your Organization's Security Posture Part 1: Customize the Office 365 Logon Portal Part 2: Training Users with the Office 365 Attack Simulator Part 3: Deploy Multi Factor Authentication (MFA) Part 4: Deploy Windows Hello Part 5: Define Country and Region Logon Restrictions for Office 365 and Azure Services Part 6: Deploy Outlook Plug-in to Report Suspicious Emails Part 7: Deploy ATP Anti-Phishing Policies Part 8: Deploy ATP Safe Link Policies Part 9: Deploy ATP Safe Attachment Policies Part 10: Deploy and Enforce Smart Screen for Microsoft Edge, Microsoft Internet Explorer and Google Chrome Part 11: Monitor Phishing and SPAM Attacks in Office 365 Part 12: Discover Who is Attacking Your Office 365 User Identities Part 13: Update Your User Identity Password Strategy Part 14: Prevent Brute Force and Spray Attacks in Office 365 Part 15: Implement the Microsoft Azure AD Password Protection Service (for On-Premises too!) Part 16: Disable Office 365 Legacy Email Authentication Protocols Part 17: Control Application Consent Registrations in Microsoft Office 365 and Microsoft Azure Part 18: Increase Security with Microsoft Secure Score Part 19: Email Phishing Protection Security Checklist Part 20: Recommended Security and Anti-Phishing Training from Microsoft Ignite 2018
Part 11: Monitor Phishing and SPAM Attacks in Office 365
Within this blog series we have setup over ten locks that an attacker using phishing emails must overcome - reducing the likelihood of success. With many of these locks now in place, we need to monitor the effectiveness of our efforts to prevent these attacks from entering the network. We also want to monitor these policies to make sure they are not causing any negative impacts to communications in your organization. This must be done on a routine schedule by the systems administrator or security team.
Even though many adjustments in the environment have now been made to improve the security posture, this is not a finish line that signifies the complete security of your organization. Rather, this is an ongoing race to secure your organization against the ever evolving and growing sophistication of these cyber-attacks. As I discover additional features to implement and options to adjust, I will continue documenting them in future blogs.
Information about each threat report available in Office 365 has been documented in this link that I highly recommend you review. Below are instructions to access the reports and how to schedule key reports to be sent for review periodically.
Accessing the Advanced Threat Protection Reports
- Logon to https://protection.office.com as a global administrator account.
- On the left side of the screen, click Reports to expand the list of reports.
- Click Dashboard
- Here, we can see several ATP reports, malware detection reports, SPAM detection reports, etc. to choose from.
- The reports I find most useful and insightful in the attacks on an environment are:
- Threat Protection Status
- Malware Detections
- ATP File Types
- SPAM Detections
- Spoof Mail
Schedule Email Delivery of Key Security Reports
To keep track of the types of attacks your organization is experiencing, I recommend you either logon to the reporting portal on a periodic basis and/or schedule reports to be emailed to you and your support team for review.
When you click on each of the reports, you are presented with the option to Create a Schedule for email delivery. Below are some quick steps for creating these reports.
- As an example report to schedule, click on the Advanced Threat Protection File Types Report.
- Click the option to +Create Schedule
- You are now presented with a standard report schedule that may be accepted as is or may be customized. To customize the schedule, under Options, select Customize Schedule.
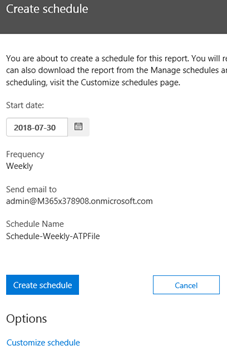
- Using the options presented, you can adjust the scheduled report name, frequency of delivery, email recipients (to you and/or a security monitoring team), etc. I suggest you choose only a few key reports for delivery. Scheduling any more than a few reports will just become noise in your Inbox and you will not make the time to review them.
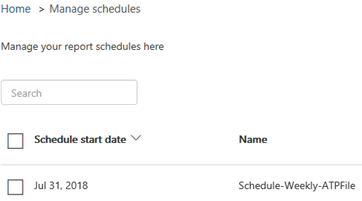
- To review and modify all scheduled reports, click the option to Manage Schedules under the Reports section of the Security & Compliance area. Below, you can see one of the sample report I have scheduled for delivery.
Conclusion: In this blog, we reviewed information about the Microsoft Security Reports available for review. We also reviewed why these are important to frequently review to gain valuable insights into the attacks your organization is experiencing. It is through this understanding that you will understand how to adjust settings to help mitigate against the latest attack vectors without causing an impact to user productivity.