Porting Cloud PSTN Telephone Numbers Between Office 365 Tenants
For organizations using the rich telecom and PBX features in Office 365 Skype for Business, a question often received by Microsoft is how to port (transfer) telephone numbers from one Office 365 tenant to another. The process is far easier and faster than you may imagine. The information required for Office 365 tenant number transfer requests and the process is explained below.
Note - the information below is only used for internal (Office 365 tenant to tenant) requests and is not used for number port requests from other carriers to Office 365. Information on external port requests is located here and here.
To submit a telephone number port request from one Office 365 tenant to another, a request is made to the Microsoft Number Porting Team by sending an email to PTN@Microsoft.com with key pieces of information:
- Source Office 365 tenant domain name (sourcedomain.onmicrosoft.com)
- Source Office 365 tenant unique identifier (see below for more information)
- Source Office 365 tenant PIN (see below for more information)
- Destination Office 365 tenant domain name (destinationdomain.onmicrosoft.com)
- Destination Office 365 tenant unique identifier (see below for more information)
- Number(s) to be ported from source to destination tenant
- Requested date and time range of port request execution (see below for scheduling requirements)
The Office 365 Tenant to Tenant Porting Process:
When the information above has been submitted, you will receive a confirmation that the request has been received. An analyst will then review the information submitted to verify accuracy and request additional information or clarification if needed. Once the information has been verified, an email will be sent to the requester with the porting request summary information. The requester must then verify the accuracy to finalize the scheduled port request. Once the request is executed and completed, an email confirmation will then be sent.
Once the confirmation email has been received that the porting process has been completed from the source to destination tenant, the destination tenant admin will then be able to view these numbers in the Skype for Business Office 365 Admin Portal. Then, using the Office 365 administration portal or PowerShell, the numbers can then be assigned to users. I recommend using PowerShell for large amounts of number assignments. The process of assigning numbers to users must be done by the Office 365 administrator - this is not part of the tenant to tenant number porting process.
If you have additional questions, please contact the team at PTN@Microsoft.com
Tenant to Tenant Port Request Scheduling:
- Port requests must be made three business days ahead of the requested port date and time
- The execution time for the request must be between 8am-8pm EST, Monday - Friday
- A timeframe of three hours must be specified for execution. For example, between 9am-12pm EST, 5pm-8pm EST, etc.
- Once executed, the number porting process takes only minutes to complete for small amounts of numbers. If requesting a number port with thousands of numbers, this is typically within one hour from the time the process is started.
Skype for Business PIN Setup:
To submit an internal number port request, a PIN must be created and associated with your source Office 365 tenant. To create this PIN, follow the instructions below.
- Sign into the Office 365 Admin Portal at https://portal.office.com
- Launch the Admin application.

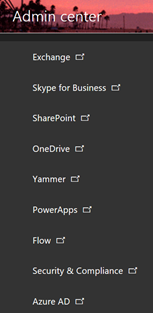
- Expand the Admin Centers on the left side and open the Skype for Business Admin portal. A second browser window will now appear.
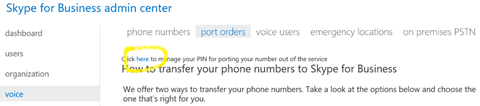
- In the Skype for Business Admin Portal, click on the Voice option on the left side.
- Then, click on Port Orders.
- Under the Port Orders screen, notice at the top there is an option to "Click here to manage your PIN for porting your number out of the service." Click the here option.
- In the window on the right side that now appears, enter a PIN between 6-10 digits in length.
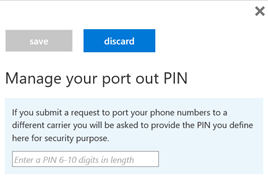
- Press Save to complete the PIN setup.
- This is the PIN to include in the Office 365 tenant to tenant number port request.
Locate the Office 365 Tenant Unique Identifier:
Using the Administration Portal:
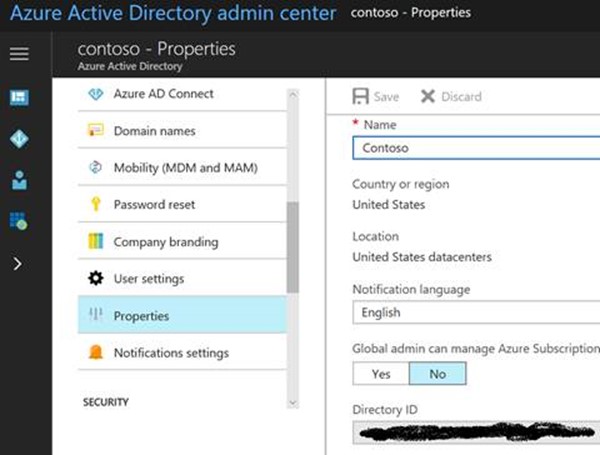
When signed into the Office 365 Admin Portal, expand the Admin Centers area at the bottom. Click the Azure AD Admin Center to launch a new browser tab.

In the Microsoft Azure AD portal, click Azure Active Directory.
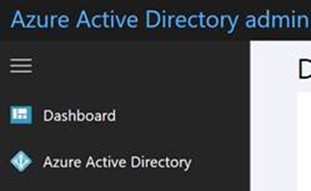
The Office 365 Tenant Unique Identification is in the Directory ID field.
Using PowerShell
While logged in to a PowerShell session connected to your Azure tenant, enter the command Login-AzureRmAccount. The tenant ID is listed in the results of this command.
For assistance connecting to your Office 365 tenant in PowerShell, there are several steps that are outlined very well in this blog. This blog will also outline how to connect to Exchange, SharePoint, and Skype for Business using the same PowerShell session.