Render custom data on a raster map
This article describes how to use the Get Map Static Image command with image composition functionality. Image composition functionality supports the retrieval of static raster tiles that contain custom data and different styles.
The following are examples of custom data:
- Custom pushpins
- Labels
- Geometry overlays
Tip
To show a simple map on a web page, it's often more cost effective to use the Azure Maps Web SDK, rather than to use the static image service. The web SDK uses map tiles; and unless the user pans and zooms the map, they will often generate only a fraction of a transaction per map load using browser caching. The Azure Maps Web SDK has options for disabling panning and zooming. Also, the Azure Maps Web SDK provides a richer set of data visualization options than a static map web service does.
Prerequisites
Important
In the URL examples, replace {Your-Azure-Maps-Subscription-key} with your Azure Maps subscription key.
This article uses the Bruno application, but you can use a different API development environment.
Note
The examples in this article require an Azure Maps account in the Gen2 pricing tier.
Azure Maps Gen1 pricing tier retirement
Gen1 pricing tier is now deprecated and will be retired on 9/15/26. Gen2 pricing tier replaces Gen1 (both S0 and S1) pricing tier. If your Azure Maps account has Gen1 pricing tier selected, you can switch to Gen2 pricing before it’s retired, otherwise it will automatically be updated. For more information, see Manage the pricing tier of your Azure Maps account.
Get static image with custom pins and labels
To get a static image with custom pins and labels:
In the Bruno app, select New Request.
Set type to HTTP.
Enter a Name for the request, such as Get Map Static Image.
Select the GET HTTP URL method.
Enter the following URL:
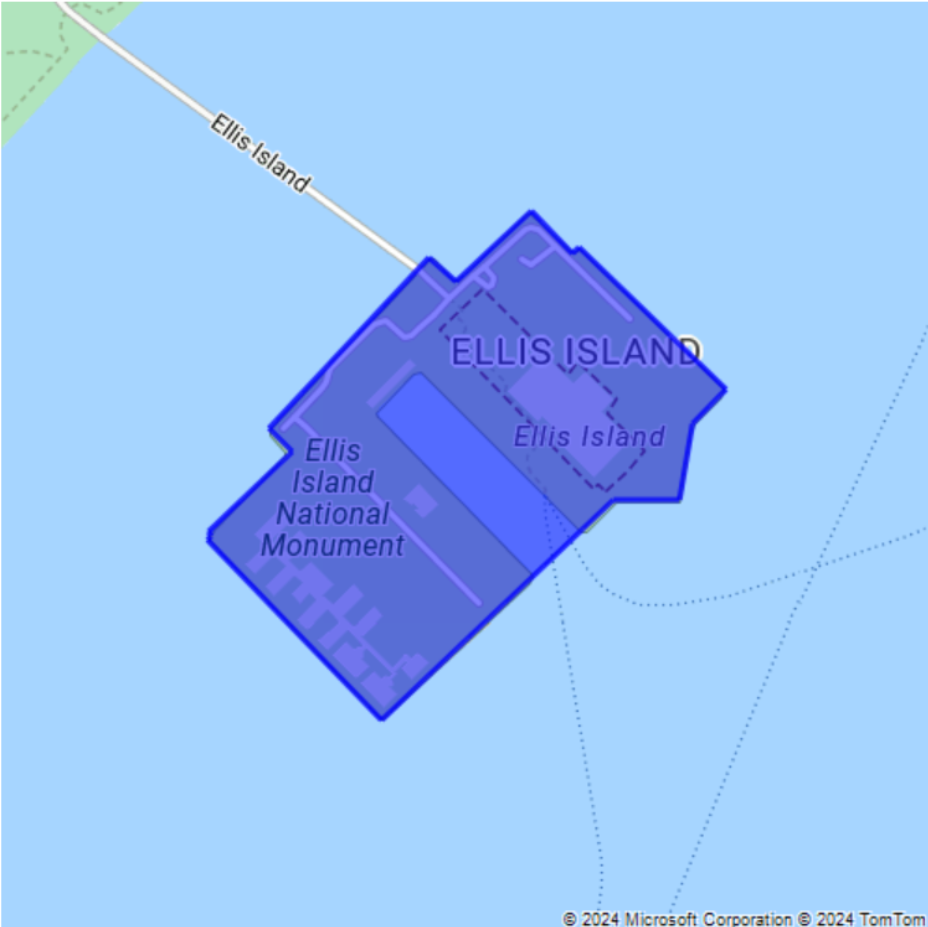
https://atlas.microsoft.com/map/static?subscription-key={Your-Azure-Maps-Subscription-key}&zoom=13&tilesetId=microsoft.base.road&api-version=2024-04-01&language=en-us¢er=-73.964085, 40.78477&path=lcFF0000|lw2|la0.60|ra700||-122.13230609893799 47.64599069048016&pins=custom%7Cla15+50%7Cls12%7Clc003b61%7C%7C%27Central Park%27-73.9657974+40.781971%7C%7Chttps%3A%2F%2Fsamples.azuremaps.com%2Fimages%2Ficons%2Fylw-pushpin.pngSelect Create.
Select the Send Request arrow that appears to the right of the request URL.
The following image is returned:

Render a polygon with color and opacity
You can modify the appearance of a polygon by using style modifiers with the path parameter.
To render a polygon with color and opacity:
In the Bruno app, select New Request.
Set type to HTTP.
Enter a Name for the request, such as GET Polygon.
Select the GET HTTP URL method.
Enter the following URL to the Render service:
https://atlas.microsoft.com/map/static?subscription-key={Your-Azure-Maps-Subscription-key}&zoom=15&tilesetId=microsoft.base.road&api-version=2024-04-01&language=en-us&path=lc0000FF|fc0000FF|lw3|la0.80|fa0.50||-74.03995513916016 40.70090237454063|-74.04082417488098 40.70028420372218|-74.04113531112671 40.70049568385827|-74.04298067092896 40.69899904076542|-74.04271245002747 40.69879568992435|-74.04367804527283 40.6980961582905|-74.04364585876465 40.698055487620714|-74.04368877410889 40.698022951066996|-74.04168248176573 40.696444909137|-74.03901100158691 40.69837271818651|-74.03824925422668 40.69837271818651|-74.03809905052185 40.69903971085914|-74.03771281242369 40.699340668780984|-74.03940796852112 40.70058515602143|-74.03948307037354 40.70052821920425|-74.03995513916016 40.70090237454063&pins=custom%7Cla15+50%7Cls12%7Clc003b61%7C%7C%27Central Park%27-73.9657974+40.781971%7C%7Chttps%3A%2F%2Fsamples.azuremaps.com%2Fimages%2Ficons%2Fylw-pushpin.png¢er=-74.040701, 40.698666&height=500&Width=500The following image is returned:
Render a circle and pushpins with custom labels
You can modify the appearance of the pins by adding style modifiers. For example, to make pushpins and their labels larger or smaller, use the sc "scale style" modifier. This modifier takes a value that's greater than zero. A value of 1 is the standard scale. Values larger than 1 makes the pins larger, and values smaller than 1 makes them smaller. For more information about style modifiers, see the Path parameter of the Get Map Static Image command.
To render a circle and pushpins with custom labels:
In the Bruno app, select New Request.
Set type to HTTP.
Enter a Name for the request, such as GET Polygon.
Select the GET HTTP URL method.
Enter the following URL to the Render service:
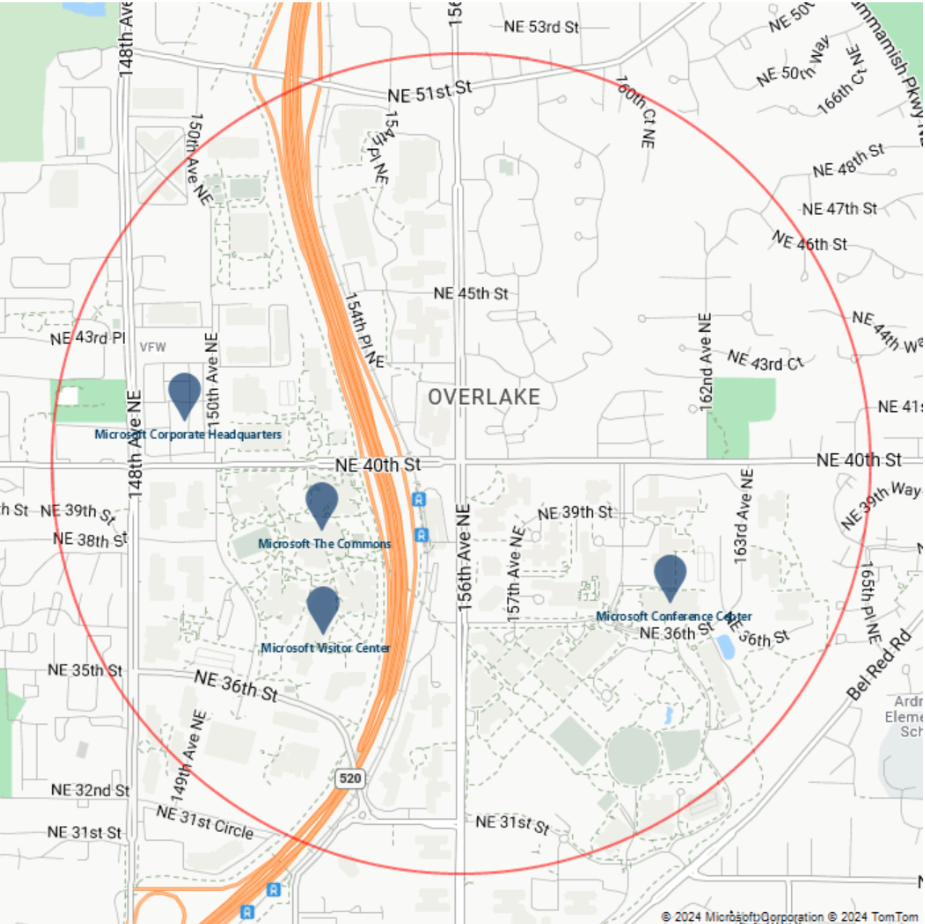
https://atlas.microsoft.com/map/static?subscription-key={Your-Azure-Maps-Subscription-key}&zoom=14&tilesetId=microsoft.base.road&api-version=2024-04-01&language=en-us¢er=-122.13230609893799,47.64599069048016&path=lcFF0000|lw2|la0.60|ra1000||-122.13230609893799 47.64599069048016&pins=default|la15+50|sc1|al0.66|lc003C62|co002D62||'Microsoft Corporate Headquarters'-122.14131832122801 47.64690503939462|'Microsoft Visitor Center'-122.136828 47.642224|'Microsoft Conference Center'-122.12552547454833 47.642940335653996|'Microsoft The Commons'-122.13687658309935 47.64452336193245&height=700&Width=700Select Create.
Select the Send Request arrow that appears to the right of the request URL.
The following image is returned:
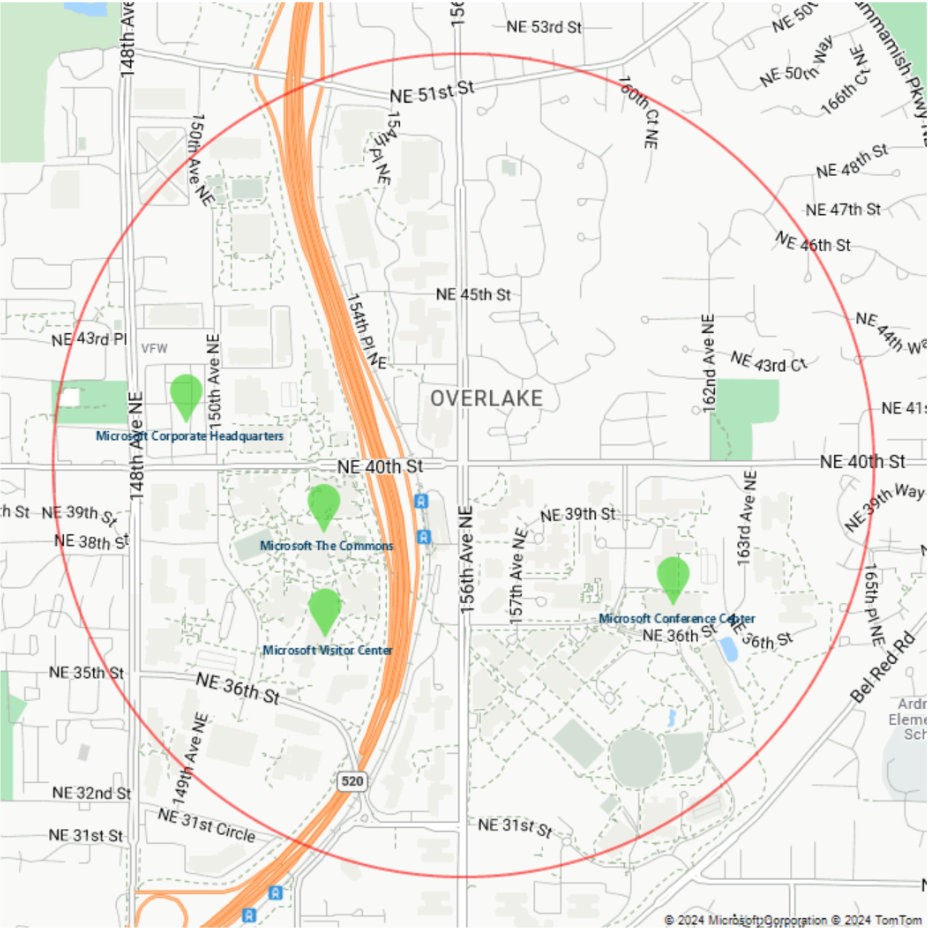
Next, change the color of the pushpins by modifying the
costyle modifier. If you look at the value of thepinsparameter (pins=default|la15+50|al0.66|lc003C62|co002D62|), notice that the current color is#002D62. To change the color to#41d42a, replace#002D62with#41d42a. Now thepinsparameter ispins=default|la15+50|al0.66|lc003C62|co41D42A|. The request looks like the following URL:https://atlas.microsoft.com/map/static?subscription-key={Your-Azure-Maps-Subscription-key}&zoom=14&tilesetId=microsoft.base.road&api-version=2024-04-01&language=en-us¢er=-122.13230609893799,47.64599069048016&path=lcFF0000|lw2|la0.60|ra1000||-122.13230609893799 47.64599069048016&pins=default|la15+50|al0.66|lc003C62|co41D42A||'Microsoft Corporate Headquarters'-122.14131832122801 47.64690503939462|'Microsoft Visitor Center'-122.136828 47.642224|'Microsoft Conference Center'-122.12552547454833 47.642940335653996|'Microsoft The Commons'-122.13687658309935 47.64452336193245&height=700&Width=700Select Create.
Select the Send Request arrow that appears to the right of the request URL.
The following image is returned:
Similarly, you can change, add, and remove other style modifiers.
Add a traffic layer
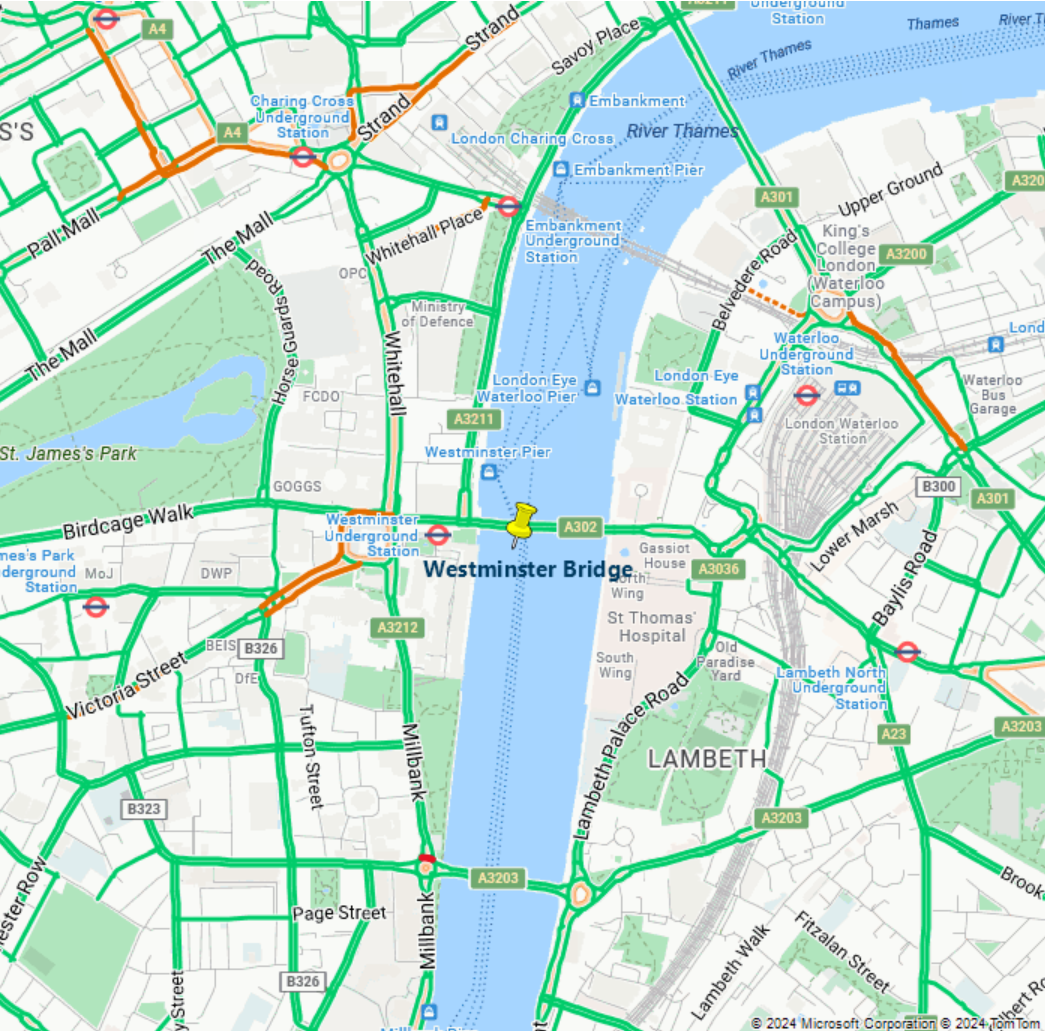
To get a static image with a traffic layer rendered on a roads basemap, use the trafficLayer parameter. The following example shows a map with a traffic layer and a pin with a label:
In the Bruno app, select New Request.
Set type to HTTP.
Enter a Name for the request, such as Get Map Static Image - traffic layer.
Select the GET HTTP URL method.
Enter the following URL:
https://atlas.microsoft.com/map/static?subscription-key={Your-Azure-Maps-Subscription-key}&zoom=14&tilesetId=microsoft.base.road&api-version=2024-04-01&language=en-us¢er= -0.122427, 51.500867&pins=custom%7Cla15+50%7Cls12%7Clc003b61%7C%7C%27Westminster Bridge%27-0.122427+51.500867%7C%7Chttps%3A%2F%2Fsamples.azuremaps.com%2Fimages%2Ficons%2Fylw-pushpin.png&height=700&Width=700&trafficLayer=microsoft.traffic.relative.mainSelect Create.
Select the Send Request arrow that appears to the right of the request URL.
The following image is returned:
Create a map using the dark gray style
To get a static image with the dark gray style applied, set the TilesetId parameter to microsoft.base.darkgrey:
In the Bruno app, select New Request.
Set type to HTTP.
Enter a Name for the request, such as Get Map Static Image - dark gray style.
Select the GET HTTP URL method.
Enter the following URL:
https://atlas.microsoft.com/map/static?subscription-key={Your-Azure-Maps-Subscription-key}&zoom=16&tilesetId=microsoft.base.darkgrey&api-version=2024-04-01&language=en-us¢er=-95.360200,29.753452&pins=custom%7Cla15+50%7Cls12%7Clc003b61%7C%7C%27Westminster Bridge%27-0.122427+51.500867%7C%7Chttps%3A%2F%2Fsamples.azuremaps.com%2Fimages%2Ficons%2Fylw-pushpin.png&height=700&Width=700Select Create.
Select the Send Request arrow that appears to the right of the request URL.
The following image is returned:
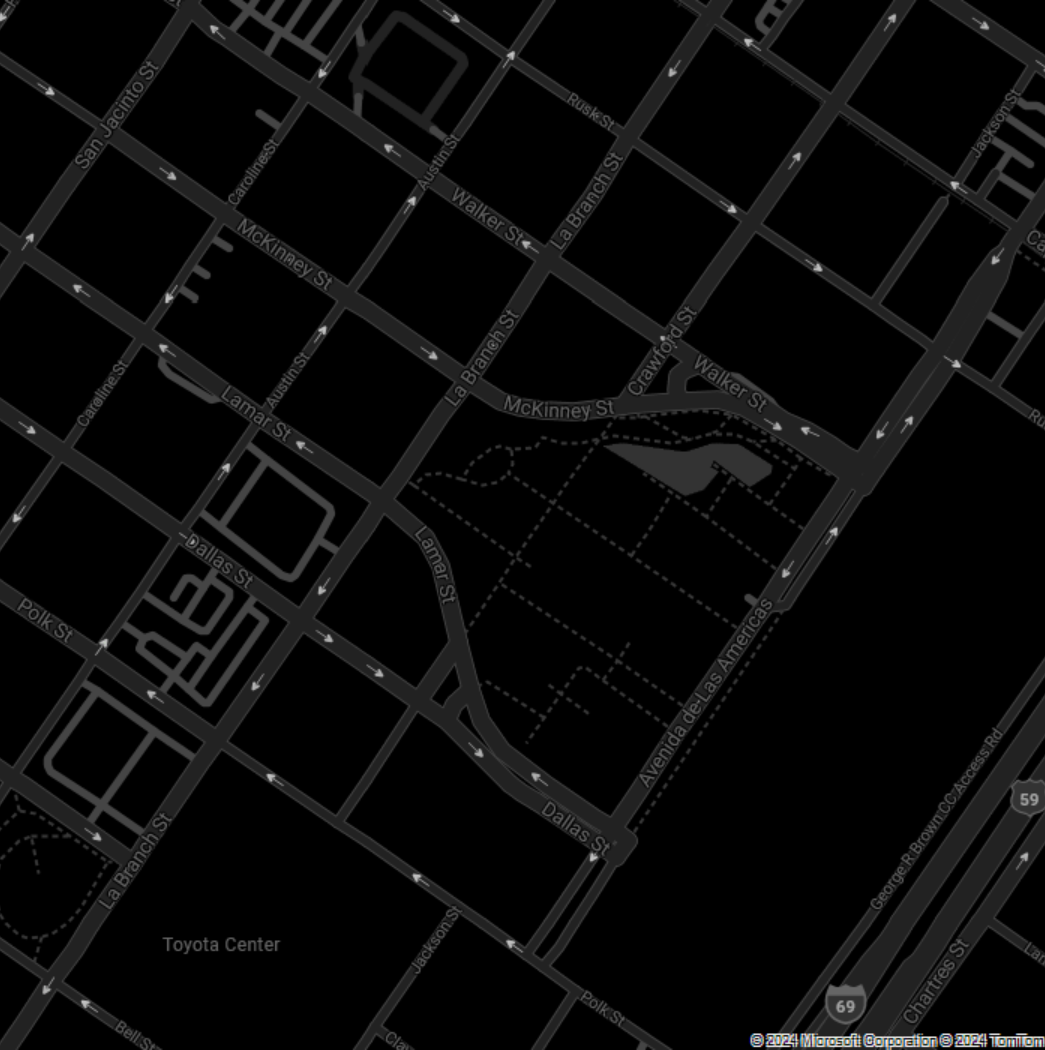
For more information the different styles available using the TilesetId parameter, see TilesetId in the Render - Get Map Tileset REST API documentation.
Create a map using the imagery style
To get a static image with the imagery style applied, set the TilesetId parameter to microsoft.imagery:
In the Bruno app, select New Request.
Set type to HTTP.
Enter a Name for the request, such as Get Map Static Image - imagery style.
Select the GET HTTP URL method.
Enter the following URL:
https://atlas.microsoft.com/map/static?subscription-key={Your-Azure-Maps-Subscription-key}&zoom=16&tilesetId=microsoft.imagery&api-version=2024-04-01&language=en-us¢er=-43.176141,-22.965458&height=700&Width=700Select Create.
Select the Send Request arrow that appears to the right of the request URL.
The following image is returned:
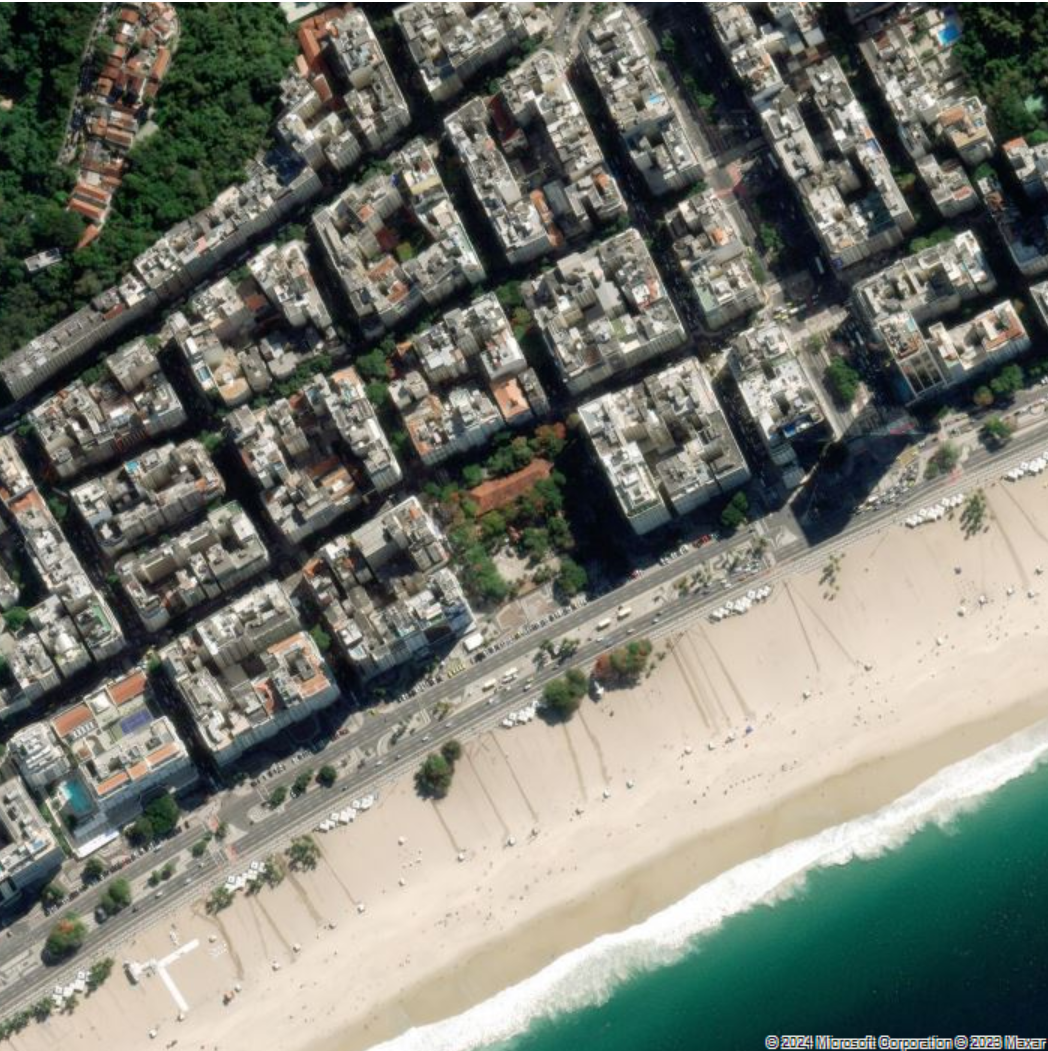
For more information the different styles available using the TilesetId parameter, see TilesetId in the Render - Get Map Tileset REST API documentation.