Copy or clone work items and more
Azure DevOps Services | Azure DevOps Server 2022 - Azure DevOps Server 2019
There are two types of copy functions you can use:
- Copy or clone a single work item: To duplicate a single work item, use the "Create copy of a work item" feature. Depending on the options you choose, this process can be considered either a copy or a clone.
- Copy a list of work items: To copy a list of work items, multi-select a list of work items and use the "Copy as HTML" or "Copy to clipboard" feature.
Note
The images in your web portal might differ from those in this article due to updates made to Azure DevOps Services. However, unless explicitly mentioned, the basic functionality remains the same.
Note
The images in your web portal might differ from those in this article due to updates made to Azure DevOps Server. However, unless explicitly mentioned, the basic functionality remains the same.
Prerequisites
- You must be added to a project.
- To view or modify work items, you must have your View work items in this node and Edit work items in this node permissions set to Allow. By default, the Contributors group has this permission set. For more information, see Set permissions and access for work tracking.
- To add new tags to add to work items, you must have Basic access or higher and have the project-level Create new tag definition permissions set to Allow. By default, the Contributors group has this permission set. Even if the permission is explicitly set for a Stakeholder, they don't have permission to add new tags, as they're prohibited through their access level. For more information, see Stakeholder access quick reference.
- All project members, even members in the Readers group, can send emails containing work items.
Copy or clone a work item
Copy a work item to create a new work item with a new ID and prepopulated fields from the original. You can modify the fields as needed. A related link to the original work item and any parent link are copied over, but history and attachments are not.
Clone a work item to create an exact copy of an existing work item, including all fields and attachments, but with a new ID. Cloning is useful when no field modifications are needed.
In summary, copy a work item to adjust prepopulated values, and clone a work item to create an exact duplicate.
Note
Some fields might get copied depending on your on-premises version and customizations. If the work item type you clone lacks a state transition rule to clear the Closed By field when the State is New or Active, that field gets copied. Current system out-of-box templates include this rule.
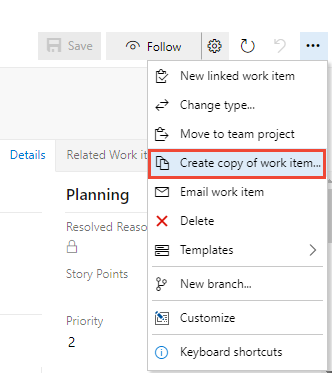
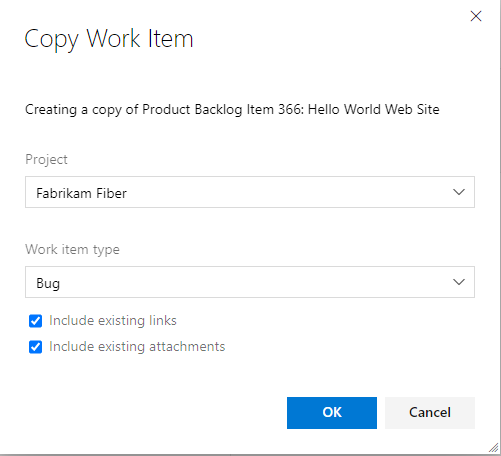
From the web portal, open the work item you want to copy or clone, open the … context menu, and choose Create copy of work item.
Choose the project and work item type if different from the copied work item. Optionally change the Title and provide more details.
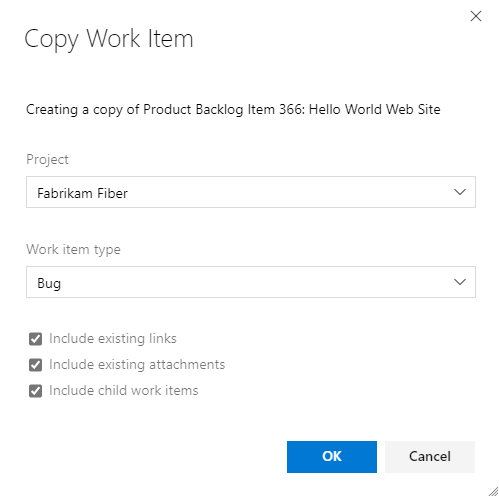
Choose options:
- Include existing links: To include all Related and external links in the copied work item. A Related link gets created automatically for the work item copied, and included in the Discussion section. There's no method for disabling this feature.
- Include existing attachments: To include attachments in the copied work item
- Include child work items: To include existing links to child work items in the copied work item. This feature isn't recursive. Only those work items directly linked as children to the work item being copied are included. This option appears even if there are no child items linked to the work item.
Note
- When you copy the work item to a different project, Include child work items is disabled.
- When you copy a work item and choose to Include child work items, a copy gets made of each child work item and linked to the copied work item through a parent-child link.
- The Include child work items feature requires installation of Azure DevOps Server 2020.1 update.
In the work item form that opens, update other fields as needed. Select OK. All work items start in the "New" state.
From the web portal, open the work item you want to copy or clone, open the … context menu, and choose Create copy of work item.
Choose the project and work item type if different from the copied work item.
Optionally, check one or more of the boxes:
- Include existing links: To link the copied work item as a Related link type and maintain all other related and external links included in the copied work item.
- Include existing attachments: To include attachments in the copied work item.
Select OK.
In the work item form that opens, update other fields as needed. All work items start in the New state.
Tip
Copied or cloned work items always have a higher ID than the original work items.
Change the work item type
If you have a large number of work items whose type you want to change, use Change work item type. If the Change work item type option isn't available to you, you can export a set of work items using Excel or CSV, copy them to a new list, and reimport them by specifying a different work item type. See Bulk add or modify work items with Excel or Import or update work items in bulk by using CSV files.
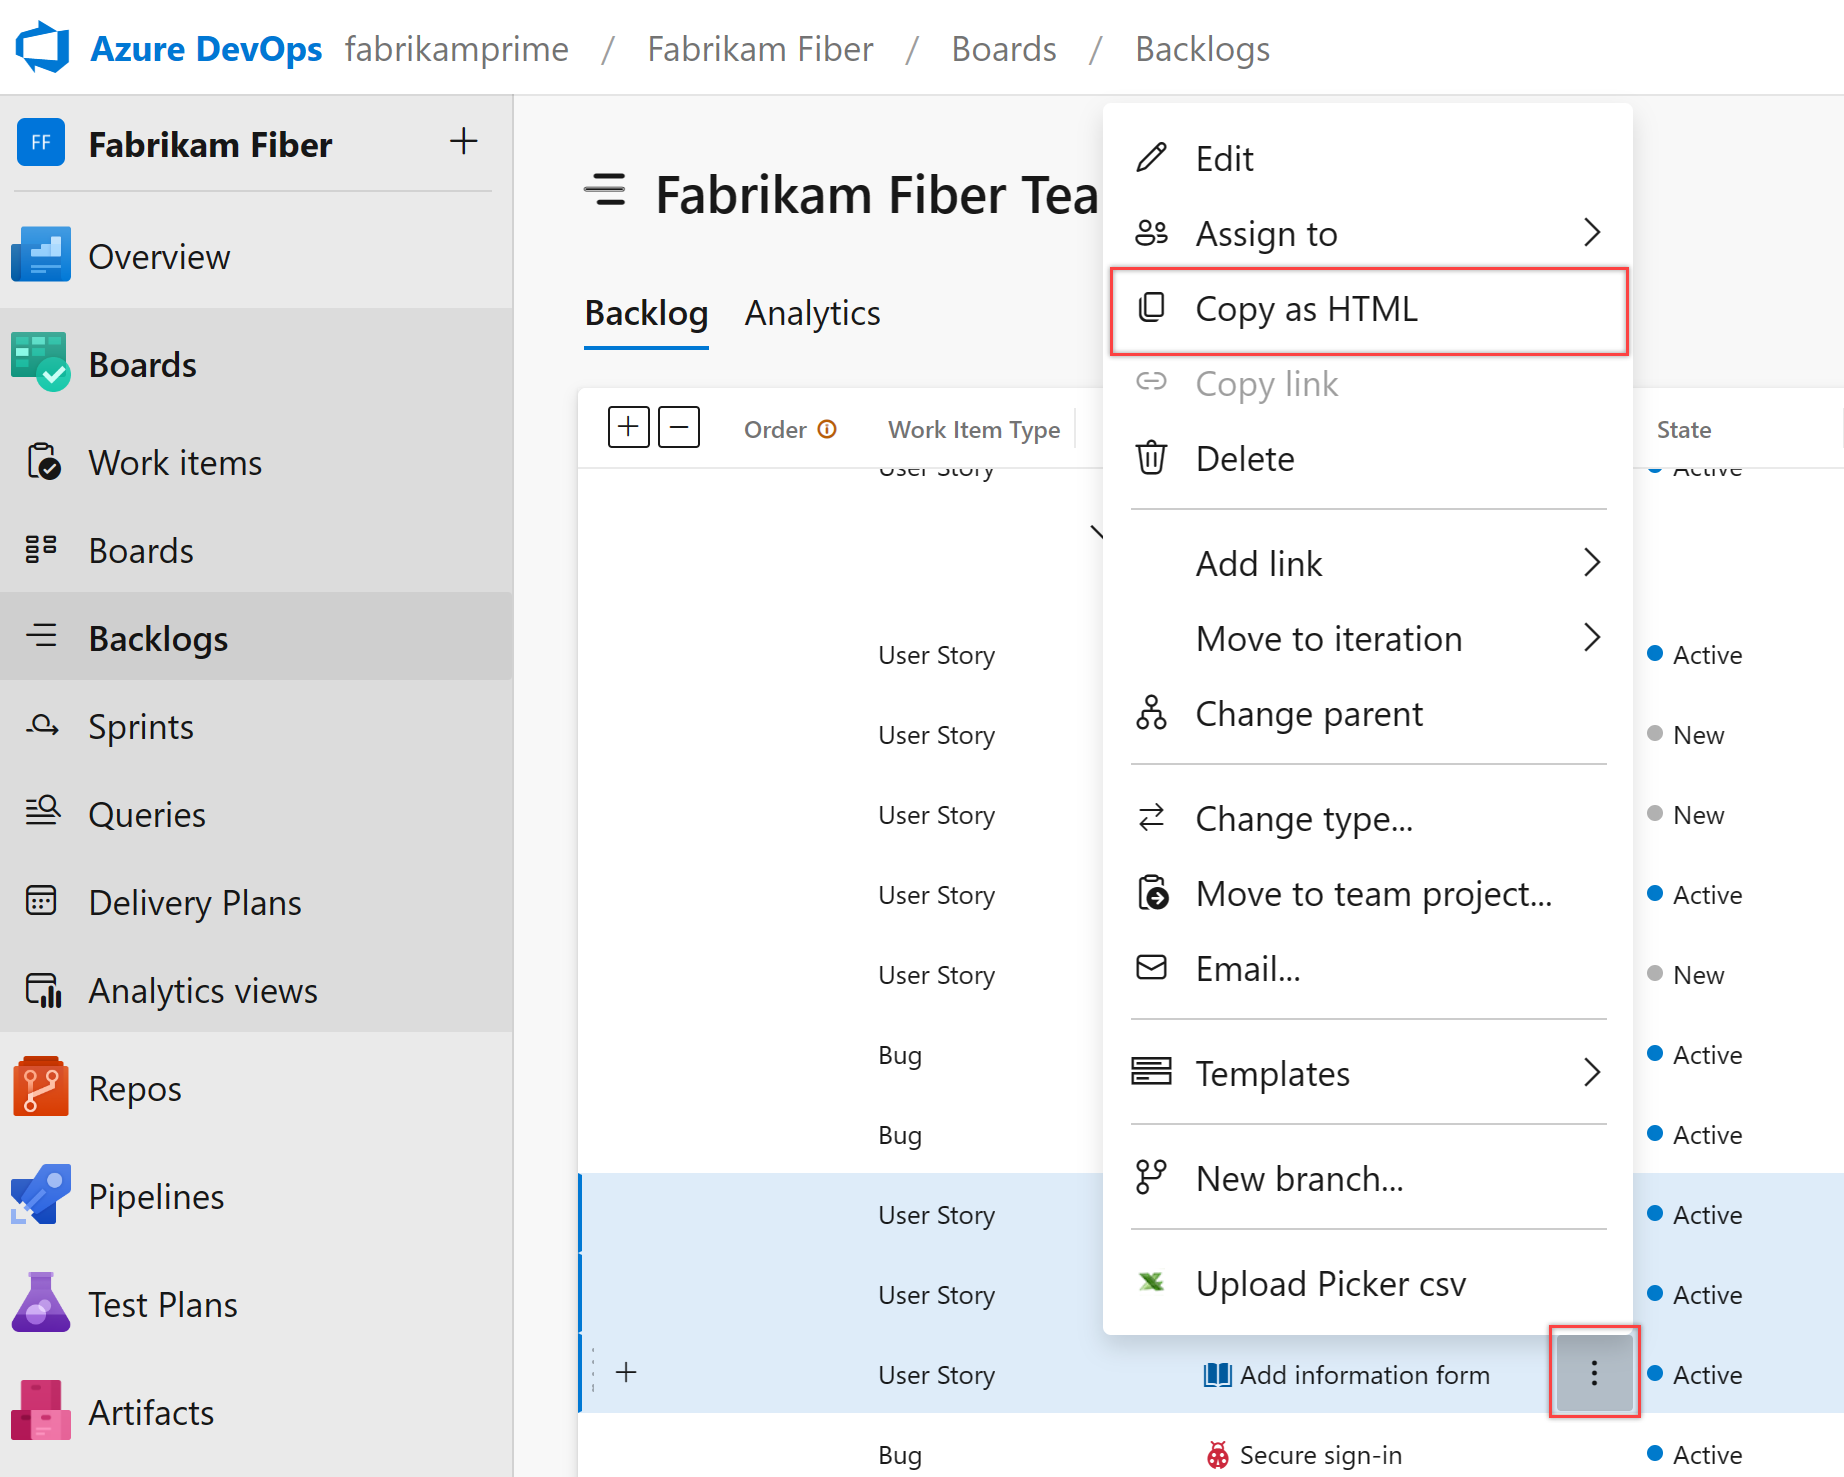
Copy a list of work items
You can copy an HTML formatted table of selected items from either a backlog page or query results list. Then, you can send an email of this list using your choice of email client, or paste the list into a Word document, Excel spreadsheet, or other application.
Note
The data copied with Copy as HTML is the same as that copied when you select Email selected work items. If you don't have an SMTP server configured, you can work around this by using Copy as HTML. For on-premises Azure DevOps, all email actions require an SMTP server to be configured.
From the web portal, open a backlog or query results page, and multi-select the work items you want to copy to the clipboard.
Open the … context menu of one of the selected work items, and then choose Copy to clipboard or Copy as HTML.
Paste the contents into your email client
Paste the contents of the clipboard into your email client or other application. To open a linked work item, users need read access to the project or area node for those work items.
The formatted table contains a link to each work item included in your selected results list. A link to a query that opens only those work items selected is also provided.

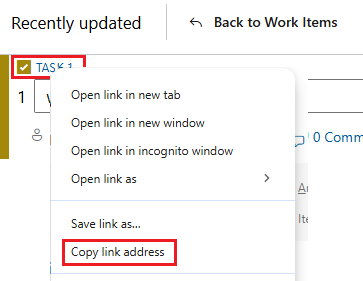
Copy the URL
Copy the URL from the web browser address or hover over the title and then select the ![]() copy-to-clipboard icon.
copy-to-clipboard icon.