Manage and configure team tools
Azure DevOps Services | Azure DevOps Server 2022 - Azure DevOps Server 2019
If you're a team administrator, you have the flexibility to tailor your backlogs and boards to align with your team's workflow. In case you require a new team, you can ask a Project Administrator group member to create one for you, which takes only a minute. Team administrators have the ability to set up and oversee all team tools.
Team administrators perform the following tasks for team tools:
- Add team members
- Add another team administrator
- Configure areas and iteration paths
- Configure backlogs, boards, and general settings
- Configure and manage team dashboards
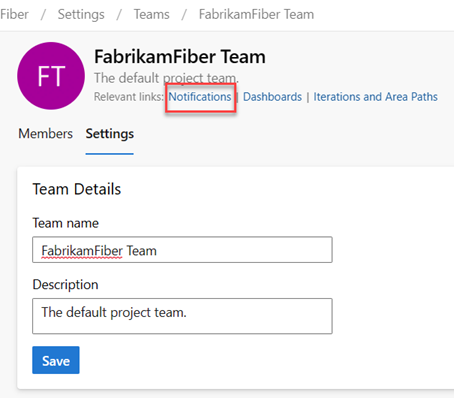
- Configure team notifications
Prerequisites
| Category | Requirements |
|---|---|
| Permissions | - To manage teams: Team administrator or member of the Project Administrators group. - To add a team: Member of the Project Administrators group. For more information, see Add teams. |
Note
For more information, see the following articles:
Open your team profile
Open your team profile to quickly access items defined for your team.
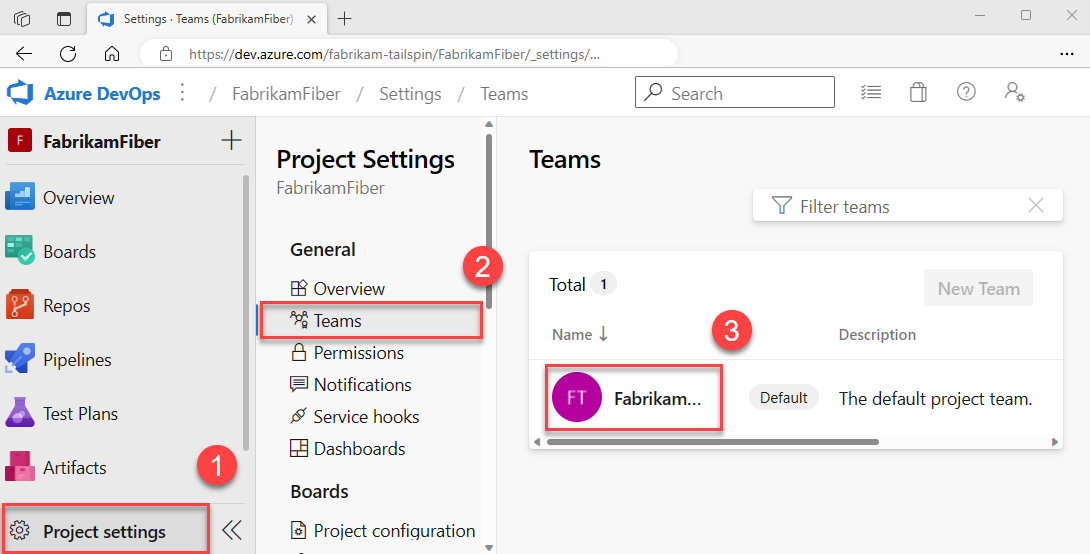
Sign in to your project (
https://dev.azure.com/{Your_Organization}/{Your_Project}).Select Project settings > Teams > your team.
Add users to a team
Tools like capacity planning, team alerts, and dashboard widgets operate within the scope of a team. They automatically access the user information of team members to facilitate planning tasks or issue alerts.
To add users to a team, see Add users to a project or specific team.

All members of a team can favorite team artifacts and define work item templates. For more information, see:
If team members don't have access to all the features they want, make sure they have the permissions needed for those features.
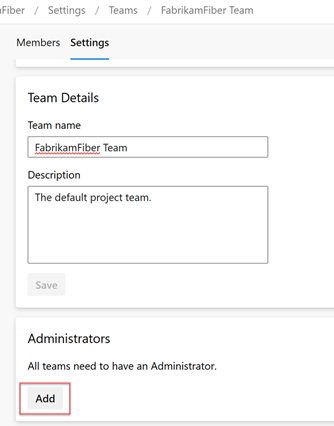
Add an administrator
When you add a team to a project, a Project Administrator should add one or more team administrators.
Configure team areas and iterations
Many Agile tools rely on the team's configured area and iteration paths. For more information, see About teams and Agile tools.
After project administrators add the project's area and iteration paths using Set area paths and Set iteration paths, team administrators can choose the relevant area and iteration paths for their team. These settings influence a wide range of Agile tools that the team can access.
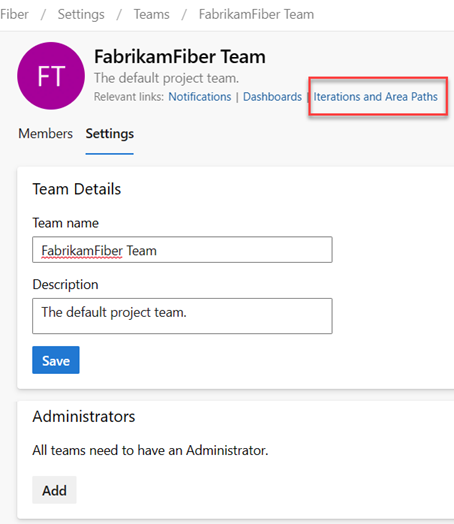
Settings include making the following associations for each team:
- Select team area paths
Can select the default area paths associated with the team. These settings affect many Agile tools available to the team. - Select team iteration paths or sprints Can select the default area paths associated with the team. These settings affect many Agile tools available to the team.
For more information, see Define area paths and assign to a team and Define iteration paths and configure team iterations.
Configure team backlogs, boards, and general settings
As a team administrator, you have the flexibility to customize your team's workflow to suit your needs. One way to do so is by choosing which backlog levels are active for your team. For instance, a feature team might only want to display the product backlog, while a management team might prefer to show the feature and epic backlogs only. Also, you can choose how to treat bugs within your workflow, either as user stories and requirements or as tasks.
Another way to customize your team's workflow is by selecting nonworking days for the team. By doing so, sprint planning and tracking tools can automatically take these days off into account when calculating capacity and sprint burndown.
Most of these team settings can be easily configured from the common configuration dialog, providing a convenient way to manage your team's workflow in one central location. You can also set team automation rules to update work items when child item states change.
Note
For more information, see Backlogs, boards, and plans. In case you don't see the desired work items on your backlog or board, see Set up your backlogs and boards.
Check that you selected the correct project, and then choose Boards > Boards, and select the correct team from the team selector dropdown menu. For more information, see Use breadcrumbs and selectors to navigate and open artifacts.
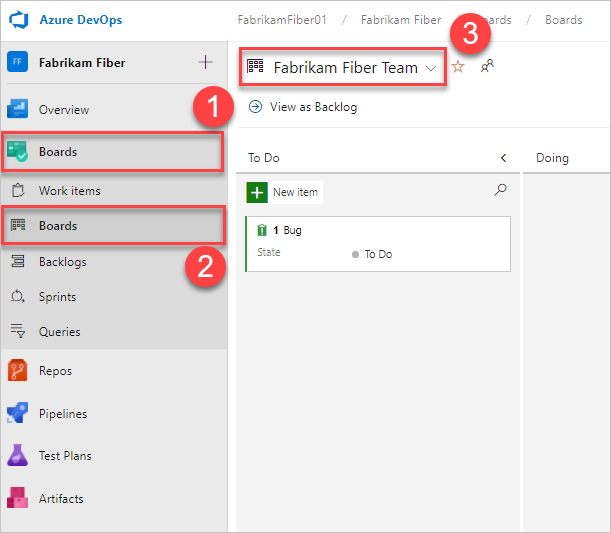
Choose Team settings
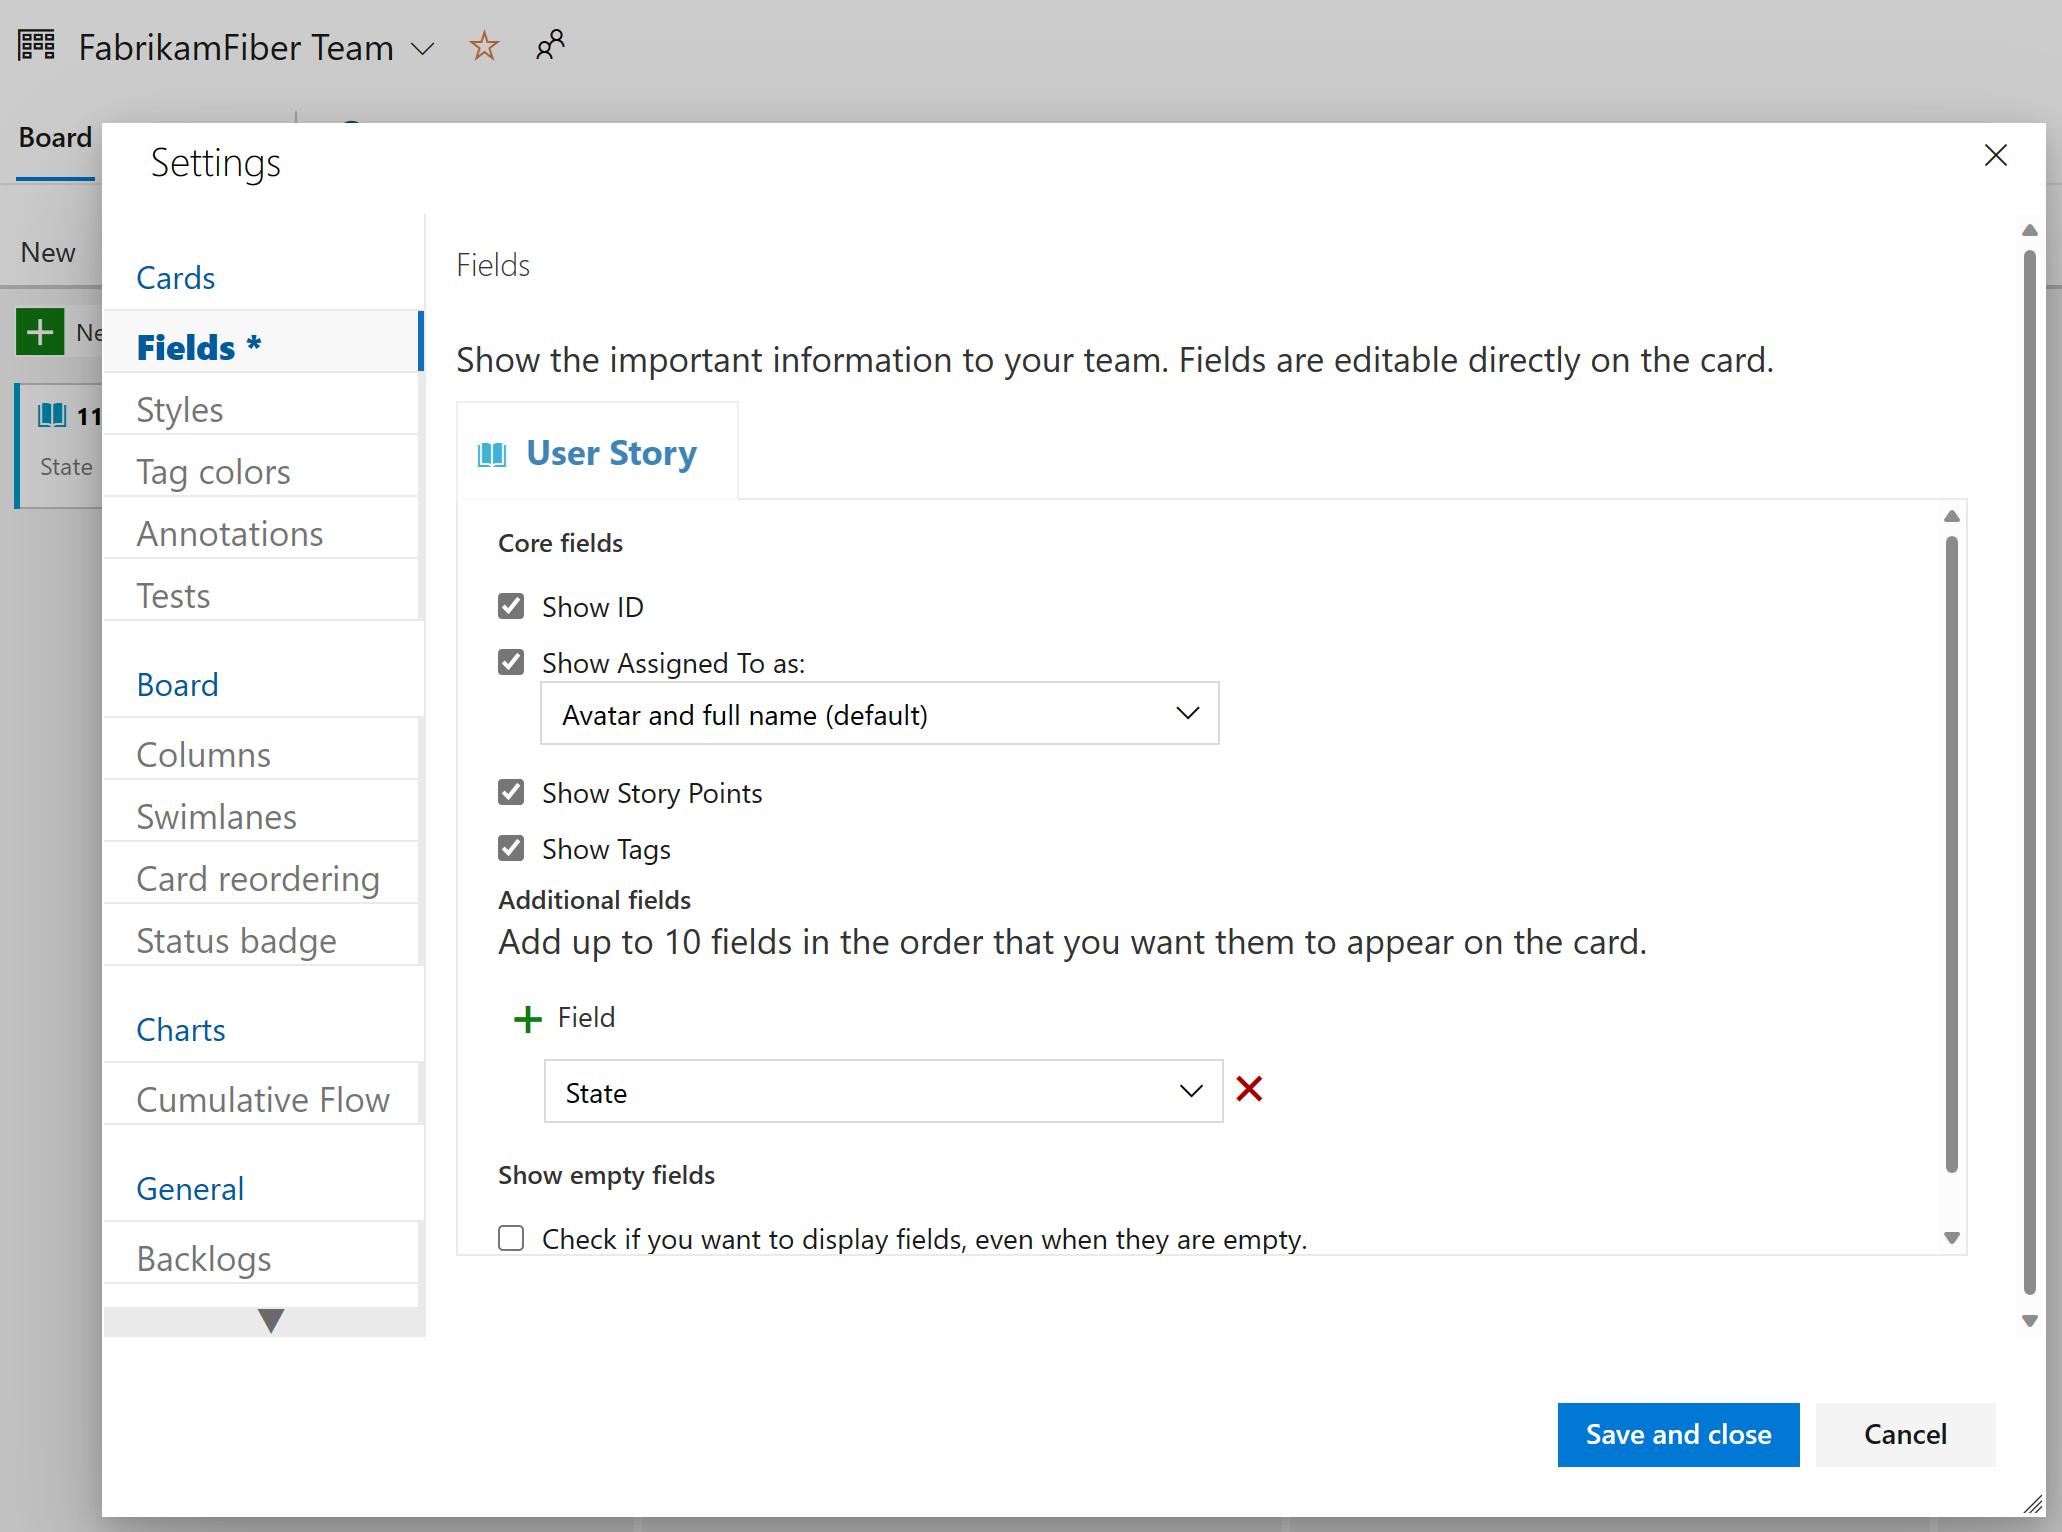
 to configure the board and set general team settings.
Choose a tab under any of the sections—Cards, Board, Charts, and General—to configure the cards or boards, the cumulative flow chart, or other team settings. When you're done configuring the settings, select Save and close.
Check that you selected the right project, (2) choose Boards > Boards, and then (3) select the correct team from the team selector menu.
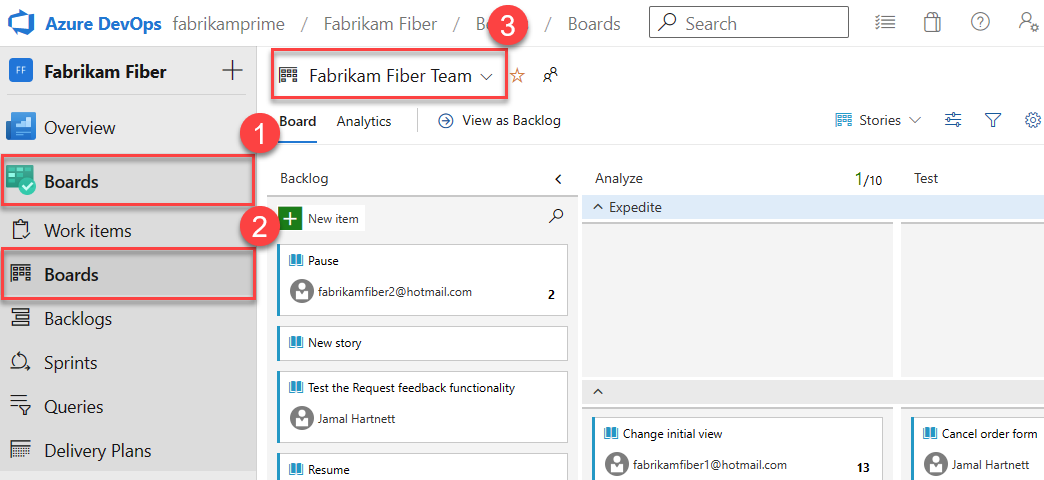
Make sure that you select the team backlog or board that you want to configure using the team selector. For more information, see Use breadcrumbs and selectors to navigate and open artifacts.
Choose the product or portfolio backlog from the board-selection menu.

Choose Team settings
 to configure the board and set general team settings.
Choose a tab under any of the sections—Cards, Board, Charts, and General—to configure the cards or boards, the cumulative flow chart, or other team settings.
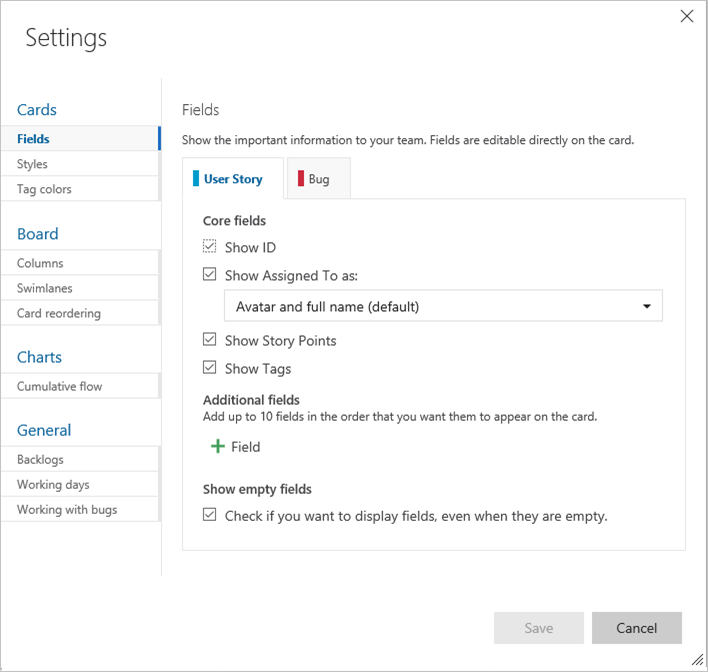
Team administrators have complete control over customizing their team's boards for both the product and portfolio backlogs. To set up a board, you can define the columns and work-in-progress (WIP) limits through the common configuration dialog. For more information, see Board overview and Board quickstart.
For detailed information on each configuration option, see the following articles:
| Category | Articles |
|---|---|
| General | - Backlogs - Working with bugs |
| Cards | - Add fields - Define styles - Add tag colors - Enable annotations - Configure inline tests |
| Chart | - Configure cumulative flow chart |
| Boards | - Add columns - Split columns - WIP limits - Definition of Done - Add swimlanes - Card reordering - Configure status badges |
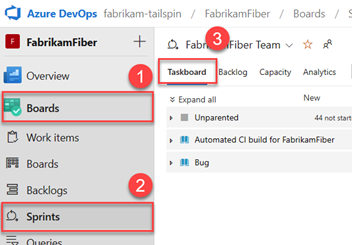
Configure sprint taskboards
Similar to boards, you can customize each sprint Taskboard to support information-rich color-coded cards and columns. For more information, see Customize sprint taskboards.
Similar to boards, each sprint Taskboard can be customized to support information-rich, color-coded cards. For more information, see Customize sprint taskboards.
Add and manage team dashboards
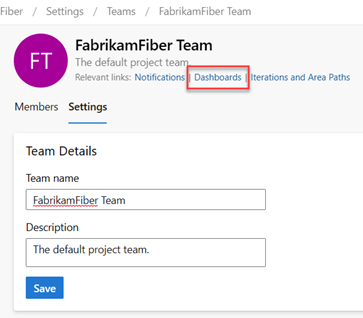
By default, all team members can add and edit team dashboards. In addition, team administrators can manage permissions for team dashboards. For more information, see Add and manage dashboards.
Update team name, description, and image
Team settings also include the team name, description, and team profile image. To add a team picture, select the image icon. The maximum file size is 2.5 MB and 2560 x 1,024 px, and then we resize to 200 x 200.
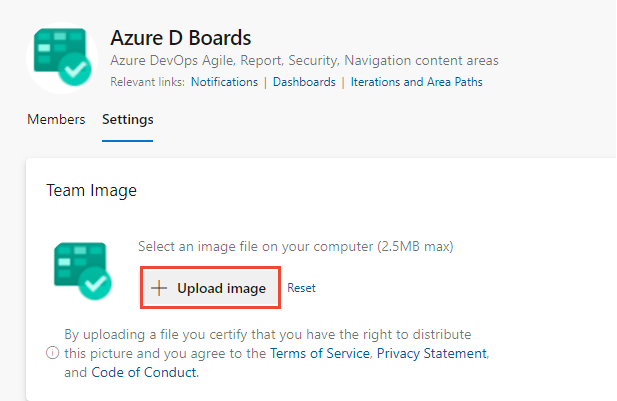
Team settings also include the team name, description, and team profile image. To add a team picture. Open the Team Profile and choose the picture icon. The maximum file size is 4 MB.
Manage notifications
Team administrators have the ability to add and edit alerts, allowing the team to receive email notifications as changes occur to work items, code reviews, source control files, and builds. Various alerts are predefined for each team. For more information, see Manage team alerts.
