Sự kiện
21 giờ 17 thg 3 - 10 giờ 21 thg 3
Tham gia chuỗi buổi gặp gỡ để xây dựng các giải pháp AI có thể mở rộng dựa trên các trường hợp sử dụng trong thế giới thực với các nhà phát triển và chuyên gia đồng nghiệp.
Đăng ký ngayTrình duyệt này không còn được hỗ trợ nữa.
Hãy nâng cấp lên Microsoft Edge để tận dụng các tính năng mới nhất, bản cập nhật bảo mật và hỗ trợ kỹ thuật.
Azure DevOps Services | Azure DevOps Server 2022 - Azure DevOps Server 2019
Azure DevOps projects contain Git repositories, work items, builds, and releases. You can use Git repos in your projects to manage your source code as your project grows. This guide shows you how to create a Git repo using the web portal.
| Category | Requirements |
|---|---|
| Organization | An organization in Azure DevOps with a Git repository. |
| Permissions | Create repository permissions, granted by default to project administrators. For more information, see Set Git repository permissions. |
| Tools | - Git for Windows, which includes Git Credential Manager, or Git for macOS and Linux. For macOS and Linux, we recommend configuring SSH authentication. |
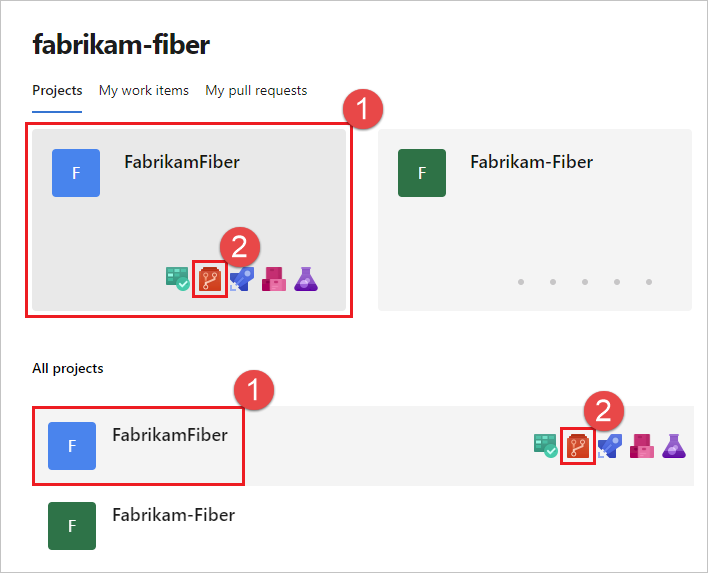
Open the Repos page in your project by browsing to https://dev.azure.com/OrganizationName, hover your mouse over the name of your project, and select the Repos icon. You can select it from the All projects list, or from the Recent projects list if you accessed it recently.
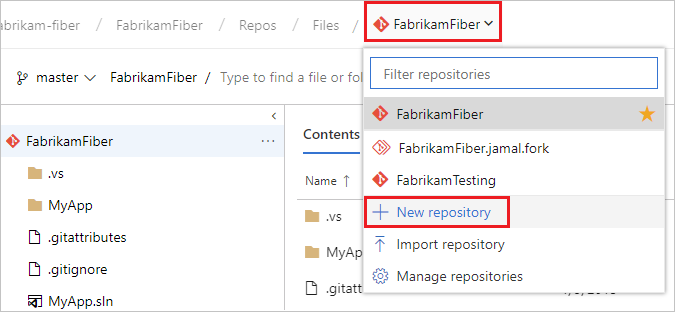
From the repo drop-down, select New repository.
In the Create a new repository dialog, verify that Git is the repository type and enter a name for your new repository. For naming restrictions, see Naming restrictions, Azure Repos (git).
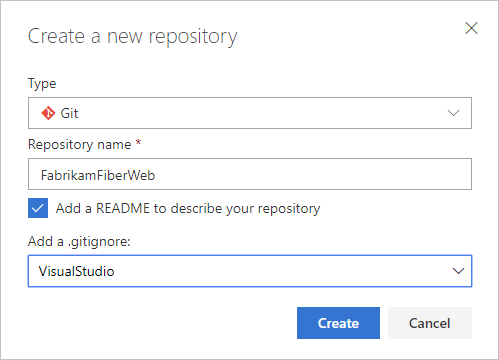
You can also add a README and create a .gitignore for the type of code you plan to manage in the repo. A README contains information about the code in your repo. The .gitignore file tells Git which types of files to ignore, such as temporary build files from your development environment.
When you're happy with the repo name and choices, select Create.
A new empty Git repo is now created in your project.
To work with a Git repo, you clone it to your computer. Cloning a repo creates a complete local copy of the repo for you to work with. Cloning also downloads all commits and branches in the repo and sets up a named relationship with the repo on the server. Use this relationship to interact with the existing repo, pushing and pulling changes to share code with your team.
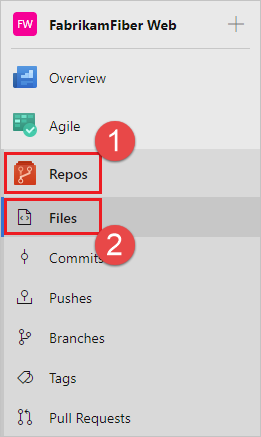
From your web browser, open the team project for your organization in Azure DevOps and select Repos > Files. If you don't have a team project, create one now.
Select Clone in the upper-right corner of the Files window and copy the clone URL.
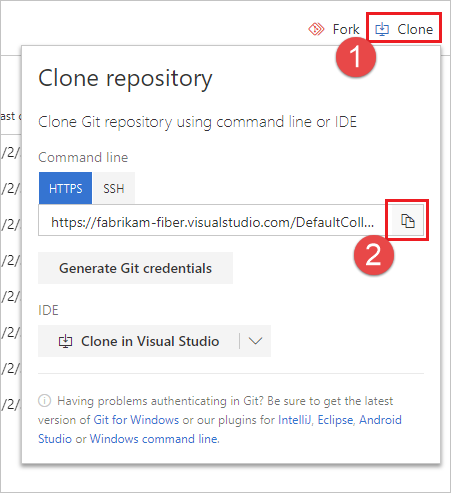
Open the Git command window (Git Bash on Git for Windows). Then, browse to the folder where you want the code from the repo stored on your computer. Run git clone followed by the path copied from the Clone URL in the previous section, as shown in the following example.
git clone https://dev.azure.com/fabrikam-fiber/MyFirstProject/_git/
Git downloads a copy of the code into a new folder for you to work with. The download includes all commits and branches from the repo.
Switch your directory to the repository that you cloned.
cd fabrikam-fiber
Keep this command window open, because you use it in the following steps.
In this step, we make a change to the files on your computer, commit the changes locally, push the commit up to the repo on the server, and view the changes there.
Browse to the folder on your computer where you cloned the repo and open the README.md file in your editor of choice.
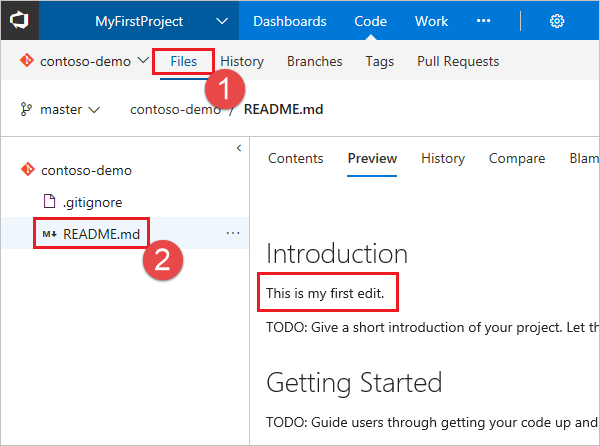
Make some changes, for example add This is my first edit. to the file, and save and close the file.
In the Git command window, navigate to the fabrikam-fiber directory by entering the following command:
cd fabrikam-fiber
Commit your changes by entering the following command in the Git command window:
git commit -a -m "My first commit"
When you use git commit, -a means to commit all changed files, and -m specifies a commit message.
Push your changes up to the Git repo by entering the following command into the Git command window:
git push
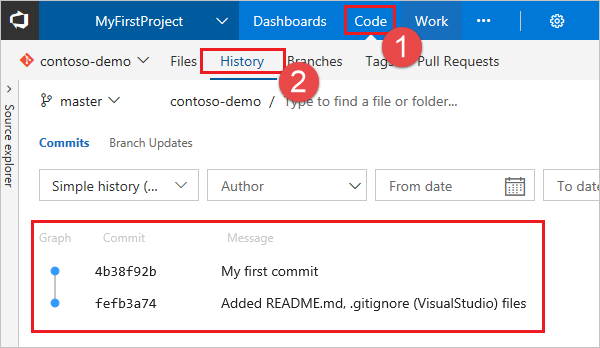
Switch back to the web portal and select History from the Code view to view your new commit. The new repo has two commits. The first is the commit where the README and .gitignore were added when the repo was created. The second is the commit you just made.
Switch to the Files tab and select the README file to view your changes.
Sự kiện
21 giờ 17 thg 3 - 10 giờ 21 thg 3
Tham gia chuỗi buổi gặp gỡ để xây dựng các giải pháp AI có thể mở rộng dựa trên các trường hợp sử dụng trong thế giới thực với các nhà phát triển và chuyên gia đồng nghiệp.
Đăng ký ngayĐào tạo
Mô-đun
Manage changes to your Bicep code by using Git - Training
Learn how to use Git version control with your Bicep files and infrastructure as code.
Chứng chỉ
Chứng chỉ của Microsoft: Chuyên gia Kỹ sư DevOps - Certifications
Chứng chỉ này đo lường khả năng của bạn để hoàn thành các nhiệm vụ kỹ thuật sau: Thiết kế và thực hiện các quy trình và thông tin liên lạc, thiết kế và thực hiện một chiến lược kiểm soát nguồn, thiết kế và thực hiện quy trình xây dựng và phát hành, phát triển một kế hoạch bảo mật và tuân thủ, và thực hiện một chiến lược thiết bị.