Note
Access to this page requires authorization. You can try signing in or changing directories.
Access to this page requires authorization. You can try changing directories.
Windows provides a set of standard cursors that can be used by applications. The following cursor identifiers are defined in WinUser.h:
| Value | Meaning |
|---|---|
| IDC_ARROW MAKEINTRESOURCE(32512) |
 Normal select
 |
| IDC_IBEAM MAKEINTRESOURCE(32513) |
 Text select
 |
| IDC_WAIT MAKEINTRESOURCE(32514) |
 Busy
Busy |
| IDC_CROSS MAKEINTRESOURCE(32515) |
 Precision select
 |
| IDC_UPARROW MAKEINTRESOURCE(32516) |
 Alternate select
 |
| IDC_SIZENWSE MAKEINTRESOURCE(32642) |
 Diagonal resize 1
 |
| IDC_SIZENESW MAKEINTRESOURCE(32643) |
 Diagonal resize 2
 |
| IDC_SIZEWE MAKEINTRESOURCE(32644) |
 Horizontal resize
 |
| IDC_SIZENS MAKEINTRESOURCE(32645) |
 Vertical resize
 |
| IDC_SIZEALL MAKEINTRESOURCE(32646) |
 Move
Move |
| IDC_NO MAKEINTRESOURCE(32648) |
 Unavailable
 |
| IDC_HAND MAKEINTRESOURCE(32649) |
 Link select
 |
| IDC_APPSTARTING MAKEINTRESOURCE(32650) |
 Working in background
 |
| IDC_HELP MAKEINTRESOURCE(32651) |
 Help select
 |
| IDC_PIN MAKEINTRESOURCE(32671) |
 Location select
 |
| IDC_PERSON MAKEINTRESOURCE(32672) |
 Person select
 |
A number of additional cursors are also available that do not have identifiers defined in WinUser.h (or are considered obsolete):
| Value | Meaning |
|---|---|
| MAKEINTRESOURCE(32631) |  A pen cursor.
 |
| MAKEINTRESOURCE(32652) |  A scrolling cursor with arrows pointing north and south.
 |
| MAKEINTRESOURCE(32653) |  A scrolling cursor with arrows pointing west and east.
 |
| MAKEINTRESOURCE(32654) |  A scrolling cursor with arrows pointing north, south, east, and west.
 |
| MAKEINTRESOURCE(32655) |  A scrolling cursor with an arrow pointing north.
 |
| MAKEINTRESOURCE(32656) |  A scrolling cursor with an arrow pointing south.
 |
| MAKEINTRESOURCE(32657) |  A scrolling cursor with an arrow pointing west.
 |
| MAKEINTRESOURCE(32658) |  A scrolling cursor with an arrow pointing east.
 |
| MAKEINTRESOURCE(32659) |  A scrolling cursor with arrows pointing north and west.
 |
| MAKEINTRESOURCE(32660) |  A scrolling cursor with arrows pointing north and east.
 |
| MAKEINTRESOURCE(32661) |  A scrolling cursor with arrows pointing south and west.
 |
| MAKEINTRESOURCE(32662) |  A scrolling cursor with arrows pointing south and east.
 |
| MAKEINTRESOURCE(32663) |  An arrow cd cursor.
 |
See Guidelines for information on using standard cursors.
Each standard cursor has a corresponding default image. The user can replace the default image of any standard cursor system-wide through mouse settings.
Custom cursors are designed for use in a specific application and can be any design the developer defines. The following illustration shows several custom cursors.
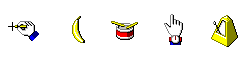
Cursors can be either monochrome or color (including 32bpp ARGB for per-pixel alpha transparency), and either static or animated.
HCURSOR and HICON both refer to the same underlying object type, but they are distinct handle types under strict Win32 typing and many cursor- or icon-specific functions accept only one of them. Pass a cursor handle to an icon function (or the reverse) only where the function is explicitly documented to accept both. The distinction between cursor and icon is recorded inside the object and affects behavior in a few cases - for example, GetIconInfo returns fIcon=FALSE for a cursor handle.
This overview provides information on the following topics:
- The Hot Spot
- The Mouse and the Cursor
- Cursor Creation
- The Window Class Cursor
- Cursor Sizes
- Cursor Location and Appearance
- Cursor Confinement
- Cursor Destruction
- Cursor Duplication
The Hot Spot
In the cursor, a pixel called the hot spot marks the exact screen location that is affected by a mouse event, such as clicking a mouse button. Typically, the hot spot is the focal point of the cursor. The system tracks and recognizes this point as the position of the cursor. For example, typical hot spots are the pixel at the tip of an arrow-shaped cursor and the pixel in the middle of a crosshair-shaped cursor. The following images shows two cursors from a drawing program, in which hot spots are associated with the tip of the brush and the crosshair of the paint can.

When a mouse input event occurs, the mouse driver translates the event into an appropriate mouse message that includes the coordinates of the hot spot. The system sends the mouse message to the window that contains the hot spot or to the window that is capturing mouse input. For more information, see Mouse Input.
The Mouse and the Cursor
The system reflects the movement of the mouse by moving the cursor on the screen accordingly. As the cursor moves over different parts of windows or into different windows, the system (or an application) changes the appearance of the cursor. For example, when the cursor crosses over a hyperlink, the system changes the cursor from an arrow to a hand.
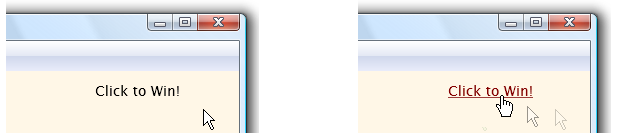
If the system does not have a mouse, the system displays and moves the cursor only when the user chooses certain system commands, such as those used to size or move a window. To provide the user with a method of displaying and moving the cursor when a mouse is not available, an application can use the cursor functions to simulate mouse movement. Given this simulation capability, the user can use the arrow keys to move the cursor.
Cursor Creation
Standard cursors are predefined and do not need to be created. Use LoadCursor or LoadImage to obtain an HCURSOR handle.
To create a custom cursor for an application, you typically use a graphics application and include the cursor as a resource in the application's resource-definition file. Like icon resources, cursor resources (.cur files or RT_CURSOR / RT_GROUP_CURSOR in a PE file) store multiple images at different sizes - see Icon Creation for details on the multi-image format. At run time, call LoadCursor to retrieve the cursor handle; the system automatically selects the best-matching image. To load a cursor directly from a .cur or .ani file, use LoadCursorFromFile or LoadImage with LR_LOADFROMFILE.
You can also create a custom cursor at run time by using CreateIconIndirect with an ICONINFO structure whose fIcon member is FALSE and whose xHotspot and yHotspot members specify the hot spot, or by using CreateCursor or CreateIconFromResourceEx with fIcon=FALSE. For examples, see Creating a Cursor and Creating an Alpha Blended Cursor.
The Window Class Cursor
When you register a window class using the RegisterClassEx function, set the hCursor field of WNDCLASSEX to the desired cursor handle. Every window of that class uses this cursor by default. For more information, see Class Cursor.
To override the class cursor for a specific window or hit-test area, process the WM_SETCURSOR message and call SetCursor. To replace the class cursor for all windows of a class, use SetClassLongPtr with GCLP_HCURSOR.
Cursor Sizes
The system reports the nominal cursor size via GetSystemMetrics with SM_CXCURSOR / SM_CYCURSOR. This is the size of the cursor image buffer; the visible cursor shape is typically smaller due to transparent edges. Unlike icon sizes, cursor sizes change in steps - not every DPI value produces a distinct cursor size. The standard sizes at default cursor size setting are:
| Display scale | DPI range | SM_CXCURSOR / SM_CYCURSOR |
|---|---|---|
| < 150% | < 144 DPI | 32x32 |
| 150-199% | 144-191 DPI | 48x48 |
| 200-299% | 192-287 DPI | 64x64 |
| 300-399% | 288-383 DPI | 96x96 |
| >= 400% | >= 384 DPI | 128x128 |
The user can also change the cursor size independently of DPI via Settings > Accessibility > Mouse pointer and touch > Size. Always call GetSystemMetrics with SM_CXCURSOR to get the actual effective size rather than assuming a fixed value. In per-monitor DPI-aware applications, use GetSystemMetricsForDpi with the DPI of the target monitor, which you can obtain with GetDpiForWindow or GetDpiForMonitor. For more information, see High DPI Desktop Application Development on Windows.
To retrieve the dimensions of a cursor from its handle, see Getting a Cursor size.
Cursor Location and Appearance
The system automatically displays a cursor for the mouse, updates its position on the screen, and redraws the cursor design associated with the window to which the cursor is pointing. You can obtain current screen coordinates of the cursor and move the cursor to any location on the screen by using the GetCursorPos and SetCursorPos functions, respectively. These functions return and accept coordinates in the logical coordinate space of the calling thread's DPI awareness context. To work in physical screen pixels regardless of DPI awareness, use GetPhysicalCursorPos and SetPhysicalCursorPos instead.
You can retrieve the handle to the current cursor by using the GetCursor function, and set the cursor by using the SetCursor function. SetCursor takes effect only while the calling thread owns mouse input - the reliable place to call it is in a WM_SETCURSOR handler. When handling WM_SETCURSOR, return TRUE after calling SetCursor; otherwise DefWindowProc will override the cursor with the class cursor. See Displaying a Cursor for an example.
You can hide and redisplay the cursor by using the ShowCursor function. This function maintains a per-thread visibility counter; the cursor is visible only when the counter is greater than or equal to zero. Each call to ShowCursor(FALSE) must be paired with a call to ShowCursor(TRUE) - while the counter remains negative, the cursor stays hidden for that thread until enough ShowCursor(TRUE) calls bring the counter back to zero or above.
The GetCursorInfo function retrieves whether the cursor is hidden or shown, its handle, and its screen coordinates.
Cursor Confinement
You can confine the cursor to a rectangular area on the screen by using the ClipCursor function. This is useful for when the user must respond to a certain event within the confined area of the rectangle. For example, you might use ClipCursor to confine the cursor to a modal dialog box, preventing the user from interacting with other windows until the dialog box is closed.
The GetClipCursor function retrieves the screen coordinates of the rectangular area to which the cursor is temporarily confined. When it is necessary to confine the cursor, you can also use this function to save the coordinates of the original area in which the cursor can move. Then, you can restore the cursor to the original area when the new confinement is no longer necessary.
Cursor Destruction
The same ownership rules that apply to icons also apply to cursors - destroy owned cursor handles by calling DestroyCursor. See Icon Destruction for the shared handle exceptions that apply to both icons and cursors. The cursor-specific shared functions are LoadCursor and LoadCursorFromFile - both return shared cursors that must not be passed to DestroyCursor. LoadCursor always uses LR_SHARED internally regardless of the instance parameter; use LoadImage without LR_SHARED if you need an owned handle.
Cursor Duplication
The CopyCursor function creates a new independent cursor object with the same image and hotspot as the original - analogous to CopyIcon for icons. The copy is owned by the caller.
For information on how to add, remove, or replace cursor resources in executable files, see Resources.