你当前正在访问 Microsoft Azure Global Edition 技术文档网站。 如果需要访问由世纪互联运营的 Microsoft Azure 中国技术文档网站,请访问 https://docs.azure.cn。
适用于 .NET 的 Azure CDN 库入门
可以使用适用于 .NET 的 Azure CDN 库来自动创建和管理 CDN 配置文件和终结点。 本教程介绍一个简单的 .NET 控制台应用程序的创建示例,演示几个可用的操作。 本教程不会详细介绍适用于 .NET 的 Azure CDN 库的所有方面。
需要 Visual Studio 2015 来完成本教程。 可免费下载 Visual Studio Community 2015。
提示
可在 MSDN 上下载本教程中已完成的项目。
先决条件
在编写 CDN 管理代码之前,需要做一些准备工作,使代码能够与 Azure 资源管理器进行交互。 若要执行此准备工作,你需要:
- 创建一个资源组,用来包含本教程中创建的 CDN 配置文件
- 配置 Microsoft Entra ID 以提供应用程序的身份验证
- 将权限应用于资源组,使得只有来自 Microsoft Entra 租户的已授权用户可与 CDN 配置文件进行交互
创建资源组
登录到 Azure 门户。
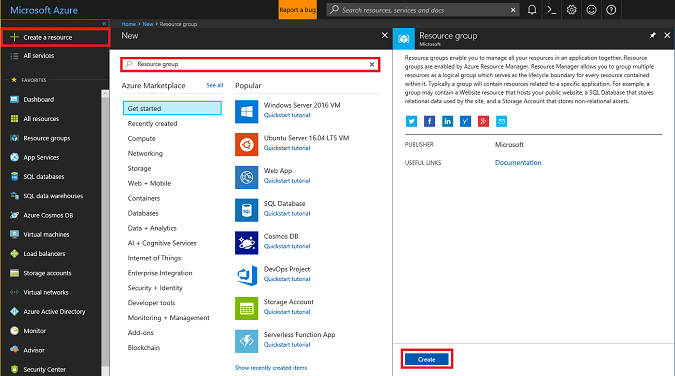
单击“创建资源”。
搜索“资源组”,在“资源组”窗格中,单击“创建”。
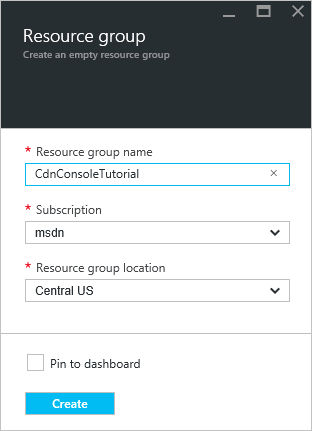
将资源组命名为 CdnConsoleTutorial。 选择订阅,并选择离你最近的位置。 如果需要,可以单击“固定到仪表板”复选框,将资源组固定到门户中的仪表板。 这便于以后查找该资源组。 完成选择后,单击“创建”。
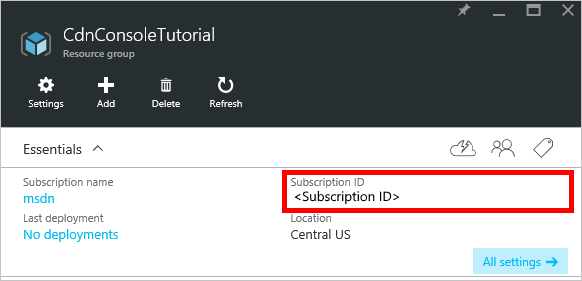
创建资源组之后,如果未将它固定到仪表板,可以依次单击“浏览”和“资源组”找到它。 要打开该资源组,请单击它。 记下订阅 ID。 稍后需要用到此信息。
创建 Microsoft Entra 应用程序并应用权限
可通过下面两种方式在 Microsoft Entra ID 中进行应用身份验证:个人用户或服务主体。 服务主体类似于 Windows 中的服务帐户。 不是向特定用户授予与 CDN 配置文件进行交互的权限,权限将授予给服务主体。 服务主体通常用于自动化的非交互式流程。 尽管本教程涉及到编写交互式控制台应用,但重点介绍服务主体身份验证方式。
创建服务主体需要多个步骤,包括创建 Microsoft Entra 应用程序。 要创建它,请遵循此教程。
重要
请务必遵循链接的教程中的所有步骤。 必须完全按照说明完成操作,这很重要。 请务必记下租户 ID、租户域名(通常是 .onmicrosoft.com 域,除非指定了自定义域)、客户端 ID 和客户端身份验证密钥,因为稍后需要用到这些信息。 请妥善保护客户端 ID 和客户端身份验证密钥,因为任何人都可以使用这些凭据以服务主体的身份执行操作。
执行“Configure multi-tenant application”(配置多租户应用程序)步骤时,请选择“No”(否)。
执行将应用程序分配到角色步骤时,请使用前面创建的资源组 CdnConsoleTutorial 而不是“读者”角色来分配“CDN 配置文件参与者”角色。 在资源组中为应用程序分配“CDN 配置文件参与者”角色之后,请返回本教程。
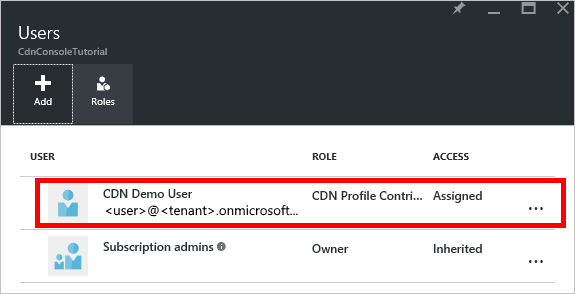
创建服务主体并分配“CDN 配置文件参与者”角色之后,资源组的“用户”边栏选项卡看起来应类似于以下图像。

交互式用户身份验证
如果想要使用交互式个人用户身份验证而不是服务主体身份验证,操作过程与适用于服务主体的过程类似。 事实上,需要遵循的过程基本相同,只是要做一些轻微的更改。
重要
仅当选择使用个人用户身份验证而不是服务主体身份验证时,才要执行后续步骤。
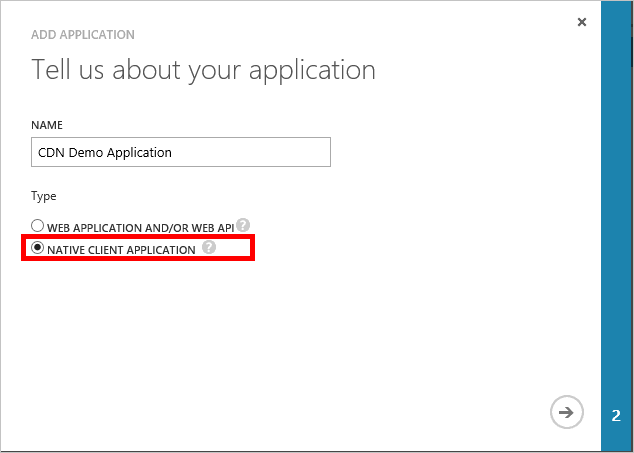
创建应用程序时,请选择“本机应用程序”而不是“Web 应用程序”。
在下一页上,系统会提示输入重定向 URI。 系统不会验证 URI,但请记住输入的 URI。 稍后需要用到此信息。
不需要创建客户端身份验证密钥。
我们不会向“CDN 配置文件参与者”角色分配服务主体,而是分配个人用户或组。 在本示例中,可以看到已将“CDN 演示用户”分配到“CDN 配置文件参与者”角色。
创建项目并添加 NuGet 包
现在我们已经为 CDN 配置文件创建了一个资源组,并且向 Microsoft Entra 应用程序授予了管理该组中的 CDN 配置文件和终结点的权限,接下来可以开始创建应用程序了。
重要
已弃用 Microsoft.IdentityModel.Clients.ActiveDirectory NuGet 包和 Azure AD 身份验证库 (ADAL)。 自 2020 年 6 月 30 以来,未添加任何新功能。 强烈建议进行升级。 有关详细信息,请参阅迁移指南。
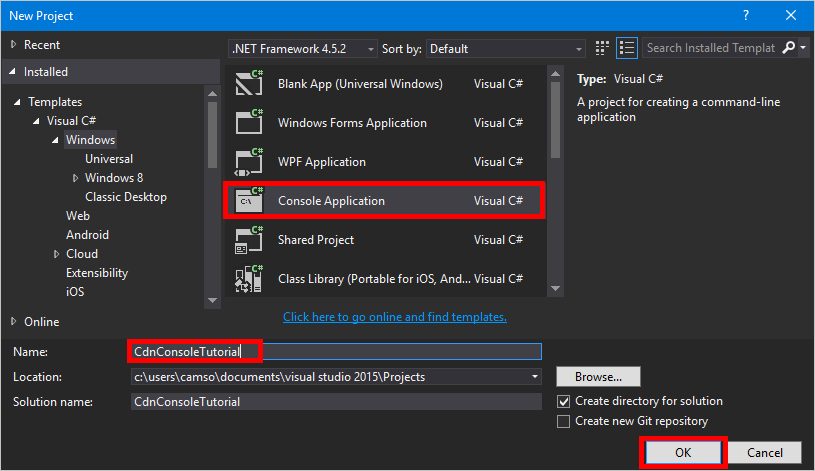
在 Visual Studio 2015 中,依次选择“文件”、“新建”和“项目...”以打开新建项目对话框。 展开“Visual C# ”,并在左侧窗格中选择“Windows”。 在中心窗格中选择“控制台应用程序”。 为项目命名,然后选择“确定”。
我们的项目将使用 NuGet 包中包含的部分 Azure 库。 让我们将这些库添加到项目中。
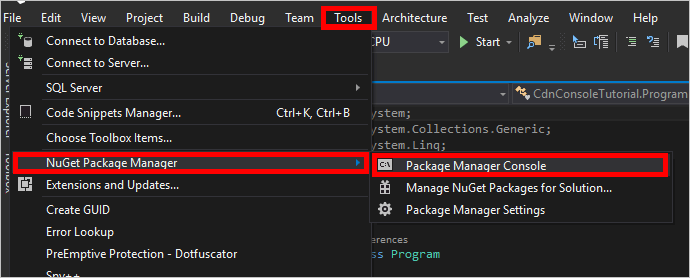
依次选择“工具”菜单、“Nuget 包管理器”和“包管理器控制台”。
在“包管理器控制台”中,执行以下命令以安装 Active Directory 验证库 (ADAL) :
Install-Package Microsoft.Identity.Client执行以下命令来安装 Azure CDN 管理库:
Install-Package Microsoft.Azure.Management.Cdn
指令、常量、主方法和帮助器方法
让我们来编写程序的基本结构。
返回“Program.cs”选项卡,将顶部的
using指令替换为以下命令:using System; using System.Collections.Generic; using Microsoft.Azure.Management.Cdn; using Microsoft.Azure.Management.Cdn.Models; using Microsoft.Azure.Management.Resources; using Microsoft.Azure.Management.Resources.Models; using Microsoft.Identity.Client; using Microsoft.Rest;我们需要定义我们的方法将使用的一些常量。 在
Program类中的Main方法之前,添加以下代码块。 请务必根据需要使用值替换占位符,包括 <尖括号> 。//Tenant app constants private const string clientID = "<YOUR CLIENT ID>"; private const string clientSecret = "<YOUR CLIENT AUTHENTICATION KEY>"; //Only for service principals private const string authority = "https://login.microsoftonline.com/<YOUR TENANT ID>/<YOUR TENANT DOMAIN NAME>"; //Application constants private const string subscriptionId = "<YOUR SUBSCRIPTION ID>"; private const string profileName = "CdnConsoleApp"; private const string endpointName = "<A UNIQUE NAME FOR YOUR CDN ENDPOINT>"; private const string resourceGroupName = "CdnConsoleTutorial"; private const string resourceLocation = "<YOUR PREFERRED AZURE LOCATION, SUCH AS Central US>";也要在该类级别上定义这两个变量。 我们稍后将使用这些变量来确定我们的配置文件和终结点是否已存在。
static bool profileAlreadyExists = false;
static bool endpointAlreadyExists = false;
按如下所示替换
Main方法:static void Main(string[] args) { //Get a token AuthenticationResult authResult = GetAccessToken(); // Create CDN client CdnManagementClient cdn = new CdnManagementClient(new TokenCredentials(authResult.AccessToken)) { SubscriptionId = subscriptionId }; ListProfilesAndEndpoints(cdn); // Create CDN Profile CreateCdnProfile(cdn); // Create CDN Endpoint CreateCdnEndpoint(cdn); Console.WriteLine(); // Purge CDN Endpoint PromptPurgeCdnEndpoint(cdn); // Delete CDN Endpoint PromptDeleteCdnEndpoint(cdn); // Delete CDN Profile PromptDeleteCdnProfile(cdn); Console.WriteLine("Press Enter to end program."); Console.ReadLine(); }我们的一些其他方法会用“是/否”问题提示用户。 添加以下方法,使其更容易:
private static bool PromptUser(string Question)
{
    Console.Write(Question + " (Y/N): ");
    var response = Console.ReadKey();
    Console.WriteLine();
    if (response.Key == ConsoleKey.Y)
    {
        return true;
    }
    else if (response.Key == ConsoleKey.N)
    {
        return false;
    }
    else
    {
        // They pressed something other than Y or N.  Let's ask them again.
        return PromptUser(Question);
    }
}
既然已经编写了程序的基本结构,我们现在应该创建 Main 方法调用的方法。
身份验证
在可以使用 Azure CDN 管理库之前,我们需要验证我们的服务主体并获取身份验证令牌。 此方法使用 Active Directory 身份验证库检索令牌。
private static AuthenticationResult GetAccessToken()
{
    AuthenticationContext authContext = new AuthenticationContext(authority);
    ClientCredential credential = new ClientCredential(clientID, clientSecret);
    AuthenticationResult authResult =
        authContext.AcquireTokenAsync("https://management.core.windows.net/", credential).Result;

    return authResult;
}
如果你使用个人用户身份验证,则 GetAccessToken 方法看起来会稍有不同。
重要
仅选择个人用户身份验证而不是服务主体身份验证时,才使用此代码示例。
private static AuthenticationResult GetAccessToken()
{
    AuthenticationContext authContext = new AuthenticationContext(authority);
    AuthenticationResult authResult = authContext.AcquireTokenAsync("https://management.core.windows.net/",
        clientID, new Uri("http://<redirect URI>"), new PlatformParameters(PromptBehavior.RefreshSession)).Result;

    return authResult;
}
请确保将 <redirect URI> 替换为你在 Microsoft Entra ID 中注册应用程序时输入的重定向 URI。
列出 CDN 配置文件和终结点
现在,我们已准备好执行 CDN 操作。 该方法执行的第一项操作是列出资源组中的所有配置文件和终结点,如果它找到常量中指定的配置文件和终结点名称的匹配项,则会记下该匹配项以备后用,这样我们就不会创建重复项。
private static void ListProfilesAndEndpoints(CdnManagementClient cdn)
{
    // List all the CDN profiles in this resource group
    var profileList = cdn.Profiles.ListByResourceGroup(resourceGroupName);
    foreach (Profile p in profileList)
    {
        Console.WriteLine("CDN profile {0}", p.Name);
        if (p.Name.Equals(profileName, StringComparison.OrdinalIgnoreCase))
        {
            // Hey, that's the name of the CDN profile we want to create!
            profileAlreadyExists = true;
        }

        //List all the CDN endpoints on this CDN profile
        Console.WriteLine("Endpoints:");
        var endpointList = cdn.Endpoints.ListByProfile(p.Name, resourceGroupName);
        foreach (Endpoint e in endpointList)
        {
            Console.WriteLine("-{0} ({1})", e.Name, e.HostName);
            if (e.Name.Equals(endpointName, StringComparison.OrdinalIgnoreCase))
            {
                // The unique endpoint name already exists.
                endpointAlreadyExists = true;
            }
        }
        Console.WriteLine();
    }
}
创建 CDN 配置文件和终结点
接下来创建一个配置文件。
private static void CreateCdnProfile(CdnManagementClient cdn)
{
    if (profileAlreadyExists)
    {
        Console.WriteLine("Profile {0} already exists.", profileName);
    }
    else
    {
        Console.WriteLine("Creating profile {0}.", profileName);
        ProfileCreateParameters profileParms =
            new ProfileCreateParameters() { Location = resourceLocation, Sku = new Sku(SkuName.StandardVerizon) };
        cdn.Profiles.Create(profileName, profileParms, resourceGroupName);
    }
}
创建配置文件后,创建一个终结点。
private static void CreateCdnEndpoint(CdnManagementClient cdn)
{
    if (endpointAlreadyExists)
    {
        Console.WriteLine("Profile {0} already exists.", profileName);
    }
    else
    {
        Console.WriteLine("Creating endpoint {0} on profile {1}.", endpointName, profileName);
        EndpointCreateParameters endpointParms =
            new EndpointCreateParameters()
            {
                Origins = new List<DeepCreatedOrigin>() { new DeepCreatedOrigin("Contoso", "www.contoso.com") },
                IsHttpAllowed = true,
                IsHttpsAllowed = true,
                Location = resourceLocation
            };
        cdn.Endpoints.Create(endpointName, endpointParms, profileName, resourceGroupName);
    }
}
注意
上面的示例为终结点分配了名为 Contoso 的源,主机名为 www.contoso.com。 应该将其更改为指向你自己的源的主机名。
清除终结点
假设已经创建终结点,我们可能想在程序中执行的一个常见任务是清除终结点中的内容。
private static void PromptPurgeCdnEndpoint(CdnManagementClient cdn)
{
    if (PromptUser(String.Format("Purge CDN endpoint {0}?", endpointName)))
    {
        Console.WriteLine("Purging endpoint. Please wait...");
        cdn.Endpoints.PurgeContent(resourceGroupName, profileName, endpointName, new List<string>() { "/*" });
        Console.WriteLine("Done.");
        Console.WriteLine();
    }
}
注意
在上面的示例中,字符串 /* 表示我想清除终结点路径根目录中的所有内容。 这相当于在 Azure 门户的“清除”对话框中勾选“清除所有”。 在 CreateCdnProfile 方法中,我使用代码 Sku = new Sku(SkuName.StandardVerizon) 创建了“来自 Edgio 的 Azure CDN”配置文件。
删除 CDN 配置文件和终结点
最后的方法将删除我们的终结点和配置文件。
private static void PromptDeleteCdnEndpoint(CdnManagementClient cdn)
{
    if(PromptUser(String.Format("Delete CDN endpoint {0} on profile {1}?", endpointName, profileName)))
    {
        Console.WriteLine("Deleting endpoint. Please wait...");
        cdn.Endpoints.DeleteIfExists(endpointName, profileName, resourceGroupName);
        Console.WriteLine("Done.");
        Console.WriteLine();
    }
}

private static void PromptDeleteCdnProfile(CdnManagementClient cdn)
{
    if(PromptUser(String.Format("Delete CDN profile {0}?", profileName)))
    {
        Console.WriteLine("Deleting profile. Please wait...");
        cdn.Profiles.DeleteIfExists(profileName, resourceGroupName);
        Console.WriteLine("Done.");
        Console.WriteLine();
    }
}
运行程序
我们现在可以通过在 Visual Studio 中单击“启动”按钮来编译和运行程序。
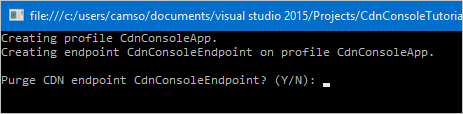
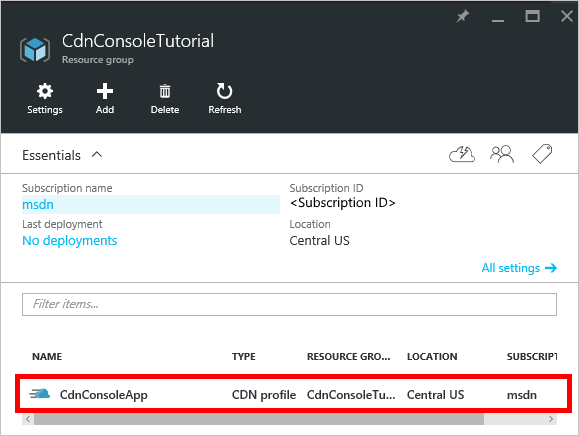
当程序达到上述提示时,应该能够返回到 Azure 门户中的资源组,并看到已经创建了配置文件。
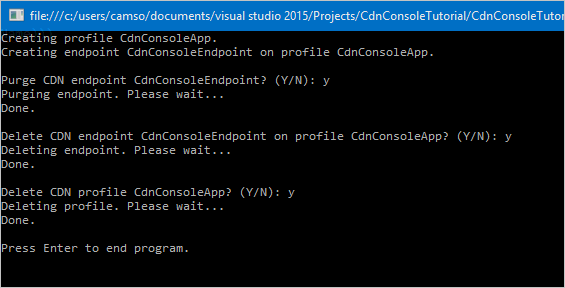
然后,我们可以确认提示,运行程序的其余步骤。
后续步骤
要从本演练中查看完成的项目,请下载示例。
若要查找与适用于 .NET 的 Azure CDN 管理库有关的其他文档,请查看 MSDN 上的参考。
使用 PowerShell 管理 CDN 资源。