Here I will show step-by-step how to make a VPN tunnel to connect two Virtual Networks (VNets) with different deployment models: classic deployment (ASM) and Azure Resource Manager (ARM).
Before we begin we need to install the latest version of Azure PowerShell. Also if you already created the VNets, make sure the IP address range between VNets do not overlap, if they do make the necessary changes.
Creating the Virtual Networks
First let's start by creating the classic Virtual Network. Note: I'll use the classic portal to create this VNet, however you can use the New portal.
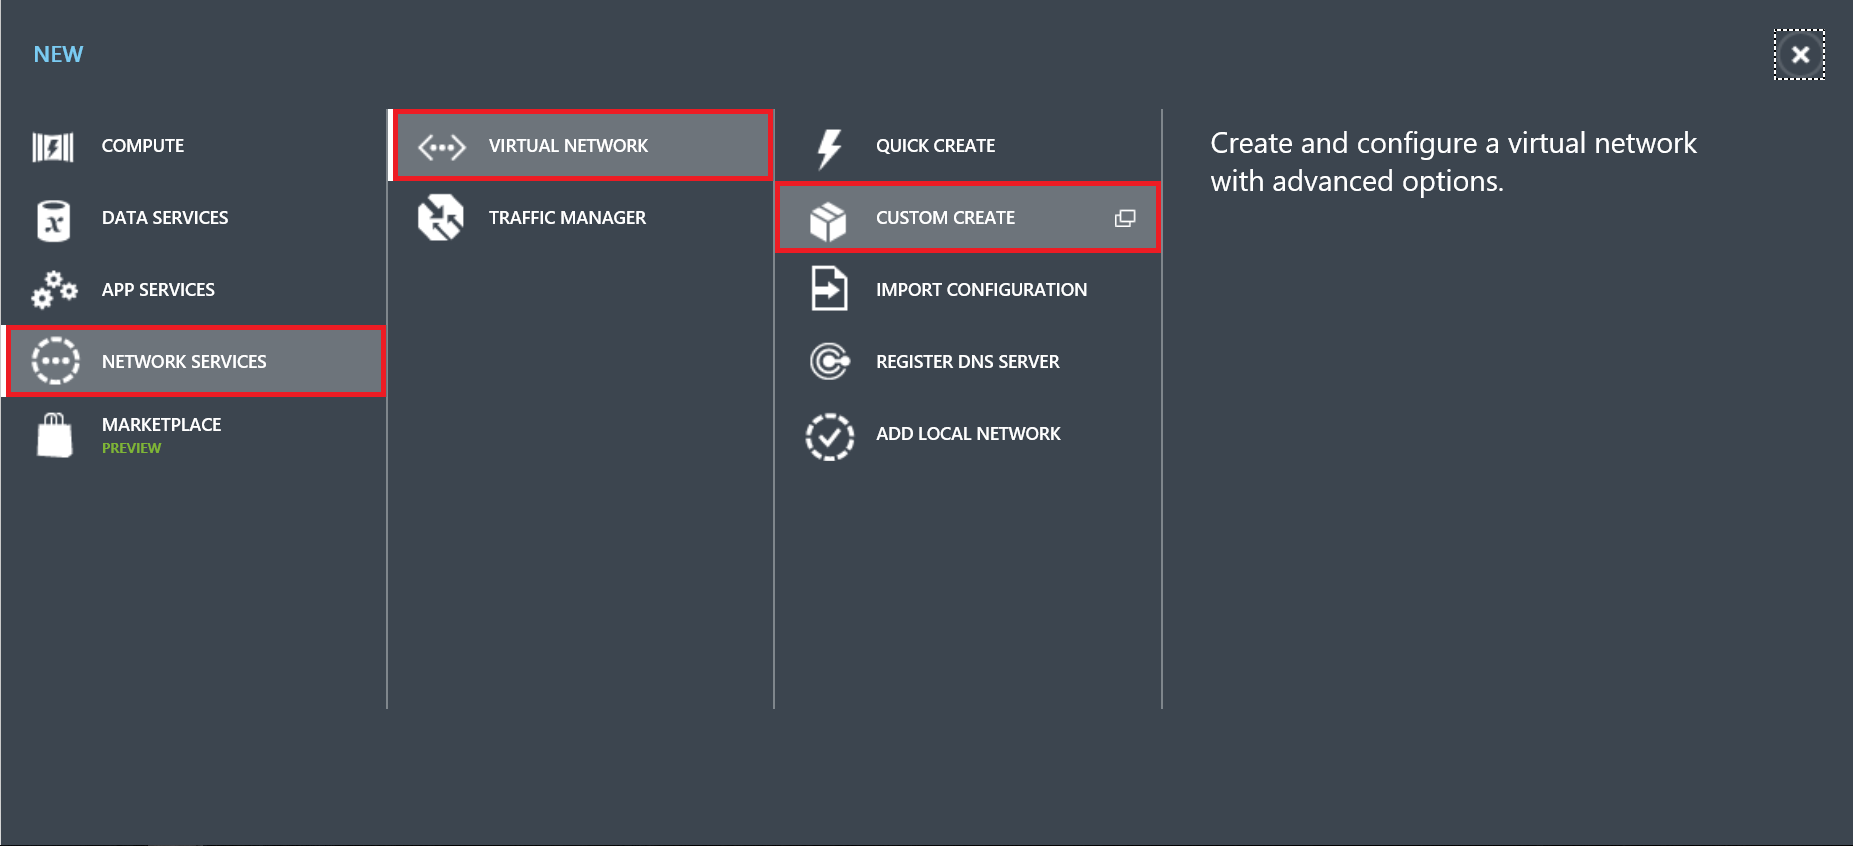
To create the classic VNet click on the NEW button on the bottom left corner of your Azure portal (Classic portal), click on NETWOKR SERVICES, VIRTUAL NETWORK, and CUSTOM CREATE. The CREATE A VIRTUAL NETWORK windows will open.
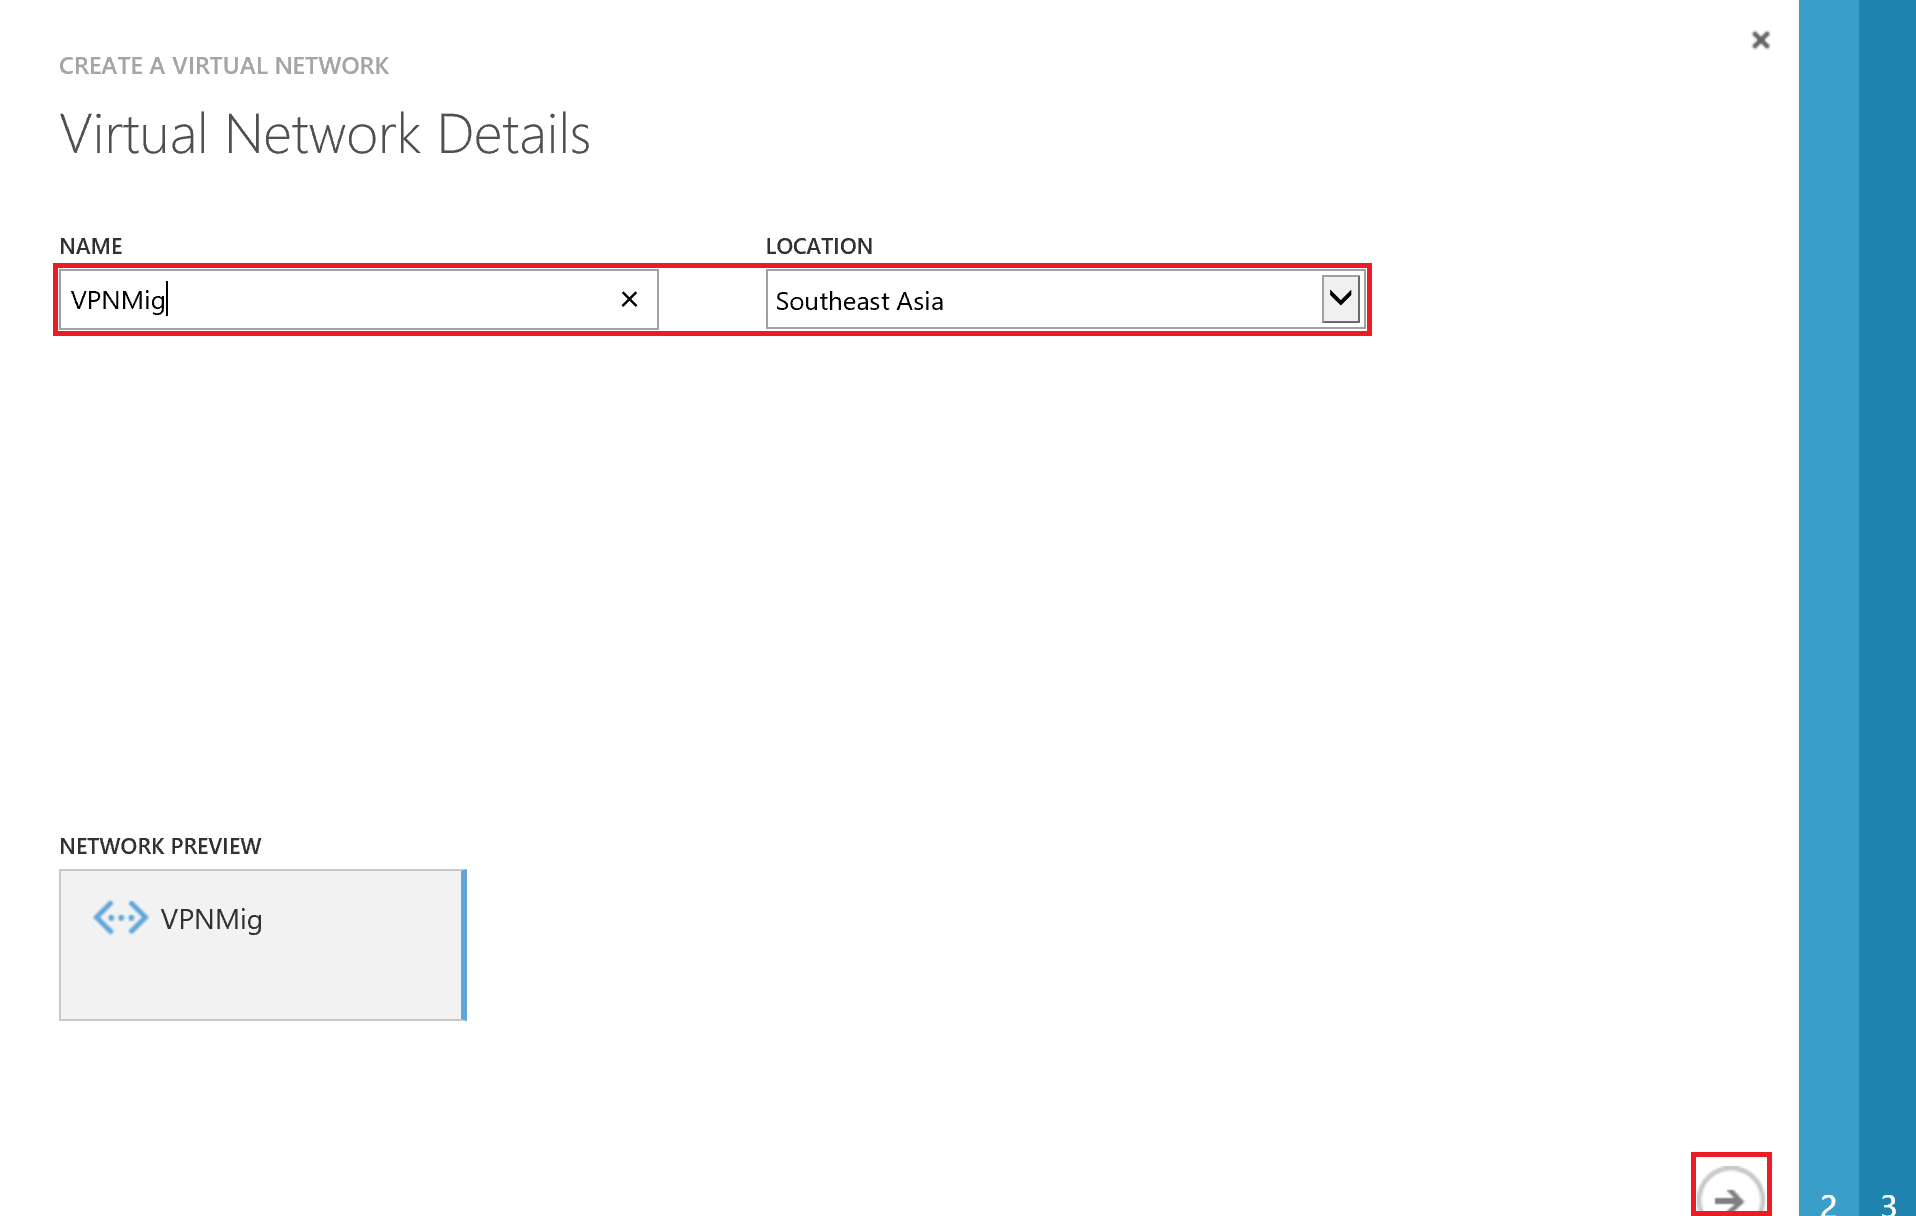
On the Virtual Network Details page write the NAME of the Virtual Network (I called VPNMig1 but in the post I'll refer to this VNet as classic VNet), the LOCATION (if you have more than one subscription, you need to select the Azure SUBSCRIPTION you want to use). Continue to the next page by clicking on the arrow on the lower left.
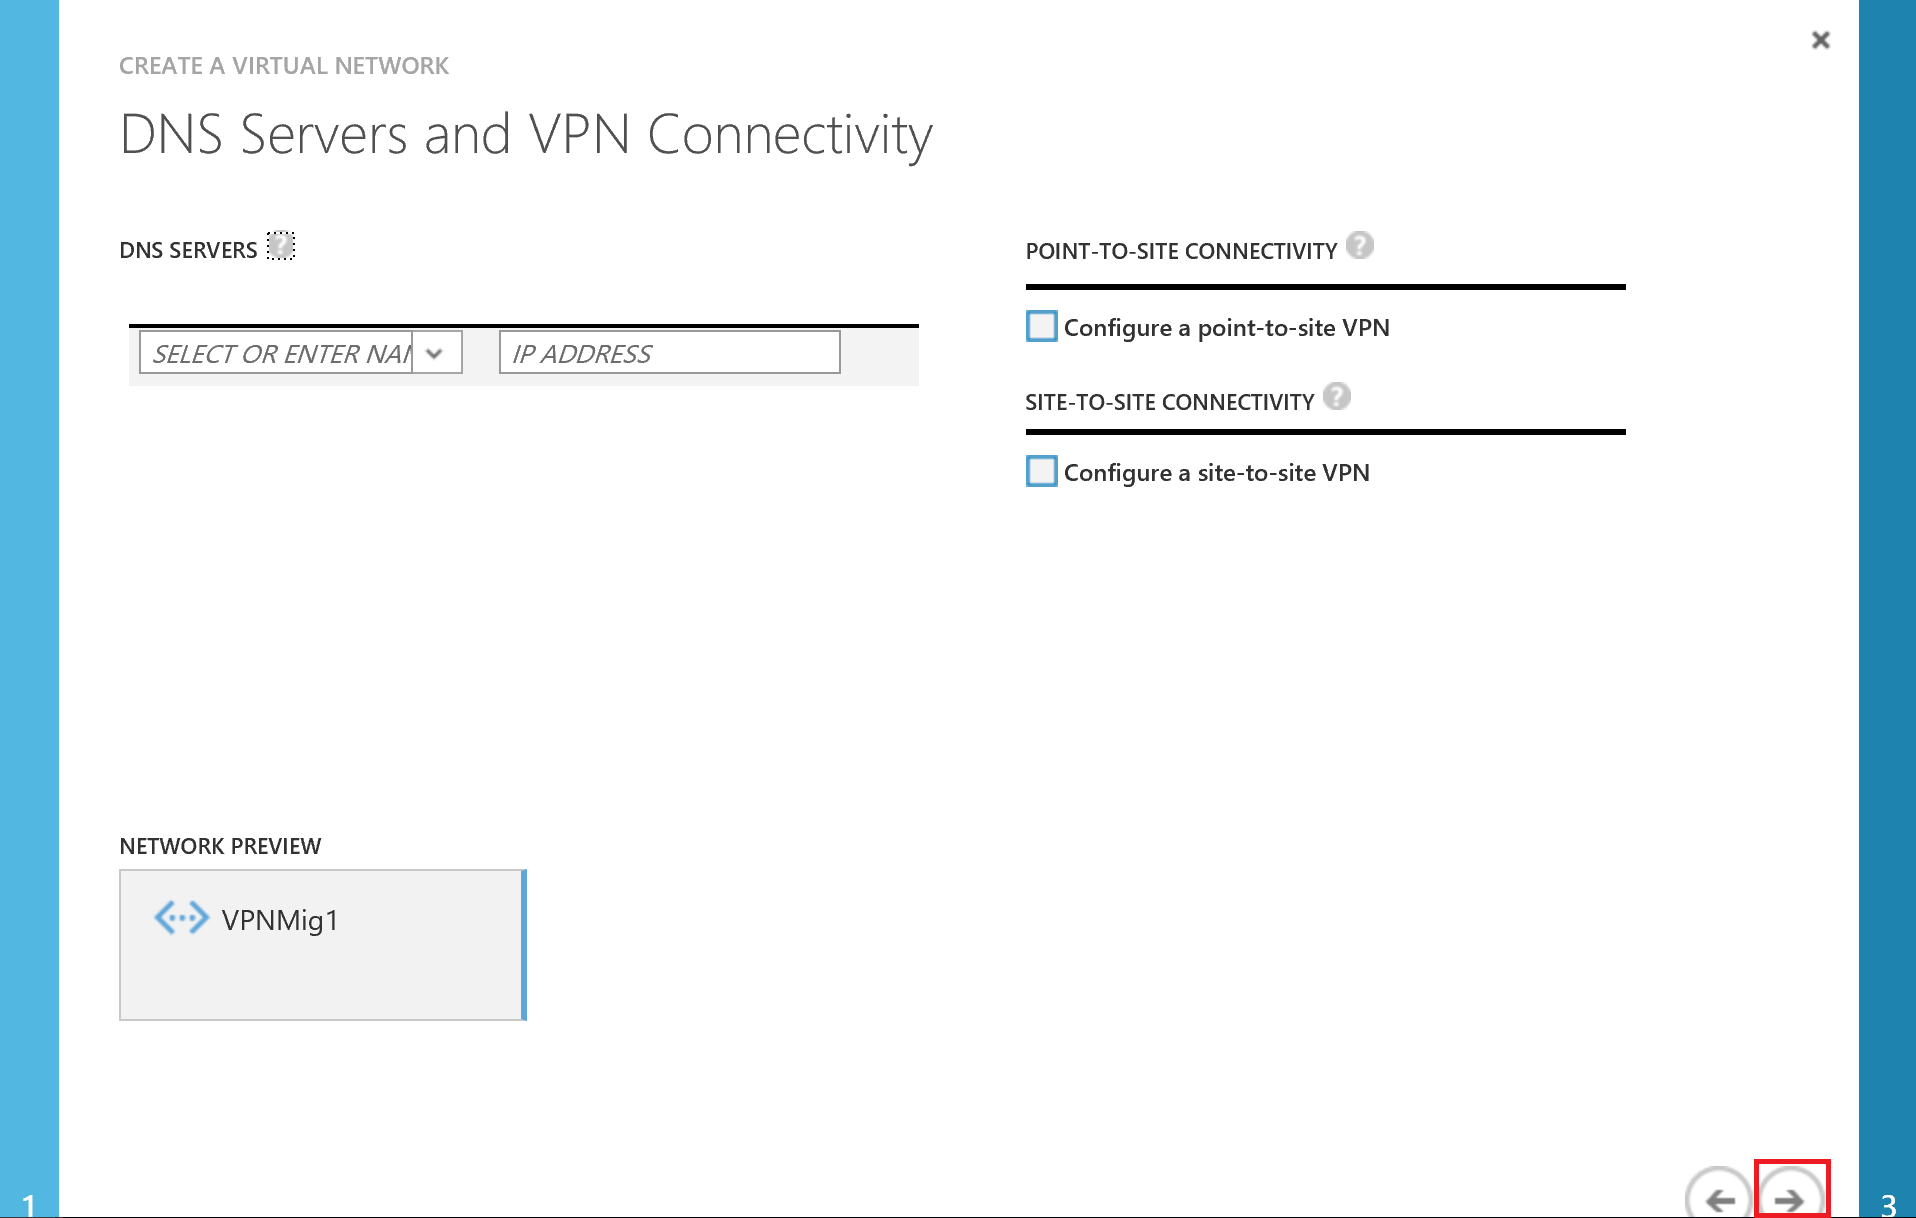
On the DNS Server and VPN Connectivity page, I'll do nothing and continue to the next page (you can set a DNS server if you wish).
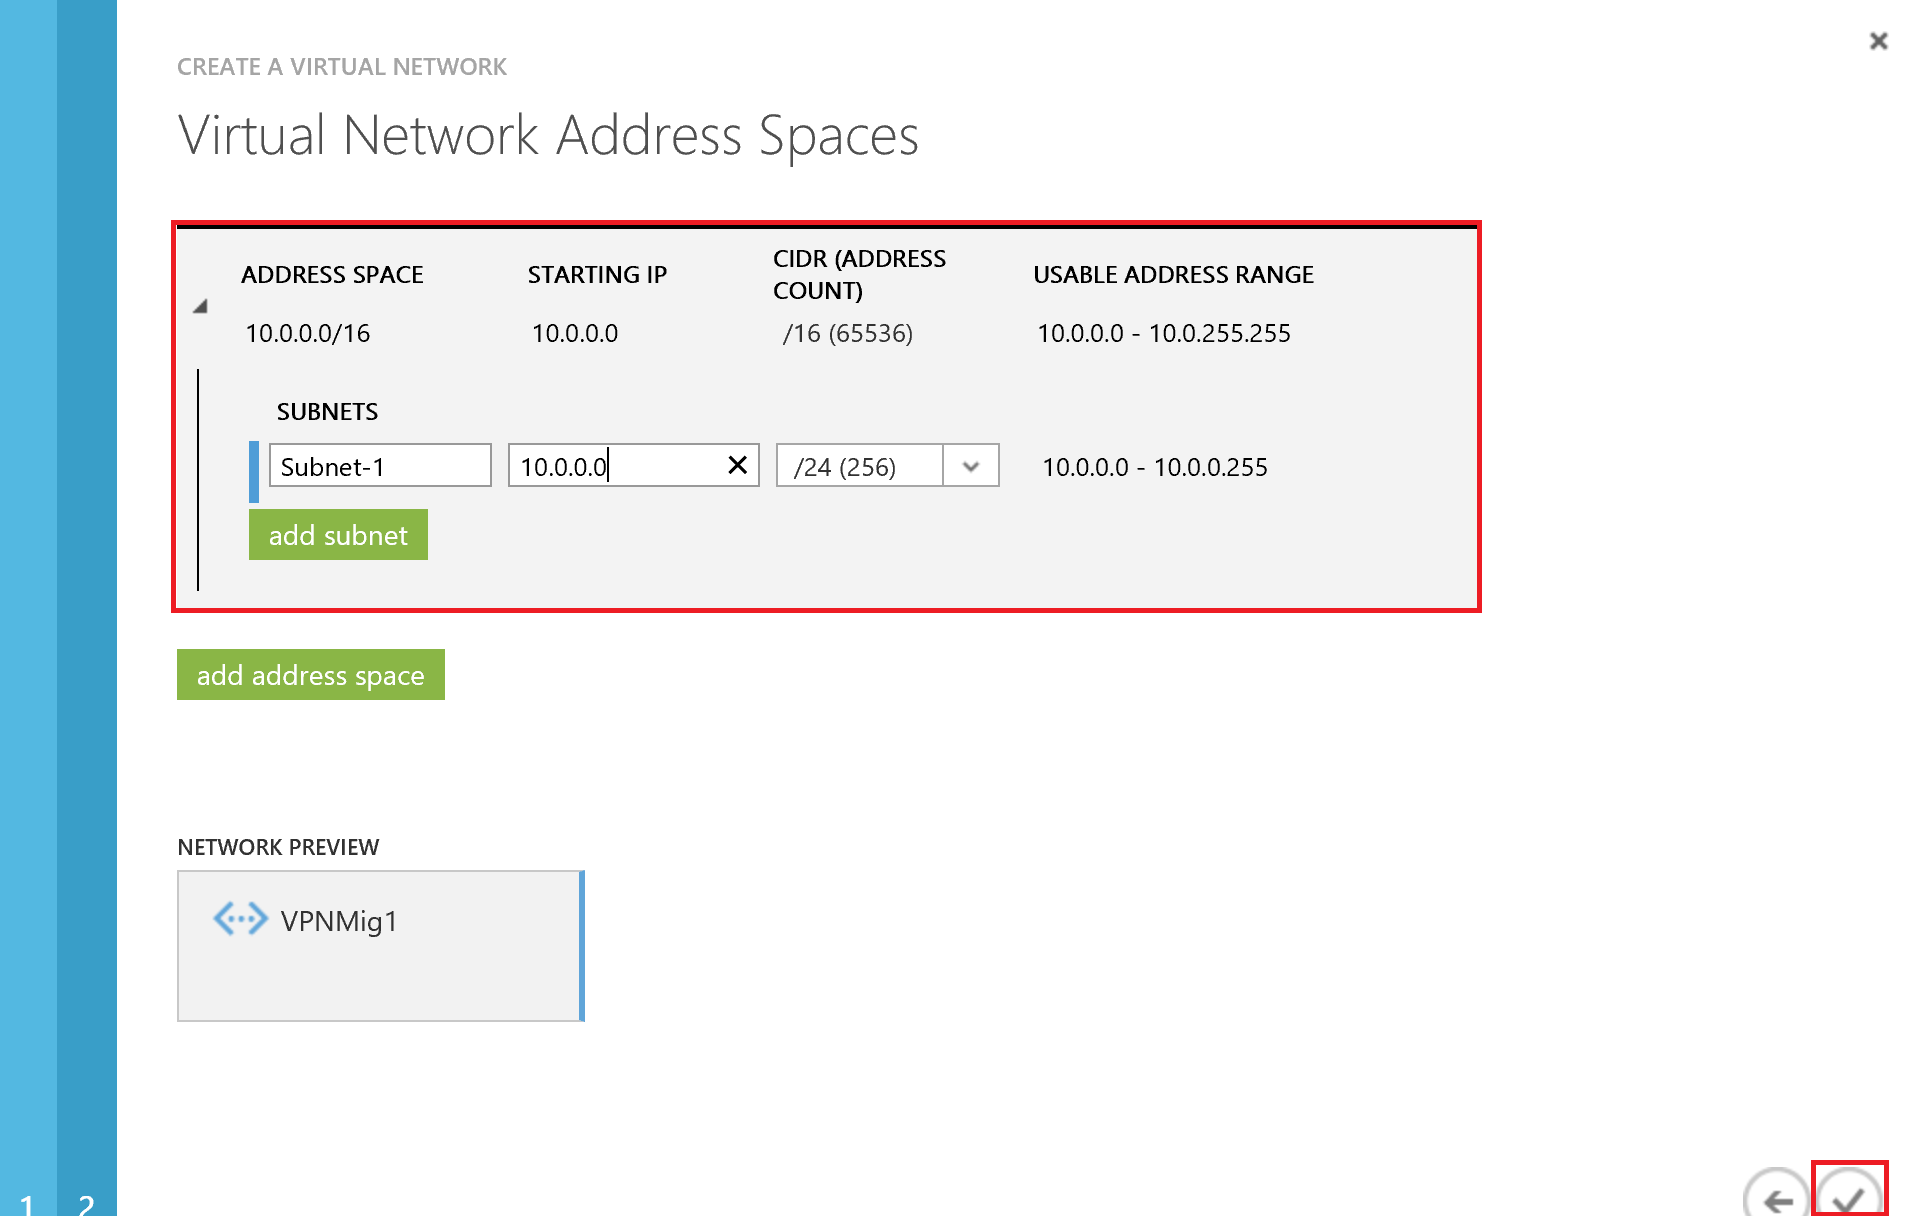
On the Virtual Network Address Spaces page, write the STARTING IP address (I'll use 10.0.0.0 for the classic VNet) and select the CIDR (ADDRESS COUNT) prefix (I selected /16 for the classic VNet). Also modify the CIDR prefix for the Subnet-1 to the prefix you need (I will set it to /24). Click the checkmark to finish.
With this we created our classic VNet (VPNMig1).

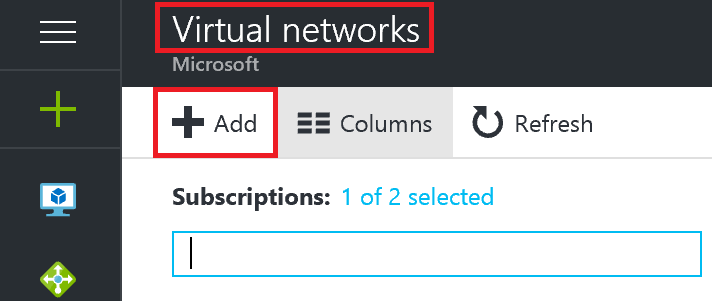
Next, we can create our ARM VNet. On the new portal navigate to Virtual Networks (Note: do not confuse it with the classic Virtual Network, the icon is same <···> but the ARM VNet has green dots). Then click the plus symbol ( + Add) at the top of the Virtual Networks panel to add an new VNet.
On the Create virtual network windows. Write the Name of the VNet (I called it VPNMig2), select the Address space (make sure it does not overlap to the address spaces of the classic VNet; in this case I'll set this VNet to 192.168.10.0/24). Select the Subnet name (I left the default name), the Subnet address range (192.168.10.0/25), select your Subscription, the name for the Resource group, and the Location (I'll set the location to East US). Then click on Create.

The ARM VNet is created.

Configure the Classic Virtual Network
Now that we have the two Virtual Networks created let us begin with the configuration. First we need to create a local site. Here I will start with the configuration of the classic VNet (I'll work with the New Portal from here on; if you want to try this steps on the classic portal you can find them in this blog). So first navigate to the Virtual network (classic) .
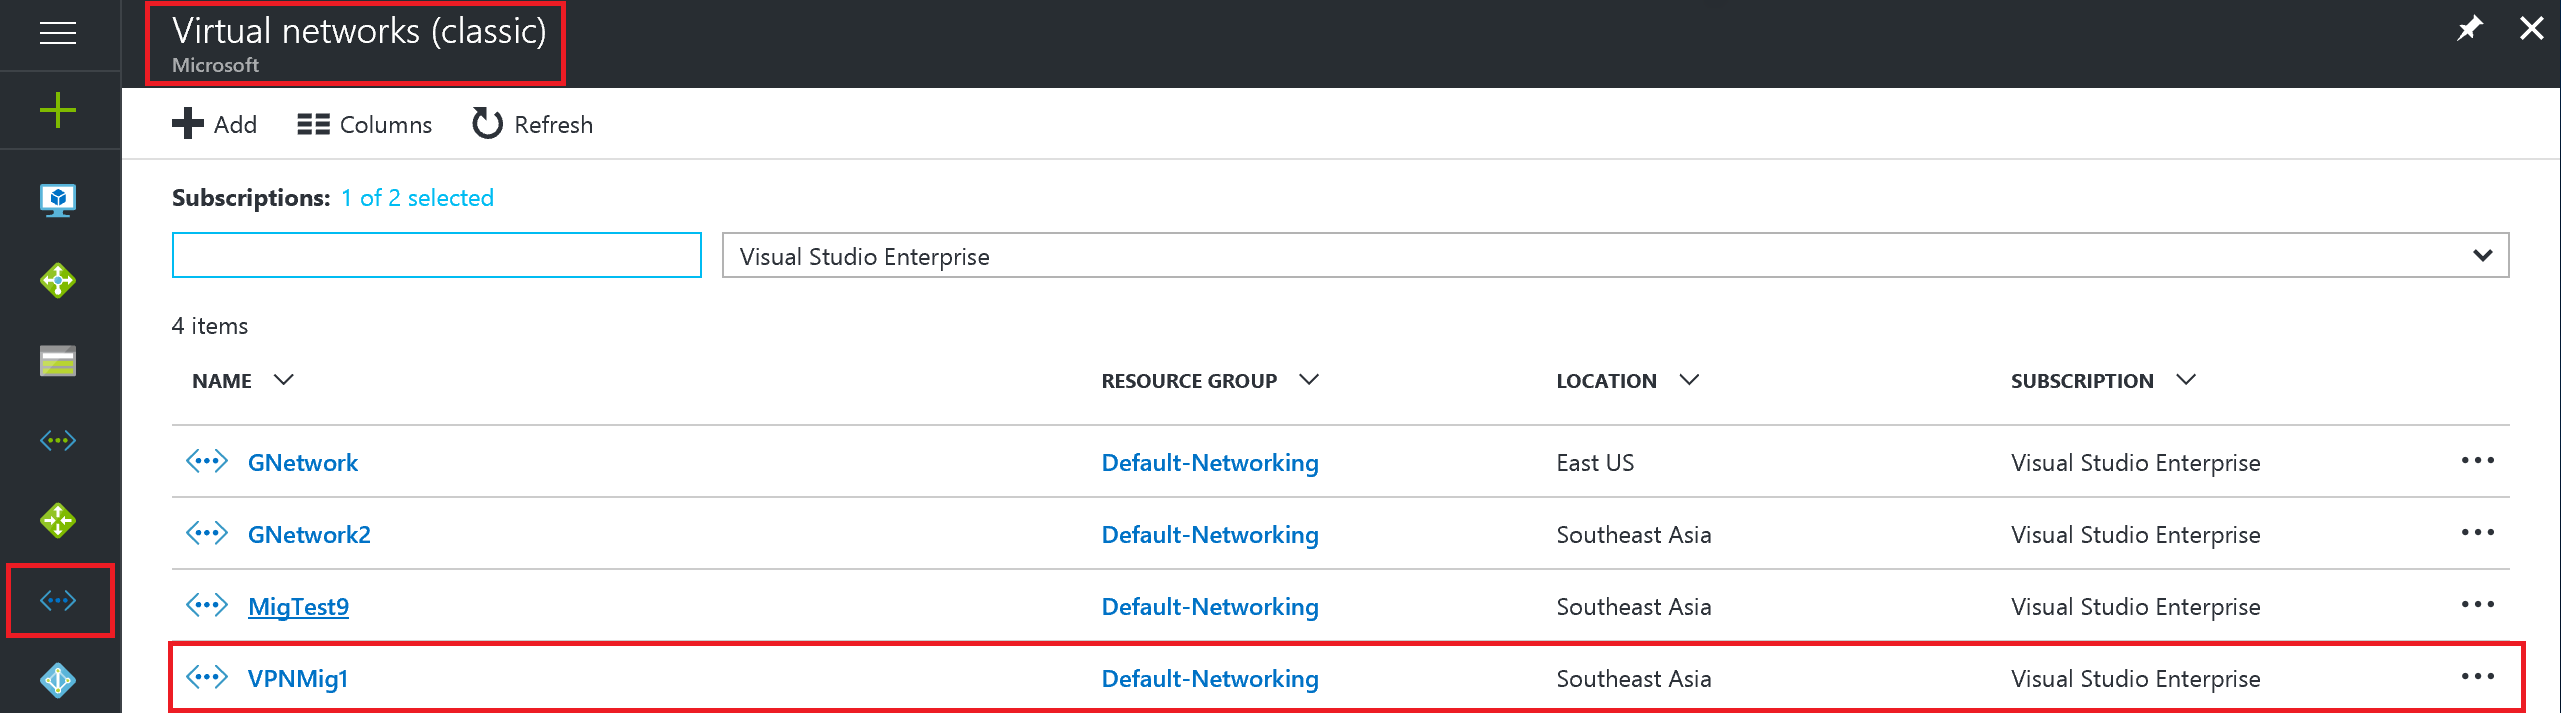
Then click on your classic VNet (VPNMig1 in my case) and Overview, and on VPN connections click on Gateway.

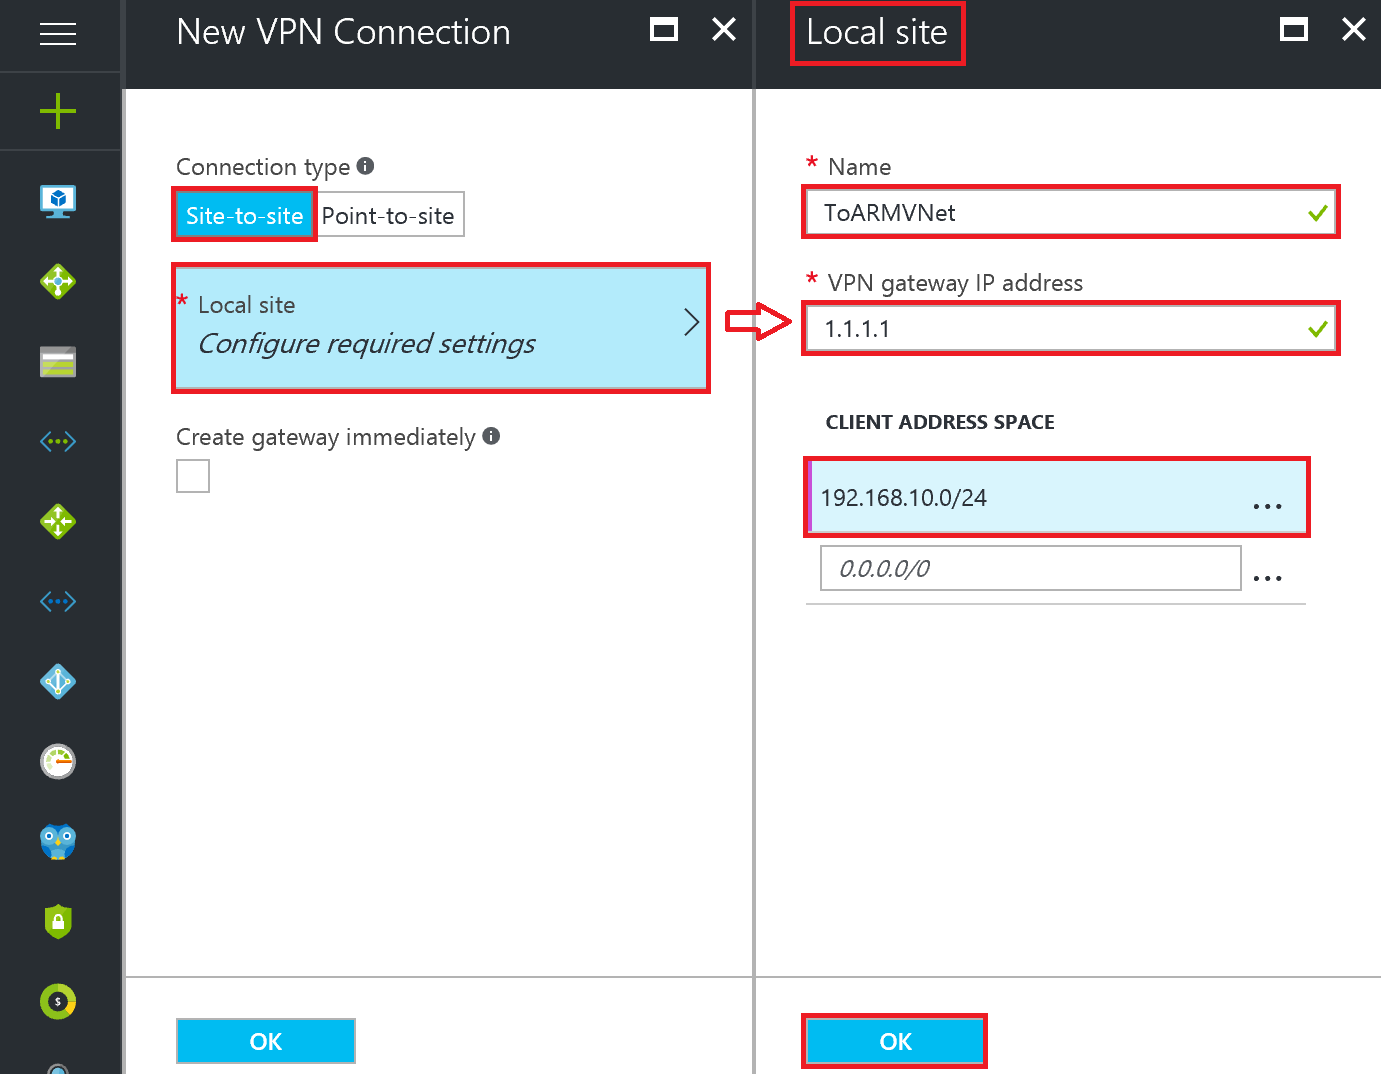
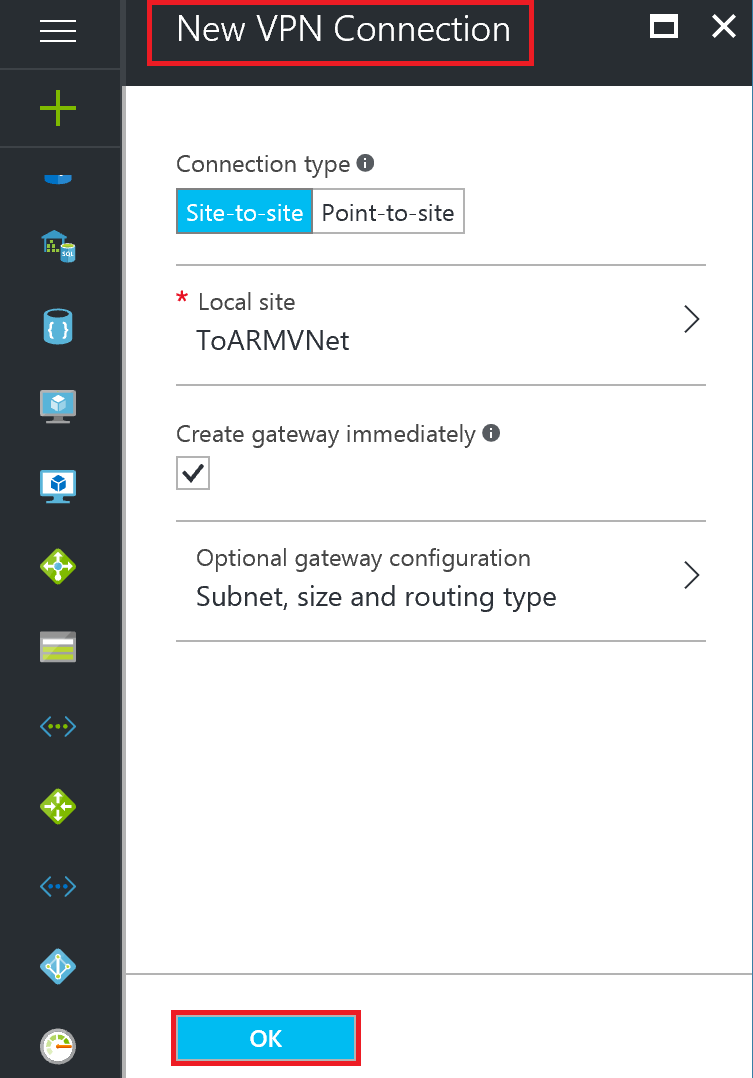
On the New VPN Connection page, on Connection type select Site-to-site. Then click on Local site, (this will open Local site page). On the Local site page, write the Name of the local site, on VPN gateway IP address, write the IP of the ARM VNet gateway (as I haven't created the gateway I'll write a temporal IP), and on CLIENT ADDRESS SPACE write the IP of the ARM VNet (192.168.10.0/24), and click the OK button on the Local site page.
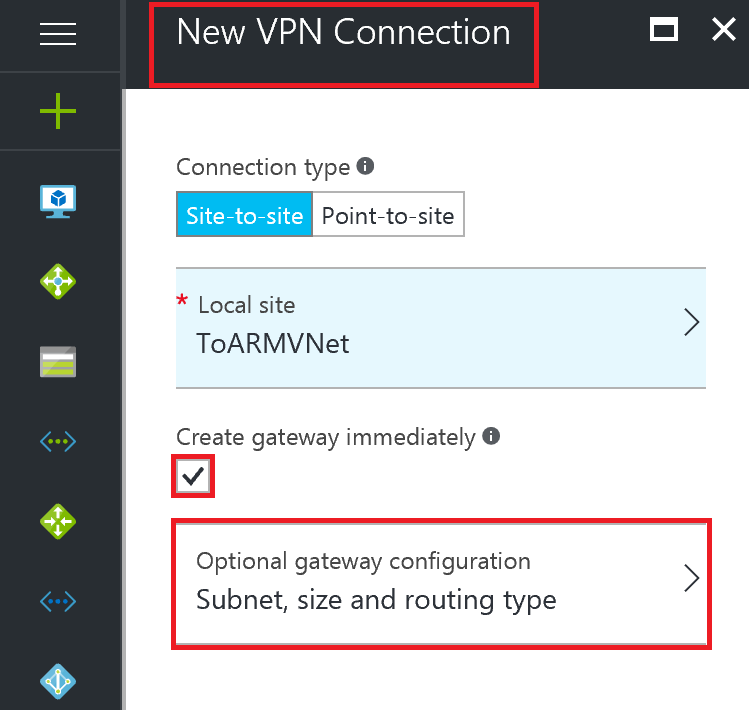
Next let us create the gateway for the classic VNet. Back on the New VPN Connection page just check the Create gateway immediately box, a new tab will be added for Optional gateway configuration, click on it.
On the Gateway configuration page, click on Subnet. A new Add Subnet windows will be open. There select the Address range for the gateway subnet and click the OK button on the Add Subnet page.

On the Gateway configuration page, Size refers to the gateway SKU. The higher the SKU, more CPU and bandwidth will be allocated to the gateway (I'll select Standard SKU). Leave the Routing Type on Dynamic and click on the OK button.

Finally, On the New VPN connection page click the OK button. Deployment of the Local site and the gateway will begin. Note that this step can take over 40min to complete.
If you open the classic portal and navigate to Virtual Networks, you will be able to confirm that the Gateway is being created.
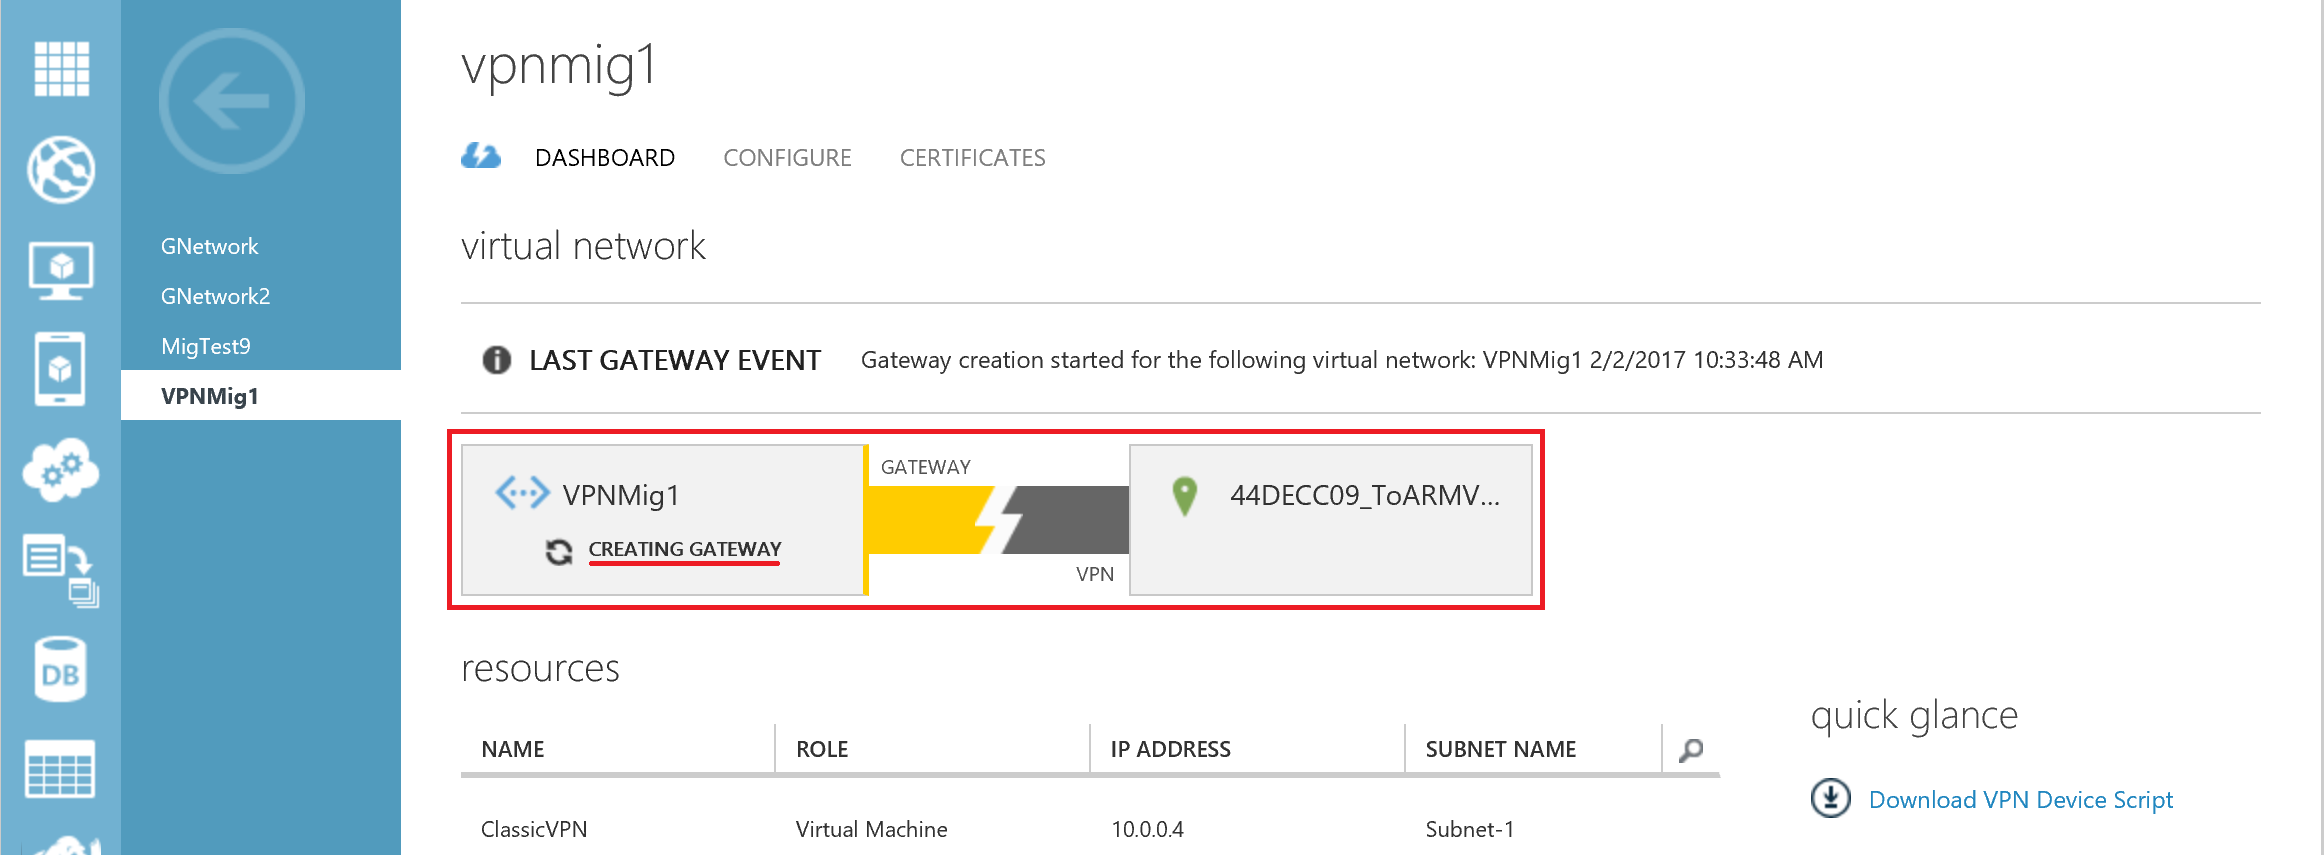
40 to 45 min later the gateway is finally created. Take note of the gateway IP address as we are going to need it.

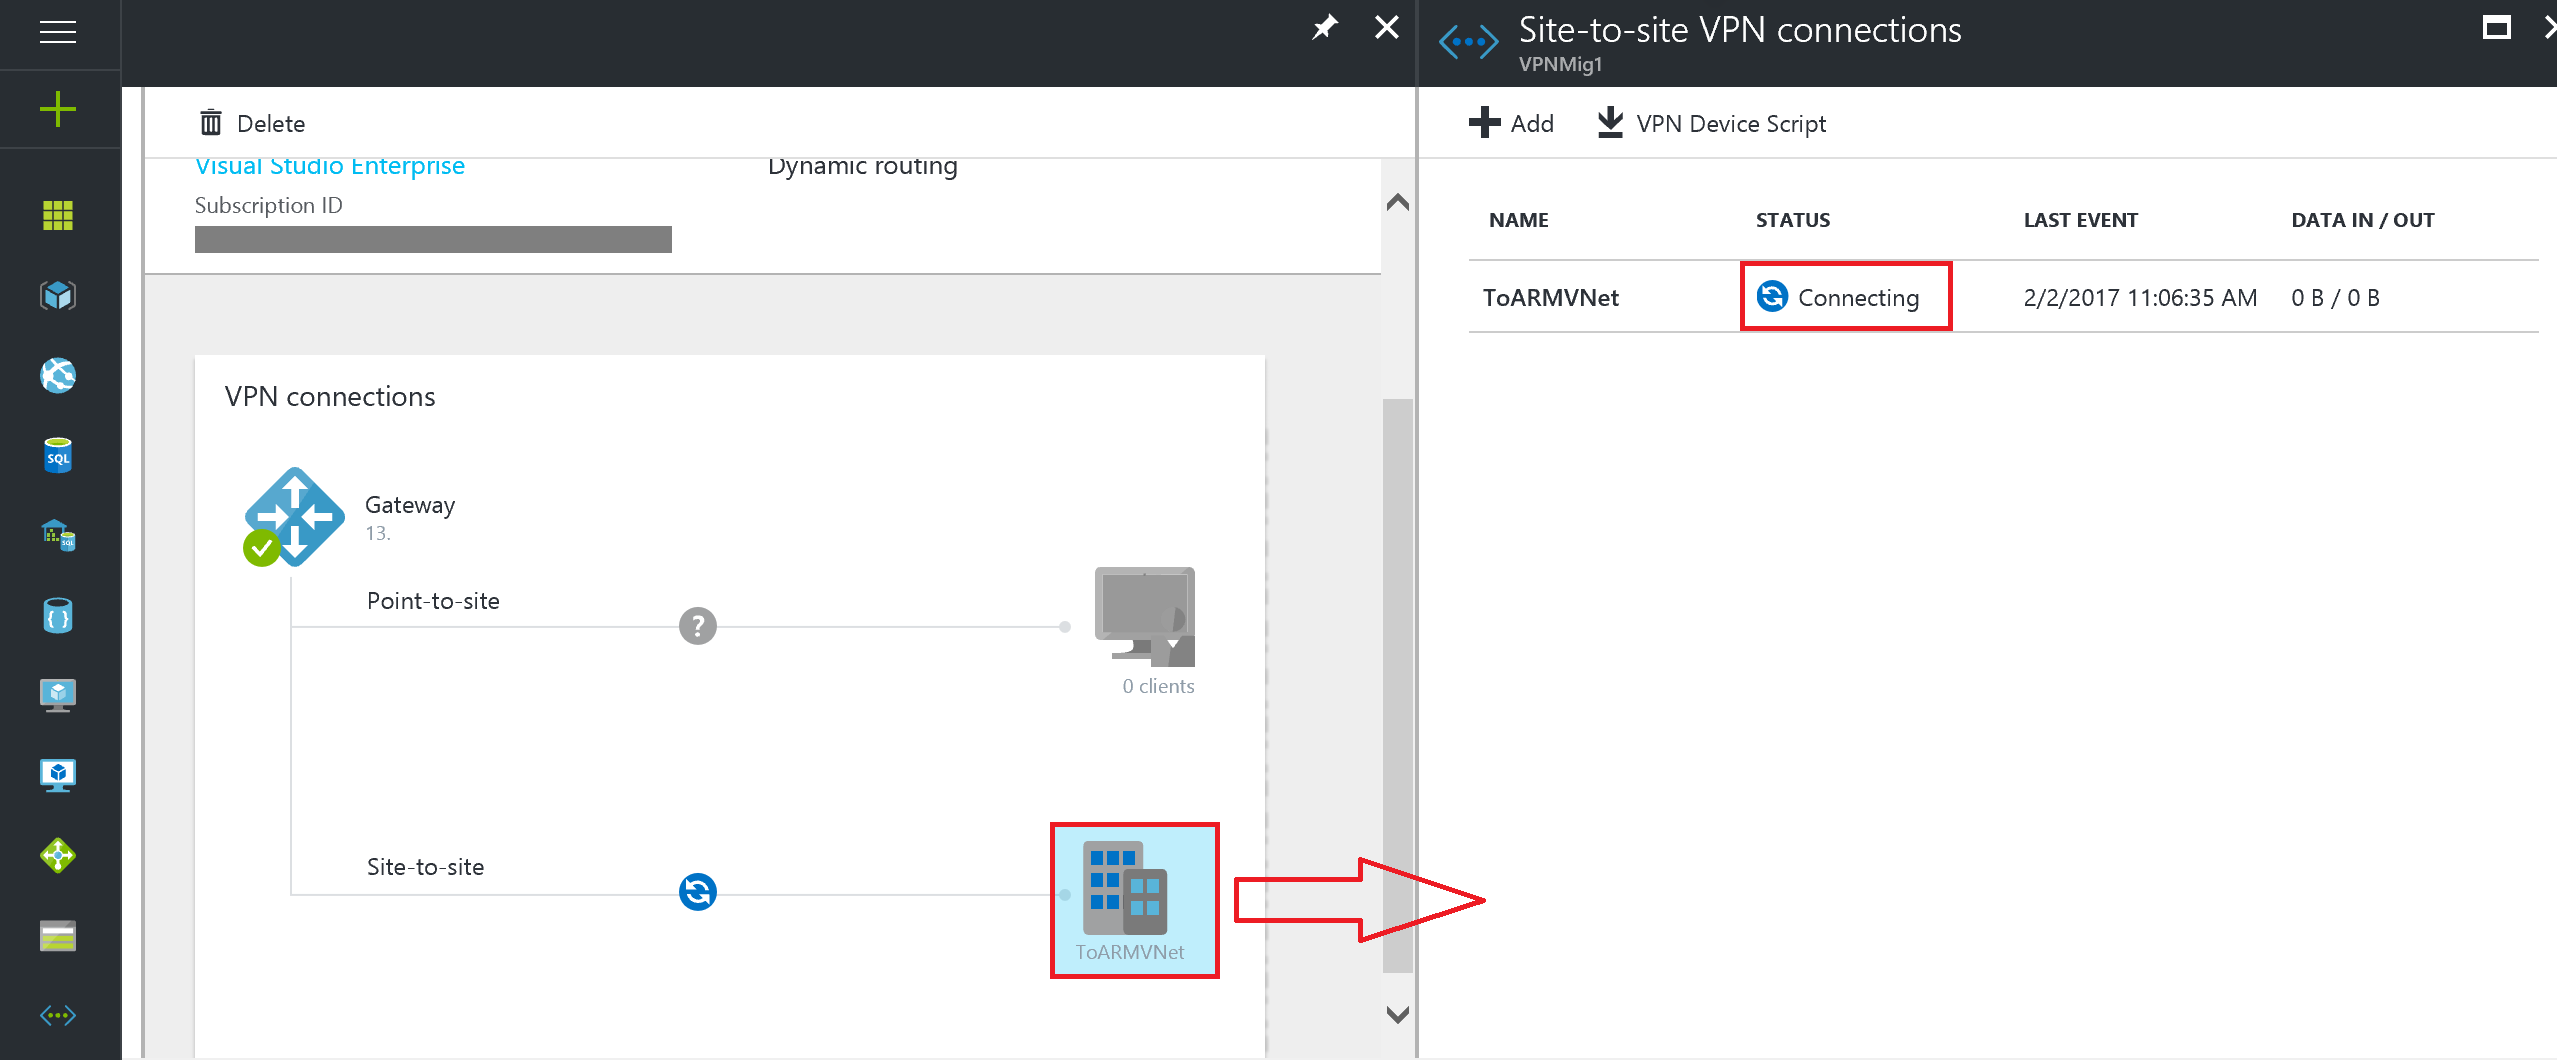
You can also check the status of your gateway connections by clicking on the building with the name of the local site you created (ToARMNet). Notice the local network site you created is listed as Connecting.
Configure the ARM Virtual Network
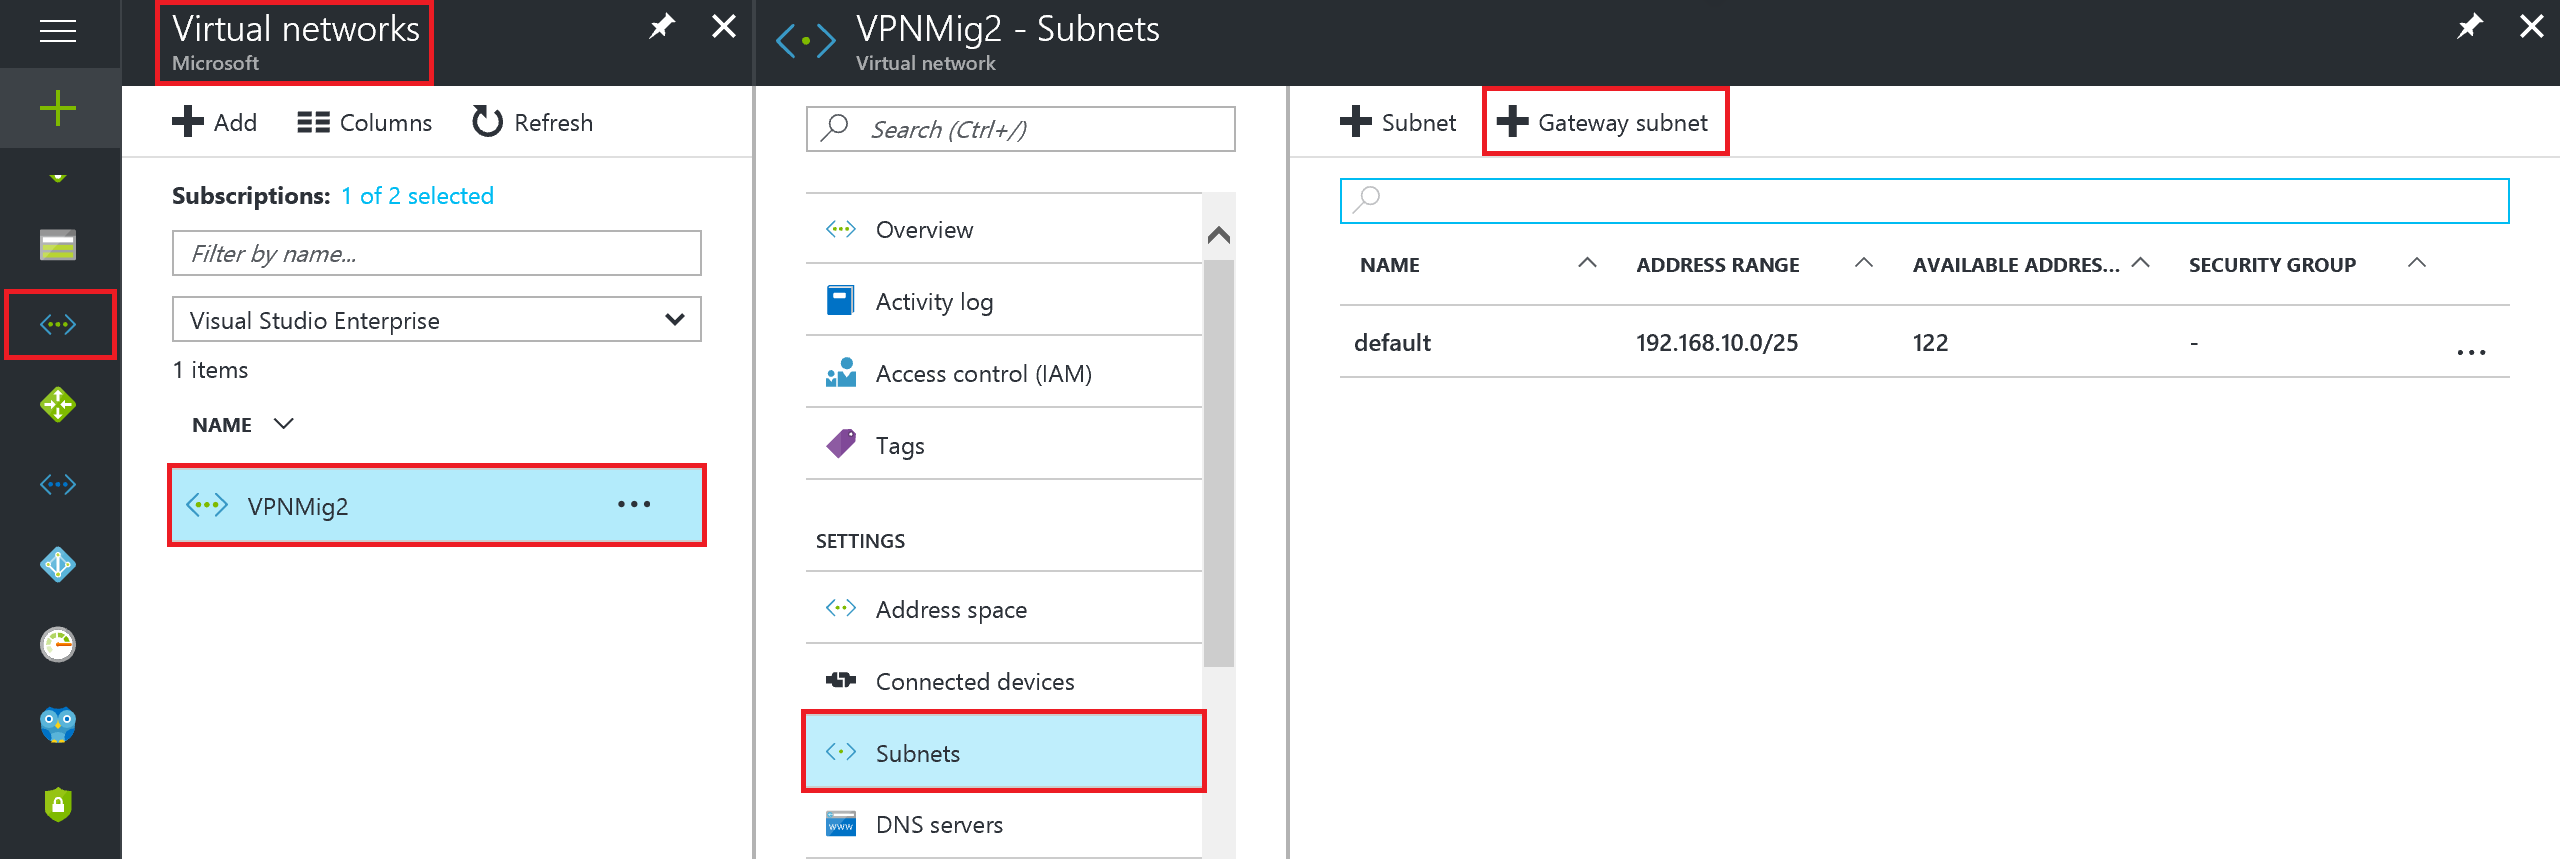
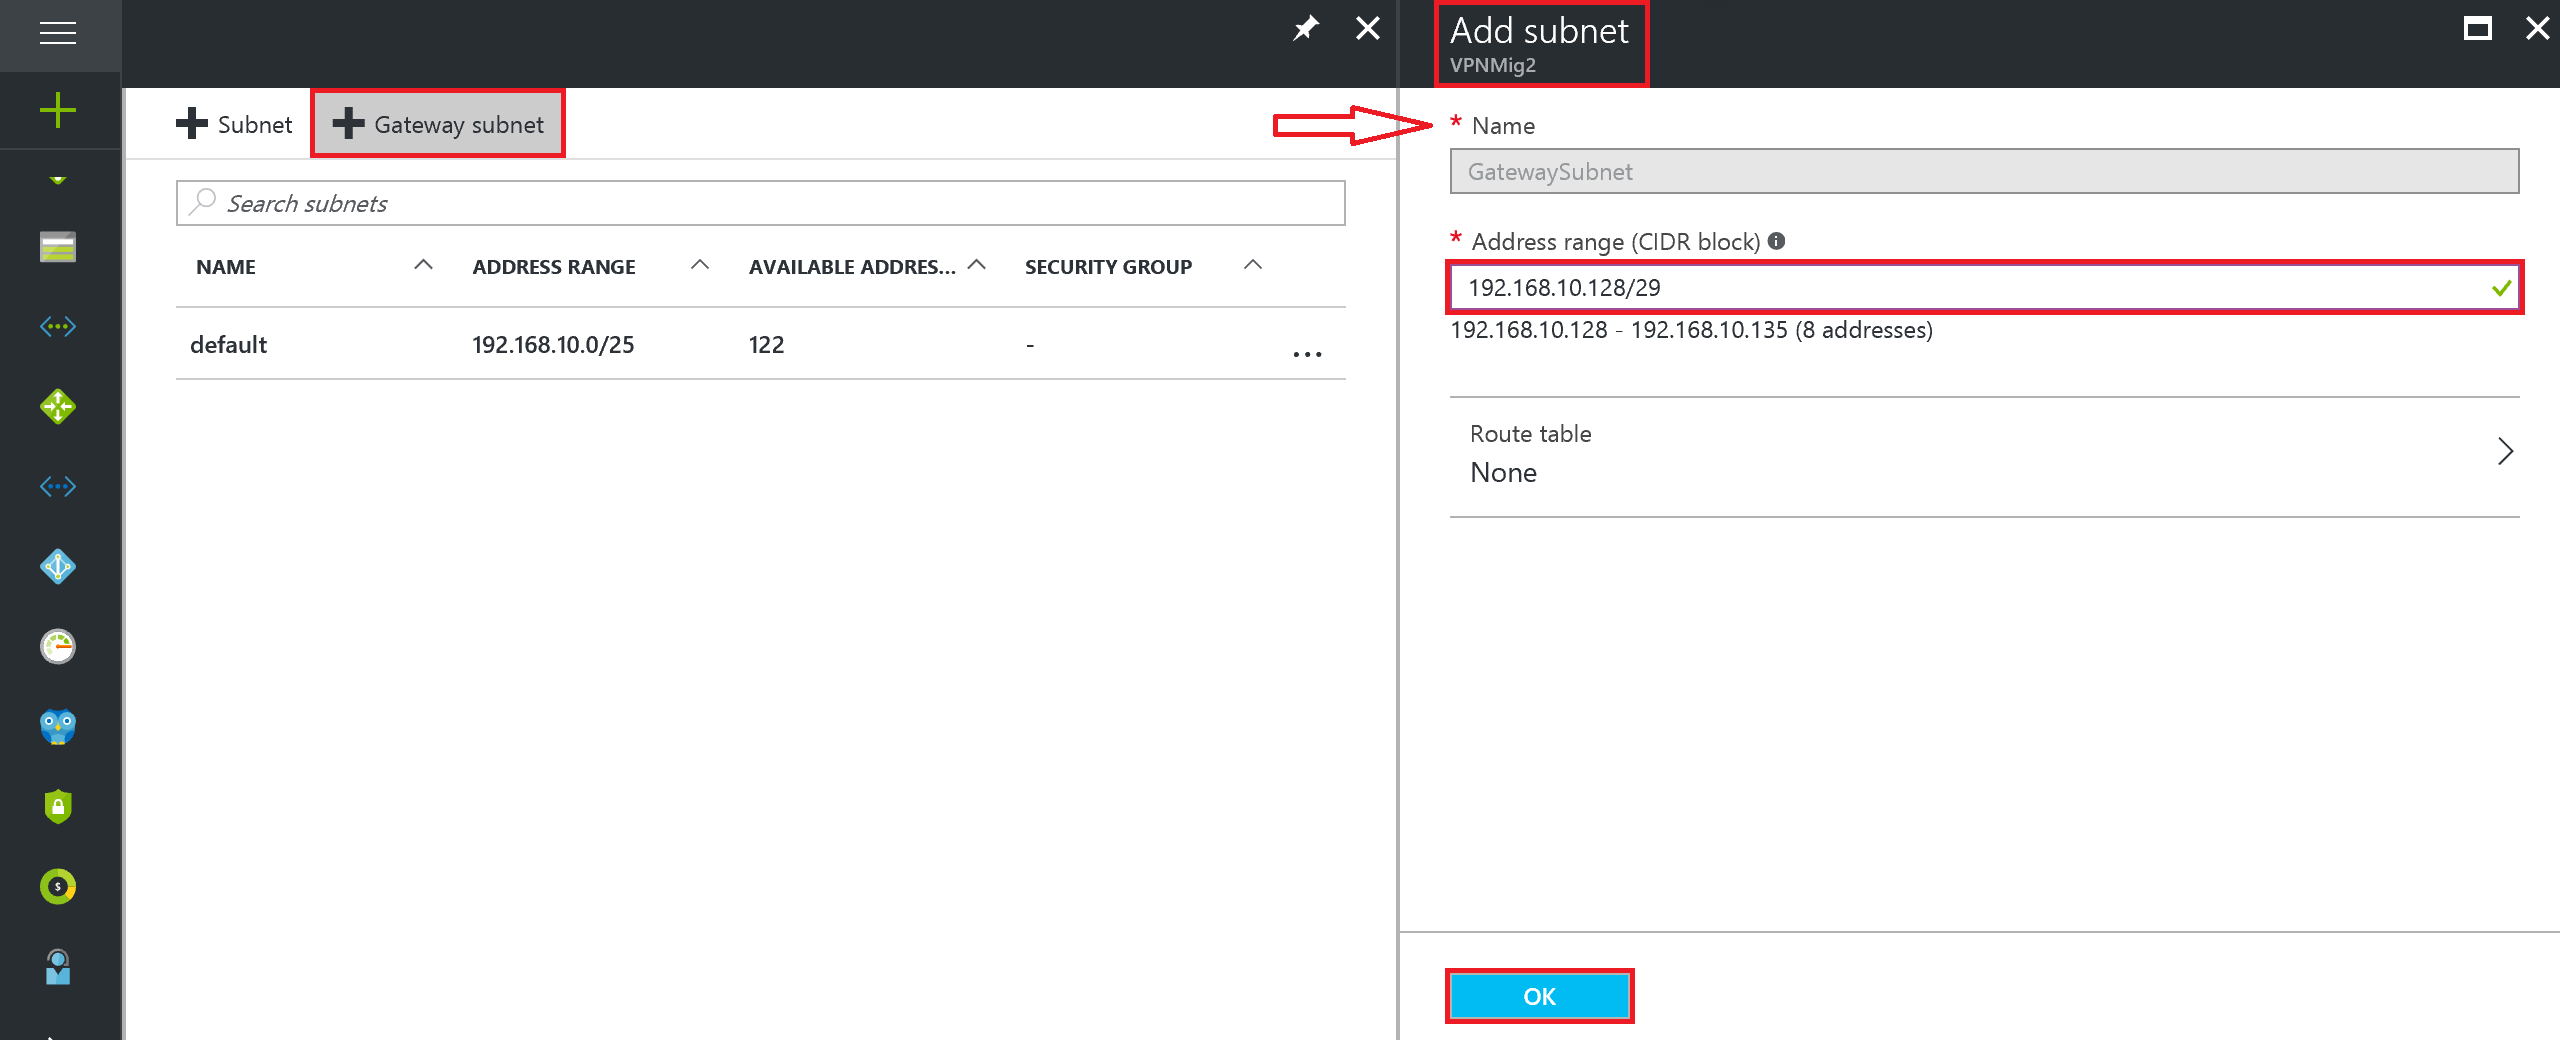
The next step is to configure the Resource manager VNet settings. Before creating the gateway we will need to create the gateway subnet. To do this, navigate to Resource Manager Virtual networks. Click on your ARM VNet, then on the setting section click on Subnets. A new page will open. On this new page click on +Gateway subnet.
The Add Subnet page will open, there you can change the IP Address range that is filled automatically with the value you wish. Then click on the OK button.
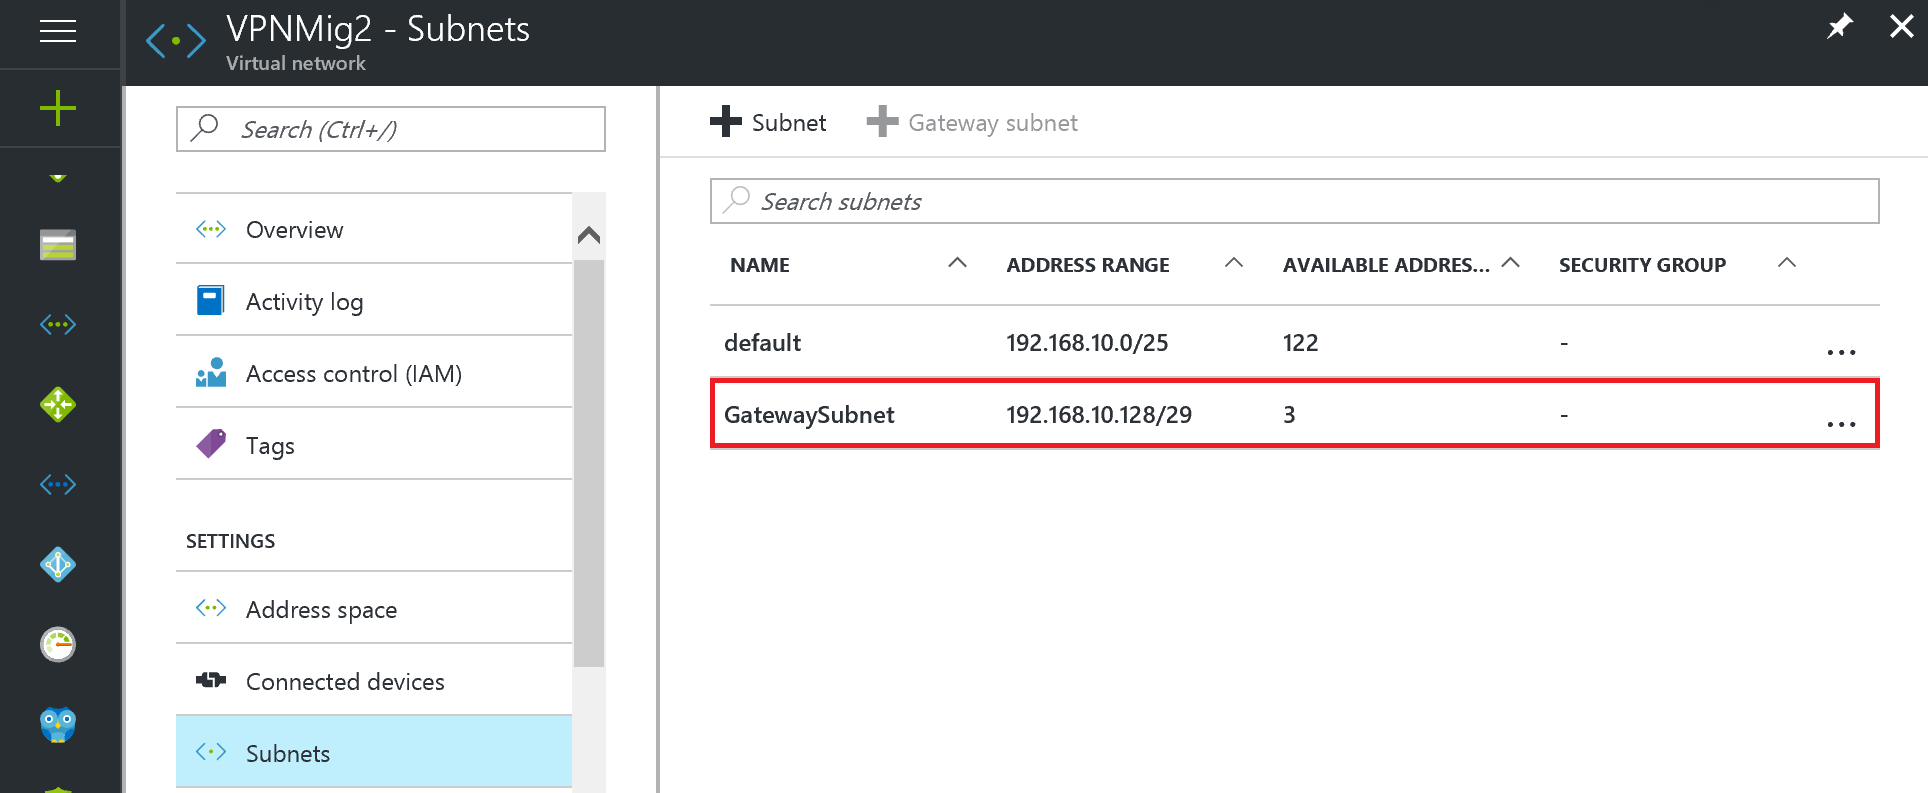
The Gateway subnet is created.
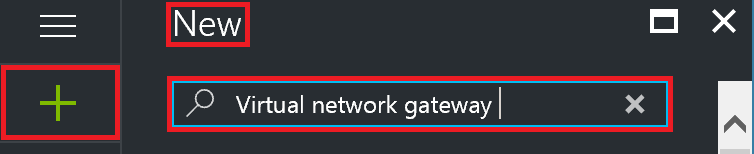
The next step is to create the ARM Virtual Network gateway. In the portal on the top left side click the + symbol and type Virtual network gateway and click Enter.
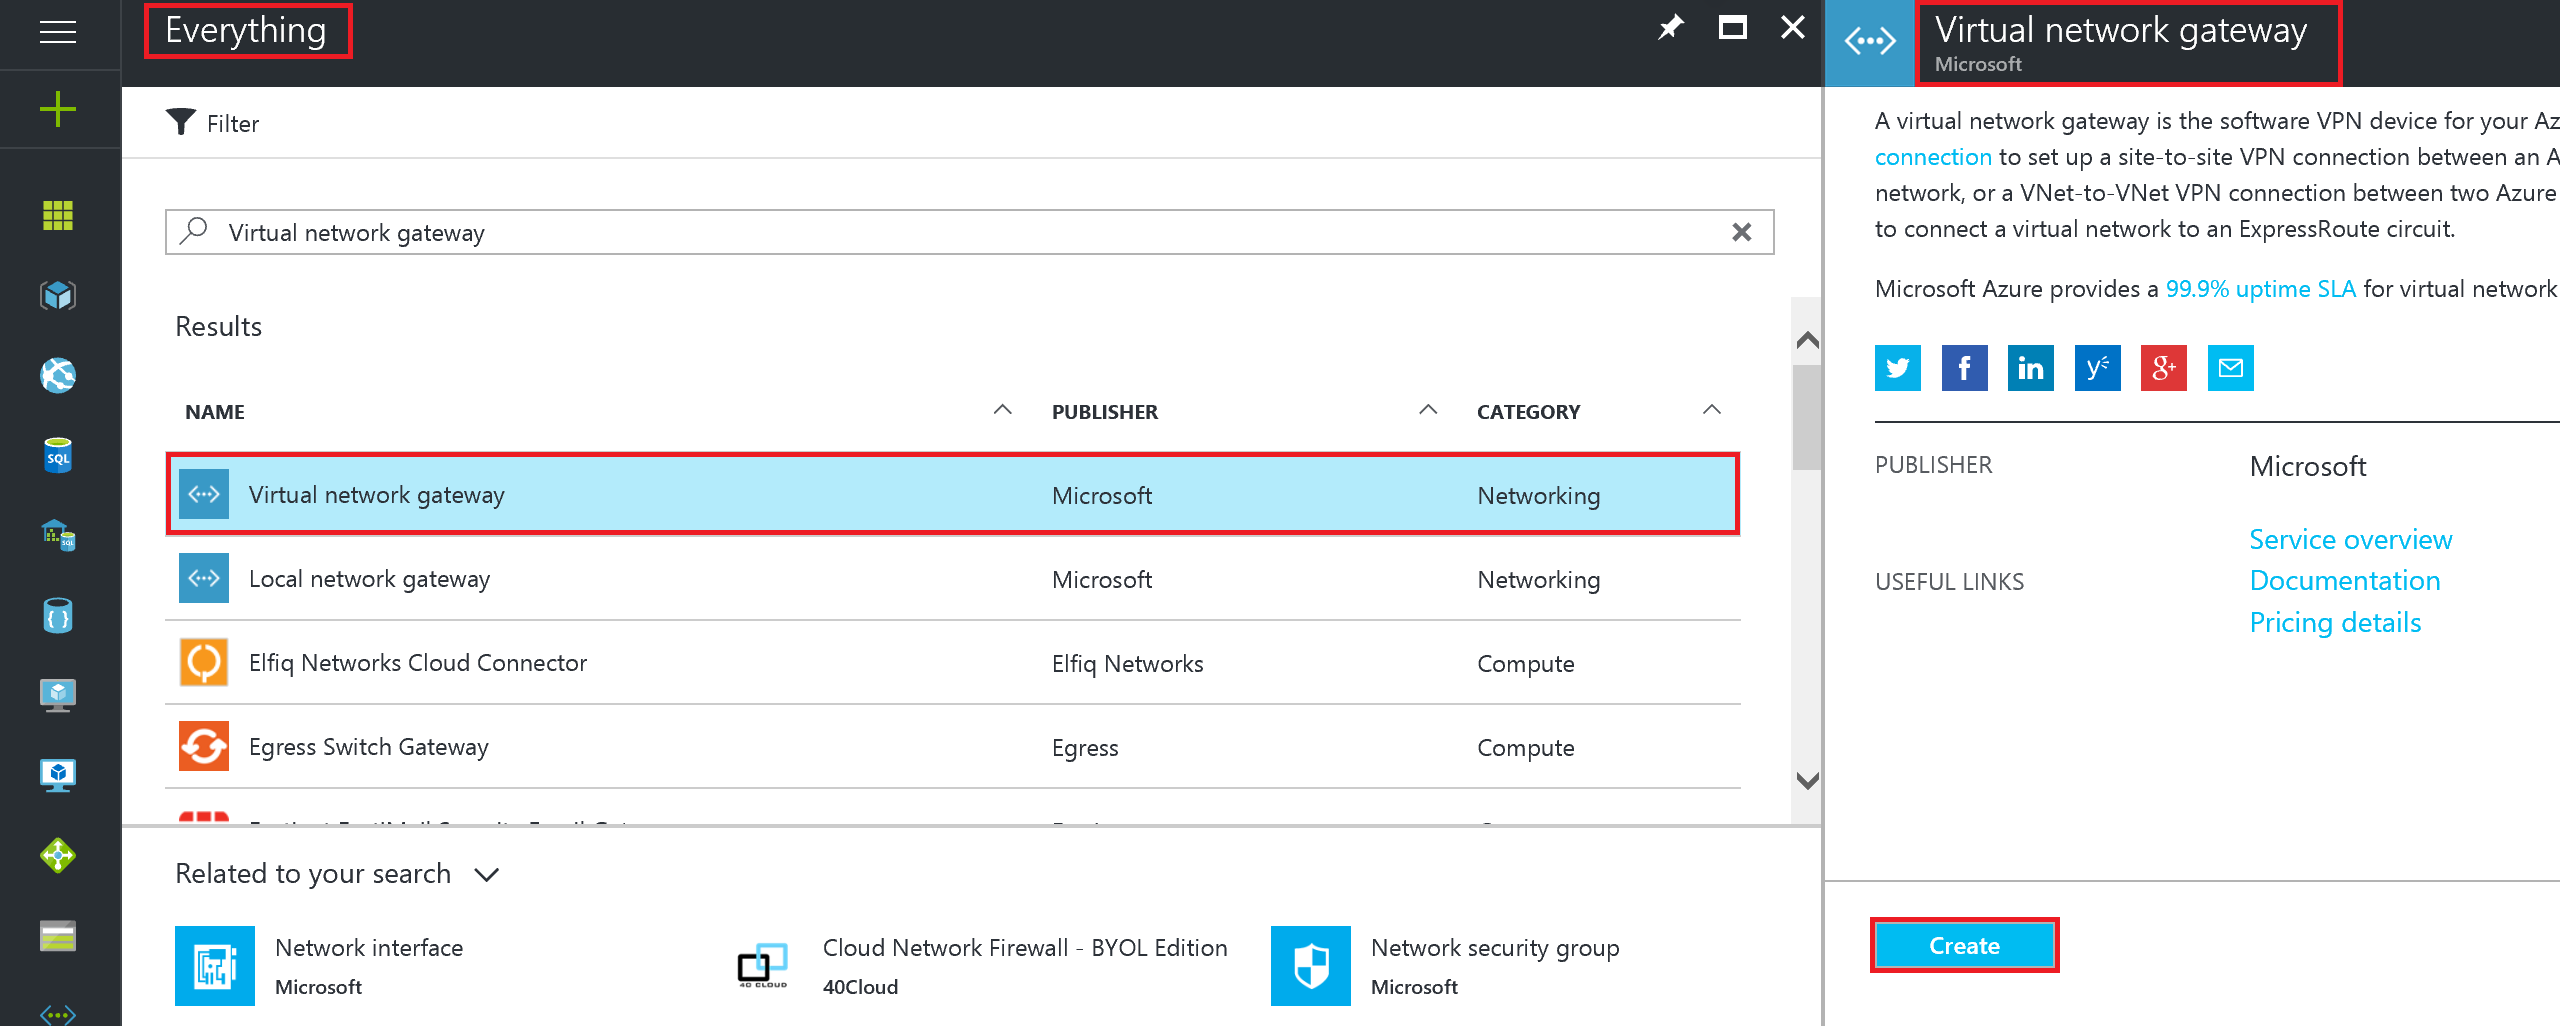
On the windows that opened select Virtual network gateway, then click on the Create button on the next page. The Create virtual network gateway window will open
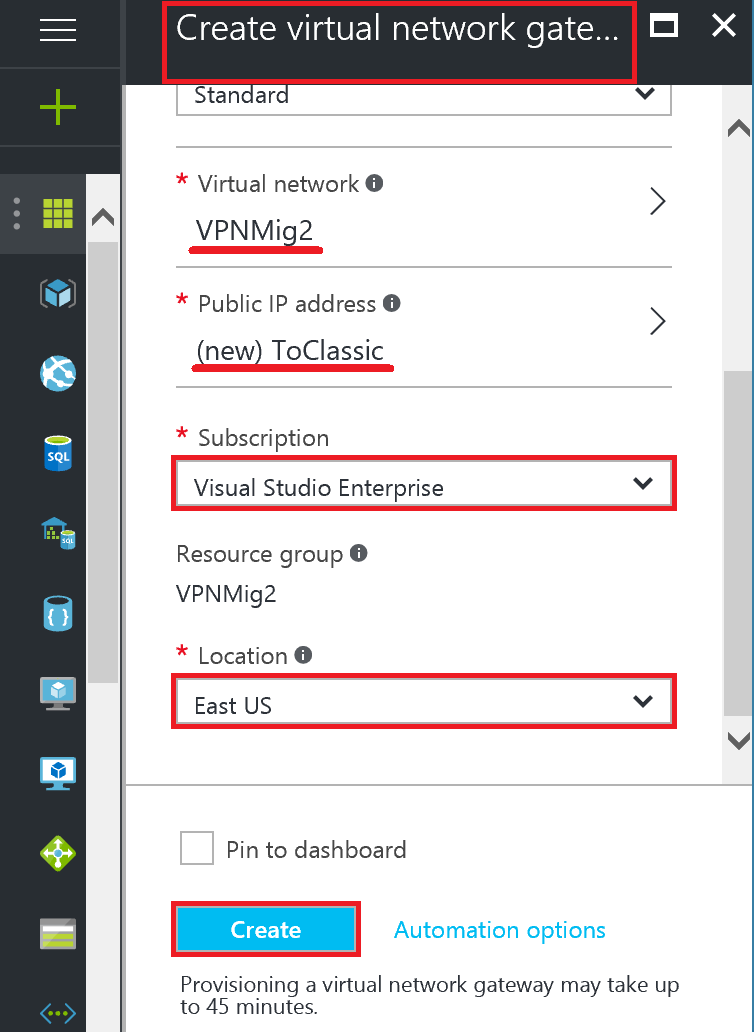
On the Create virtual network gateway window, write the Name of your gateway. On Gateway type select VPN, on VPN type select Route-based, select the SKU you wish, and then click on the Virtual network (Choose virtual network) to add this gateway to a virtual network. On the Choose virtual network page select the ARM virtual network we created at the beginning.

Then click on Public IP address to open the Choose public IP address page, and click +Create New to open the Create public IP address page.

On the Create public IP address page write the Name for your public IP, and click OK.

Finally, with the new public IP address created select the Subscription, and select the Location (same as the location of the ARM virtual network you created) and click on Create. The deployment of the virtual gateway will begin (this might take up to 45min)
After the virtual gateway is created, you can navigate to Virtual networks, click on the ARM Vnet (VPNMig2), then Overview, on the new page click on the Virtual network gateway we just created.

Then on Virtual network gateway select overview, there you can see the details of the gateway we just created including the Public IP address. There you can take note of the public IP address.

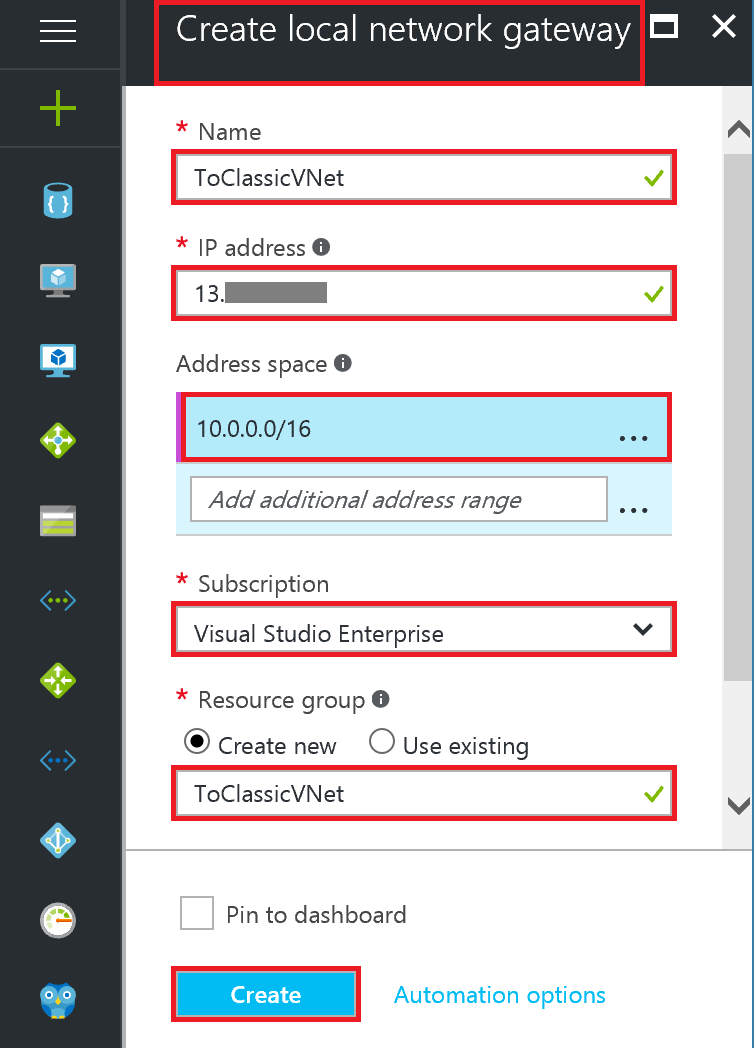
Next we need to create the local network gateway. In the portal on the top left side click the + and type Local network gateway and click Enter. On the Everything page select Local network gateway and finally on the Local network gateway page click on Create (just as we did for the virtual network gateway).

On the Create local network gateway windows, write the Name of your local network gateway. Then on IP address write the IP address of the virtual network you want to connect (in our case the IP of the Classic virtual network gateway). On the Address space write the address range for the local network (our classic VNet network). Select the Subscription and write a name for the Resource group or select the resource group you want to use and select the Location. Then click on Create.
Modify the Classic Local Site
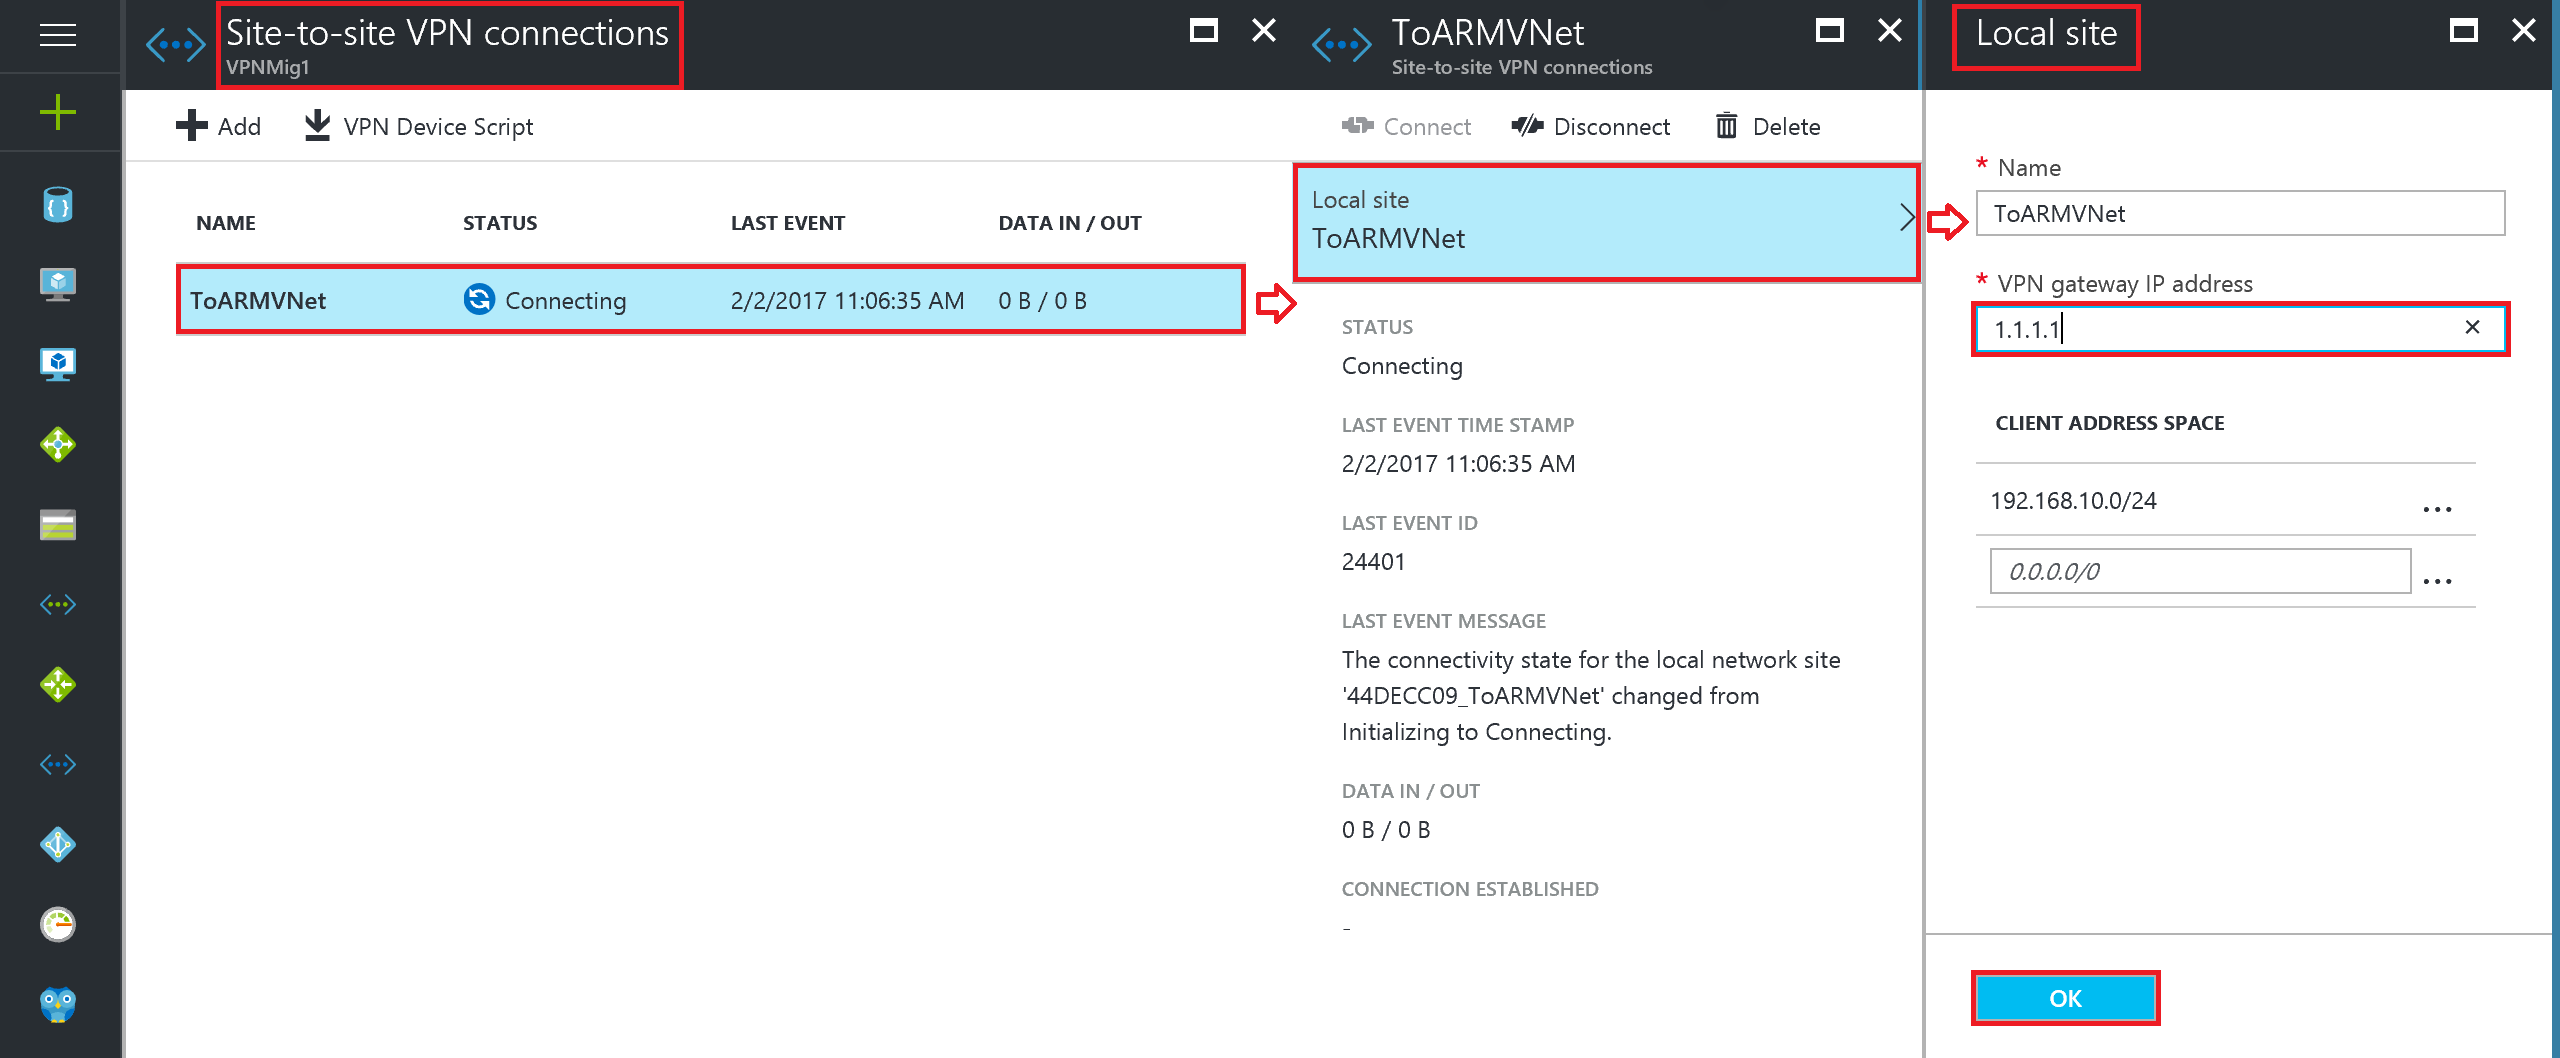
Finally before creating the connection we will need to modify our classic VNet Local site with the IP address of the ARM VNet Virtual network gateway. Navigate to virtual network (classic) select the Classic VNet we created and Overview. In the VPN connection section click on the name of the local site (the one with the building).

On the Site-to-Site VPN connections windows select the name of your Local site, then on the new page click on Local site. Finally on the Local site page modify the VPN gateway IP address with the Public IP address of the ARM VNet virtual network gateway, and click on OK.
Connecting the Virtual Networks
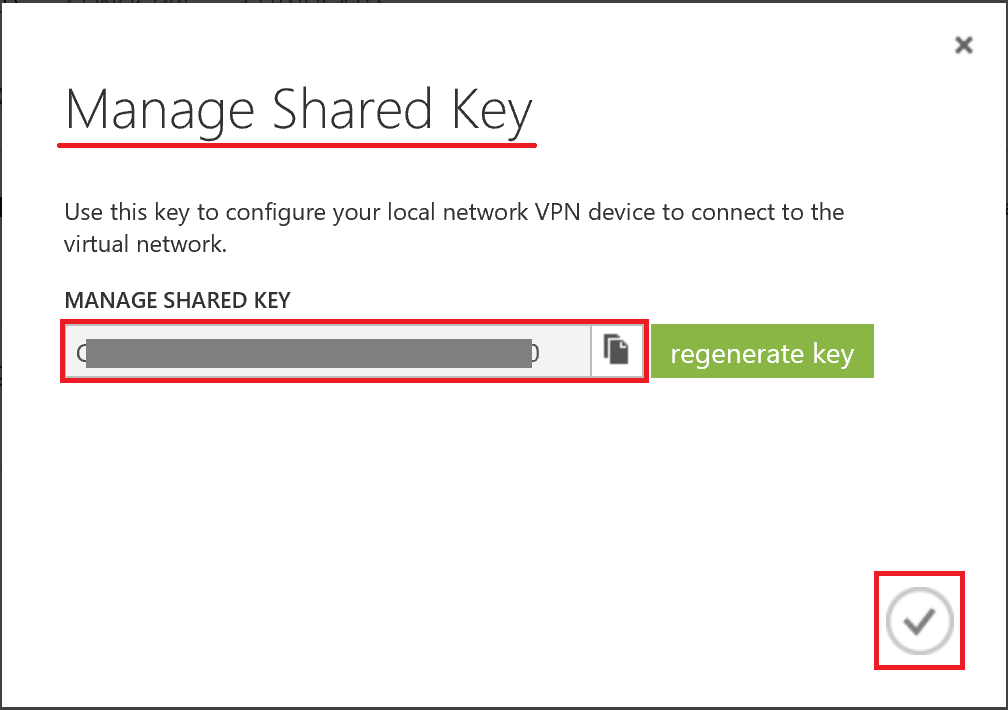
First we will need to generate a pre-shared key for our Virtual networks, the easiest way to do this is on the classic portal. Navigate to Virtual Networks, select the classic Virtual Network we created. To create the Pre-shared key open the DASHBOARD and click on MANAGE KEY on the bar at the bottom.
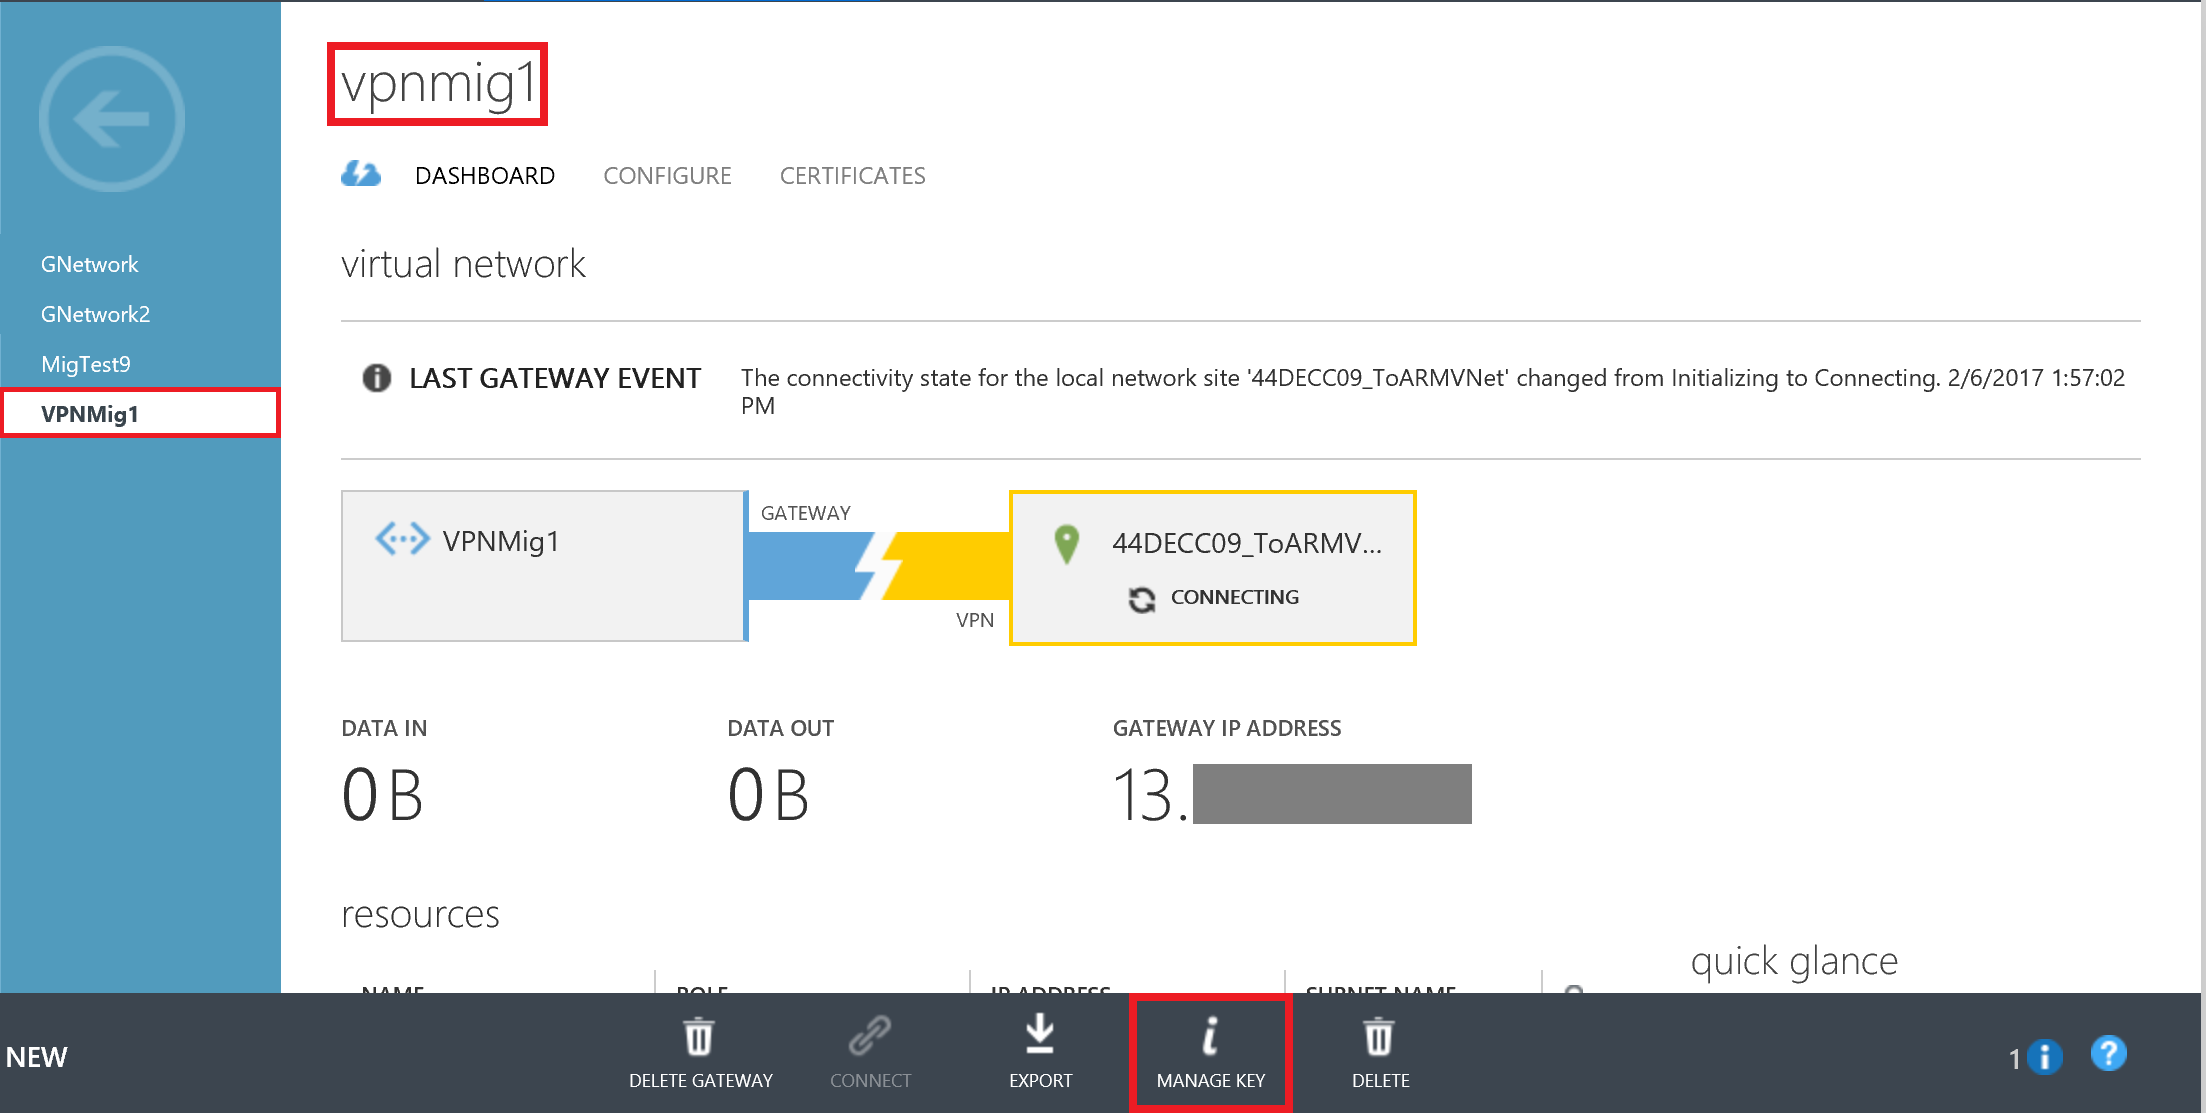
On the Manage Share Key page copy the key to your notepad and click on the checkmark. There are other method to generate the pre-shared key.
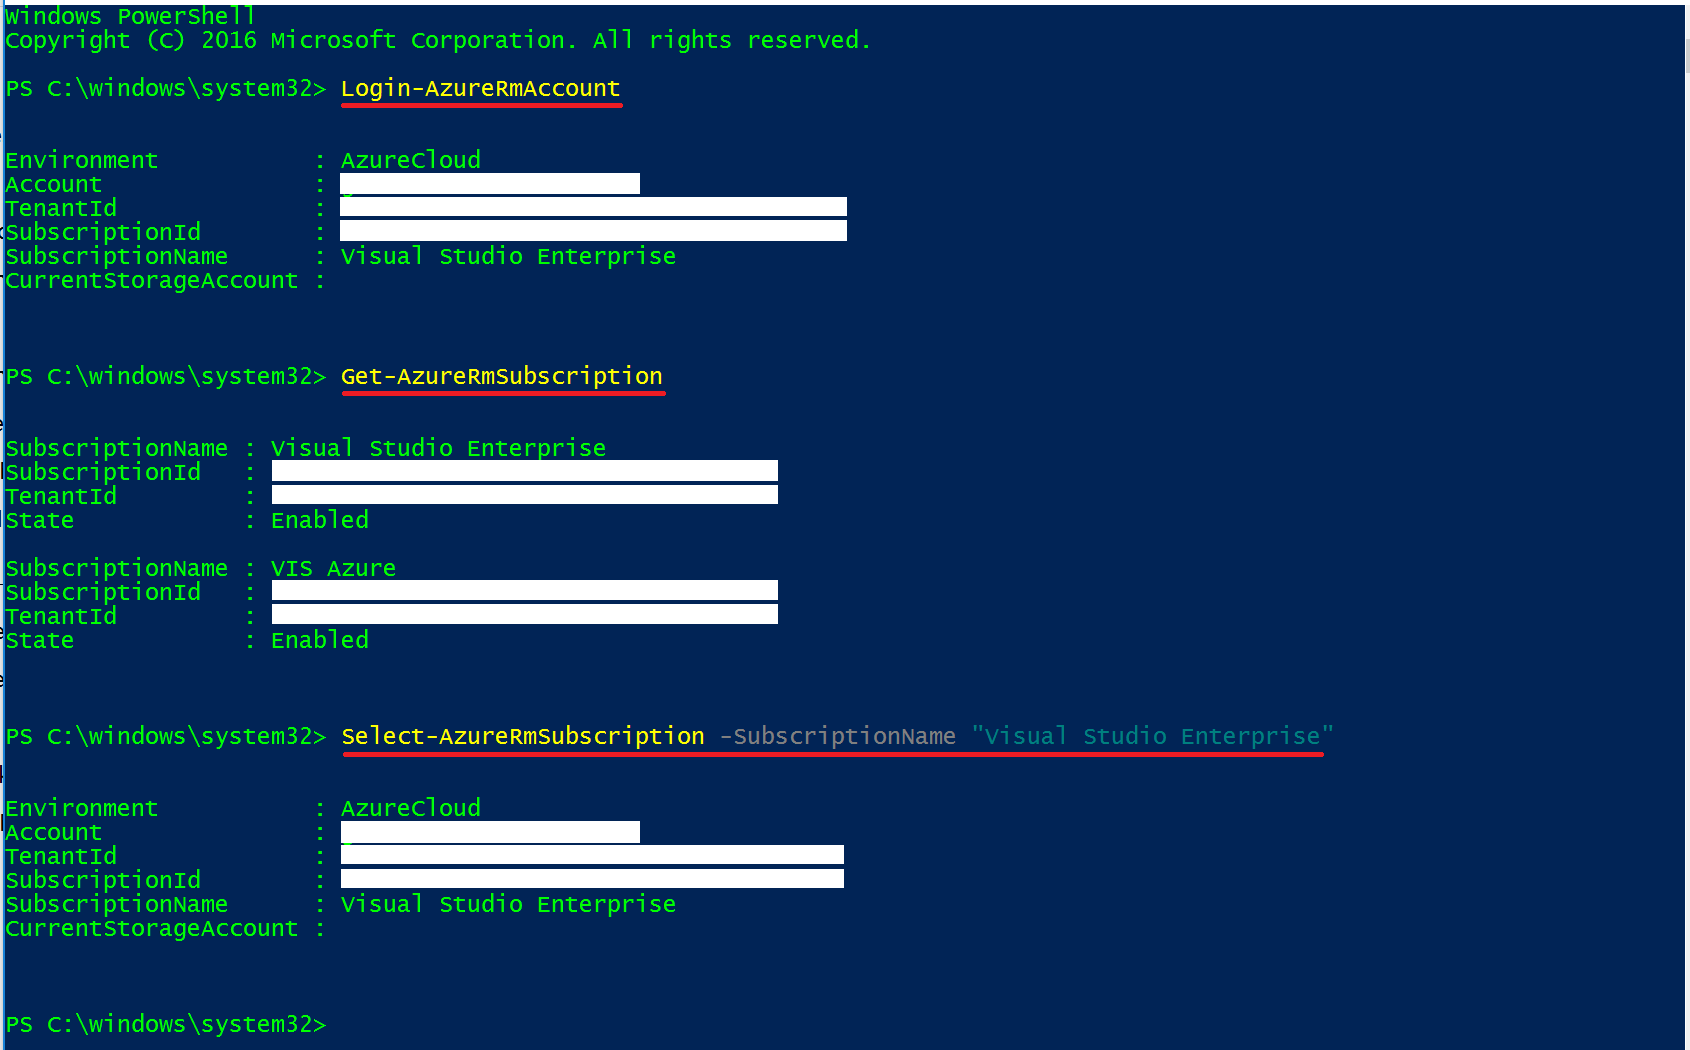
To set the Pre-Shared key to our classic VNet we need to use PowerShell as this steps cannot be done through the portal. So, let us login to the Azure Accounts. Open the PowerShell console with elevated rights to login to your ARM account type:
Login-AzureRmAccount
If you have more than one subscription, you should select the subscription you are working with.
 Get-AzureRmSubscription

Select-AzureRmSubscription -SubscriptionName "Name of Your Subscription"
Add your Azure Account to use the classic PowerShell cmdlets
Add-AzureAccount
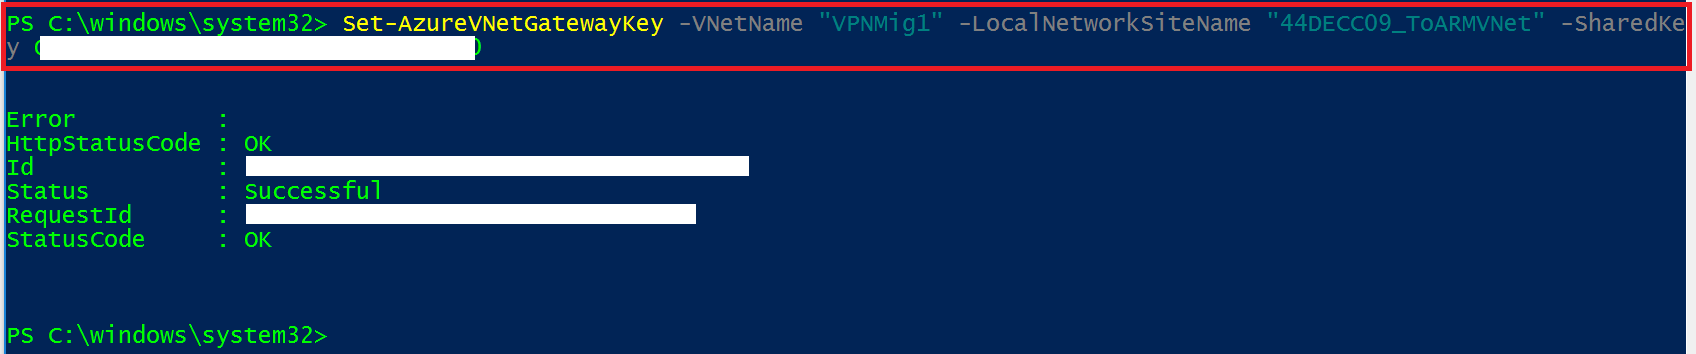
Now we can set the pre-shared key for the connection from our classic VNet (VPNMig1) to our ARM VNet. (Note the shared key XXXYYYYZZZZZAAAAA, is the key you copied on your notepad).
Set-AzureVNetGatewayKey -VNetName "VPNMig1" -LocalNetworkSiteName "44DECC09_ToARMVNet" -SharedKey XXXYYYYZZZZZAAAAA
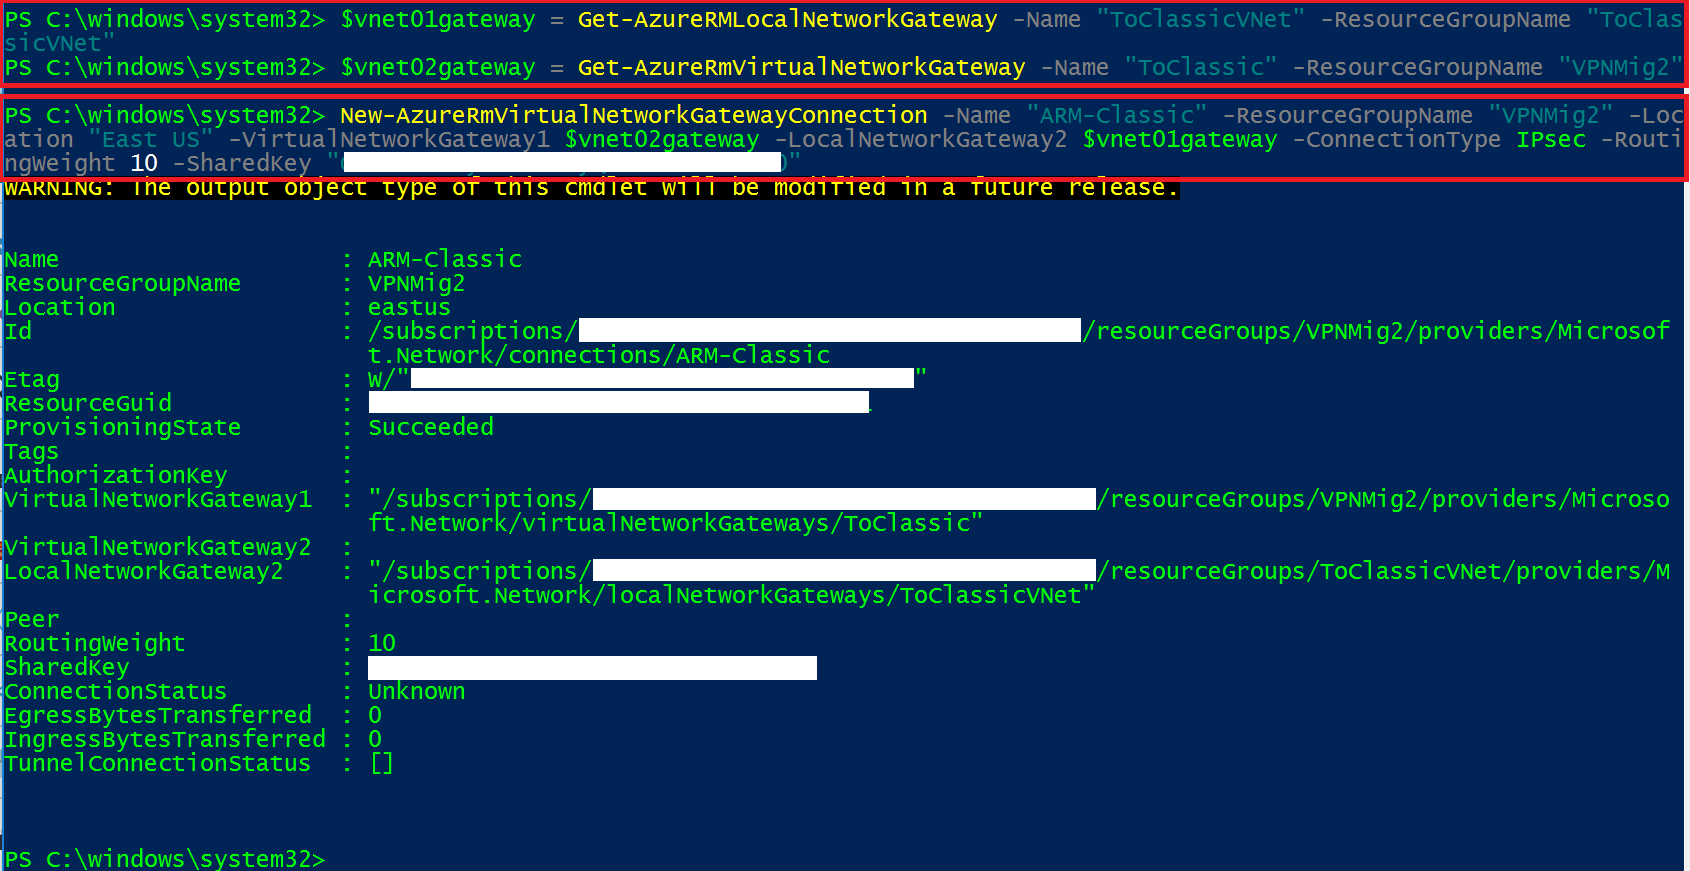
To set the pre-shared key for the connection from our ARM VNet (VPNMig1) to our classic VNet we first need to define some variable (to simplify the command). Note that you should change the names you the ones of your ARM Local Network Gateway and ARM Virtual Network Gateway and their corresponding resource groups.
 $vnet01gateway = Get-AzureRMLocalNetworkGateway -Name "ToClassicVNet" -ResourceGroupName "ToClassicVNet"

$vnet02gateway = Get-AzureRMVirtualNetworkGateway -Name "ToClassic" -ResourceGroupName "VPNMig2"
Then we can create the connection. Not in the command below -Name "ARM-Classic" will be the name we set for this connection (not a name we created before), so feel free to modify to a name of your liking. The ConnectionType should be IPsec and the SharedKey is the same key we copied on the notepad for or classic VNet
New-AzureRmVirtualNetworkGatewayConnection -Name "ARM-Classic" -ResourceGroupName "VPNMig2" -Location "East US" -VirtualNetworkGateway1 $vnet02gateway -LocalNetworkGateway2 $vnet01gateway -ConnectionType IPsec -RoutingWeight 10 -SharedKey "XXXYYYYZZZZZAAAAA"
Verify the connection
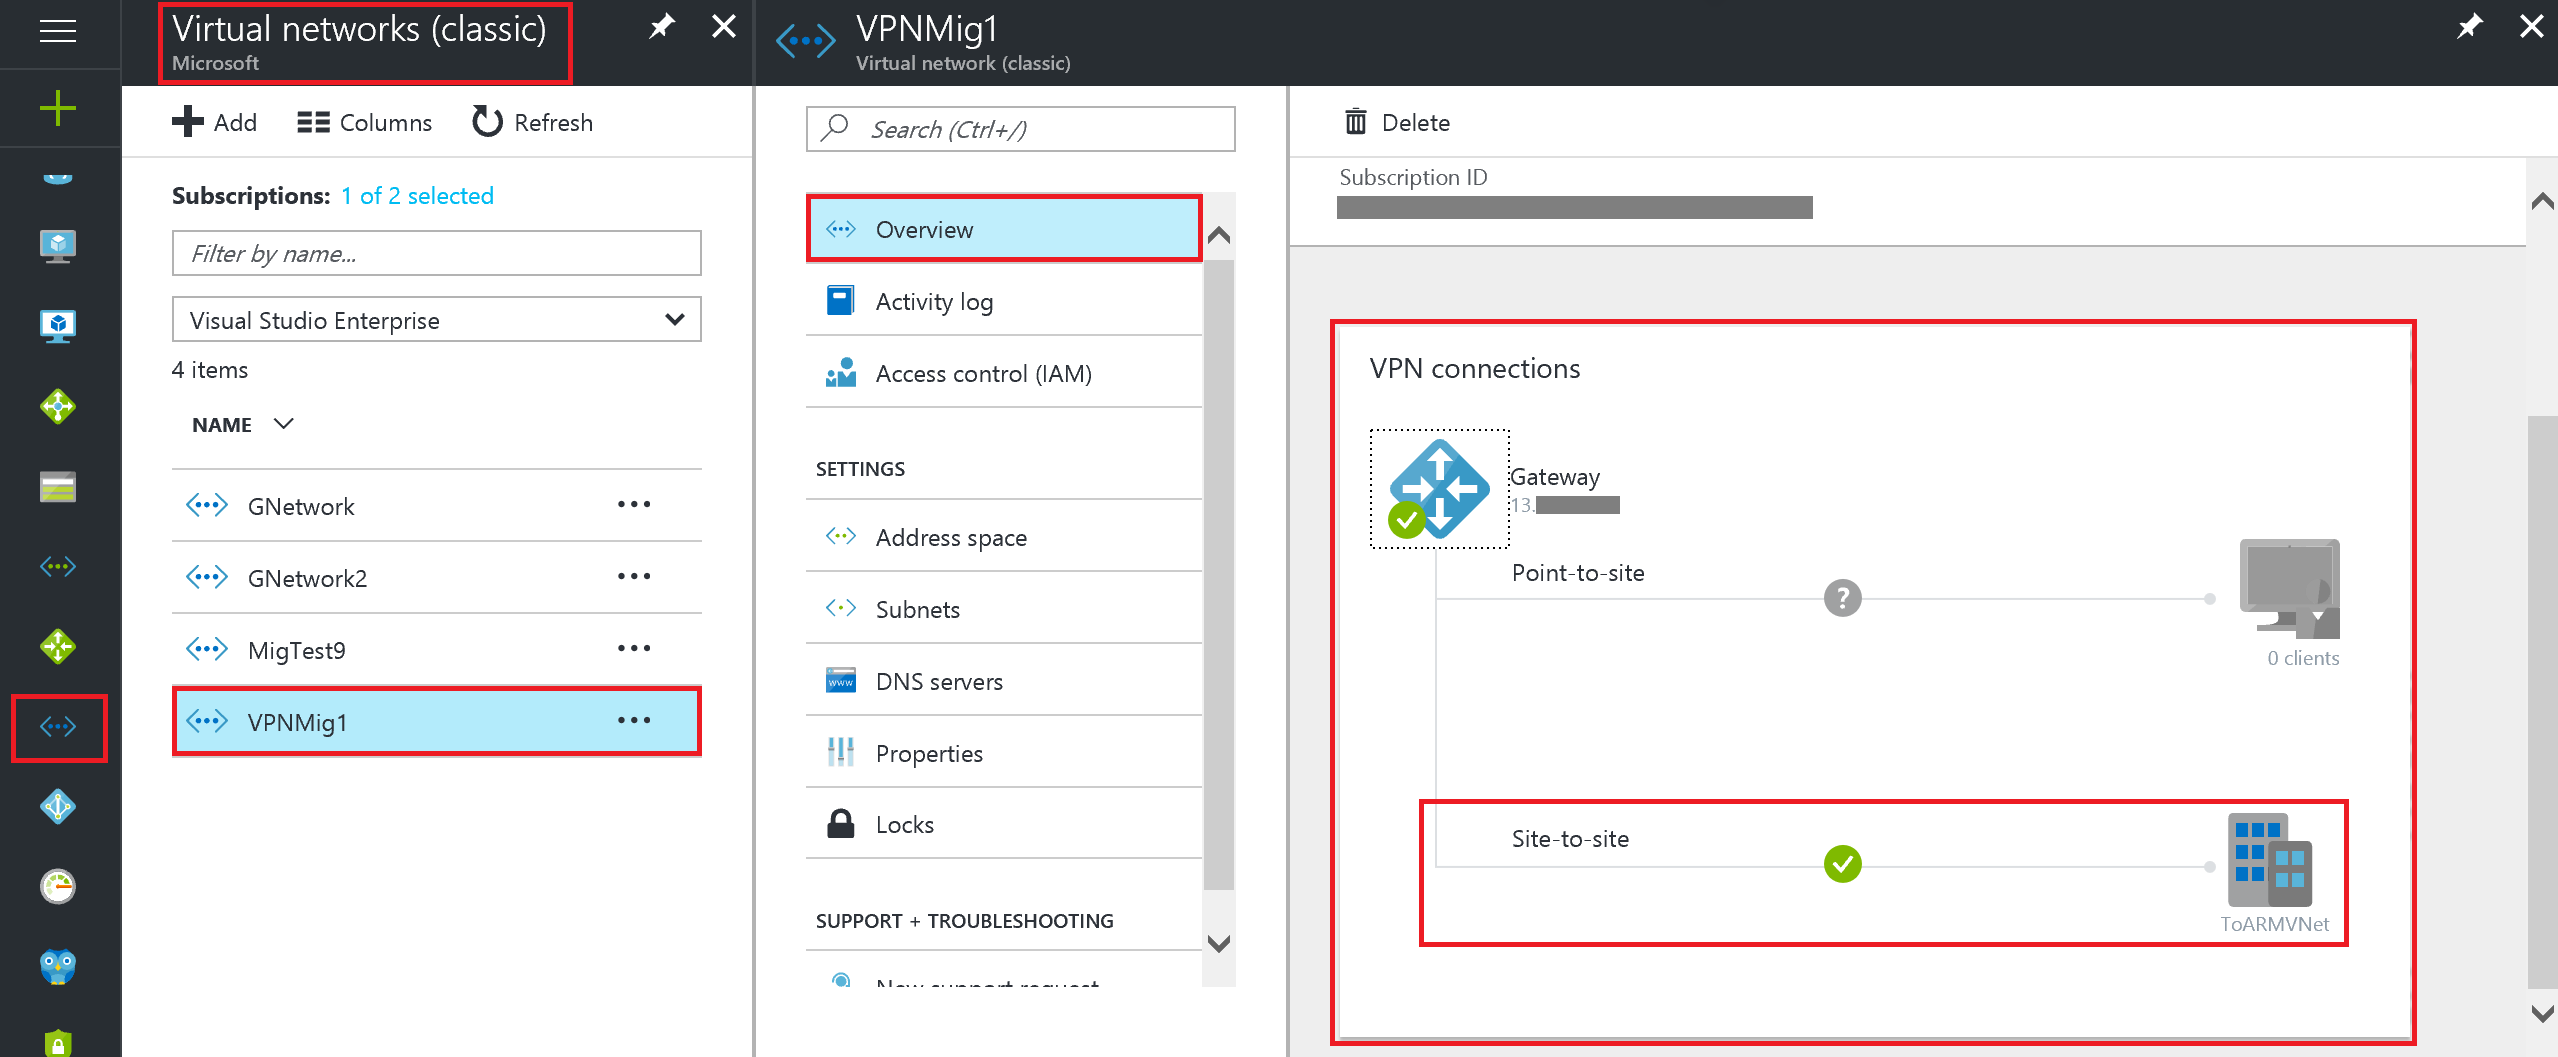
We can verify the connection of the Virtual Networks using the Portal. For the connection from classic to ARM VNet Navigate to Virtual networks (classic) , and in the VPN connections section you will see the gateway is connected.
From the classic portal you can also see the connection was made.

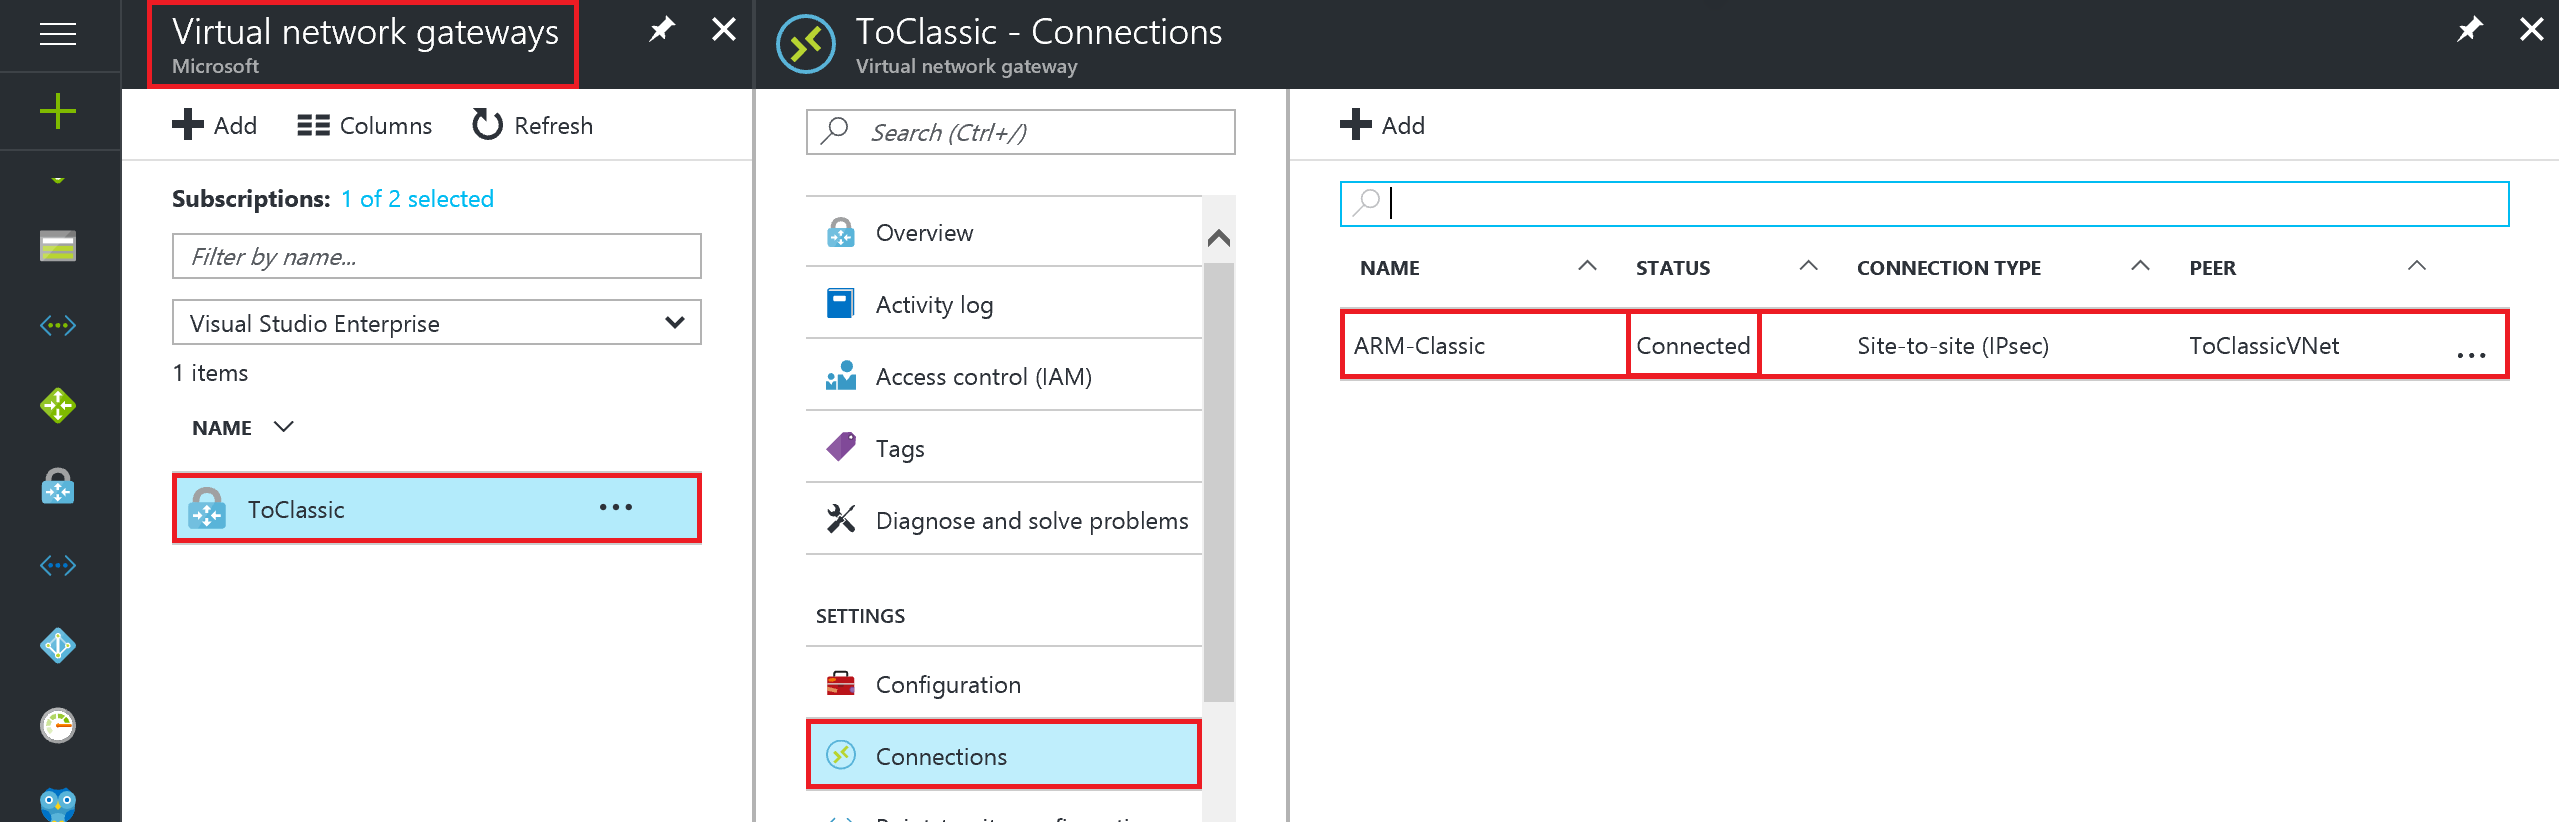
For verifying the connection from ARM to classic VNet Navigate to Virtual Network gateways, select the name of the gateway connecting to our classic VNet, then select Connections. On the new page you can verify the status of the connection.
You can also do another test by creating VMs on each VNet and trying to ping the VM on the other network.
This will be the end of this article. See you on the next post!