你当前正在访问 Microsoft Azure Global Edition 技术文档网站。 如果需要访问由世纪互联运营的 Microsoft Azure 中国技术文档网站,请访问 https://docs.azure.cn。
使用绘图工具模块
Azure Maps Web SDK 提供了一个绘图工具模块。 使用此模块,可以轻松地使用输入设备(如鼠标或触摸屏)绘制和编辑地图上的形状。 此模块的核心类是绘图管理器。 绘图管理器提供了在地图上绘制和编辑形状所需的一切功能。 它可直接使用,并与自定义工具栏 UI 集成。 还可以使用内置的 DrawingToolbar 类。
在网页中加载绘图工具模块
- 创建一个新的 HTML 文件,并照常实现该地图。
- 加载 Azure Maps 绘图工具模块。 可以通过两种方法加载该模块:
使用 Azure Maps 服务模块的全局托管 Azure 内容分发网络版本。 在文件的
<head>元素中添加对 JavaScript 和 CSS 的引用:<link rel="stylesheet" href="https://atlas.microsoft.com/sdk/javascript/drawing/1/atlas-drawing.min.css" type="text/css" /> <script src="https://atlas.microsoft.com/sdk/javascript/drawing/1/atlas-drawing.min.js"></script>或者,可以通过使用 azure-maps-drawing-tools npm 包在本地加载 Azure Maps Web SDK 源代码的绘图工具模块,然后将其托管在你的应用中。 此程序包还包括了 TypeScript 定义。 使用此命令:
npm install azure-maps-drawing-tools然后,在源文件中导入 JavaScript:
import * as drawing from "azure-maps-drawing-tools";还需要嵌入 CSS 才能正确显示各种控件。 如果使用的是 JavaScript 捆绑程序来捆绑依赖项并打包代码,请参考所使用捆绑程序的文档,了解如何完成操作。 如果使用的是 Webpack,则通常通过将
style-loader和css-loader与 style-loader 提供的文档相结合来完成。首先,安装 style-loader 和 css-loader:
npm install --save-dev style-loader css-loader在源文件中,导入 atlas-drawing.min.css:
import "azure-maps-drawing-tools/dist/atlas-drawing.min.css";然后将加载程序添加到 Webpack 配置的模块规则部分:
module.exports = { module: { rules: [ { test: /\.css$/i, use: ["style-loader", "css-loader"] } ] } };若要了解详细信息,请参阅如何使用 Azure Maps 地图控件 npm 包。
直接使用绘图管理器
在应用程序中加载“绘图工具”模块后,可以使用绘图管理器启用绘图和编辑功能。 可以在对其进行实例化或使用 drawingManager.setOptions() 函数时,为绘图管理器指定选项。
设置绘制模式
下面的代码将创建一个绘图管理器实例,并设置“绘制模式”选项。
//Create an instance of the drawing manager and set drawing mode.
drawingManager = new atlas.drawing.DrawingManager(map,{
    mode: "draw-polygon"
});
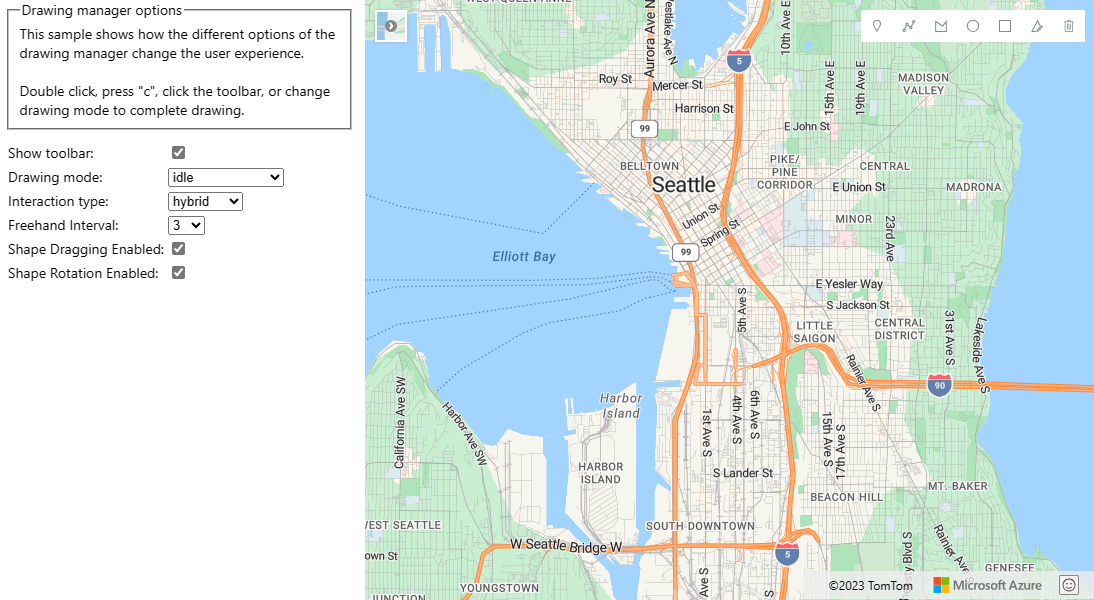
下图是 DrawingManager 的绘制模式的示例。 选择地图上的任意位置以开始绘制多边形。
设置交互类型
绘图管理器支持三种不同的方法来与地图进行交互以绘制形状。
-
click-在单击鼠标或触摸时添加坐标。 -
freehand- 在地图上拖动鼠标或触摸时添加坐标。 -
hybrid-在单击或拖动鼠标或触摸时添加坐标。
下面的代码将启用多边形绘制模式,并设置绘图管理器应遵循的绘图交互的类型 freehand。
//Create an instance of the drawing manager and set drawing mode.
drawingManager = new atlas.drawing.DrawingManager(map,{
    mode: "draw-polygon",
    interactionType: "freehand"
});
自定义绘图选项
前面的示例演示了如何在实例化绘图管理器时自定义绘图选项。 还可以使用 drawingManager.setOptions() 函数设置“绘图管理器”选项。
通过绘图管理器选项,可使用 setOptions 函数来测试绘图管理器的所有选项的自定义。 如需此示例的源代码,请参阅绘图管理器选项源代码。
将形状置于编辑模式
通过将现有形状传入绘图管理器的 edit 函数,以编程方式将现有形状置于编辑模式。 如果形状是 GeoJSON 特征,则使用 atls.Shape 类将其包装,然后再将其传入。
若要以编程方式使形状退出编辑模式,请将绘图管理器模式设置为 idle。
//If you are starting with a GeoJSON feature, wrap it with the atlas.Shape class.
var feature = {
    "type": "Feature",
    "geometry": {
        "type": "Point",
        "coordinates": [0,0]
        },
    "properties":  {}
};

var shape = new atlas.Shape(feature);

//Pass the shape into the edit function of the drawing manager.
drawingManager.edit(shape);

//Later, to programmatically take shape out of edit mode, set mode to idle.
drawingManager.setOptions({ mode: 'idle' });
注意
将形状传入绘图管理器的 edit 函数时,形状将添加到由绘图管理器维护的数据源中。 如果此形状以前在另一个数据源中,则会从该数据源中删除它。
若要将形状添加到绘图管理器中供最终用户查看和编辑,但又不想以编程方式将其置于编辑模式,请从绘图管理器中检索数据源并将形状添加到其中。
//The shape(s) you want to add to the drawing manager so
var shape = new atlas.Shape(feature);

//Retrieve the data source from the drawing manager.
var source = drawingManager.getSource();

//Add your shape.
source.add(shape);

//Alternatively, load in a GeoJSON feed using the sources importDataFromUrl function.
source.importDataFromUrl('yourFeatures.json');
下表列出了不同类型的形状特征支持的编辑类型。
| 形状特征 | 编辑点 | 旋转 | 删除形状 |
|---|---|---|---|
| 点 | ✓ | ✓ | |
| LineString | ✓ | ✓ | ✓ |
| Polygon | ✓ | ✓ | ✓ |
| MultiPoint | ✓ | ✓ | |
| MultiLineString | ✓ | ✓ | |
| MultiPolygon | ✓ | ✓ | |
| 圆形 | ✓ | ✓ | |
| Rectangle | ✓ | ✓ | ✓ |
后续步骤
了解如何使用绘制工具模块中的更多功能:
详细了解本文中使用的类和方法: