重要
从 2024 年 9 月 1 日开始,云服务(经典版)对所有客户已停止支持。 从 2024 年 10 月开始,Microsoft 将停止并关闭任何正在运行的现有部署,数据将永久性丢失。 新部署应使用基于 Azure 资源管理器的新型部署模型 Azure 云服务(外延支持)。
有关 Azure 诊断的背景信息,请参阅 Azure 诊断概述。
如何在工作者角色中启用诊断
本演练介绍如何实现一个使用 .NET EventSource 类来发送遥测数据的 Azure 工作角色。 Azure Diagnostics 用于收集遥测数据,并将其存储在一个 Azure 存储帐户中。 创建工作角色时,Visual Studio 会自动启用诊断功能1.0,作为Azure软件开发工具包 (SDK) .NET 2.4及更低版本解决方案的一部分。 以下说明介绍了创建辅助角色、从解决方案禁用 Diagnostics 1.0,以及在辅助角色中部署 Diagnostics 1.2 或 1.3 的过程。
先决条件
本文假定你具有 Azure 订阅,并要将 Visual Studio 与 Azure SDK 配合使用。 如果你没有 Azure 订阅,可以注册免费试用版。 请确保安装并配置 Azure PowerShell 0.8.7 或更高版本。
步骤 1:创建工作角色
- 启动 Visual Studio。
- 从面向 .NET Framework 4.5 的“云”模板创建一个“Azure 云服务”项目 。 将项目命名为“WadExample”并选择“确定”。
- 选择Worker Role,然后选择“确定”。 项目已创建。
- 在“解决方案资源管理器”中,双击 WorkerRole1 属性文件 。
- 在“配置”选项卡中,取消选中“启用诊断”,以禁用 Diagnostics 1.0(Azure SDK 2.4 和更低版本)。
- 生成解决方案以验证无误。
步骤 2:为代码添加监控工具
将 WorkerRole.cs 的内容替换为以下代码。 继承自 EventSource 类的 SampleEventSourceWriter 类实现四个日志记录方法:SendEnums、MessageMethod、SetOther 和 HighFreq。 WriteEvent 方法的第一个参数定义相关事件的 ID。 Run 方法实现一个无限循环,该循环每隔 10 秒调用 SampleEventSourceWriter 类中实现的每个日志记录方法。
using Microsoft.WindowsAzure.ServiceRuntime;
using System;
using System.Diagnostics;
using System.Diagnostics.Tracing;
using System.Net;
using System.Threading;

namespace WorkerRole1
{
    sealed class SampleEventSourceWriter : EventSource
    {
        public static SampleEventSourceWriter Log = new SampleEventSourceWriter();
        public void SendEnums(MyColor color, MyFlags flags) { if (IsEnabled())  WriteEvent(1, (int)color, (int)flags); }// Cast enums to int for efficient logging.
        public void MessageMethod(string Message) { if (IsEnabled())  WriteEvent(2, Message); }
        public void SetOther(bool flag, int myInt) { if (IsEnabled())  WriteEvent(3, flag, myInt); }
        public void HighFreq(int value) { if (IsEnabled()) WriteEvent(4, value); }

    }

    enum MyColor
    {
        Red,
        Blue,
        Green
    }

    [Flags]
    enum MyFlags
    {
        Flag1 = 1,
        Flag2 = 2,
        Flag3 = 4
    }

    public class WorkerRole : RoleEntryPoint
    {
        public override void Run()
        {
            // This is a sample worker implementation. Replace with your logic.
            Trace.TraceInformation("WorkerRole1 entry point called");

            int value = 0;

            while (true)
            {
                Thread.Sleep(10000);
                Trace.TraceInformation("Working");

                // Emit several events every time we go through the loop
                for (int i = 0; i < 6; i++)
                {
                    SampleEventSourceWriter.Log.SendEnums(MyColor.Blue, MyFlags.Flag2 | MyFlags.Flag3);
                }

                for (int i = 0; i < 3; i++)
                {
                    SampleEventSourceWriter.Log.MessageMethod("This is a message.");
                    SampleEventSourceWriter.Log.SetOther(true, 123456789);
                }

                if (value == int.MaxValue) value = 0;
                SampleEventSourceWriter.Log.HighFreq(value++);
            }
        }

        public override bool OnStart()
        {
            // Set the maximum number of concurrent connections
            ServicePointManager.DefaultConnectionLimit = 12;

            // For information on handling configuration changes
            // see the MSDN topic at https://go.microsoft.com/fwlink/?LinkId=166357.

            return base.OnStart();
        }
    }
}
步骤 3:部署工作角色
警告
为现有角色启用诊断时,将禁用部署包时已设置的所有扩展。 这些包括:
- Microsoft 监控代理诊断
- Microsoft Azure 安全监视
- Microsoft 反恶意软件
- Microsoft 监控代理 (Microsoft Monitoring Agent)
- Microsoft 服务分析器代理
- Microsoft Azure 域扩展
- Microsoft Azure 诊断扩展
- Microsoft Azure 远程桌面扩展
- Microsoft Azure 日志收集器
部署更新的角色后,可以通过 Azure 门户或 PowerShell 重置扩展。
- 在 Visual Studio 中,通过在解决方案资源管理器中选择 WadExample 项目,然后从生成菜单中选择发布,将辅助角色部署到 Azure。
- 选择订阅。
- 在“Microsoft Azure 发布设置”对话框中,选择“新建...”。
- 在“创建云服务和存储帐户”对话框中输入一个“名称”(例如“WadExample”),然后选择区域或地缘组 。
- 将“环境”设置为“暂存” 。
- 相应地修改任何其他设置,并选择发布。
- 完成部署后,在 Azure 门户中验证云服务是否处于“正在运行”状态。
步骤 4:创建 Diagnostics 配置文件并安装扩展
通过执行以下 PowerShell 命令下载公共配置文件架构定义:
(Get-AzureServiceAvailableExtension -ExtensionName 'PaaSDiagnostics' -ProviderNamespace 'Microsoft.Azure.Diagnostics').PublicConfigurationSchema | Out-File -Encoding utf8 -FilePath 'WadConfig.xsd'右键单击 WorkerRole1 项目并选择“添加”-“新建项...”-“Visual C# 项”->“数据”-“XML 文件”,将 XML 文件添加到 WorkerRole1 项目中。 将文件命名为
WadExample.xml。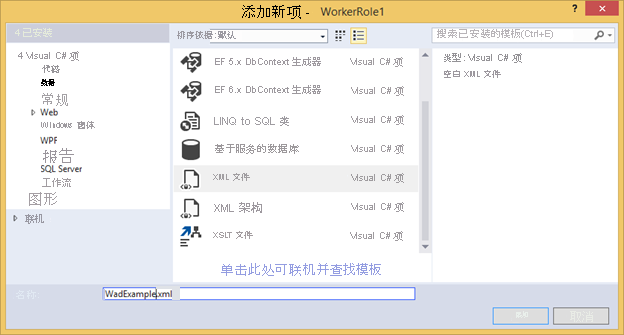
将 WadConfig.xsd 与配置文件相关联。 确保 WadExample.xml 编辑器窗口是活动的窗口。 按 F4 打开“属性”窗口。 在属性窗口中选择架构属性。 选择… 在架构属性中。 选择“添加...”按钮并导航到 .xsd 文件的保存位置,然后选择文件 WadConfig.xsd。 选择“确定”。
将 WadExample.xml 配置文件的内容替换为以下 XML 并保存该文件。 此配置文件定义两个要收集的性能计数器:一个对应于 CPU 使用率,另一个对应于内存使用率。 配置将定义对应于 SampleEventSourceWriter 类中方法的四个事件。
<?xml version="1.0" encoding="utf-8"?>
<PublicConfig xmlns="http://schemas.microsoft.com/ServiceHosting/2010/10/DiagnosticsConfiguration">
  <WadCfg>
    <DiagnosticMonitorConfiguration overallQuotaInMB="25000">
      <PerformanceCounters scheduledTransferPeriod="PT1M">
        <PerformanceCounterConfiguration counterSpecifier="\Processor(_Total)\% Processor Time" sampleRate="PT1M" unit="percent" />
        <PerformanceCounterConfiguration counterSpecifier="\Memory\Committed Bytes" sampleRate="PT1M" unit="bytes"/>
      </PerformanceCounters>
      <EtwProviders>
        <EtwEventSourceProviderConfiguration provider="SampleEventSourceWriter" scheduledTransferPeriod="PT5M">
          <Event id="1" eventDestination="EnumsTable"/>
          <Event id="2" eventDestination="MessageTable"/>
          <Event id="3" eventDestination="SetOtherTable"/>
          <Event id="4" eventDestination="HighFreqTable"/>
          <DefaultEvents eventDestination="DefaultTable" />
        </EtwEventSourceProviderConfiguration>
      </EtwProviders>
    </DiagnosticMonitorConfiguration>
  </WadCfg>
</PublicConfig>
步骤 5:在工作角色上安装 Diagnostics
用于在 Web 或辅助角色上管理 Diagnostics 的 PowerShell cmdlet 为:Set-AzureServiceDiagnosticsExtension、Get-AzureServiceDiagnosticsExtension 和 Remove-AzureServiceDiagnosticsExtension。
- 打开 Azure PowerShell。
- 执行脚本在工作角色上安装 Diagnostics(将 StorageAccountKey 替换为 wadexample 存储帐户的存储帐户密钥,并将 config_path 替换为 WadExample.xml 文件的路径):
$storage_name = "wadexample"
$key = "<StorageAccountKey>"
$config_path="c:\users\<user>\documents\visual studio 2013\Projects\WadExample\WorkerRole1\WadExample.xml"
$service_name="wadexample"
$storageContext = New-AzureStorageContext -StorageAccountName $storage_name -StorageAccountKey $key
Set-AzureServiceDiagnosticsExtension -StorageContext $storageContext -DiagnosticsConfigurationPath $config_path -ServiceName $service_name -Slot Staging -Role WorkerRole1
步骤 6:查看遥测数据
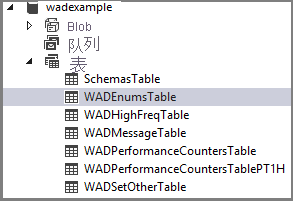
在 Visual Studio 的“服务器资源管理器”中,导航到 wadexample 存储帐户。 在云服务大约运行 5 分钟后,你应该会看到表 WADEnumsTable、WADHighFreqTable、WADMessageTable、WADPerformanceCountersTable 和 WADSetOtherTable。 双击其中一个表以查看收集的遥测数据。
配置文件架构
诊断配置文件定义启动诊断代理时用于初始化诊断配置设置的值。 有关有效值和示例,请参阅 最新架构参考 。
故障排除
如果遇到问题,请参阅 Azure 诊断疑难解答,获取有关常见问题的帮助。
后续步骤
若要更改你收集的数据、排查问题或者了解有关诊断的一般信息,请参阅相关 Azure 虚拟机诊断文章的列表。