你当前正在访问 Microsoft Azure Global Edition 技术文档网站。 如果需要访问由世纪互联运营的 Microsoft Azure 中国技术文档网站,请访问 https://docs.azure.cn。
本文介绍如何使用 Azure 通信服务 UI 库在 Android 或 iOS 应用中集成通话和聊天功能。
先决条件
- Azure 帐户和有效的 Azure 订阅。 免费创建帐户。
- 运行 Android Studio 的操作系统。
- 已部署的 Azure 通信服务资源。
- Azure 通信服务访问令牌。
获取完整示例
你可以从 GitHub 获取完整的示例项目。
设置项目
在 Android Studio 中,创建新的项目:
在“文件”菜单中,依次选择“新建”>“新建项目”。
在“新建项目”中,选择“空活动”项目模板。
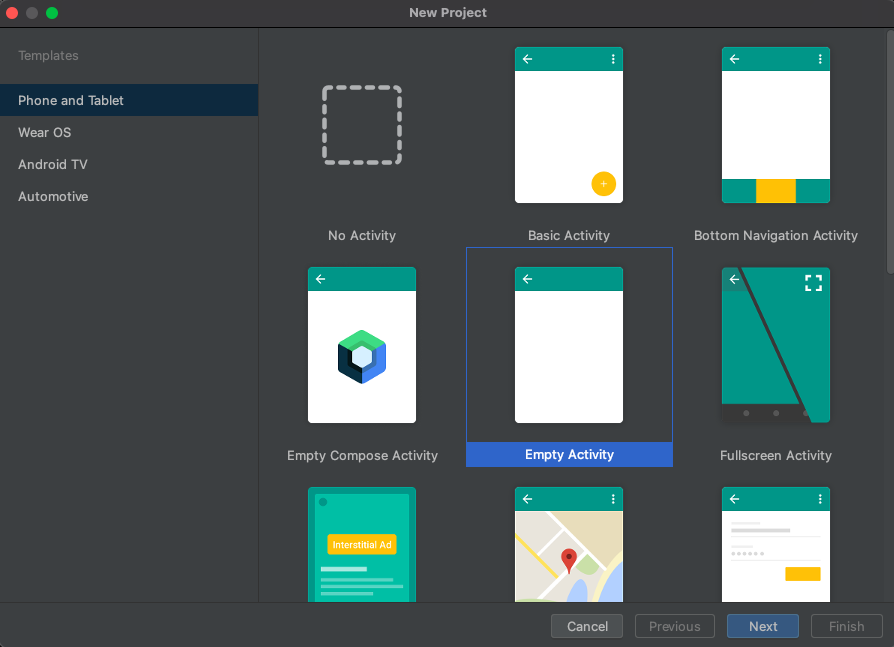
选择“下一步”。
在“空活动”中,将项目命名为 UILibraryQuickStart。 对于语言,请选择“Java”或“Kotlin”。 对于最低 SDK”,请选择“API 26: Android 8.0 (Oreo)”或更高版本。
选择“完成”。

安装包
完成以下部分以安装所需的应用程序包。
添加依赖项
在应用级 UILibraryQuickStart/app/build.gradle 文件中,添加以下依赖项:
dependencies {
    ...
    implementation("com.azure.android:azure-communication-ui-calling:+")
    implementation("com.azure.android:azure-communication-ui-chat:+")
    ...
}
将 META-INF 排除添加到 UILibraryQuickStart/app/build.gradle android 部分:
packaging {
    resources.excludes.add("META-INF/*")
}
添加 Maven 存储库
需要两个 Maven 存储库才能集成库:
mavenCentral存储库Azure 包存储库
repositories {
    ...
    mavenCentral()
    maven {
        url = URI("https://pkgs.dev.azure.com/MicrosoftDeviceSDK/DuoSDK-Public/_packaging/Duo-SDK-Feed/maven/v1")
    }
    ...
}
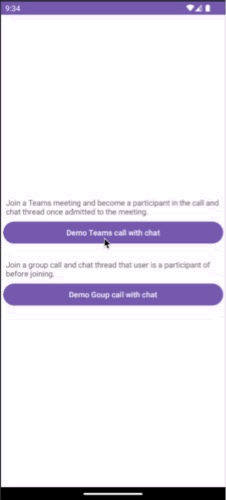
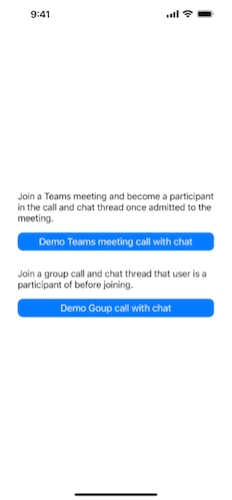
使用通话和聊天功能连接到 Teams 会议
你将使用 CallComposite 连接到通话。 在用户获准接入通话后,CallComposite 会通过将状态更改为 connected 来通知你。 然后,用户可以连接到聊天线程。
当用户选择“聊天”按钮时,一个自定义按钮会被添加到 CallComposite。 CallComposite 会最小化,且“聊天”将显示在 Teams 中。
在 Activity_main.xml 中添加按钮和聊天容器视图
在 app/src/main/res/layout/activity_main.xml 布局文件中,添加以下代码来创建一个启动复合组件的按钮:
<?xml version="1.0" encoding="utf-8"?>
<androidx.constraintlayout.widget.ConstraintLayout xmlns:android="http://schemas.android.com/apk/res/android"
    xmlns:app="http://schemas.android.com/apk/res-auto"
    xmlns:tools="http://schemas.android.com/tools"
    android:layout_width="match_parent"
    android:layout_height="match_parent"
    tools:context=".MainActivity">
    <LinearLayout
        android:id="@+id/buttonContainer"
        android:layout_width="match_parent"
        android:layout_height="wrap_content"
        android:orientation="horizontal"
        app:layout_constraintTop_toTopOf="parent"
        app:layout_constraintStart_toStartOf="parent"
        app:layout_constraintEnd_toEndOf="parent"
        >
        <Button
            android:id="@+id/startCallButton"
            android:layout_width="wrap_content"
            android:layout_height="wrap_content"
            android:text="Start Call"
            app:layout_constraintStart_toStartOf="parent"
            android:layout_marginStart="4dp"
            />
    </LinearLayout>
    <androidx.constraintlayout.widget.ConstraintLayout
        android:id="@+id/chatContainer"
        android:layout_width="match_parent"
        android:layout_height="0dp"
        app:layout_constraintTop_toBottomOf="@+id/buttonContainer"
        app:layout_constraintBottom_toBottomOf="parent"
        app:layout_constraintStart_toStartOf="parent"
        app:layout_constraintEnd_toEndOf="parent"
        >
    </androidx.constraintlayout.widget.ConstraintLayout>
</androidx.constraintlayout.widget.ConstraintLayout>
下载聊天图标
- 从 GitHub 存储库下载图标。
- 将图标保存到 UILibraryQuickStart/app/src/main/res/drawable。
- 打开图标并将
android:fillColor更改为@color/white。
初始化复合组件
若要初始化通话复合,请转到 MainActivity 并更新连接设置:
- 将
TEAM_MEETING_LINK替换为 Teams 会议链接。 - 将
ACS_ENDPOINT替换为你的 Azure 通信服务资源的终结点。 - 将
DISPLAY_NAME替换为自己的名称。 - 将
USER_ID替换为你的 Azure 通信服务用户 ID。 - 将
USER_ACCESS_TOKEN替换为你的令牌。
获取 Azure 通信服务用户的 Teams 会议聊天线程
如 Graph 文档中所述,可以使用 Graph API 检索 Teams 会议详细信息。 Azure 通信服务通话 SDK 可接受完整的 Teams 会议链接或会议 ID。 它们将作为 onlineMeeting 资源的一部分返回,可在 joinWebUrl 属性下访问。
使用图形 API,还可以获取 threadID 值。 响应拥有包含 threadID 值的 chatInfo 对象。
package com.example.uilibraryquickstart

import androidx.appcompat.app.AppCompatActivity
import android.os.Bundle
import android.view.ViewGroup
import android.widget.Button
import androidx.constraintlayout.widget.ConstraintLayout
import com.azure.android.communication.common.CommunicationTokenCredential
import com.azure.android.communication.common.CommunicationTokenRefreshOptions
import com.azure.android.communication.common.CommunicationUserIdentifier
import com.azure.android.communication.ui.calling.CallComposite
import com.azure.android.communication.ui.calling.CallCompositeBuilder
import com.azure.android.communication.ui.calling.models.CallCompositeCallScreenHeaderViewData
import com.azure.android.communication.ui.calling.models.CallCompositeCallScreenOptions
import com.azure.android.communication.ui.calling.models.CallCompositeCallStateCode
import com.azure.android.communication.ui.calling.models.CallCompositeCustomButtonViewData
import com.azure.android.communication.ui.calling.models.CallCompositeLocalOptions
import com.azure.android.communication.ui.calling.models.CallCompositeMultitaskingOptions
import com.azure.android.communication.ui.calling.models.CallCompositeTeamsMeetingLinkLocator
import com.azure.android.communication.ui.chat.ChatAdapter
import com.azure.android.communication.ui.chat.ChatAdapterBuilder
import com.azure.android.communication.ui.chat.presentation.ChatThreadView
import java.util.UUID

class MainActivity : AppCompatActivity() {
    companion object {
        private var callComposite: CallComposite? = null
        private var chatAdapter: ChatAdapter? = null
    }

    private val displayName = "USER_NAME"
    private val endpoint = "ACS_ENDPOINT"
    private val teamsMeetingLink = "TEAM_MEETING_LINK"
    private val threadId = "CHAT_THREAD_ID"
    private val communicationUserId = "USER_ID"
    private val userToken = "USER_ACCESS_TOKEN"

    override fun onCreate(savedInstanceState: Bundle?) {
        super.onCreate(savedInstanceState)
        setContentView(R.layout.activity_main)

        findViewById<Button>(R.id.startCallButton).setOnClickListener {
            startCallComposite()
        }
    }

    private fun startCallComposite() {
        val communicationTokenRefreshOptions = CommunicationTokenRefreshOptions({ userToken }, true)
        val communicationTokenCredential = CommunicationTokenCredential(communicationTokenRefreshOptions)
        val locator = CallCompositeTeamsMeetingLinkLocator(teamsMeetingLink)

        val localOptions = CallCompositeLocalOptions()
            .setCallScreenOptions(
                CallCompositeCallScreenOptions().setHeaderViewData(
                    CallCompositeCallScreenHeaderViewData().setCustomButtons(
                        listOf(
                            CallCompositeCustomButtonViewData(
                                UUID.randomUUID().toString(),
                                R.drawable.ic_fluent_chat_24_regular,
                                "Open Chat",
                            ) {
                                callComposite?.sendToBackground()
                                showChatUI()
                            }
                        )
                    )
                ))
        val callComposite = CallCompositeBuilder()
            .applicationContext(this.applicationContext)
            .credential(communicationTokenCredential)
            .displayName(displayName)
            .multitasking(CallCompositeMultitaskingOptions(true, true))
            .build()

        callComposite.addOnCallStateChangedEventHandler { callState ->
            // When a user is admitted to the Teams meeting, the call state becomes connected.
            // Only users admitted to the meeting can connect to the meeting's chat thread.
            if (callState.code == CallCompositeCallStateCode.CONNECTED) {
                connectChat()
            }
        }

        callComposite.launch(this, locator, localOptions)
        MainActivity.callComposite = callComposite
    }

    private fun connectChat() {
        if (chatAdapter != null)
            return

        val communicationTokenRefreshOptions =
            CommunicationTokenRefreshOptions( { userToken }, true)
        val communicationTokenCredential =
            CommunicationTokenCredential(communicationTokenRefreshOptions)

        val chatAdapter = ChatAdapterBuilder()
            .endpoint(endpoint)
            .credential(communicationTokenCredential)
            .identity(CommunicationUserIdentifier(communicationUserId))
            .displayName(displayName)
            .threadId(threadId)
            .build()
        chatAdapter.connect(applicationContext)
        MainActivity.chatAdapter = chatAdapter
    }

    private fun showChatUI() {
        chatAdapter?.let {
            // Create Chat Composite View
            val chatView = ChatThreadView(this, chatAdapter)
            val chatContainer = findViewById<ConstraintLayout>(R.id.chatContainer)
            chatContainer.removeAllViews()
            chatContainer.addView(
                chatView,
                ViewGroup.LayoutParams(
                    ViewGroup.LayoutParams.MATCH_PARENT,
                    ViewGroup.LayoutParams.MATCH_PARENT
                )
            )
        }
    }
}
先决条件
- Azure 帐户和有效的 Azure 订阅。 免费创建帐户。
- 运行 Xcode 13 或更高版本的 Mac,以及已安装到密钥链中的有效的开发人员证书。 还必须安装 CocoaPods 以提取依赖项。
- 已部署的 Azure 通信服务资源。
- Azure 通信服务访问令牌。
获取完整示例
你可以从 GitHub 获取完整的示例项目。
设置项目
完成以下部分以设置快速入门项目。
创建新的 Xcode 项目
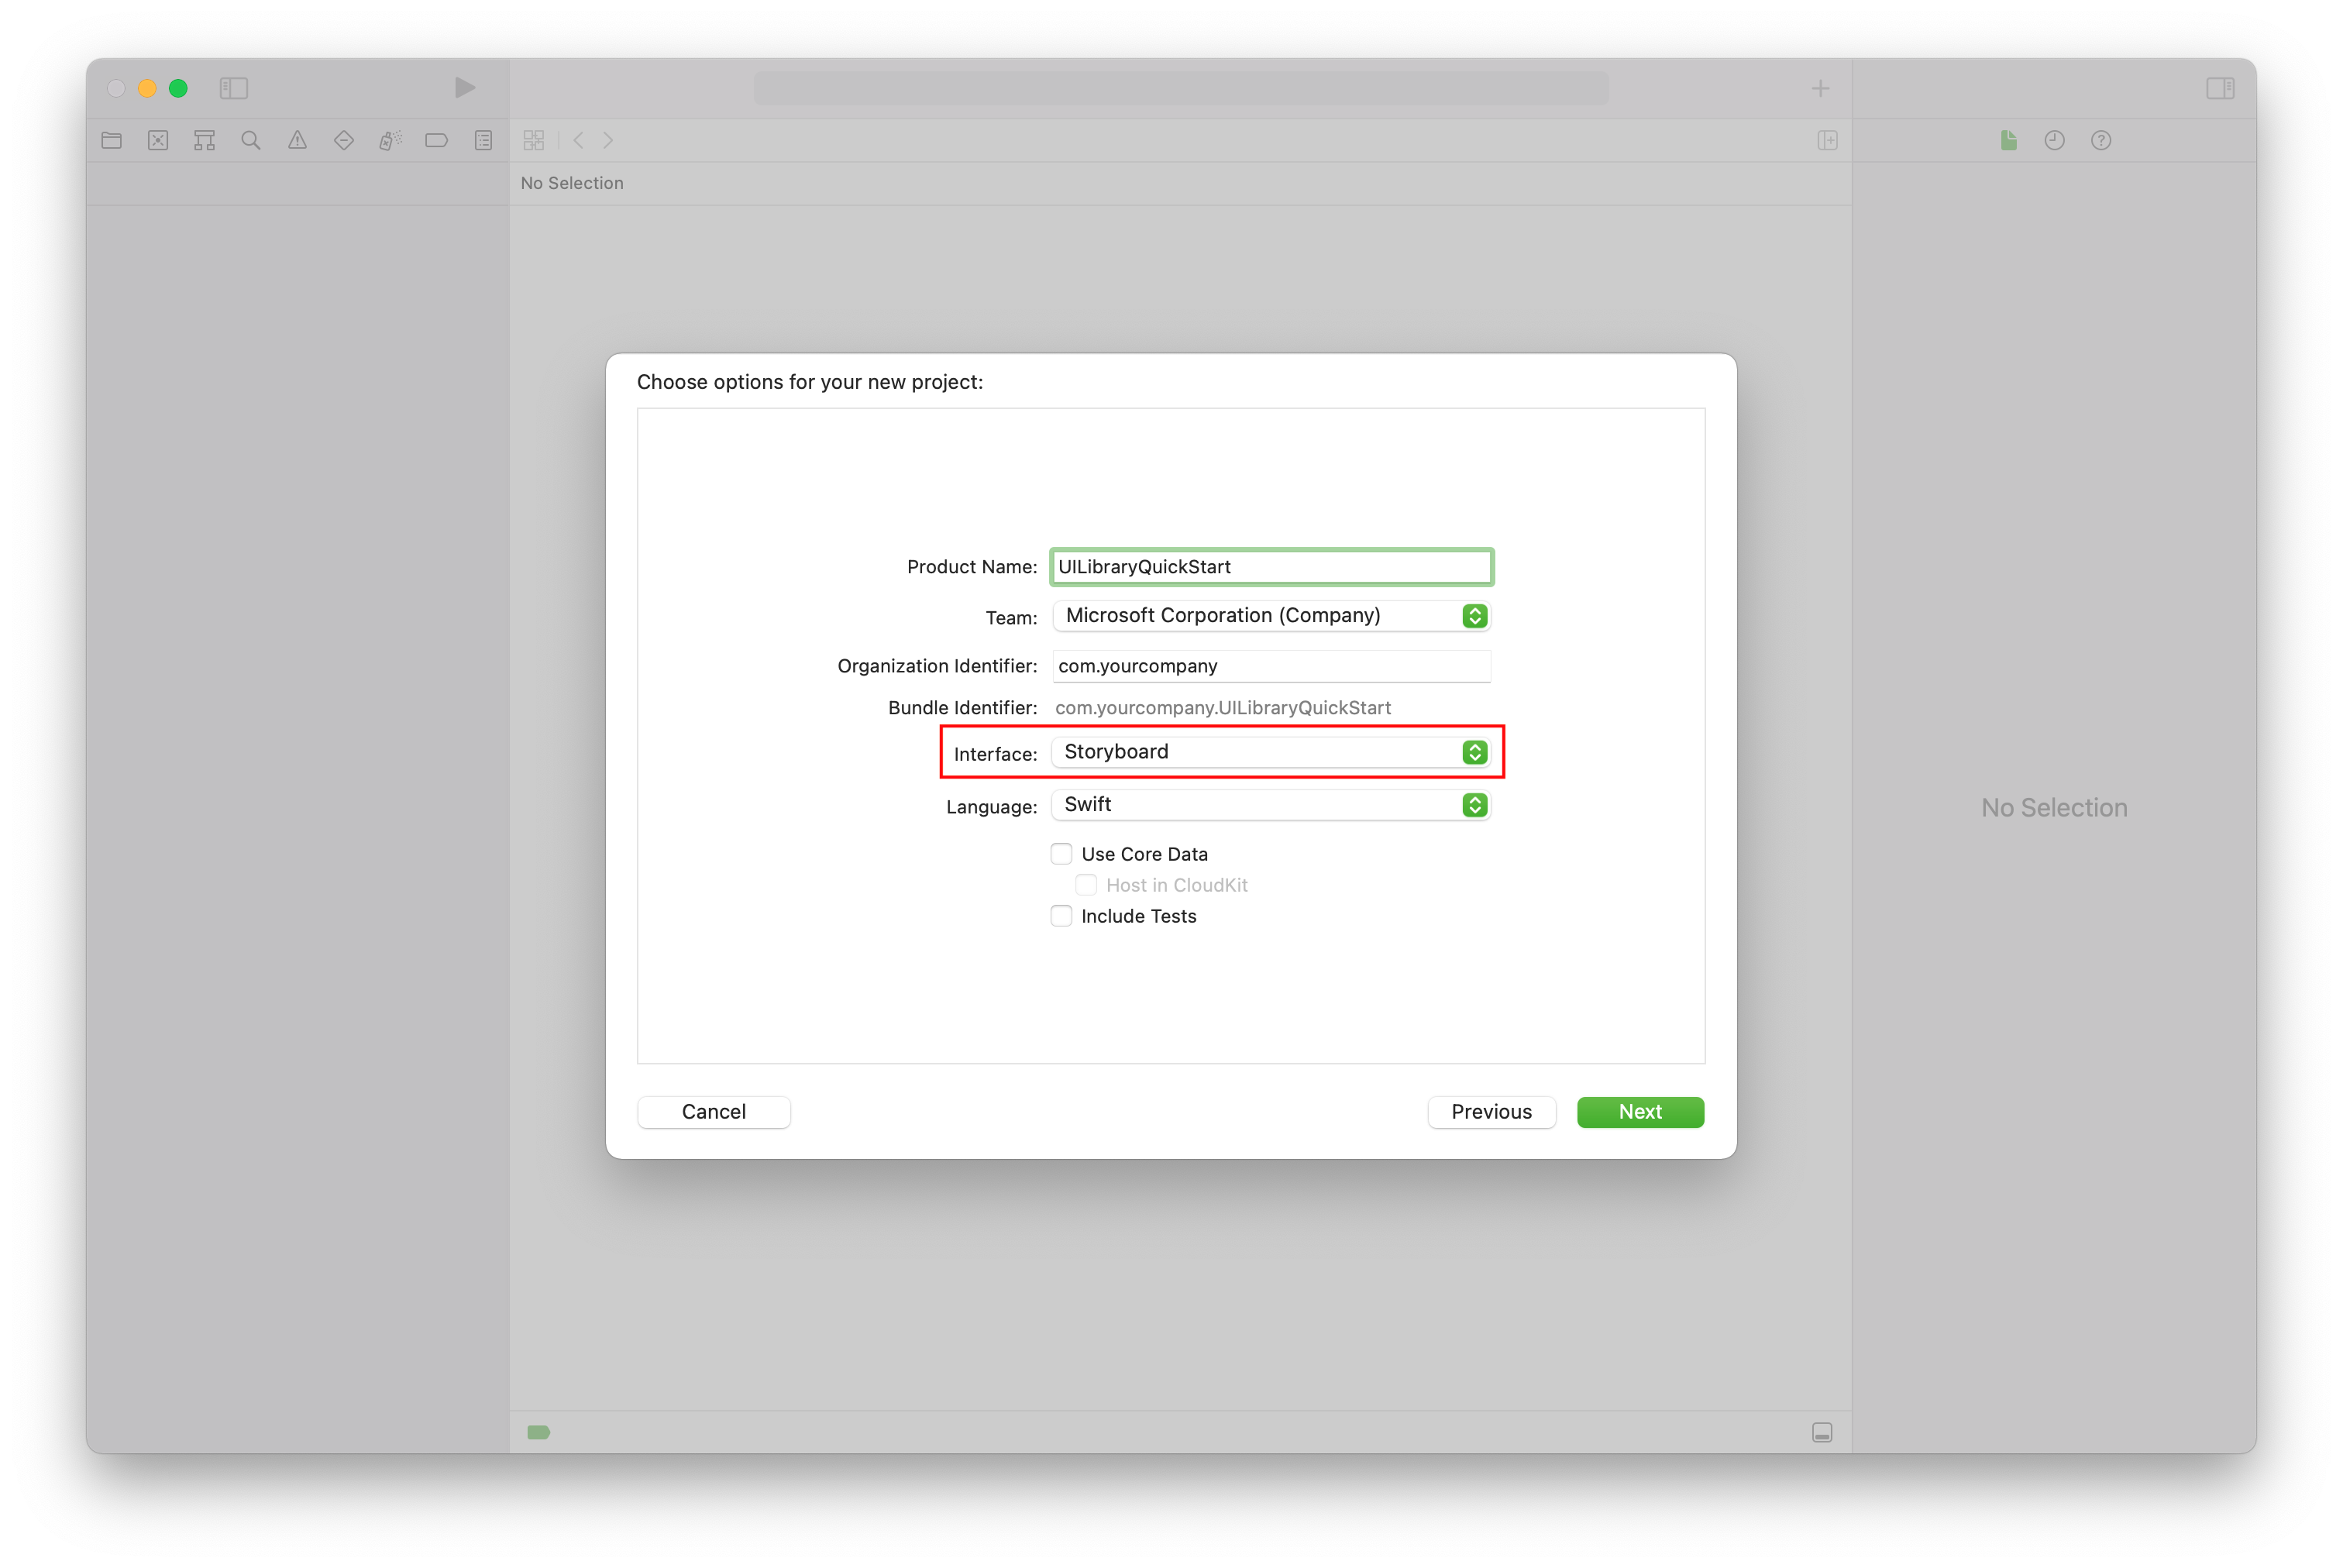
在 Xcode 中创建新项目:
在“文件”菜单中,选择“新建”>“项目”。
在“为新项目选择模板”中,选择 iOS 平台并选择“应用”应用程序模板。 快速入门使用 UIKit Storyboard。 快速入门不会创建测试,因此可以清除“包括测试”复选框。
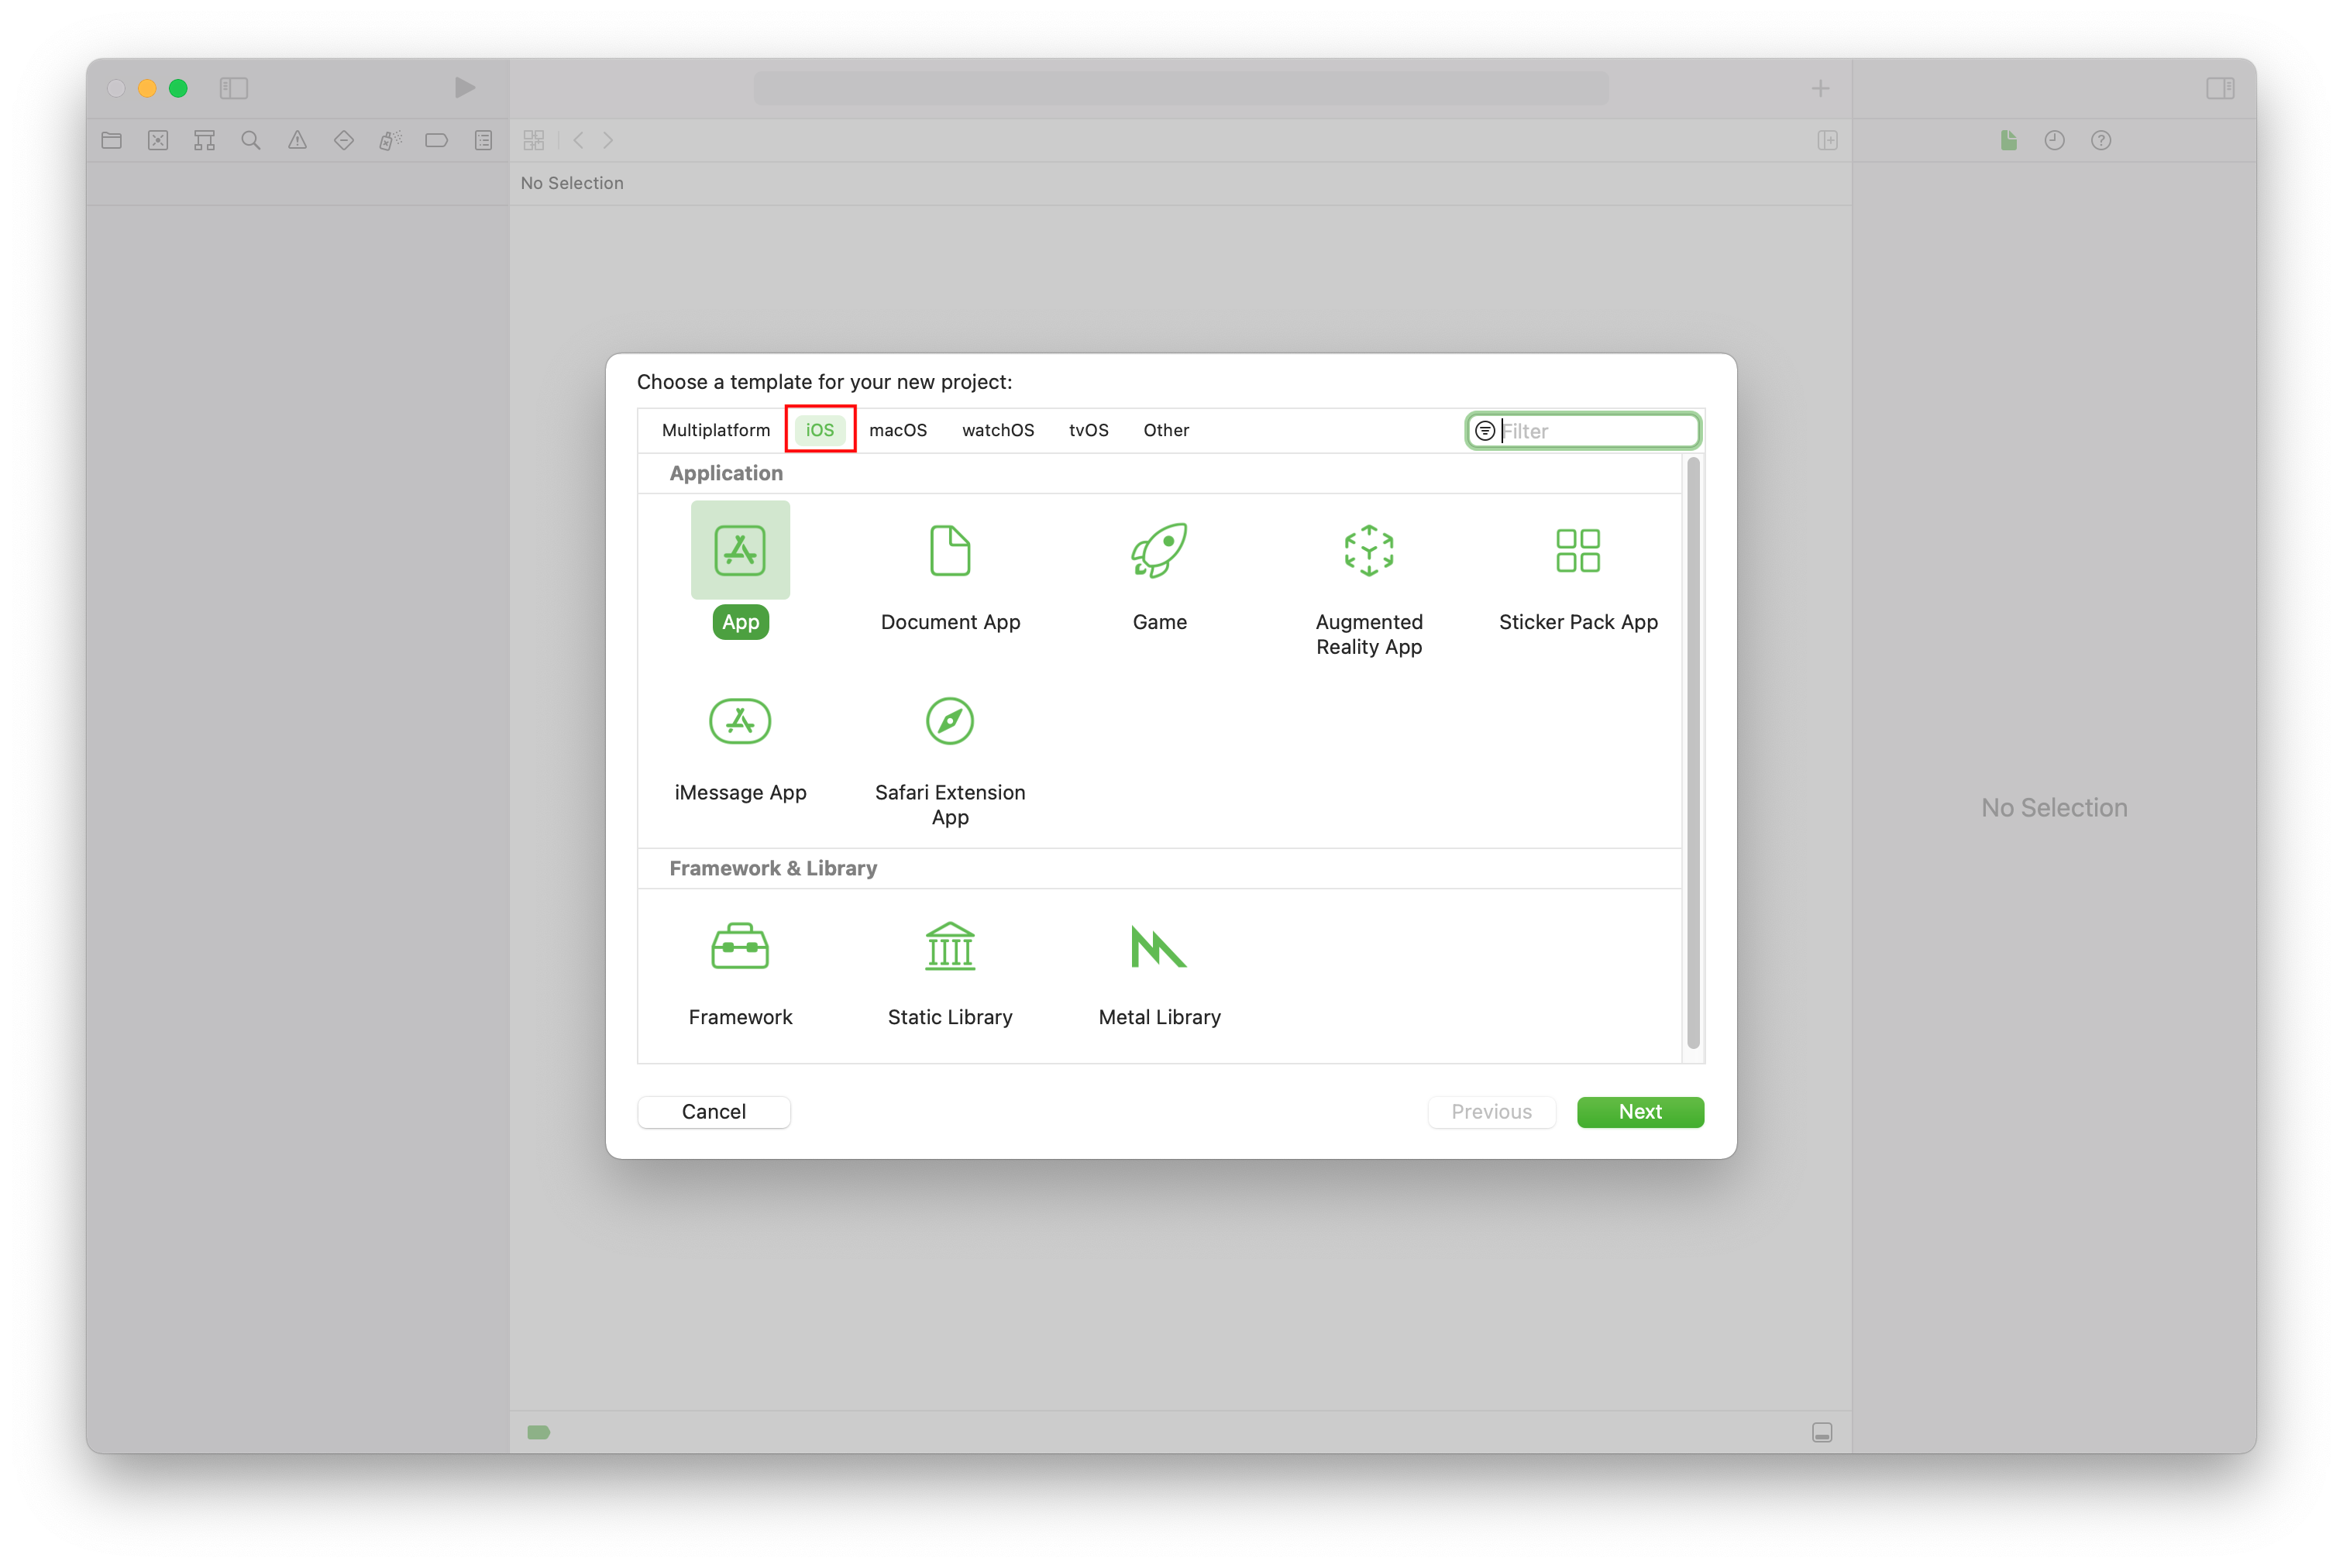
在“为新建项目选择选项”中,在产品名称处输入 UILibraryQuickStart。 请在“界面”处选择“Storyboard”。
安装包和依赖项
(可选)对于 MacBook with M1,请在 Xcode 中安装并启用 Rosetta。
在项目根目录中,运行
pod init以创建 Podfile。 如果遇到错误,请将 CocoaPods 更新为当前版本。请将以下代码添加到 Podfile 中。 将
UILibraryQuickStart替换为你的项目名称。platform :ios, '15.0' target 'UILibraryQuickStart' do use_frameworks! pod 'AzureCommunicationUICalling', '1.12.0-beta.1' pod 'AzureCommunicationUIChat', '1.0.0-beta.4' end运行
pod install --repo-update。在 Xcode 中,打开 generated.xcworkspace 文件。
请求访问设备硬件
若要访问设备的硬件(包括麦克风和摄像头),请更新应用的信息属性列表。 将关联的值设置为一个字符串,该字符串将包含在系统用于向用户请求访问权限的对话框中。
右键单击项目树的
Info.plist条目,然后选择“打开为”>“源代码” 。 将以下代码行添加到顶层<dict>节,然后保存文件。<key>NSCameraUsageDescription</key> <string></string> <key>NSMicrophoneUsageDescription</key> <string></string>以下是 Xcode 文件中
Info.plist源代码的示例: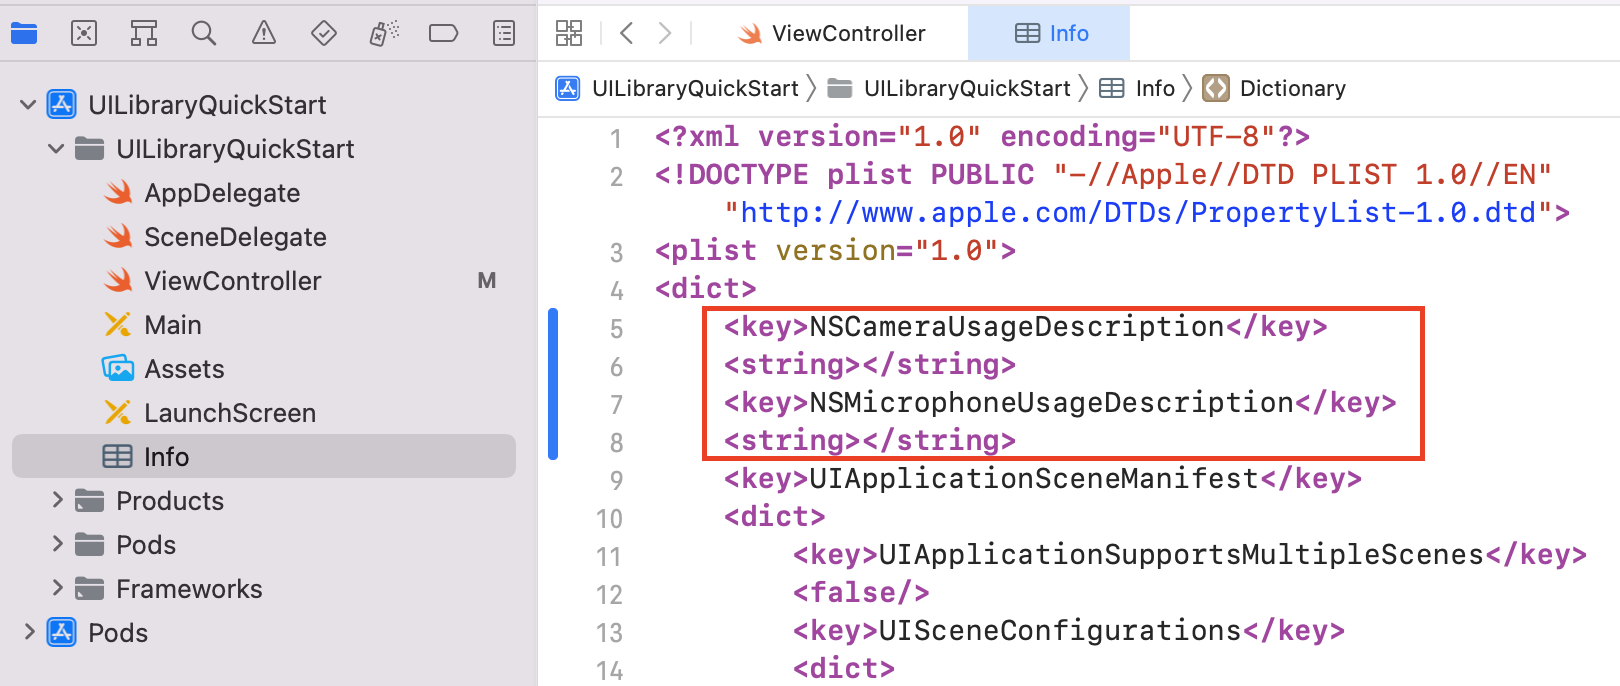
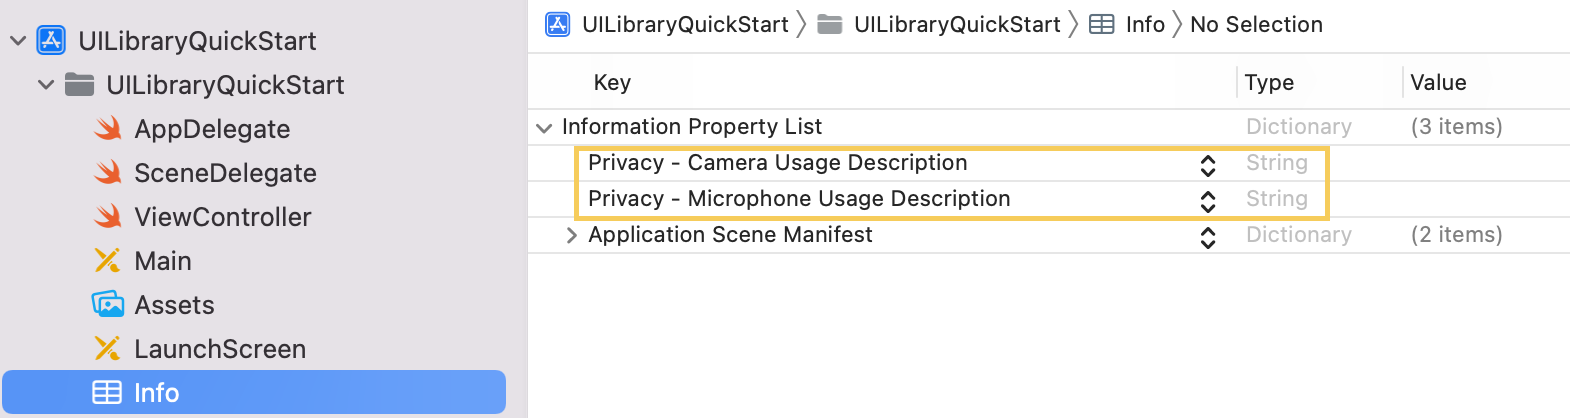
若要验证是否已正确添加设备权限请求,请选择“打开为”>“属性列表”。 检查信息属性列表是否如下例所示:
关闭 Bitcode
在 Xcode 项目中的“生成设置”下,将“启用 Bitcode”选项设置为“否”。 若要查找设置,请将筛选器从“基本”更改为“全部”,或使用搜索栏。

下载聊天图标
- 从 GitHub 存储库下载图标。
- 打开下载的文件,并将
fill更改为fill="#FFFFFF"。 - 在 Xcode 中,转到“资产”。 创建新的映像集并将其命名为 ic_fluent_chat_24_regular。 将下载的文件选为通用图标。
初始化复合组件
若要初始化复合,请转到 ViewController 并更新连接设置:
- 将
TEAM_MEETING_LINK替换为 Teams 会议链接。 - 将
ACS_ENDPOINT替换为你的 Azure 通信服务资源的终结点。 - 将
DISPLAY_NAME替换为自己的名称。 - 将
USER_ID替换为你的 Azure 通信服务用户 ID。 - 将
USER_ACCESS_TOKEN替换为你的令牌。
获取 Azure 通信服务用户的 Teams 会议聊天线程
如 Graph 文档中所述,可以使用 Graph API 检索 Teams 会议详细信息。 Azure 通信服务通话 SDK 可接受完整的 Teams 会议链接或会议 ID。 它们将作为 onlineMeeting 资源的一部分返回,可在 joinWebUrl 属性下访问。
使用图形 API,还可以获取 threadID 值。 响应拥有包含 threadID 值的 chatInfo 对象。
import UIKit
import AzureCommunicationCalling
import AzureCommunicationUICalling
import AzureCommunicationUIChat

class ViewController: UIViewController {
    private let displayName = "USER_NAME"
    private let endpoint = "ACS_ENDPOINT"
    private let teamsMeetingLink = "TEAM_MEETING_LINK"
    private let chatThreadId = "CHAT_THREAD_ID"
    private let communicationUserId = "USER_ID"
    private let userToken = "USER_ACCESS_TOKEN"


    private var callComposite: CallComposite?
    private var chatAdapter: ChatAdapter?
    private var chatCompositeViewController: ChatCompositeViewController?

    private var startCallButton: UIButton?
    private var chatContainerView: UIView?

    override func viewDidLoad() {
        super.viewDidLoad()
        view.backgroundColor = .systemBackground
        initControlBar()
    }

    @objc private func startCallComposite() {
        let callCompositeOptions = CallCompositeOptions(
            enableMultitasking: true,
            enableSystemPictureInPictureWhenMultitasking: true,
            displayName: displayName)

        let communicationTokenCredential = try! CommunicationTokenCredential(token: userToken)

        let callComposite = self.callComposite ?? CallComposite(credential: communicationTokenCredential, withOptions: callCompositeOptions)
        self.callComposite = callComposite

        callComposite.events.onCallStateChanged = { [weak self] callState in
            if callState.requestString == CallState.connected.requestString {
                self?.connectChat()
            }
        }

        let chatCustomButton = CustomButtonViewData(
            id: UUID().uuidString,
            image: UIImage(named: "ic_fluent_chat_24_regular")!,
            title: "Chat") { [weak self] _ in
                self?.callComposite?.isHidden = true
                self?.showChat()
            }
        let callScreenHeaderViewData = CallScreenHeaderViewData(customButtons: [chatCustomButton])
        let localOptions = LocalOptions(callScreenOptions: CallScreenOptions(headerViewData: callScreenHeaderViewData))
        callComposite.launch(locator: .teamsMeeting(teamsLink: teamsMeetingLink), localOptions: localOptions)
    }

    @objc private func connectChat() {
        let communicationIdentifier = CommunicationUserIdentifier(communicationUserId)
        guard let communicationTokenCredential = try? CommunicationTokenCredential(
            token: userToken) else {
            return
        }

        self.chatAdapter = ChatAdapter(
            endpoint: endpoint,
            identifier: communicationIdentifier,
            credential: communicationTokenCredential,
            threadId: chatThreadId,
            displayName: displayName)

        Task { @MainActor in
            guard let chatAdapter = self.chatAdapter else {
                return
            }
            try await chatAdapter.connect()
        }
    }

    @objc private func showChat() {
        guard let chatAdapter = self.chatAdapter,
              let chatContainerView = self.chatContainerView,
              self.chatCompositeViewController == nil else {
            return
        }

        let chatCompositeViewController = ChatCompositeViewController(with: chatAdapter)

        self.addChild(chatCompositeViewController)
        chatContainerView.addSubview(chatCompositeViewController.view)

        chatCompositeViewController.view.translatesAutoresizingMaskIntoConstraints = false
        NSLayoutConstraint.activate([
            chatCompositeViewController.view.topAnchor.constraint(equalTo: chatContainerView.topAnchor),
            chatCompositeViewController.view.bottomAnchor.constraint(equalTo: chatContainerView.bottomAnchor),
            chatCompositeViewController.view.leadingAnchor.constraint(equalTo: chatContainerView.leadingAnchor),
            chatCompositeViewController.view.trailingAnchor.constraint(equalTo: chatContainerView.trailingAnchor)
        ])

        chatCompositeViewController.didMove(toParent: self)
        self.chatCompositeViewController = chatCompositeViewController
    }

    private func initControlBar() {
        let startCallButton = UIButton()
        self.startCallButton = startCallButton
        startCallButton.layer.cornerRadius = 10
        startCallButton.contentEdgeInsets = UIEdgeInsets(top: 6, left: 16, bottom: 6, right: 16)
        startCallButton.backgroundColor = .systemBlue
        startCallButton.setTitle("Call", for: .normal)
        startCallButton.addTarget(self, action: #selector(startCallComposite), for: .touchUpInside)
        startCallButton.translatesAutoresizingMaskIntoConstraints = false

        let margin: CGFloat = 32.0

        let buttonsContainerView = UIView()
        buttonsContainerView.backgroundColor = .clear

        let buttonsStackView = UIStackView(arrangedSubviews: [startCallButton])
        buttonsStackView.axis = .horizontal
        buttonsStackView.alignment = .center
        buttonsStackView.distribution = .equalSpacing
        buttonsStackView.spacing = 10
        buttonsStackView.translatesAutoresizingMaskIntoConstraints = false
        buttonsStackView.heightAnchor.constraint(equalToConstant: 50).isActive = true

        buttonsContainerView.addSubview(buttonsStackView)

        buttonsContainerView.translatesAutoresizingMaskIntoConstraints = false
        NSLayoutConstraint.activate([
            buttonsStackView.topAnchor.constraint(equalTo: buttonsContainerView.topAnchor, constant: 8),
            buttonsStackView.bottomAnchor.constraint(equalTo: buttonsContainerView.bottomAnchor, constant: -8),
            buttonsStackView.leadingAnchor.constraint(equalTo: buttonsContainerView.leadingAnchor, constant: 16),
        ])

        let chatContainerView = UIView()
        self.chatContainerView = chatContainerView

        let verticalStackView = UIStackView(arrangedSubviews: [
            buttonsContainerView,
            chatContainerView
            ])
        verticalStackView.axis = .vertical
        verticalStackView.alignment = .fill
        verticalStackView.translatesAutoresizingMaskIntoConstraints = false
        view.addSubview(verticalStackView)

        let margins = view.safeAreaLayoutGuide
        let constraints = [
            verticalStackView.leadingAnchor.constraint(equalTo: margins.leadingAnchor),
            verticalStackView.trailingAnchor.constraint(equalTo: margins.trailingAnchor),
            verticalStackView.topAnchor.constraint(equalTo: margins.topAnchor, constant: margin),
            verticalStackView.bottomAnchor.constraint(equalTo: margins.bottomAnchor, constant: -margin)
        ]
        NSLayoutConstraint.activate(constraints)
    }
}
运行代码
运行代码以在设备上构建并运行应用。
其他功能
用例列表提供有关其他功能的详细信息。
向移动应用添加通知
Azure 通信服务与 Azure 事件网格和 Azure 通知中心集成,因此你可以向 Azure 中的应用添加推送通知。 可以使用推送通知将信息从你的应用程序发送到用户的移动设备。 推送通知可显示对话、播放声音或显示传入的通话 UI。