你当前正在访问 Microsoft Azure Global Edition 技术文档网站。 如果需要访问由世纪互联运营的 Microsoft Azure 中国技术文档网站,请访问 https://docs.azure.cn。
使用变更数据捕获资源将更改后的数据从 Azure Data Lake Storage Gen2 捕获到 Azure SQL 数据库
适用于: Azure 数据工厂
  Azure Synapse Analytics
提示
试用 Microsoft Fabric 中的数据工厂,这是一种适用于企业的一站式分析解决方案。 Microsoft Fabric 涵盖从数据移动到数据科学、实时分析、商业智能和报告的所有内容。 了解如何免费开始新的试用!
在本文中,你将使用 Azure 数据工厂用户界面创建变更数据捕获 (CDC) 资源。 该资源从 Azure Data Lake Storage Gen2 源中选取已更改的数据,并将其实时添加到 Azure SQL 数据库。
在本文中,学习如何:
- 创建 CDC 资源。
- 监视 CDC 活动。
可在本文修改和扩展配置模式。
先决条件
在开始本文的过程之前,请确保具有以下资源:
- Azure 订阅。 如果没有 Azure 订阅,请先创建免费的 Azure 帐户。
- SQL 数据库。 使用 Azure SQL 数据库作为源数据存储。 如果没有 SQL 数据库,请在 Azure 门户中创建一个。
- 存储帐户: 使用存储在 Azure Data Lake Storage Gen2 中的 Delta Lake 作为目标数据存储。 如果没有存储帐户,请参阅创建存储帐户以获取创建步骤。
创建 CDC 项目
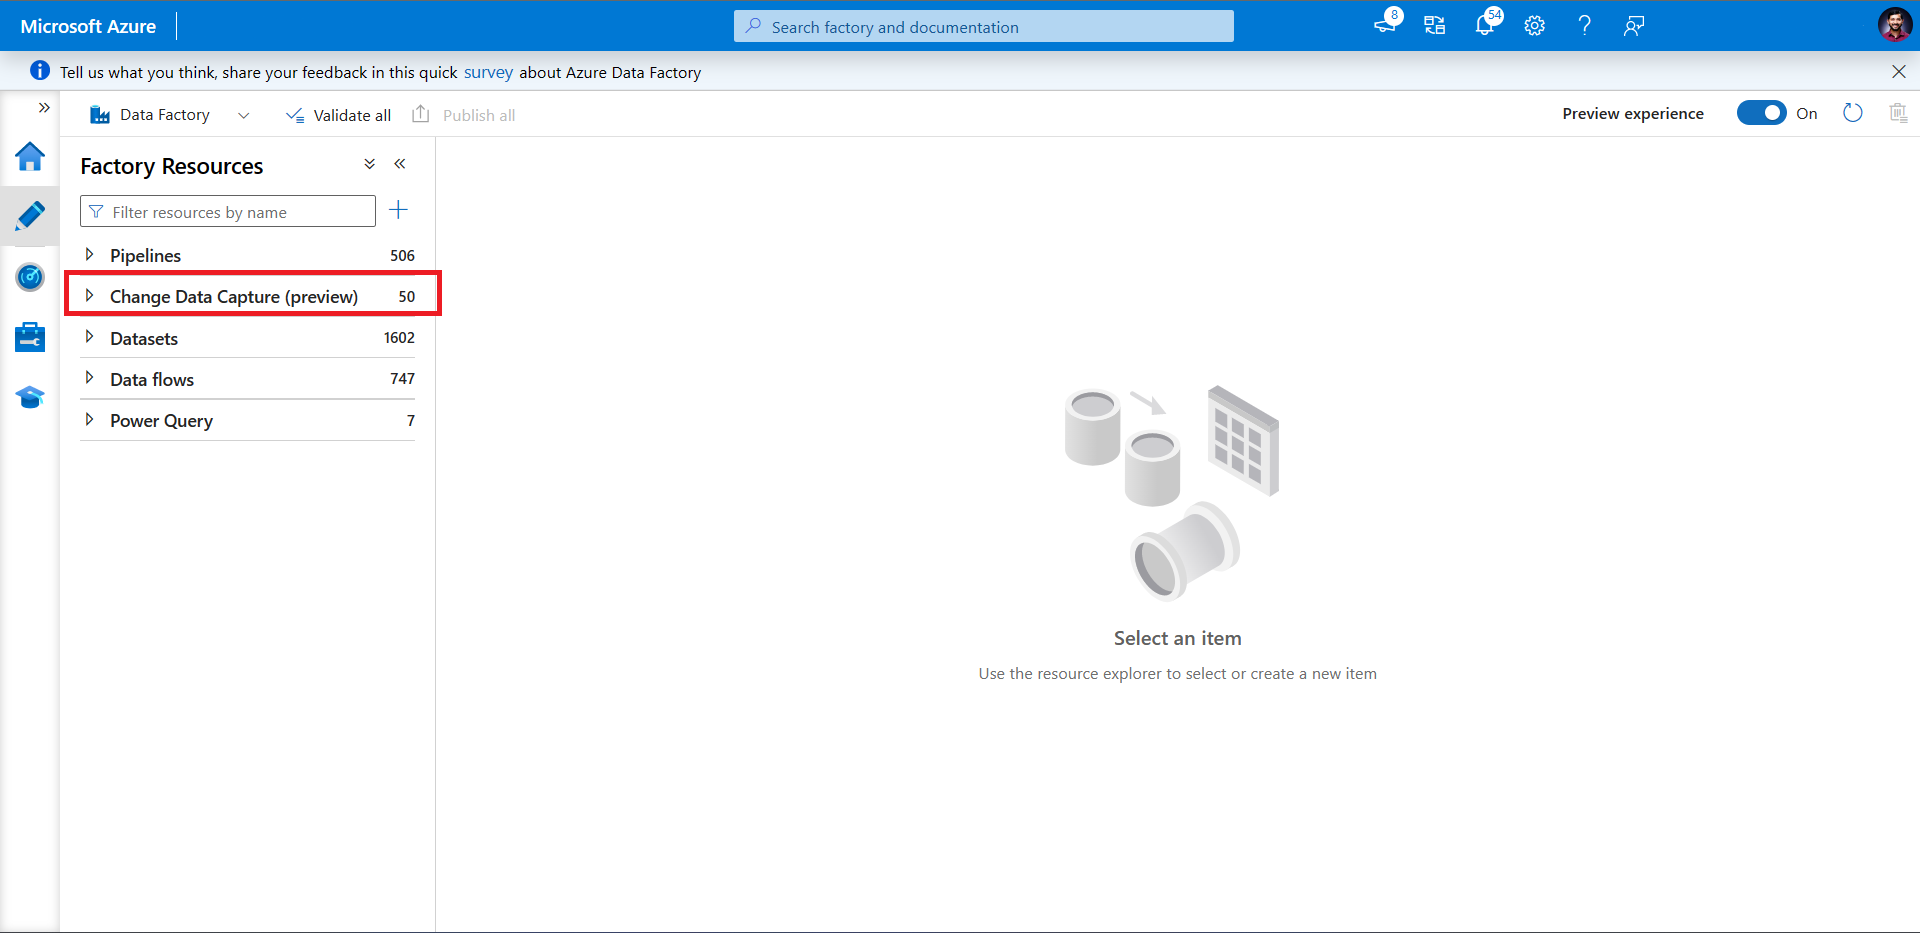
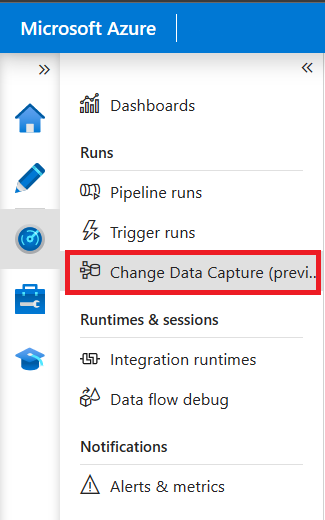
转到数据工厂中的“创作”窗格。 在“管道”下,会出现一个名为“变更数据捕获(预览版)”的新顶级项目。
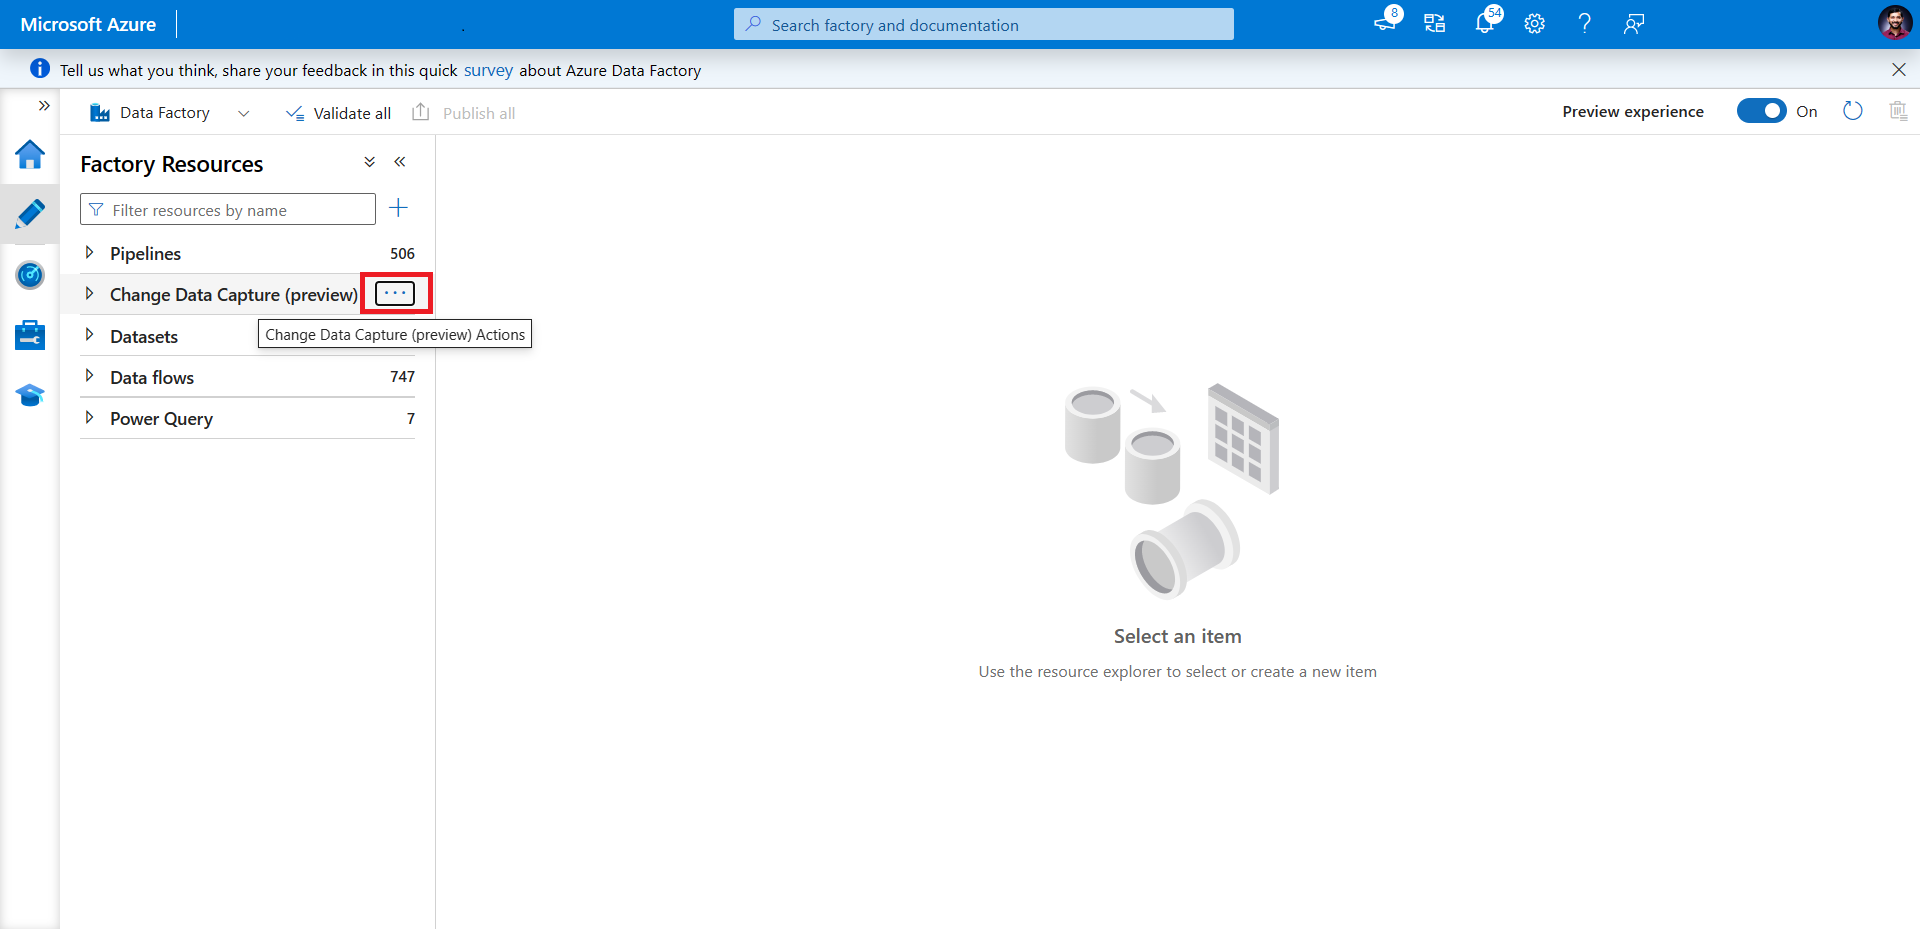
将光标悬停在“变更数据捕获(预览版)”上,直到出现三个点。 然后,选择“变更数据捕获(预览版)操作”。
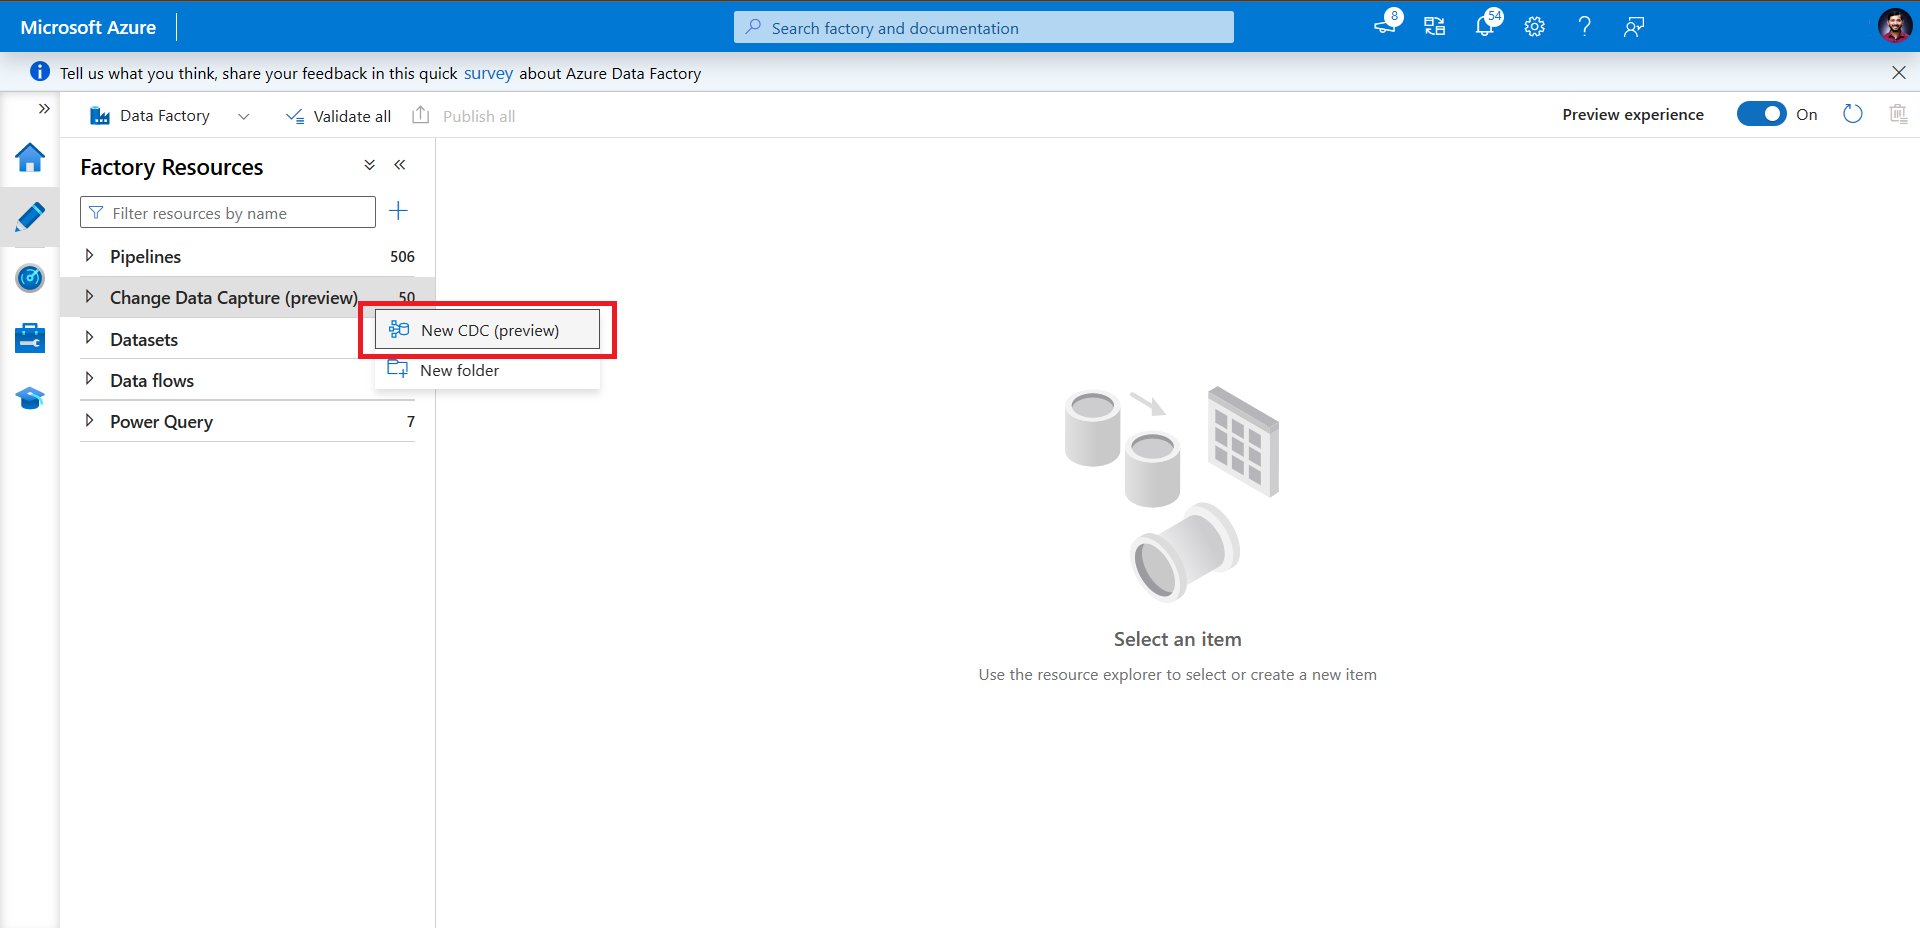
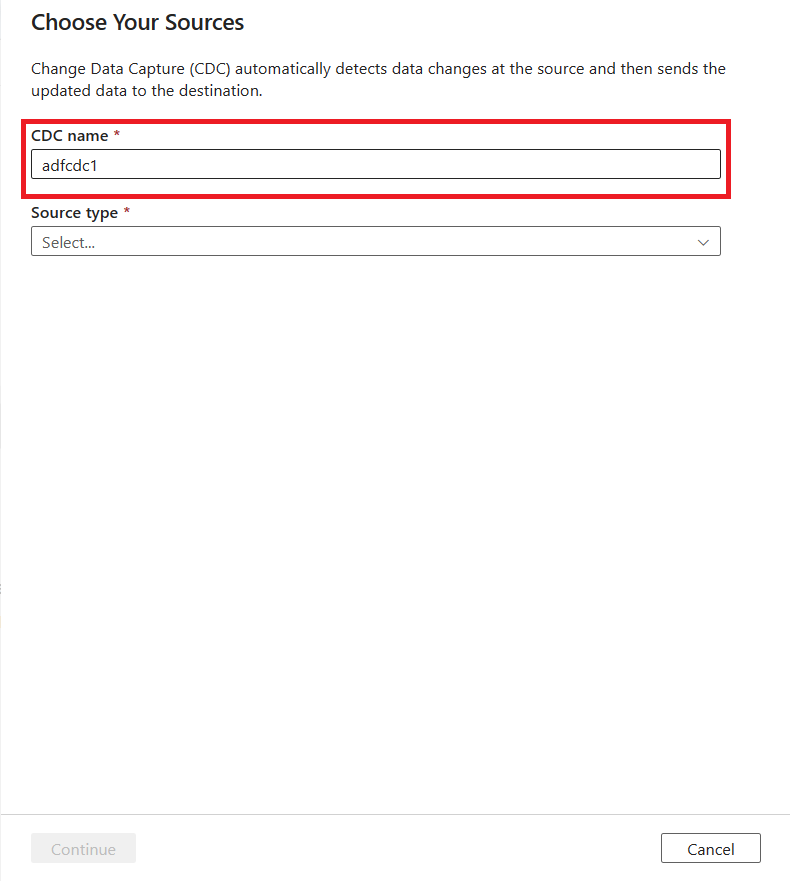
选择“新建 CDC(预览版)”。 此步骤会打开用于开始引导式过程的浮出控件。
系统会提示你为 CDC 资源命名。 默认情况下,名称为“adfcdc”,还带有一个按 1 递增的数字。 可以将此默认名称替换为自己想要的名称。
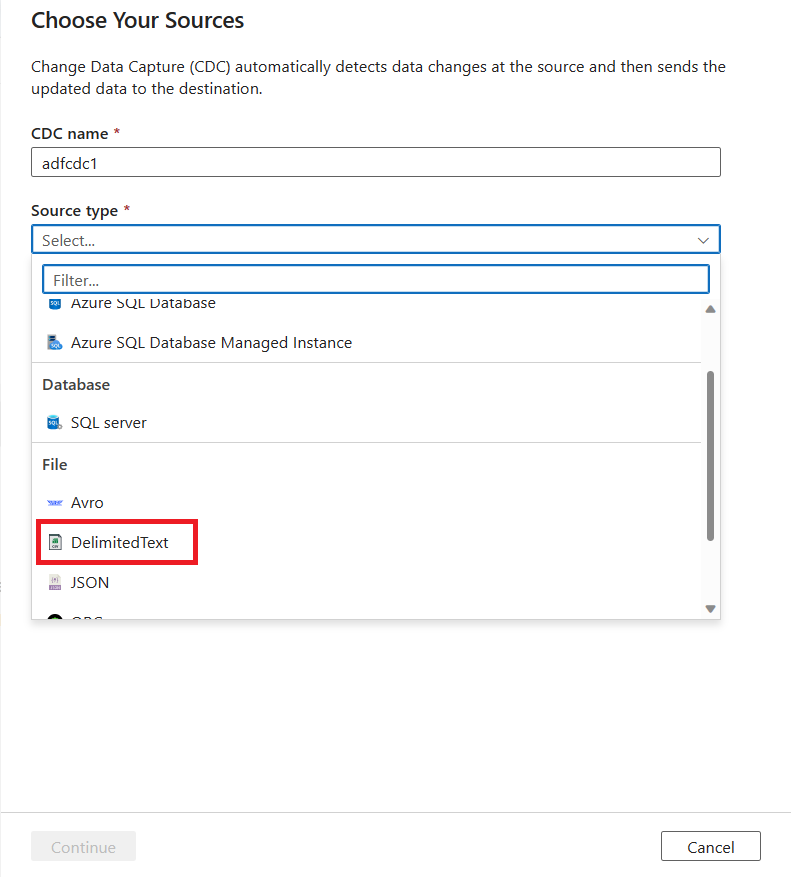
使用下拉列表选择数据源。 对于本文,请选择 DelimitedText。
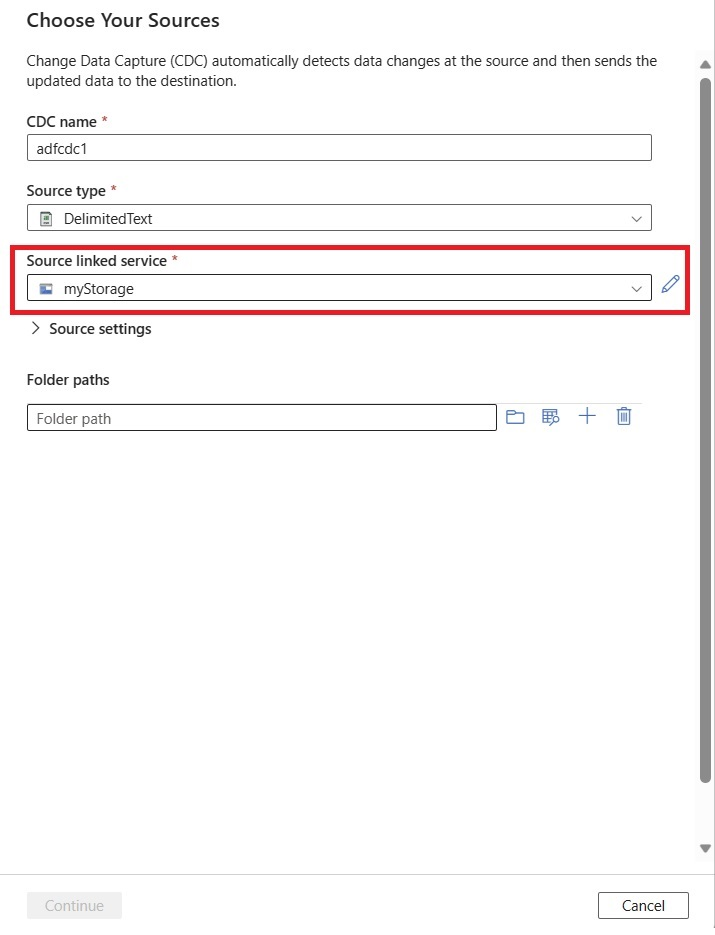
系统会提示你选择链接服务。 创建新的或选择现有的链接服务。
使用“源设置”区域可选择性地设置高级源配置,包括列分隔符和行分隔符。
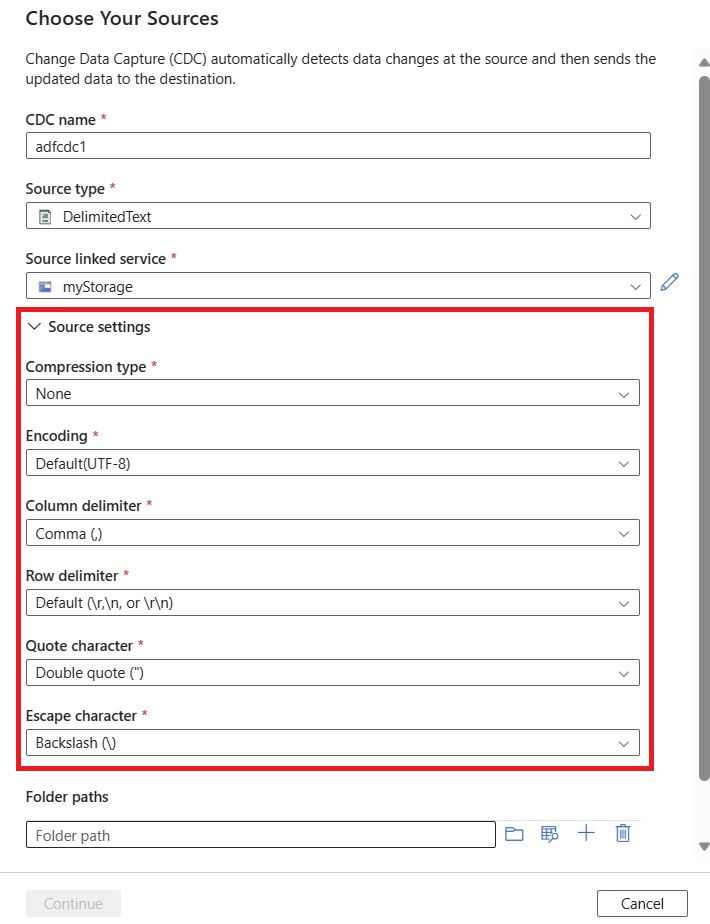
如果不手动编辑这些源设置,它们将设置为默认值。
使用“浏览”按钮选择源数据文件夹。
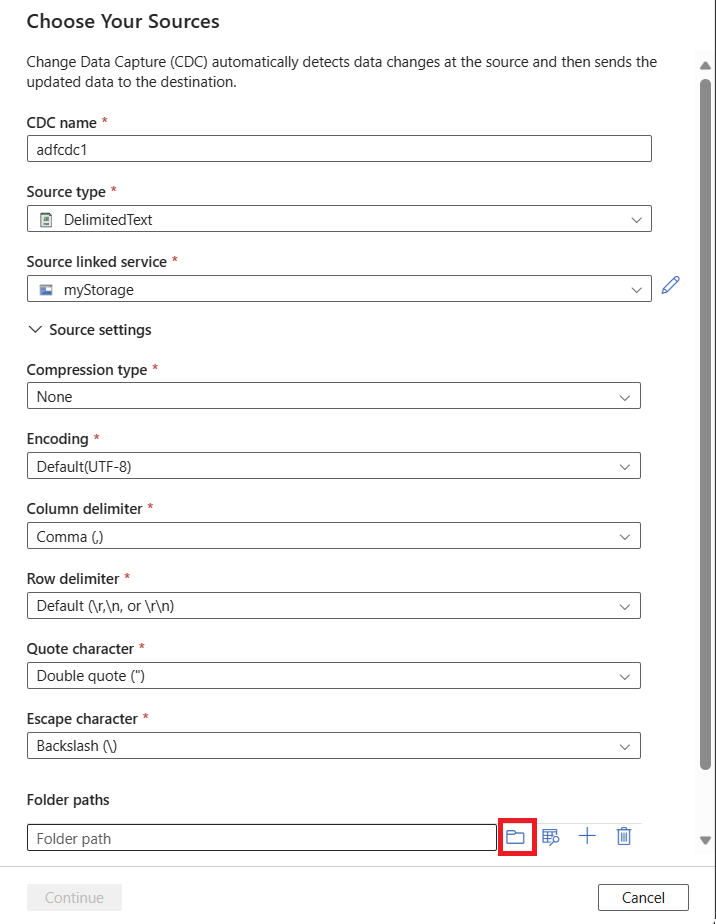
选择文件夹路径后,可选择“继续”来设置数据目标。

可选择使用加号 (+) 按钮来添加多个源文件夹。 其他源也必须使用你已选择的同一链接服务。
使用下拉列表选择“目标类型”值。 对于本文,请选择“Azure SQL 数据库”。
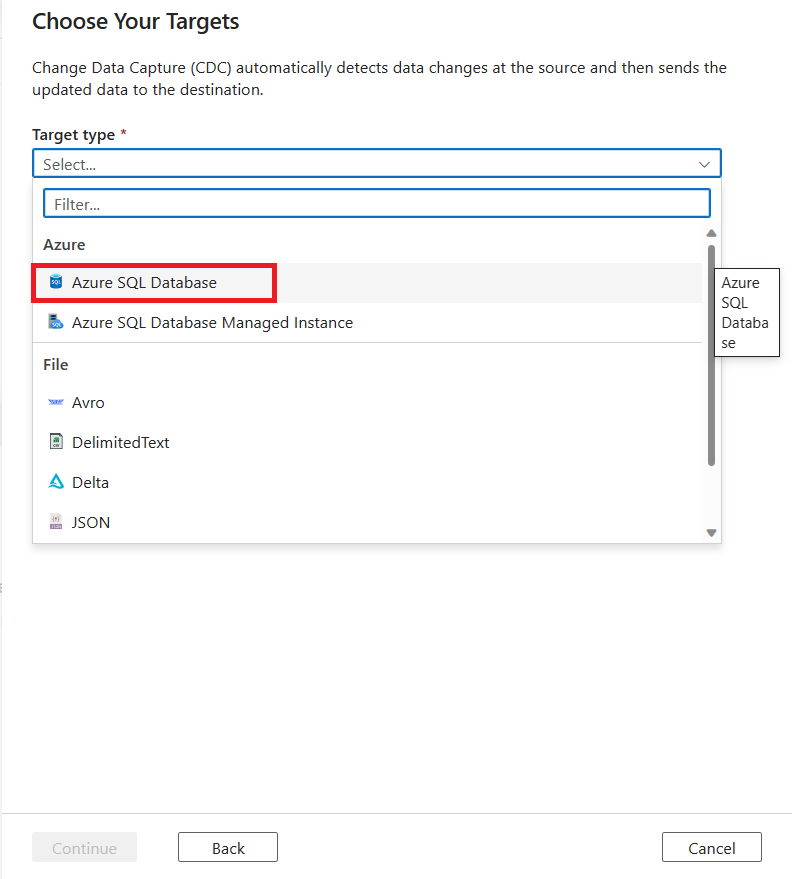
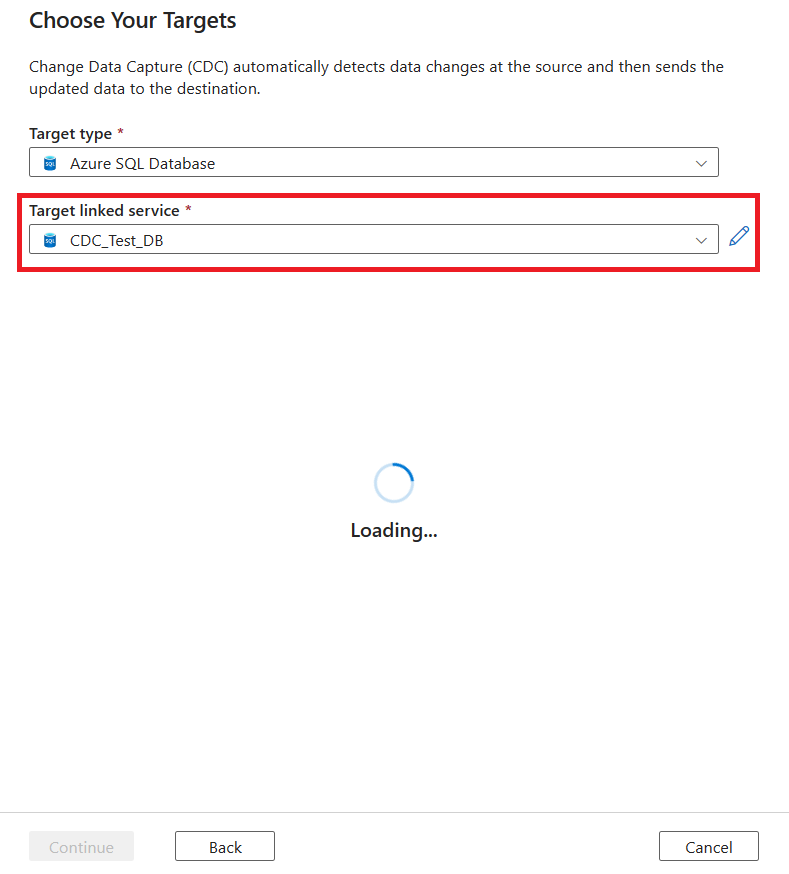
系统会提示你选择链接服务。 创建新的或选择现有的链接服务。
对于“目标表”,可以创建新的目标表或选择现有的目标表:
若要创建目标表,请选择“新建实体”选项卡,然后选择“编辑新表”。
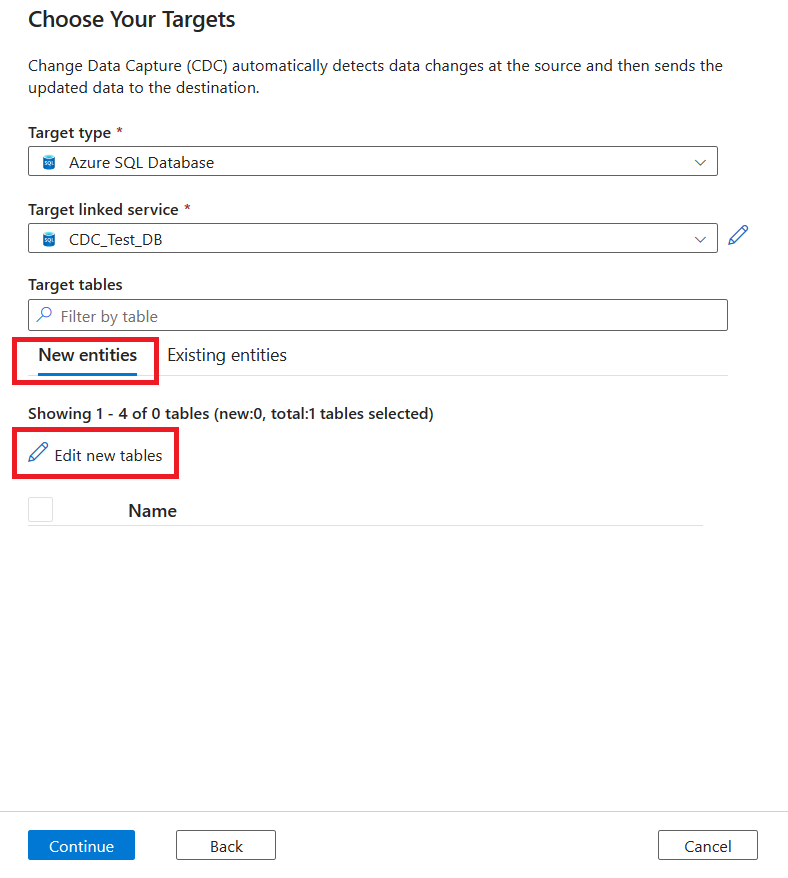
若要选择现有表,请选择“现有实体”选项卡,然后使用复选框来选择一个表。 使用“预览”按钮来查看表数据。
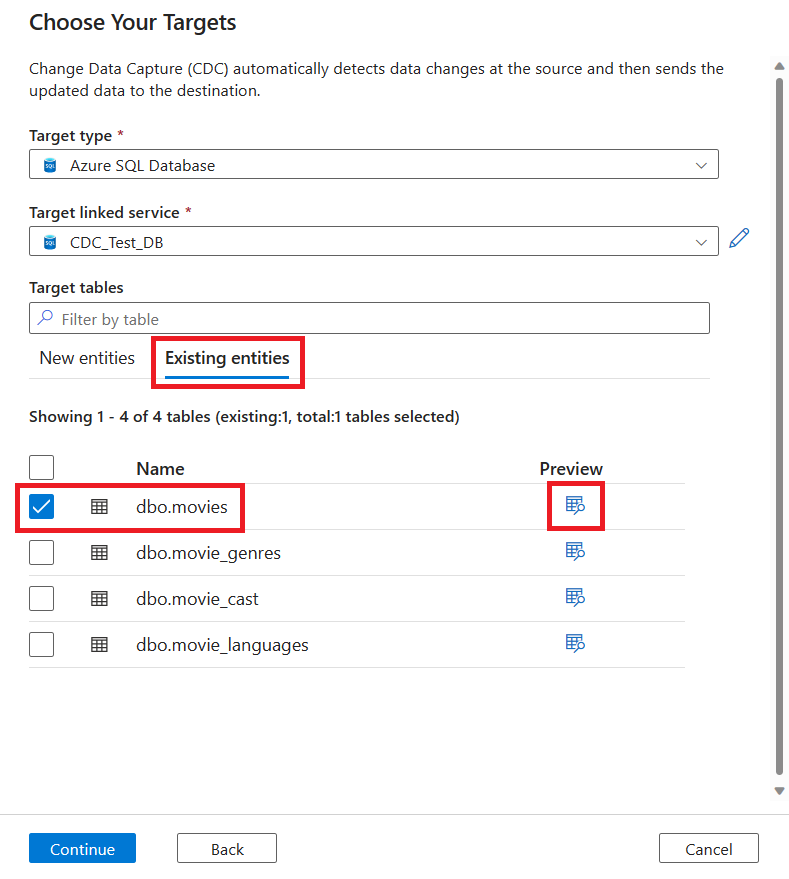
如果目标中的现有表具有匹配名称,则默认在“现有实体”下选中它们。 如果没有,则在“新建实体”下创建具有匹配名称的新表。 此外,还可使用“编辑新表”按钮来编辑新表。
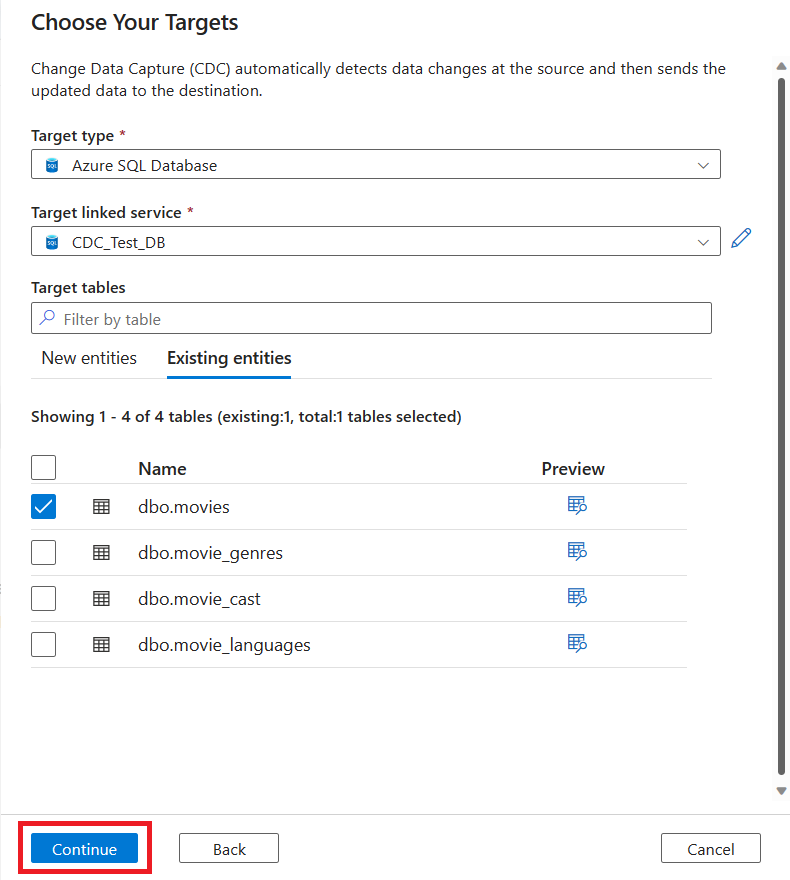
可使用这些复选框从 SQL 数据库中选择多个目标表。 选择目标表后,选择“继续”。
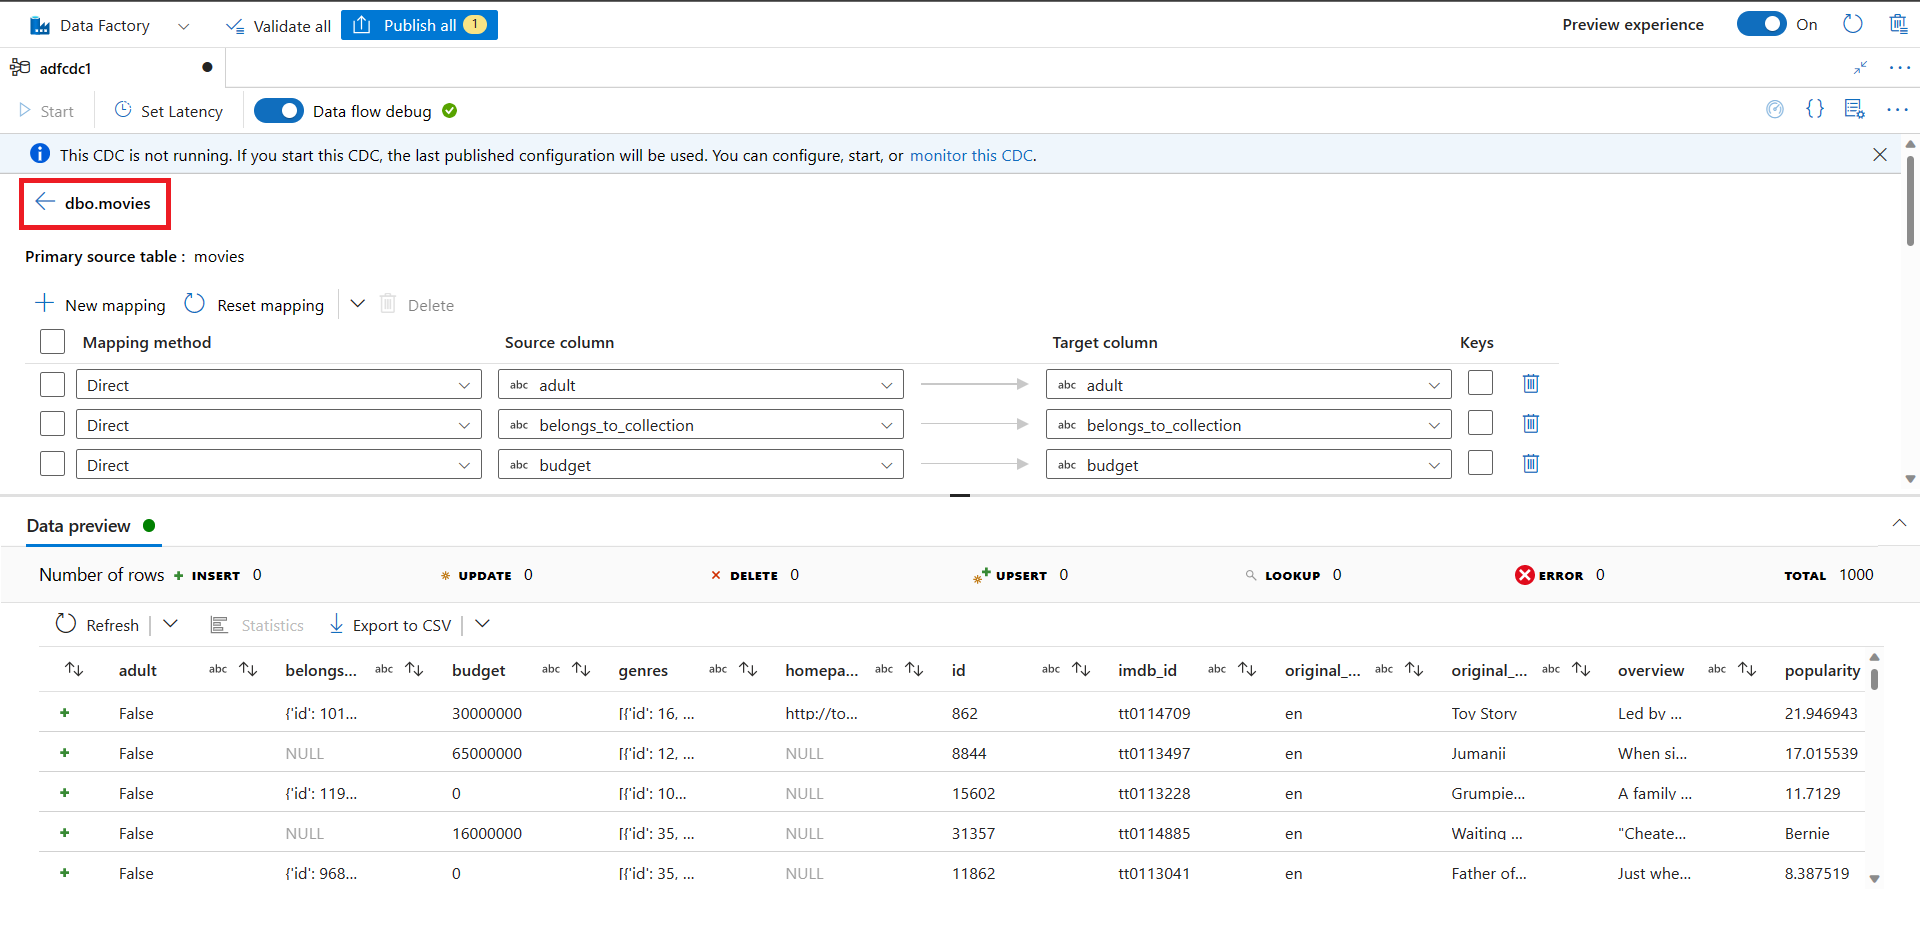
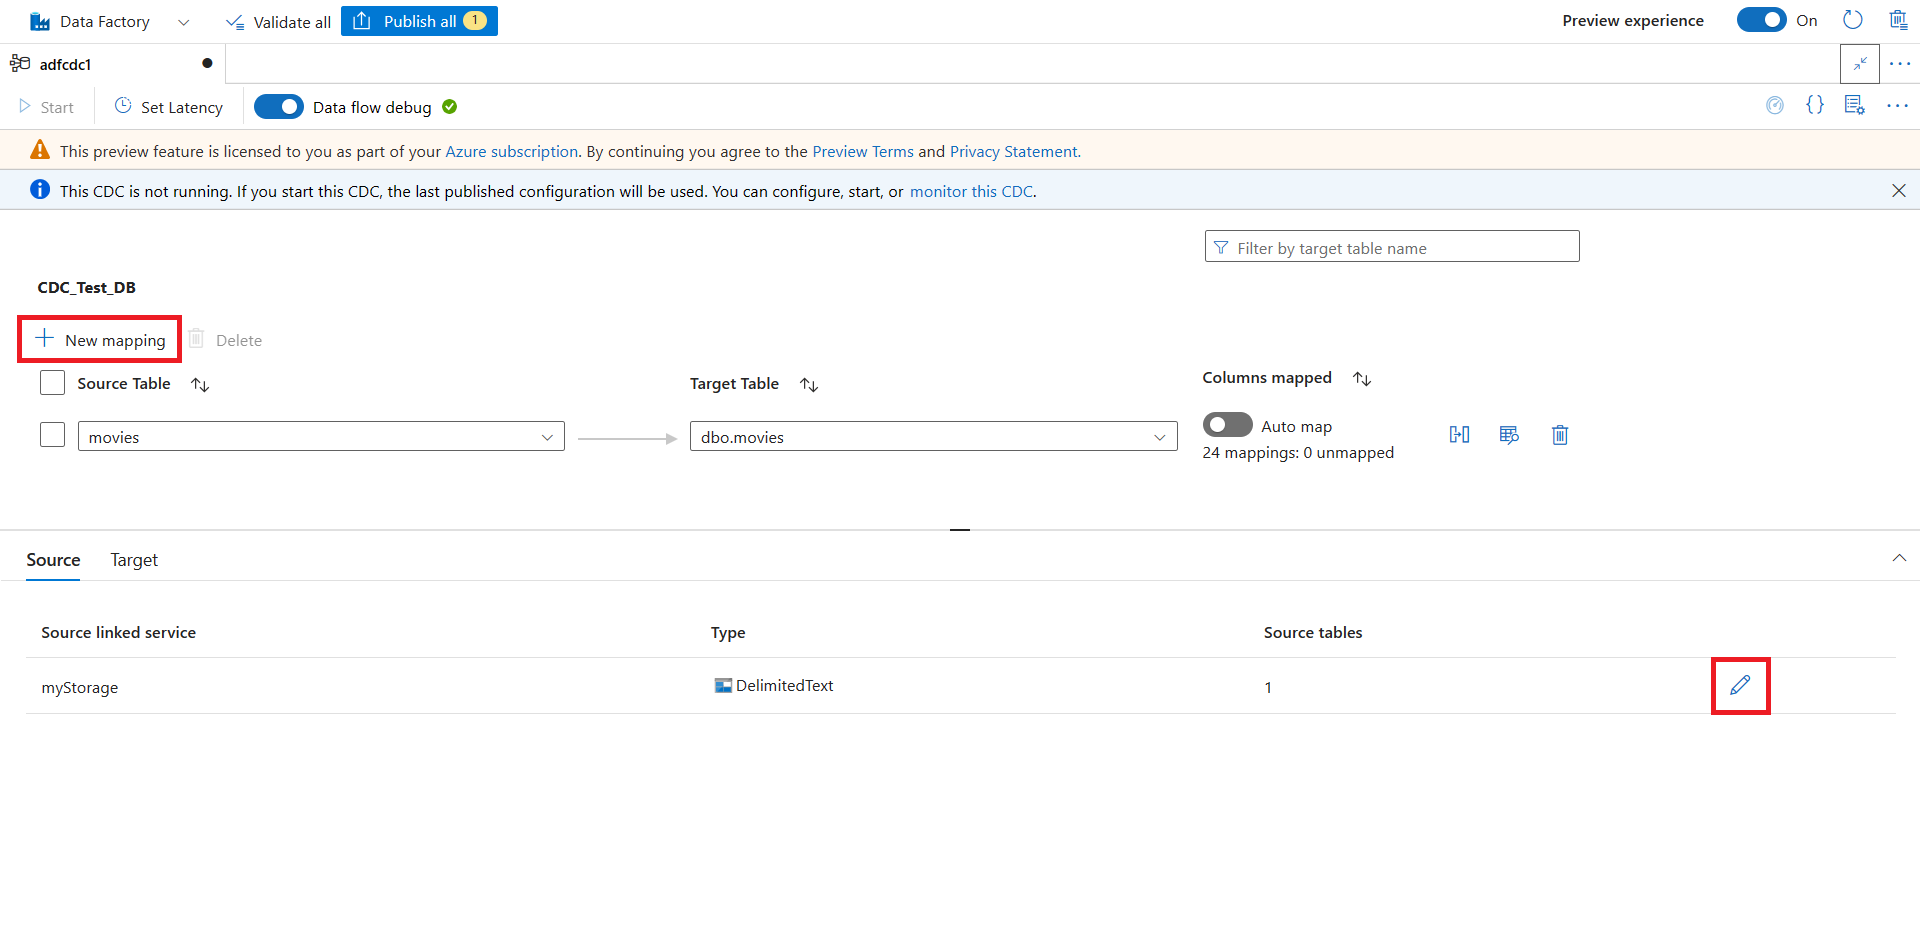
此时会显示一个用于捕获变更数据的新选项卡。 此选项卡是 CDC 工作室,可在这里配置新资源。
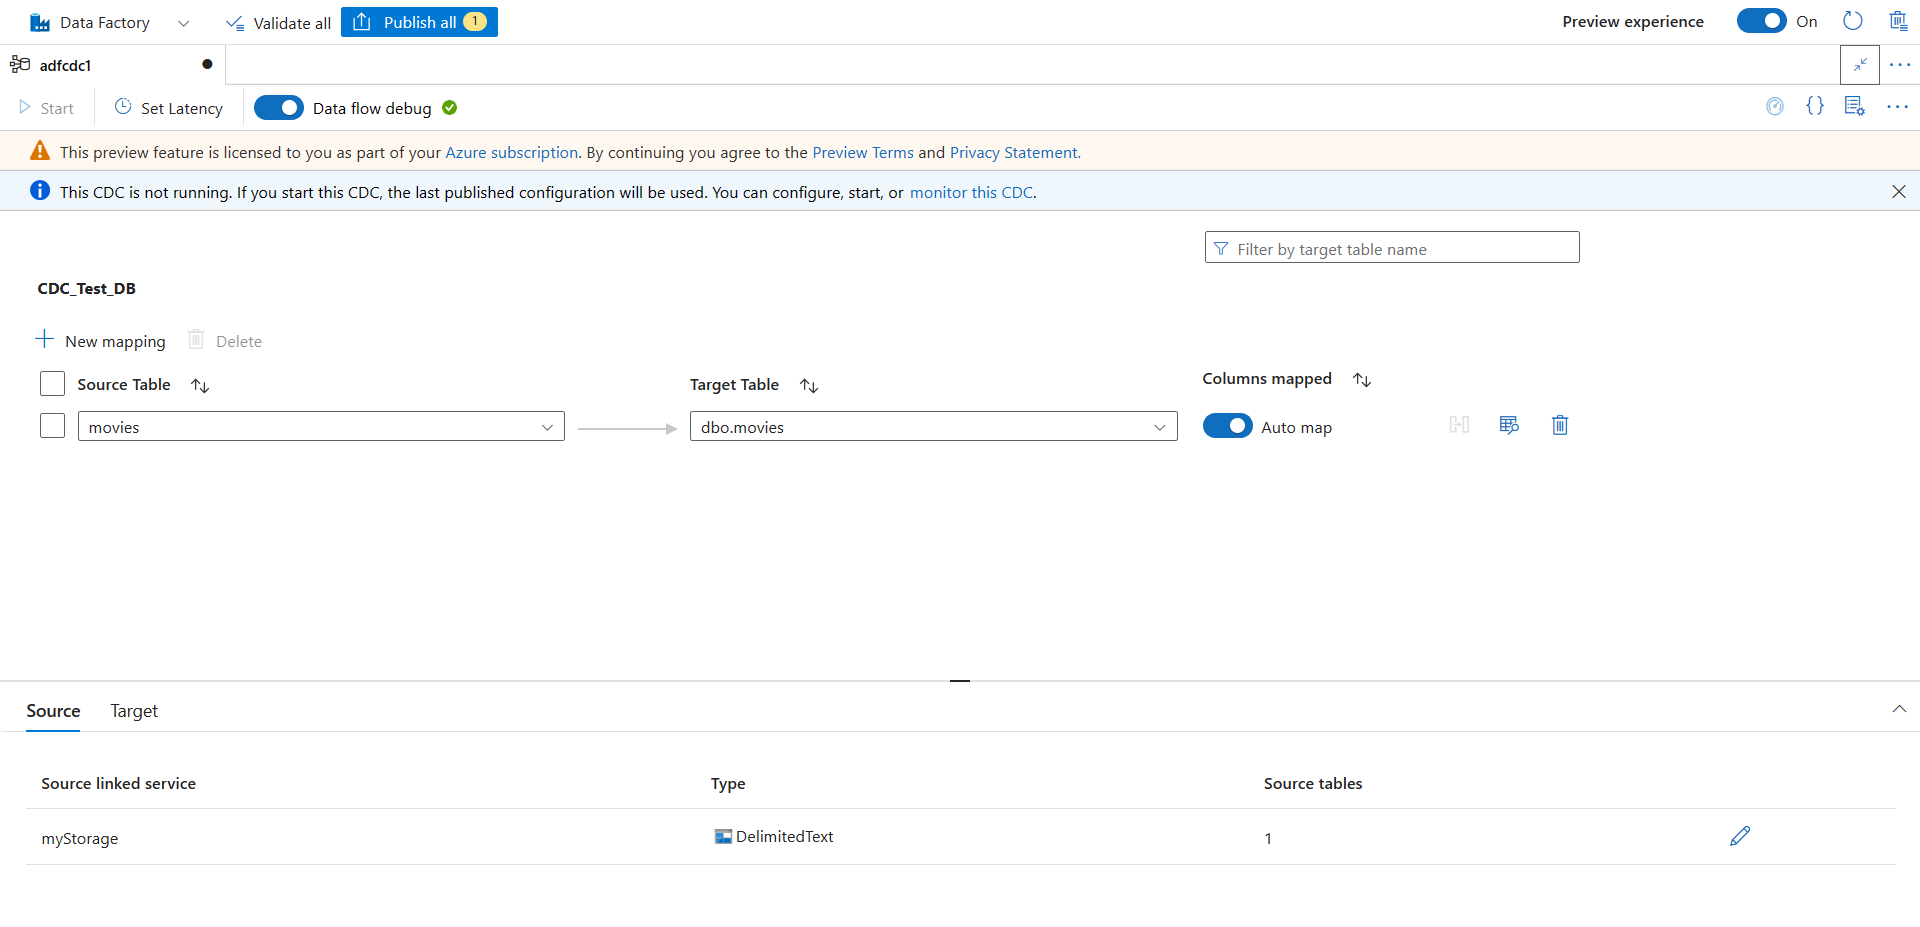
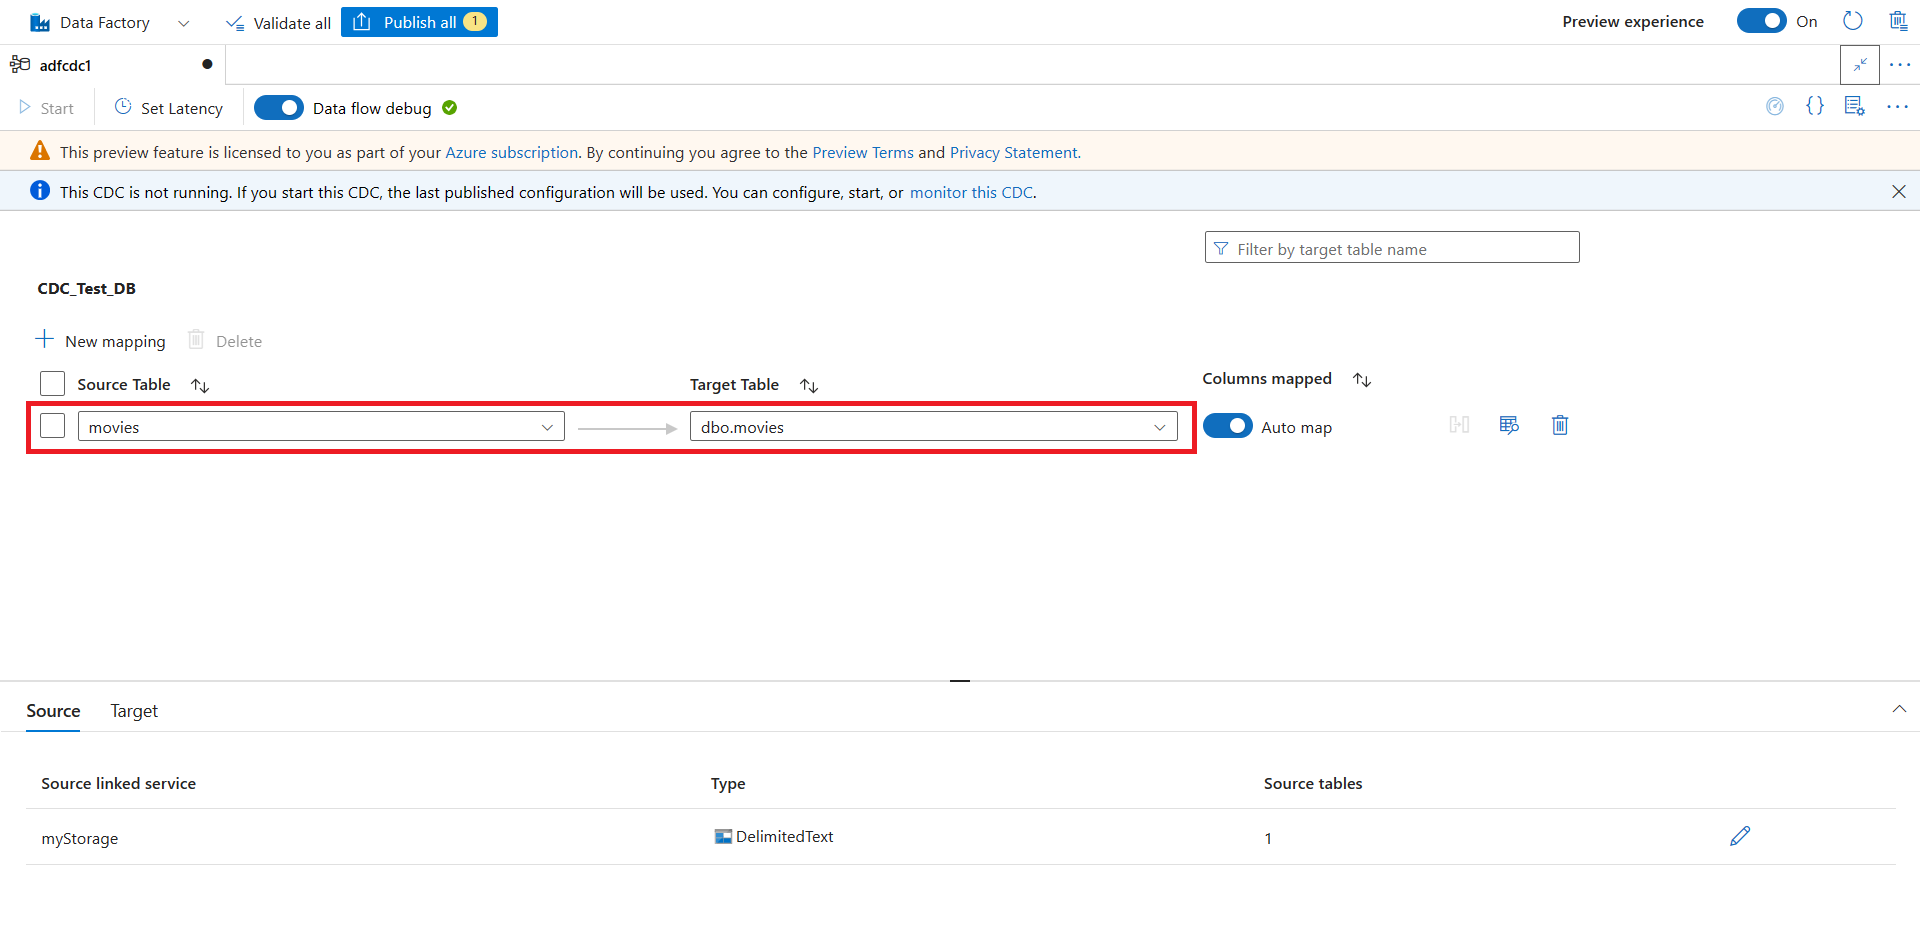
系统会自动为你创建新映射。 可使用下拉列表来更新为映射选择的源表和目标表。
选择表后,默认情况下会映射表的列,并启用“自动映射”开关。 自动映射会在接收器中自动按名称映射列,在源架构演变时拾取新的列更改,并将此信息流向受支持的接收器类型。
如果想要使用自动映射,而不是更改任何列映射,请直接转到步骤 18。
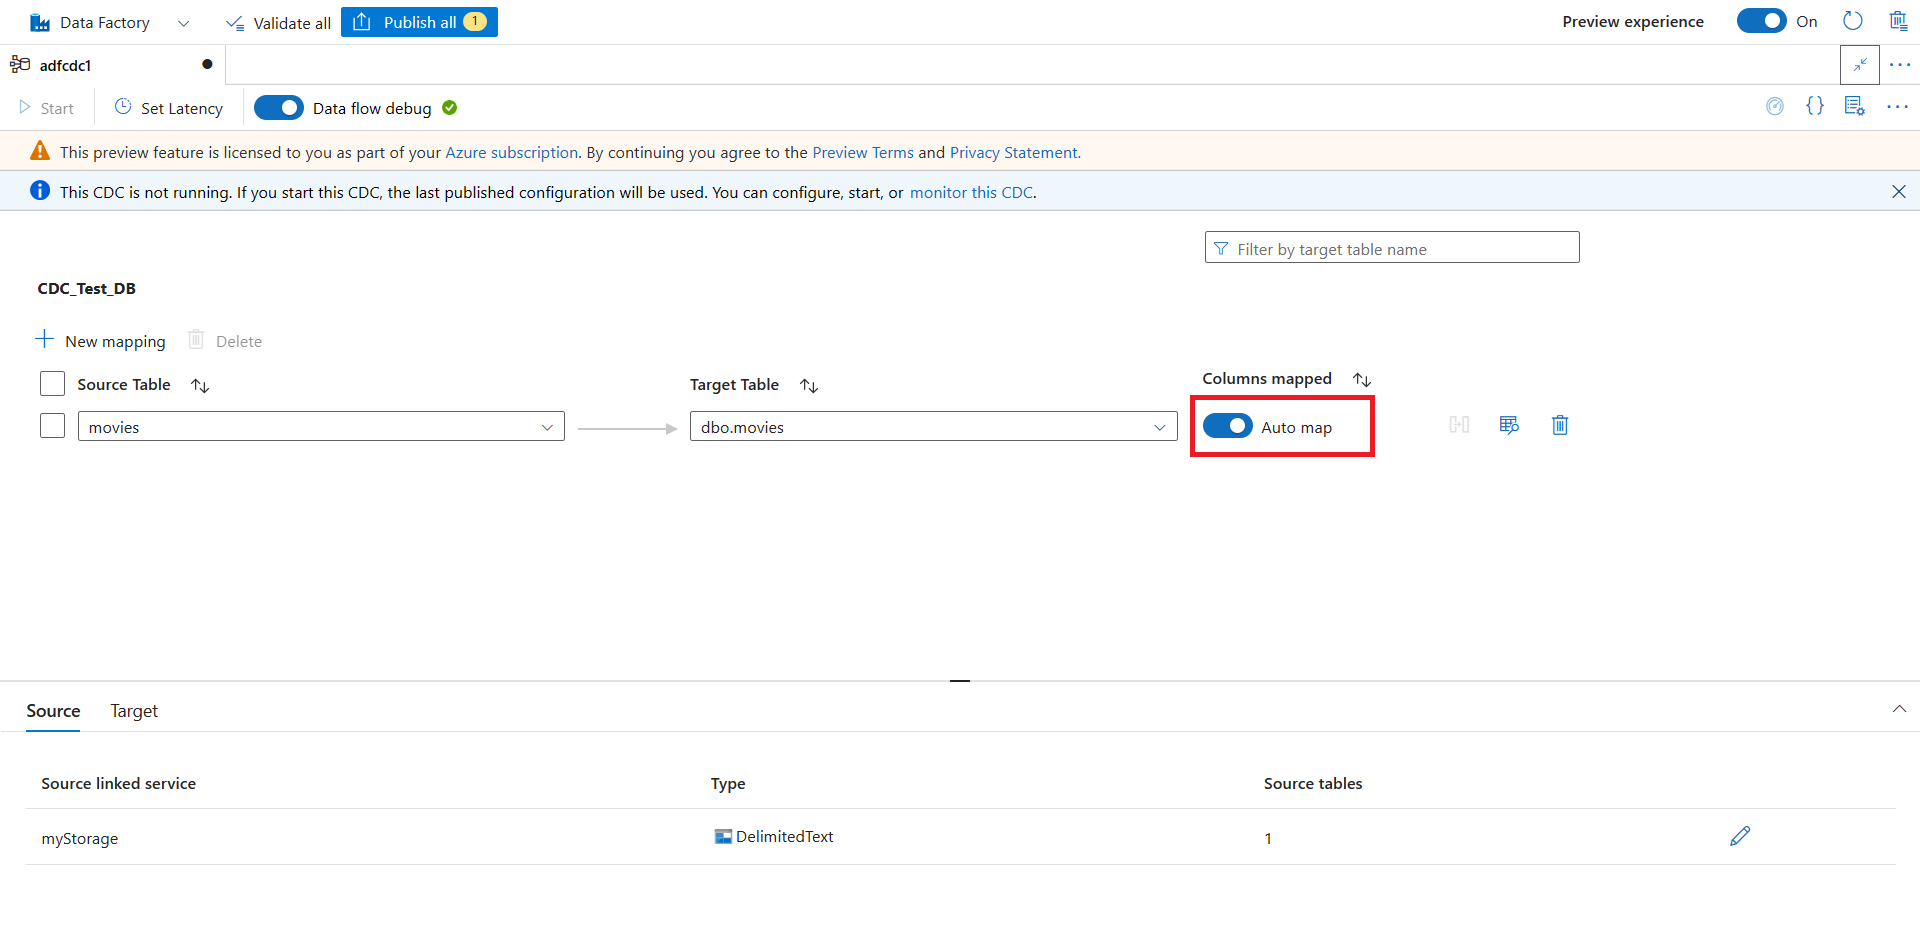
若要启用列映射,请选择映射并关闭“自动映射”开关。 然后,选择“列映射”按钮来查看映射。
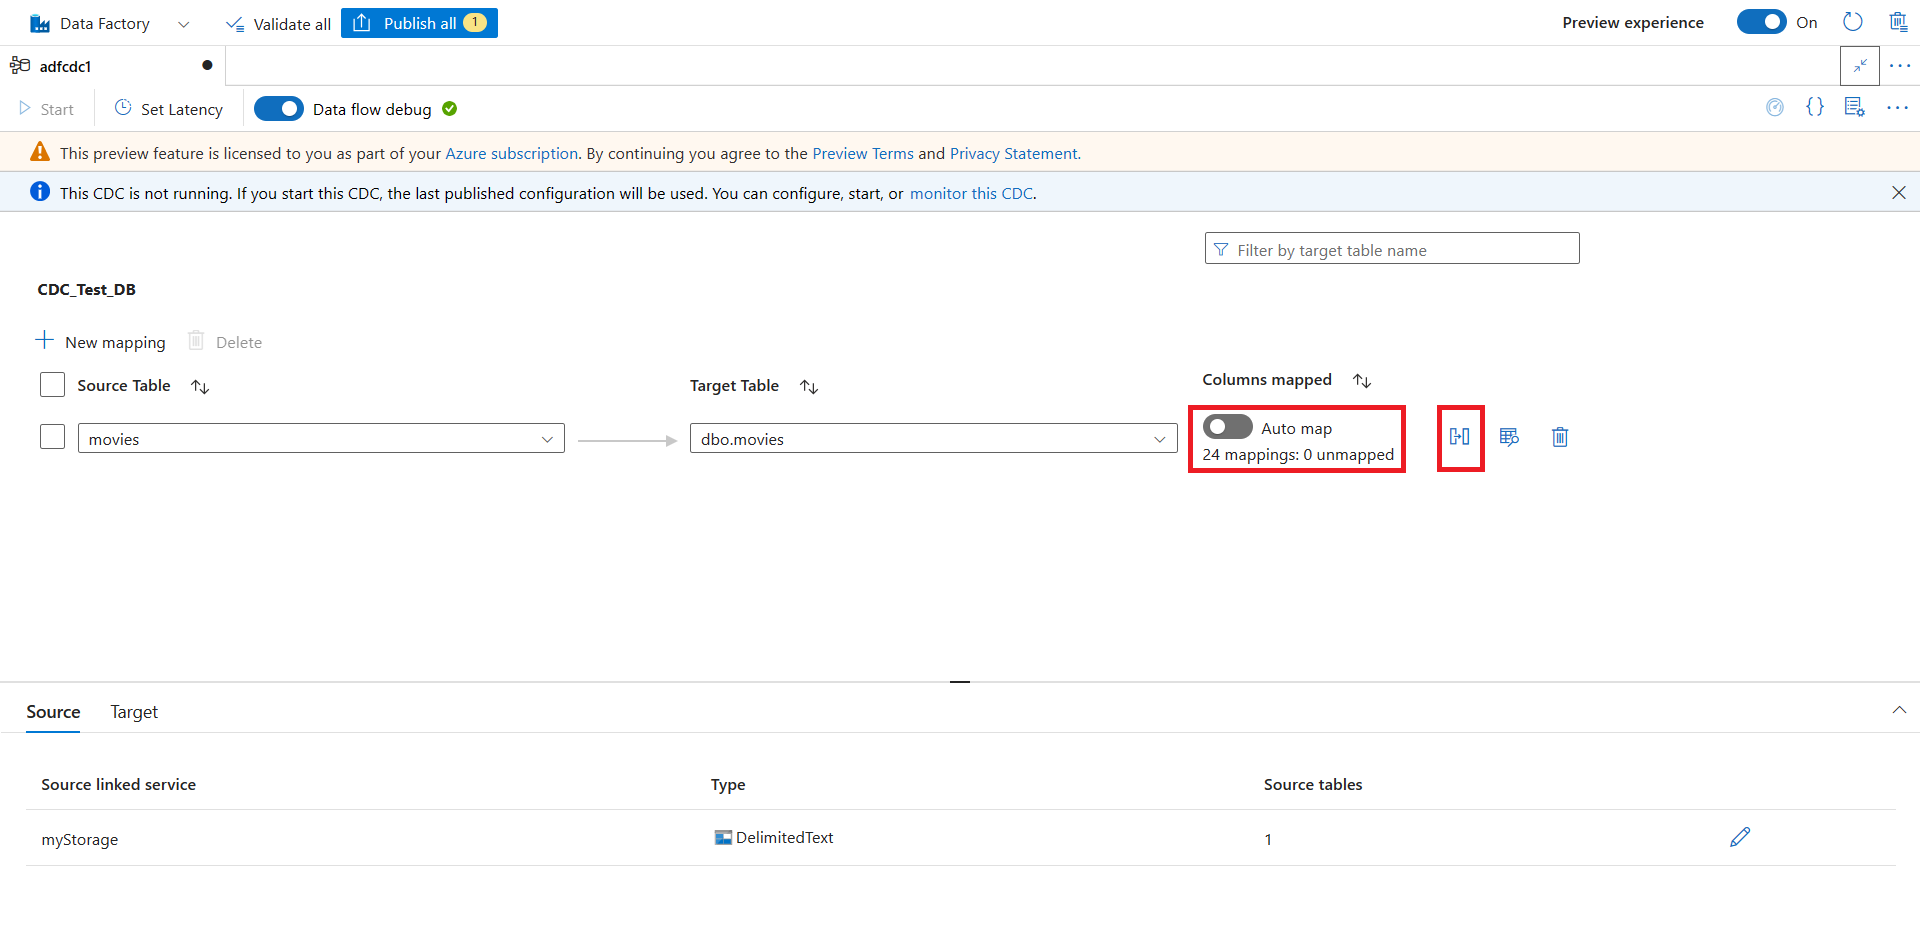
可打开“自动映射”开关,随时切换回自动映射。
查看列映射。 使用下拉列表编辑列映射的映射方法、源列和目标列。
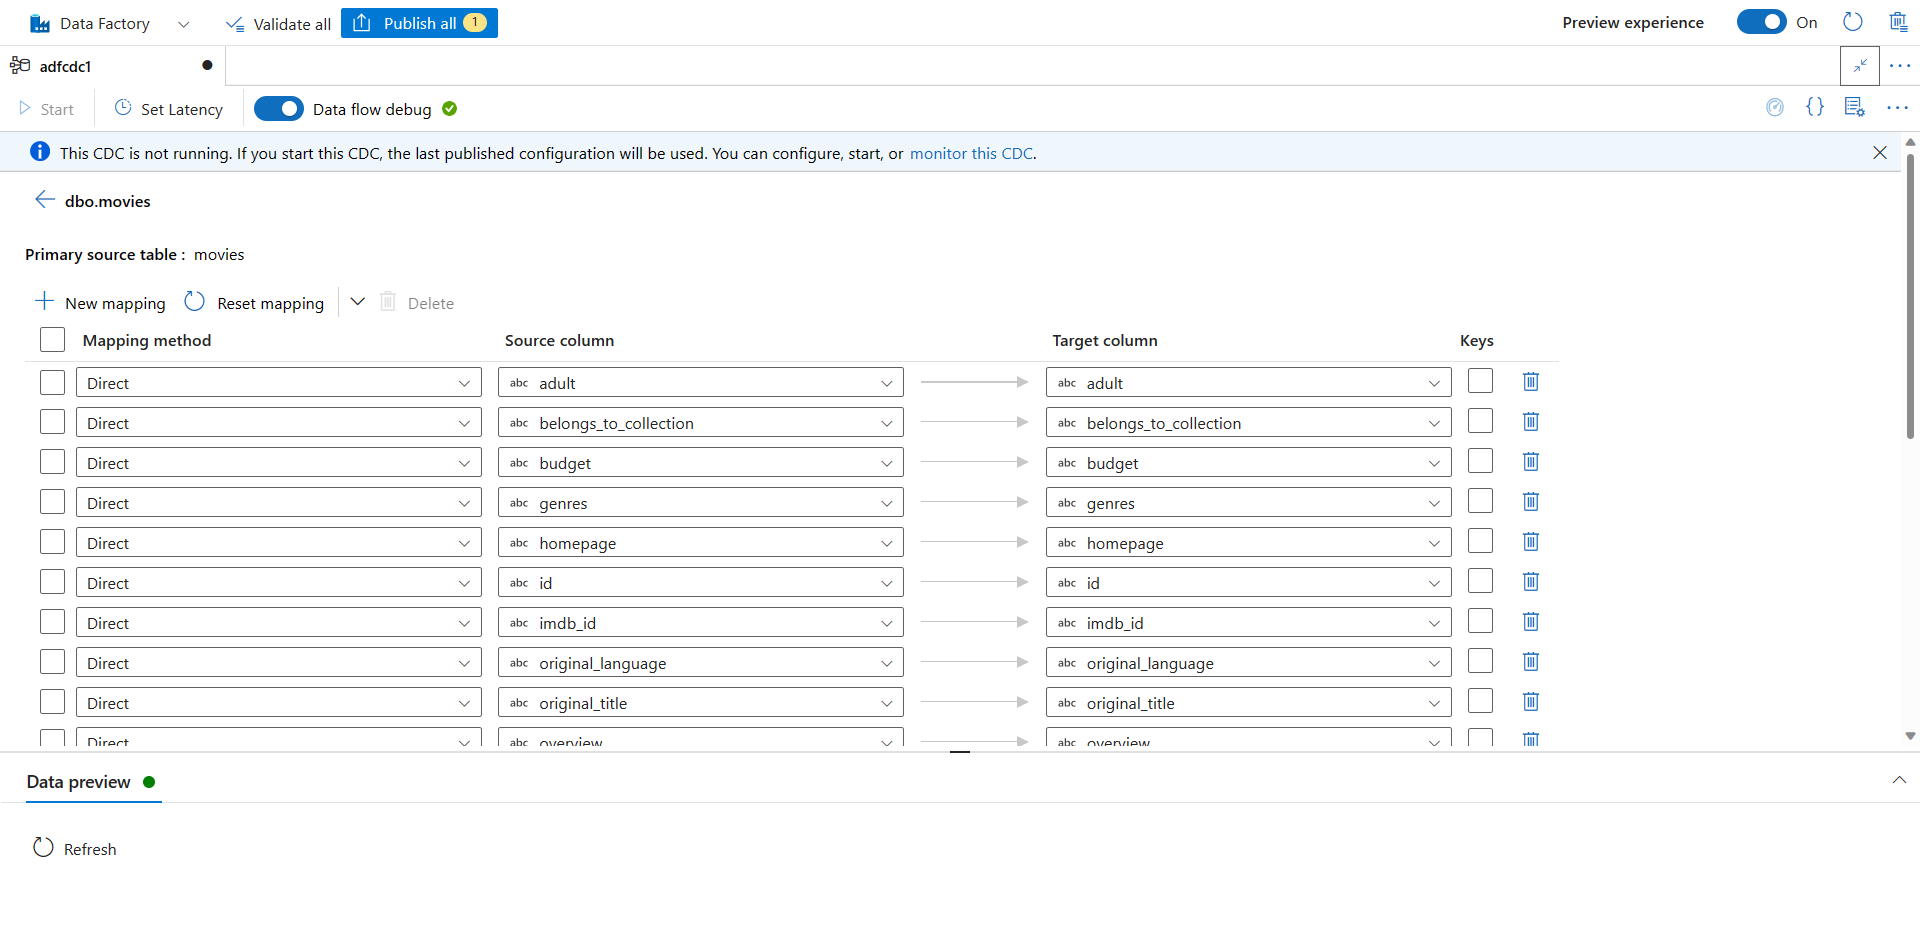
在此页中,可以:
- 使用“新建映射”按钮添加更多列映射。 使用下拉列表来选择映射方法、源列和目标列。
- 如果要跟踪受支持的接收器类型的删除操作,请选择“键”列。
- 选择“数据预览”下的“刷新”按钮,来直观呈现数据在目标中的显示方式。
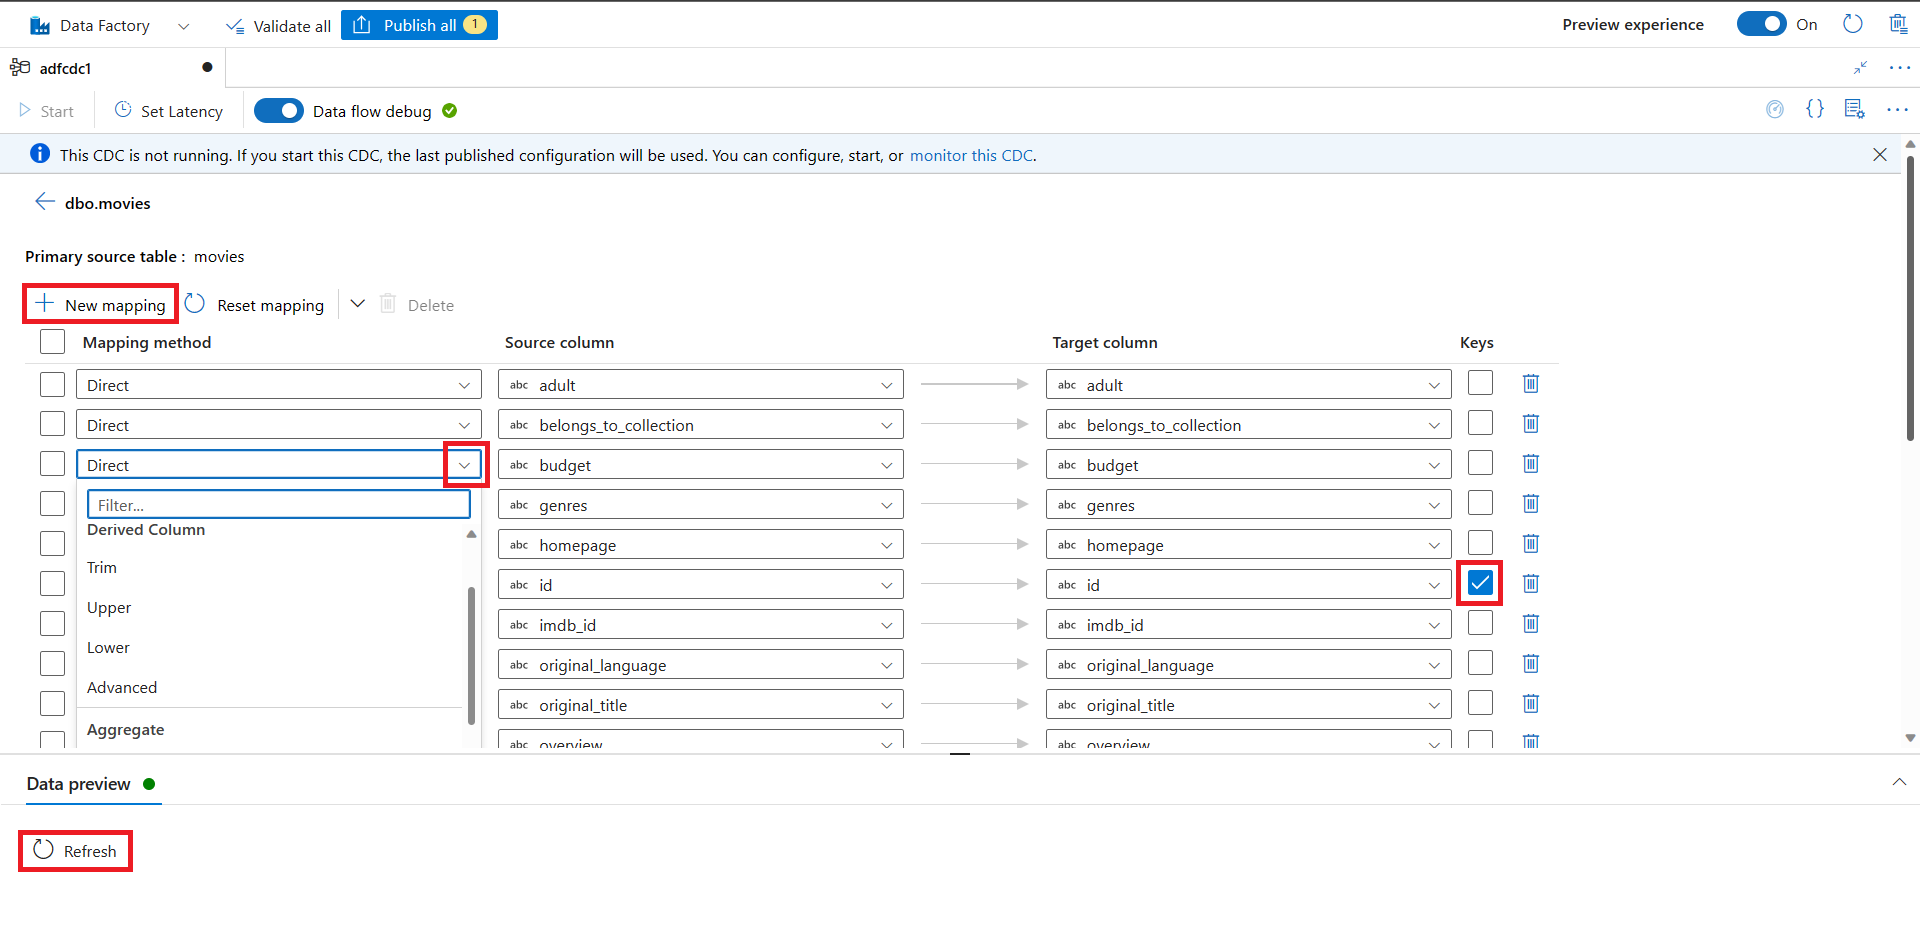
映射完成后,选择箭头按钮以返回主 CDC 画布。
可以在一个 CDC 项目中添加更多源到目标映射。 使用“编辑”按钮以添加更多数据源和目标。 然后选择“新建映射”,并使用下拉列表设置新的源和目标。 可以为其中每个映射单独打开或关闭自动映射。
映射完成后,使用“设置延迟”按钮来设置 CDC 延迟。
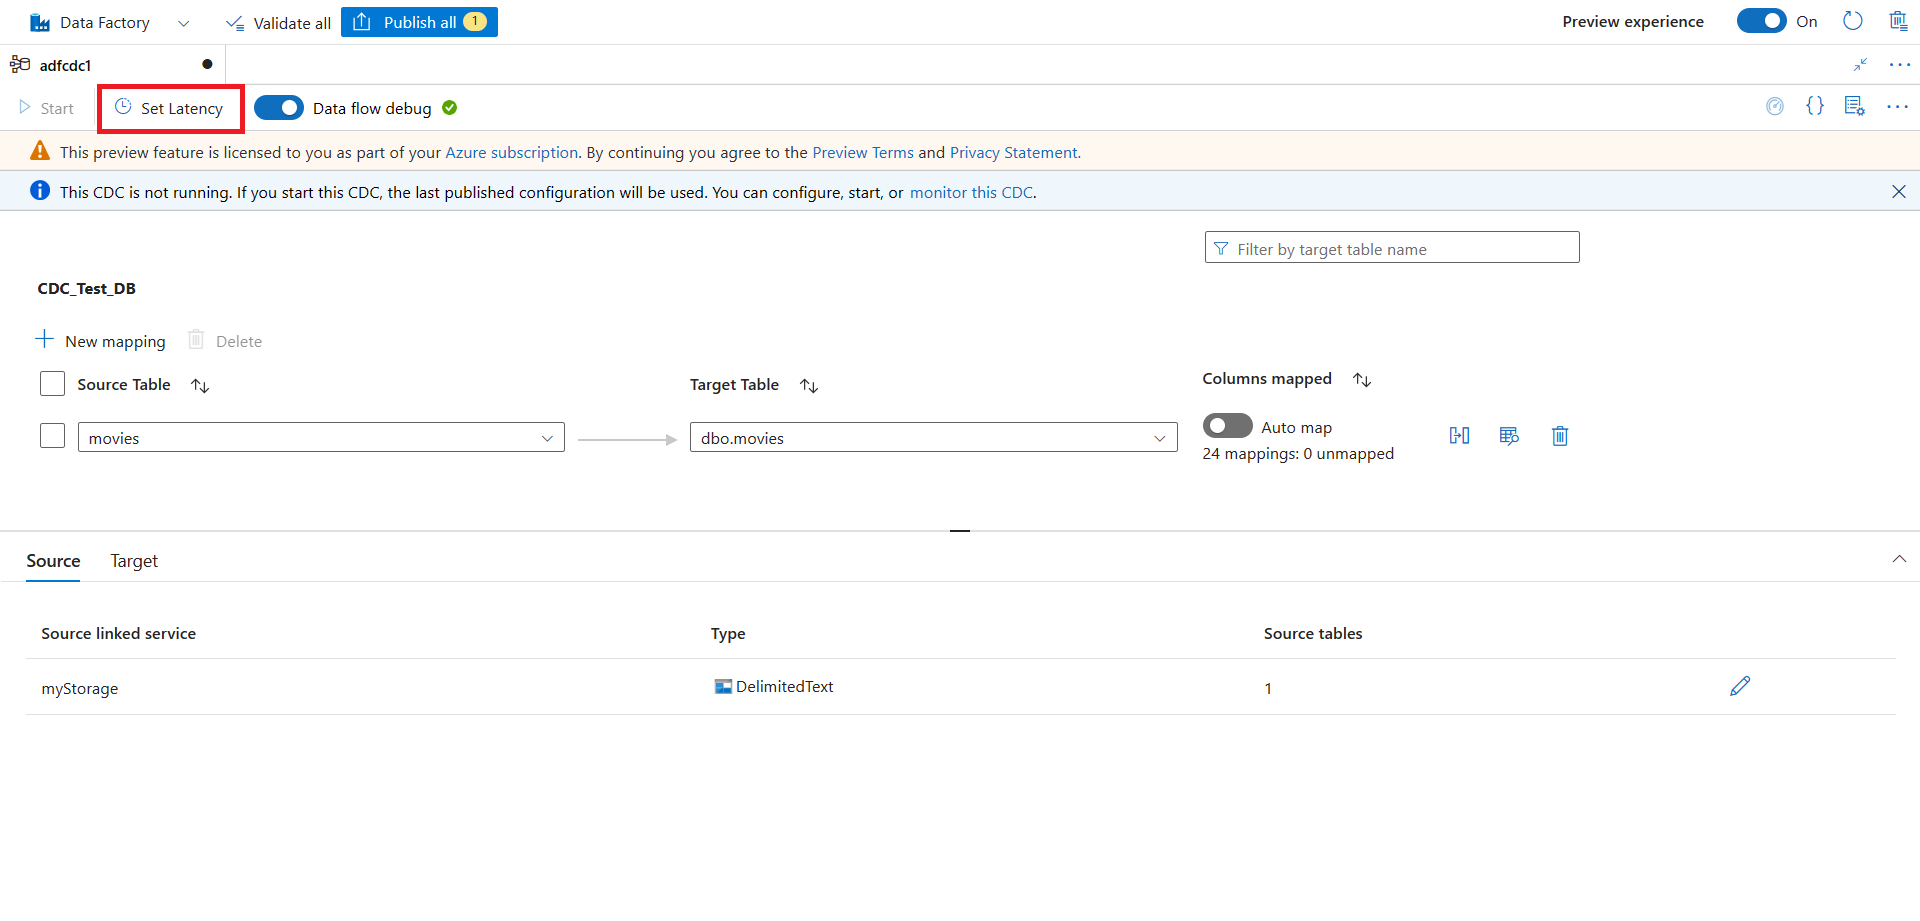
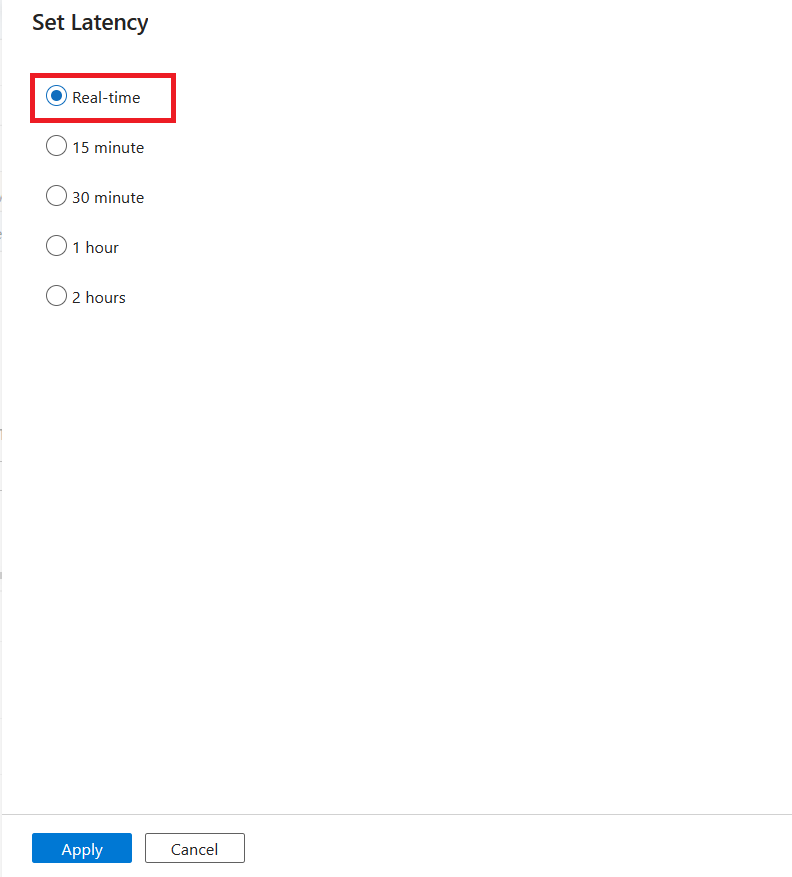
选择 CDC 延迟,然后选择“应用”以进行更改。
默认情况下,延迟设置为“15 分钟”。 本文中的示例使用“实时”选项作为延迟设置。 实时延迟以小于 1 分钟的间隔持续拾取源数据中的更改。
对于其他延迟(例如,如果选择 15 分钟),变更数据捕获将处理源数据,并拾取自上次处理时间以来更改的所有数据。
注意
如果将支持扩展到流式数据集成(Azure 事件中心和 Kafka 数据源),则延迟默认设置为“实时”。
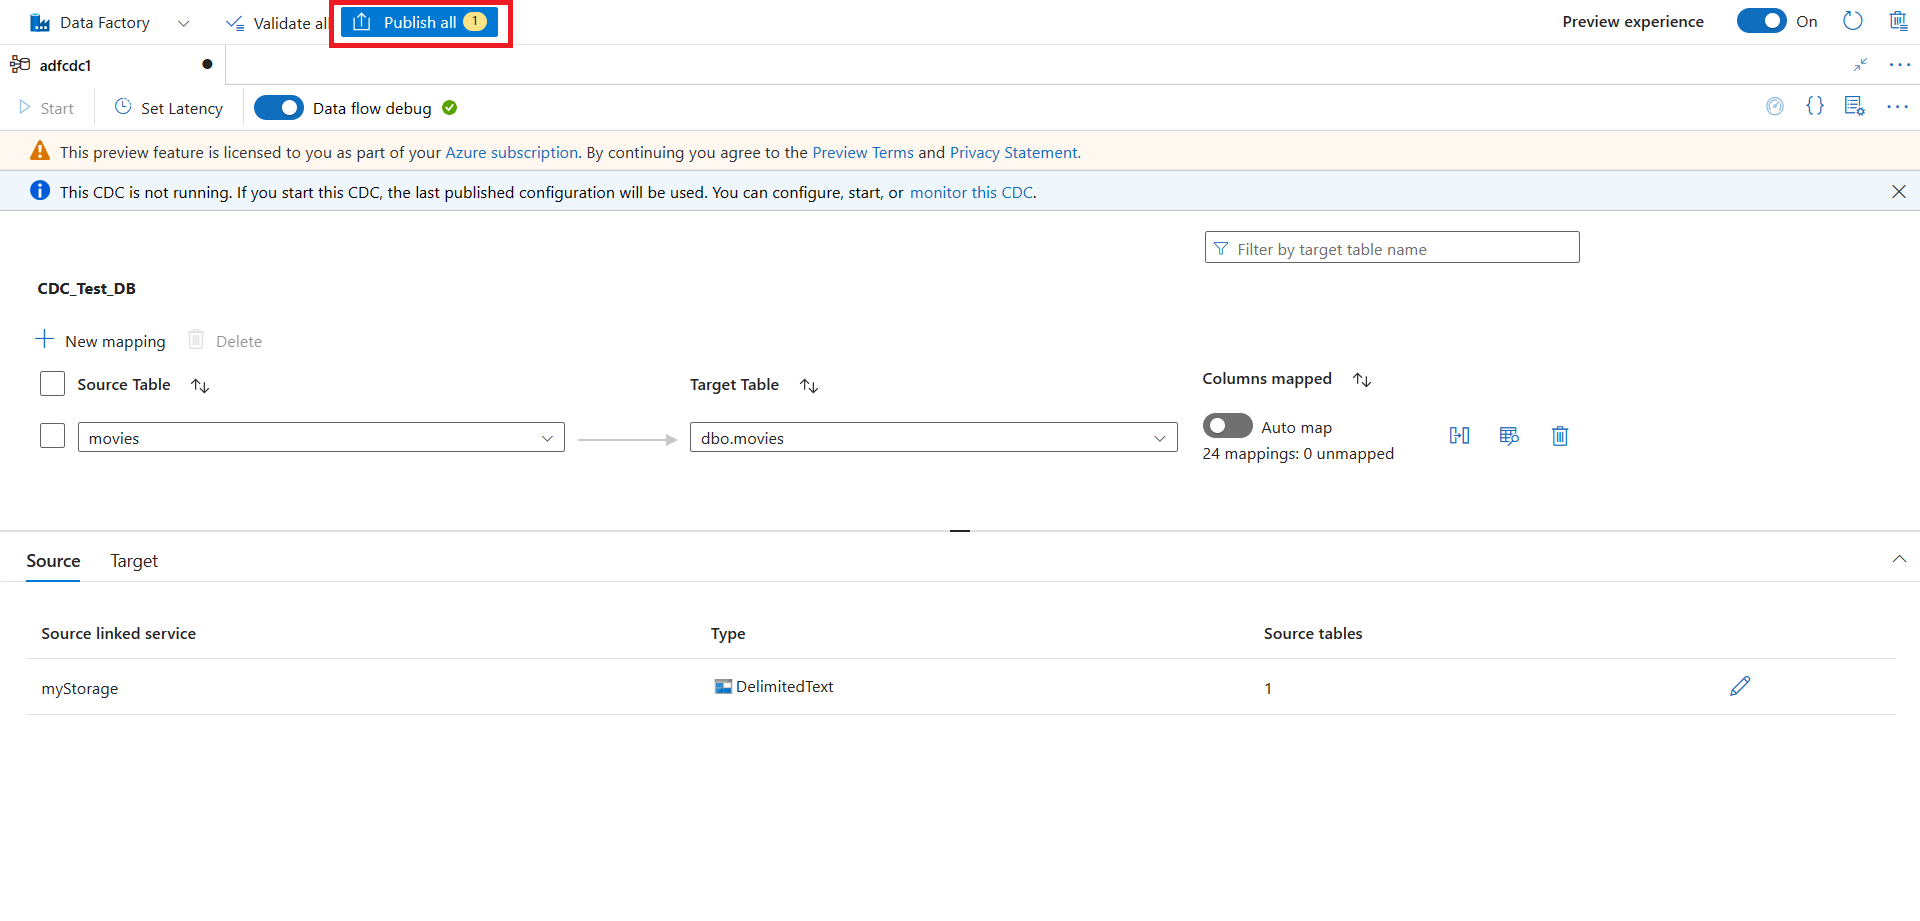
配置 CDC 后,选择“全部发布”来发布更改。
注意
如果不发布更改,将无法启动 CDC 资源。 下一步中的“开始”按钮将不可用。
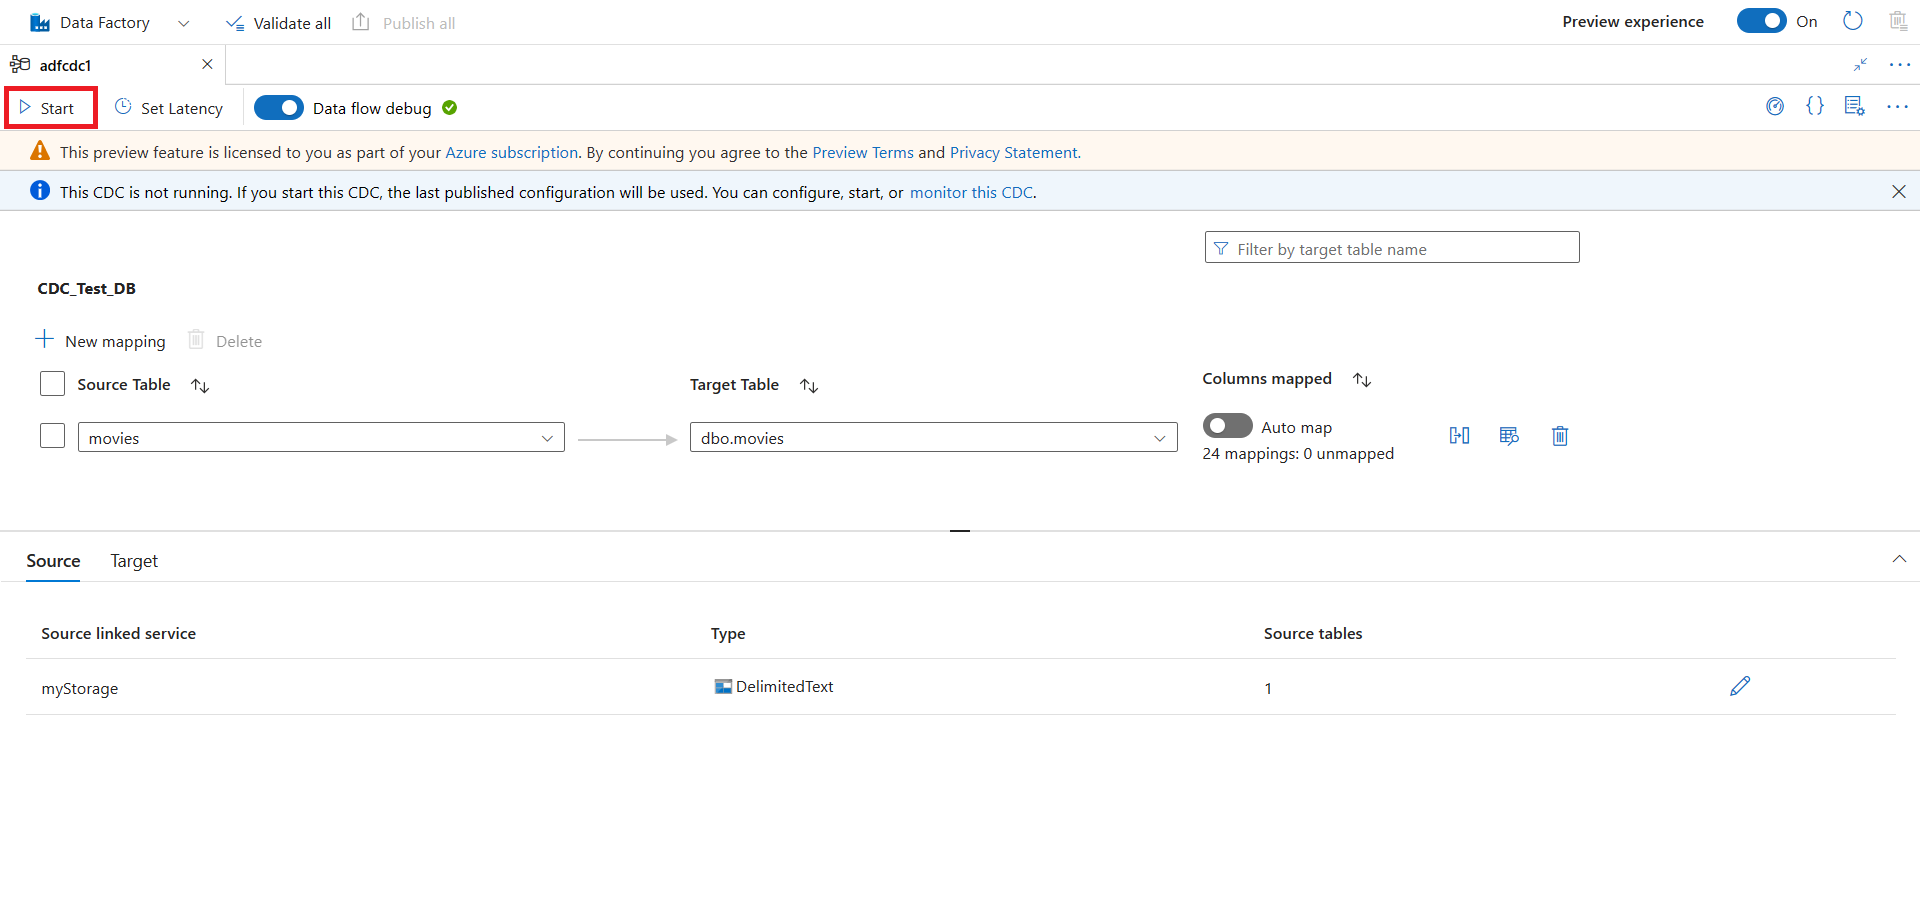
选择“开始”,开始运行变更数据捕获。


监视变更数据捕获
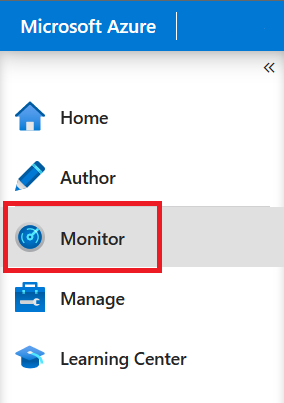
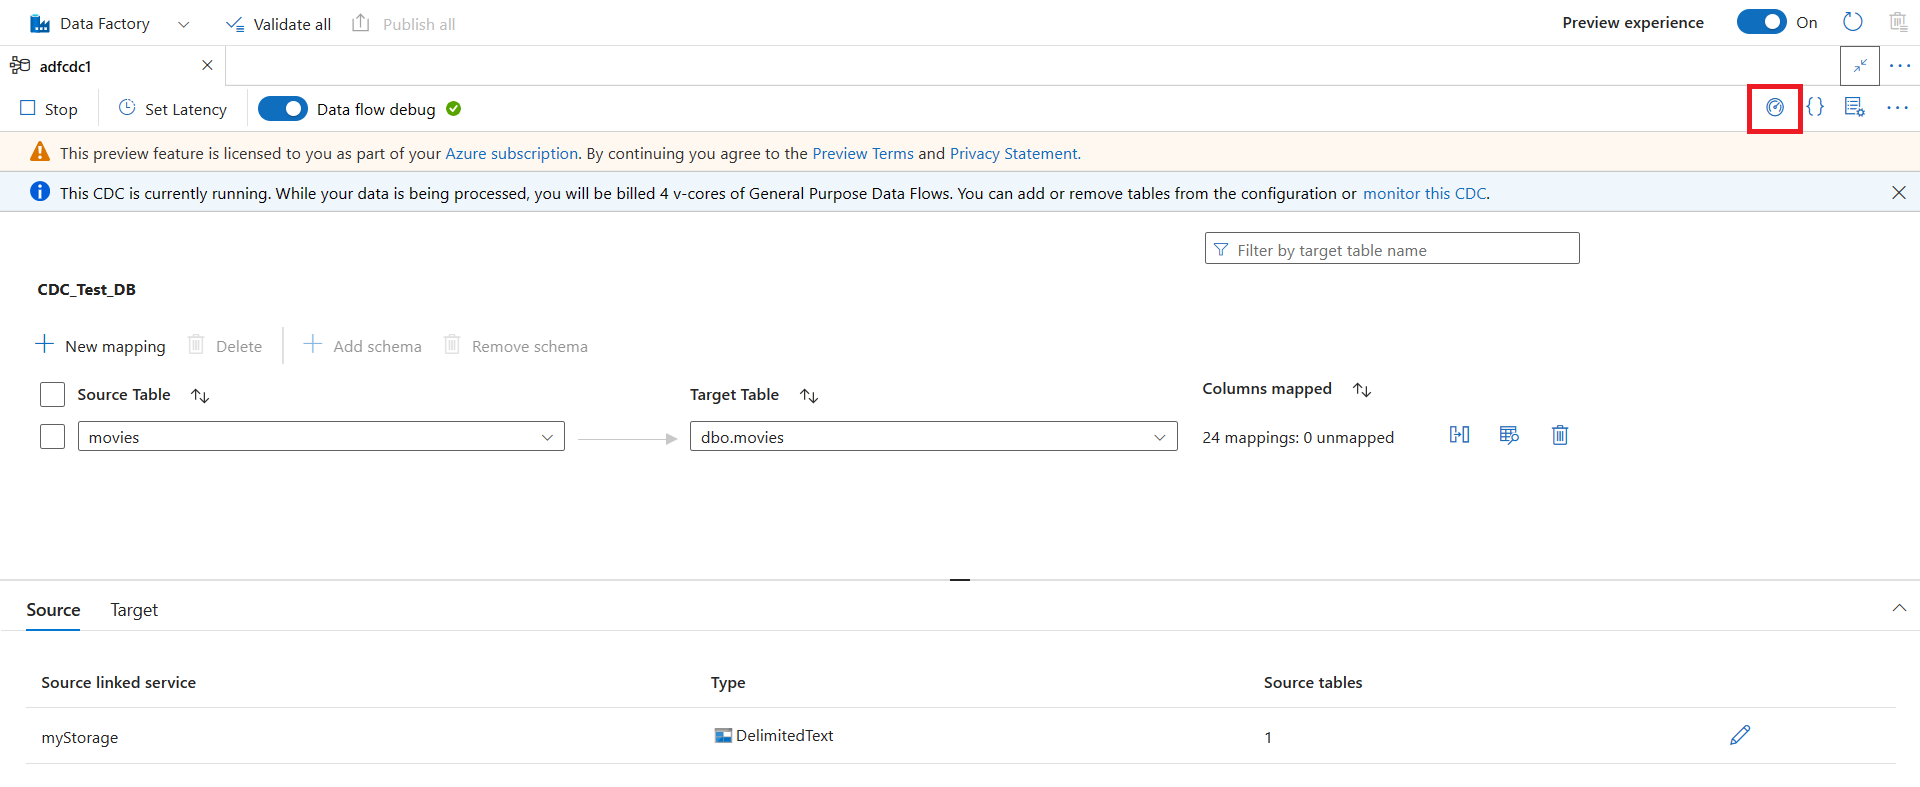
使用以下任一方法打开“监视”窗格:
在 Azure 门户中选择“监视”。
从 CDC 设计器中选择监视图标。
选择“变更数据捕获(预览版)”以查看 CDC 资源。
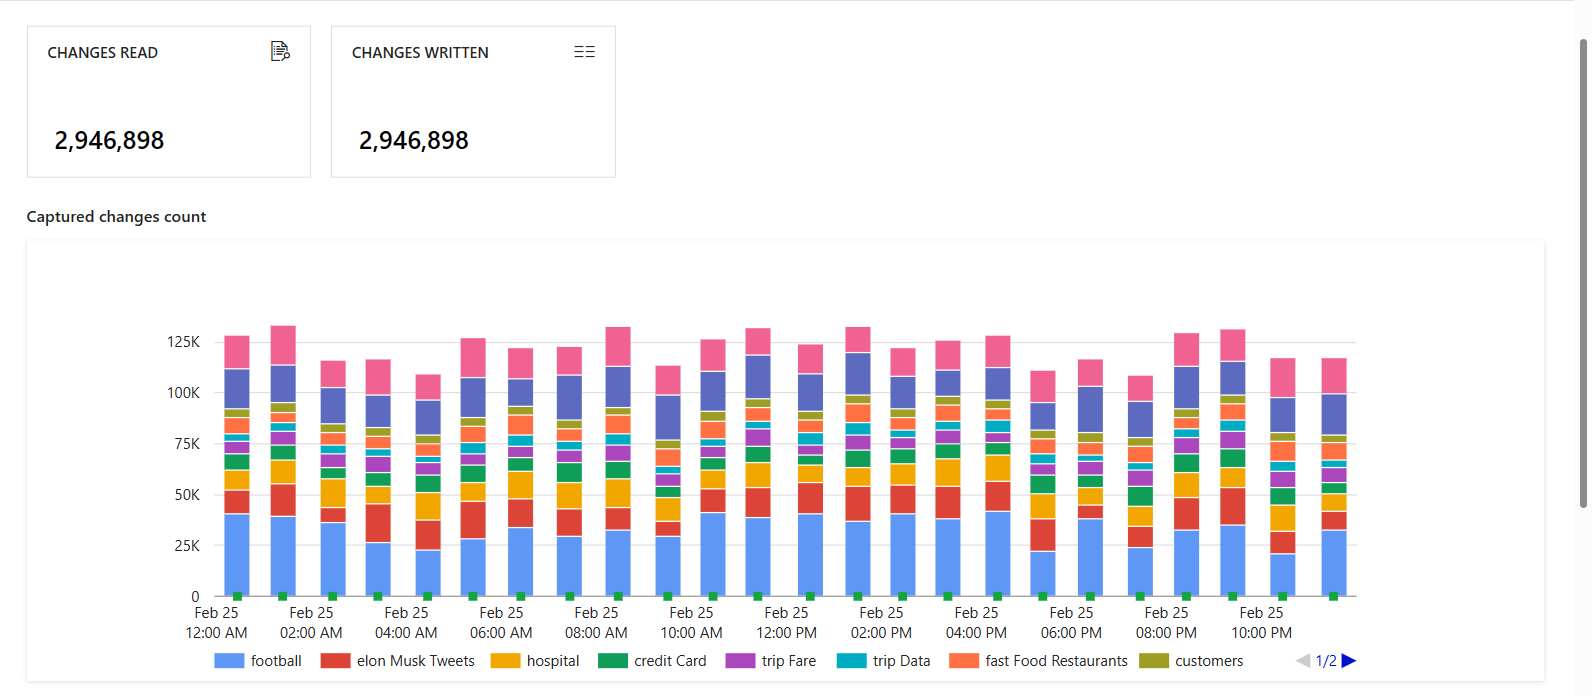
“变更数据捕获”窗格会显示变更数据捕获的源、目标、状态和上次处理时间信息。

选择 CDC 的名称以查看更多详细信息。 可以查看已读取和已写入的更改(插入、更新或删除)数及其他诊断信息。
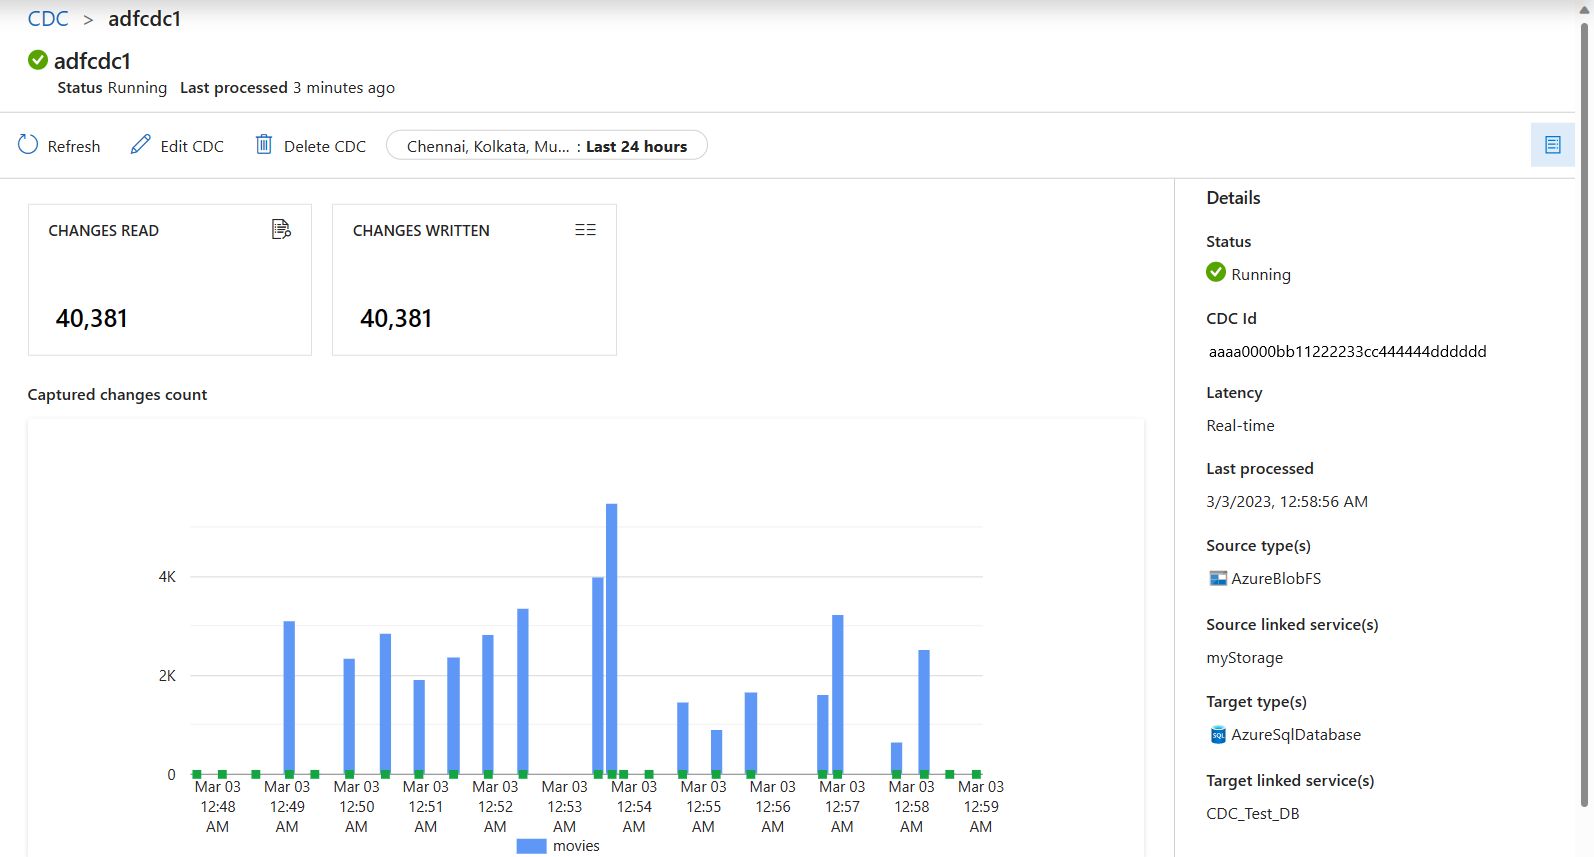
如果在变更数据捕获中设置了多个映射,每个映射以不同的颜色显示。 单击条形以查看每个映射的具体详细信息,或者使用窗格底部的诊断信息。