使用 Azure Pipelines 生成容器映像并将其推送到注册表
Azure DevOps Services
本文介绍如何创建管道,以便生成 Docker 映像并将其推送到 Azure 容器注册表或 Docker 中心。
先决条件
| 产品 | 要求 |
|---|---|
| Azure DevOps | - Azure DevOps 项目。 - 权限: - 若要授予对项目中所有管道的访问权限:您必须是 - 若要创建服务连接:您必须拥有 管理员 或 创建者 角色,适用于 服务连接。 - 如果使用自承载代理,请确保已安装 Docker,并使用提升的权限运行 Docker 引擎。 Microsoft托管代理已预安装 Docker。 |
| GitHub | - 一个 GitHub 帐户。 - 包含 Dockerfile 的 GitHub 存储库。 如果没有自己的项目,请使用 示例存储库。 - 用于授权 Azure Pipelines 的 GitHub 服务连接。 |
| 蔚蓝色 | - Azure 订阅。 - 一个 Azure 容器注册表。 |
| 产品 | 要求 |
|---|---|
| Azure DevOps | - Azure DevOps 项目。 - 权限: - 若要授予对项目中所有管道的访问权限:您必须是 - 若要创建服务连接:您必须在 服务连接中具有 管理员 或 创建者 角色。 - 如果使用自承载代理,请确保已安装 Docker,并使用提升的权限运行 Docker 引擎。 Microsoft托管代理已预安装 Docker。 |
| GitHub | - 一个 GitHub 帐户。 - 包含 Dockerfile 的 GitHub 存储库。 如果没有自己的项目,请使用 示例存储库。 - 用于授权 Azure Pipelines 的 GitHub 服务连接。 |
| Docker 中心 | - Docker Hub 帐户。 - Docker Hub 映像存储库。 |
创建 Docker 注册表服务连接
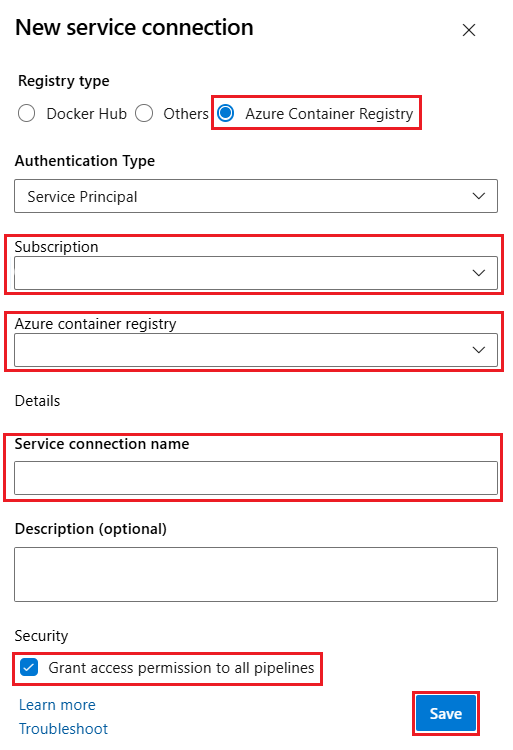
将容器映像推送到注册表之前,需要在 Azure DevOps 中创建服务连接。 此服务连接存储使用容器注册表进行安全身份验证所需的凭据。 有关详细信息,请参阅 Docker 注册表服务连接。
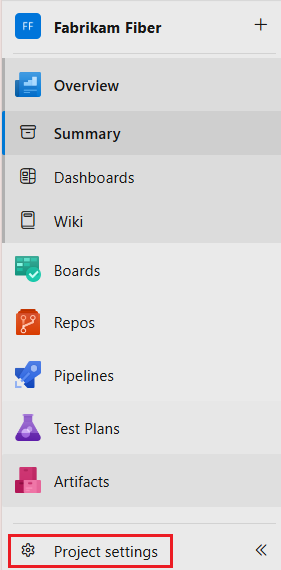
在 Azure DevOps 项目中,选择 项目设置>服务连接。
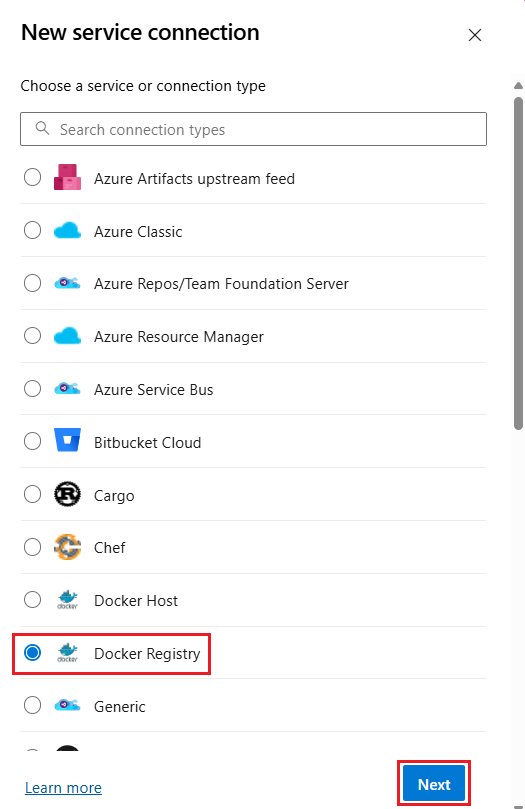
选择 新的服务连接,Docker 注册表。
选择 Docker 中心 并输入以下信息:
字段 描述 Docker ID 输入 Docker ID。 Docker 密码 输入 Docker 密码。 服务连接名称 输入服务连接的名称。 向所有管道授予访问权限 选择此选项可授予对所有管道的访问权限。 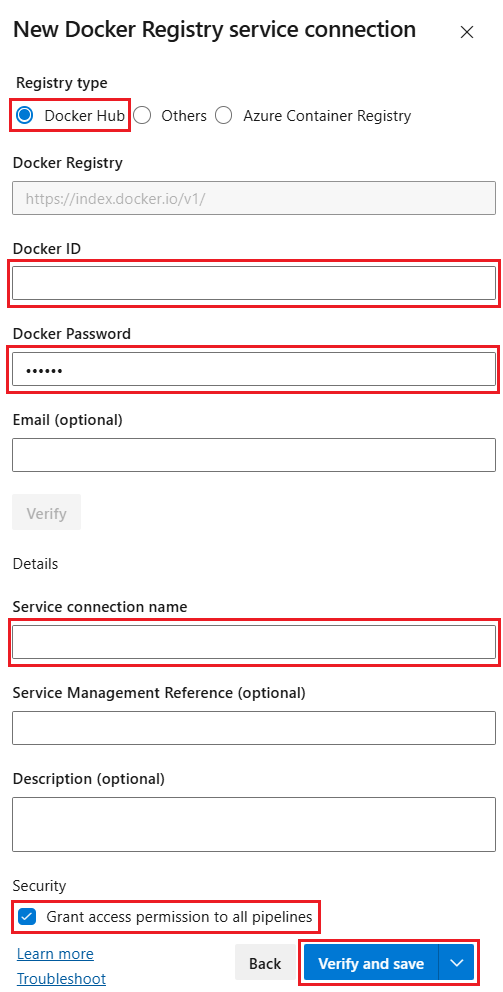
选择 验证并保存。
创建管道以生成和推送 Docker 映像
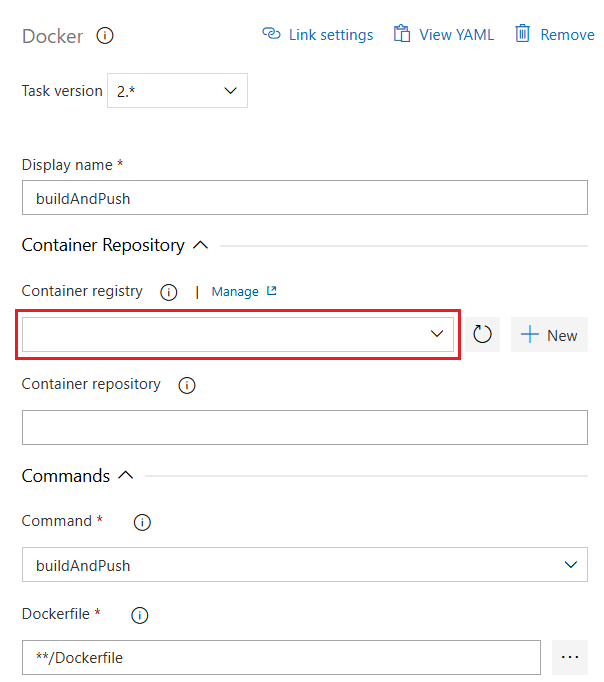
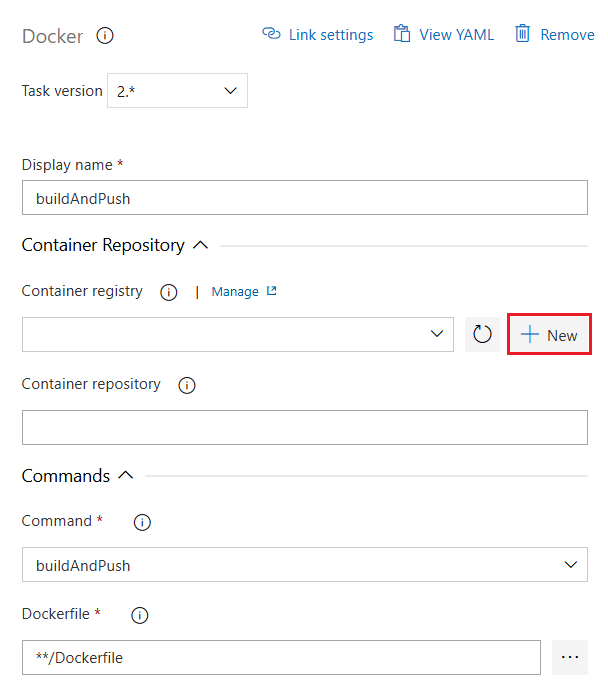
Docker@2任务用于生成映像并将其推送到容器注册表。 Docker@2任务旨在简化在 Azure Pipelines 中生成、推送和管理 Docker 映像的过程。 此任务支持各种 Docker 命令,包括生成、推送、登录、注销、启动、停止和运行。
使用以下步骤创建一个 YAML 管道,该管道使用Docker@2任务生成和推送映像。
进入 Azure DevOps 项目,选择管道和新建管道。
选择 GitHub 作为源代码的位置并选择存储库。
- 如果重定向到 GitHub 进行登录,请输入 GitHub 凭据。
- 如果你已重定向到 GitHub 来安装 Azure Pipelines 应用,请选择“批准并安装”。
选择存储库。
选择 初学者管道 模板以创建基本管道配置。
将 azure-pipelines.yml 的内容替换为以下代码:
trigger:
- main

pool:
  vmImage: 'ubuntu-latest'

variables:
  repositoryName: '<target repository name>'

steps:
- task: Docker@2
  inputs:
    containerRegistry: '<docker registry service connection>'
    repository: $(repositoryName)
    command: 'buildAndPush'
    Dockerfile: '**/Dockerfile'
编辑管道 YAML 文件,如下所示:
- 替换为
<target repository name>要在其中推送映像的容器注册表中的存储库的名称。 - 将
<docker registry service connection>替换为前面创建的 Docker 注册表服务连接的名称。
- 替换为
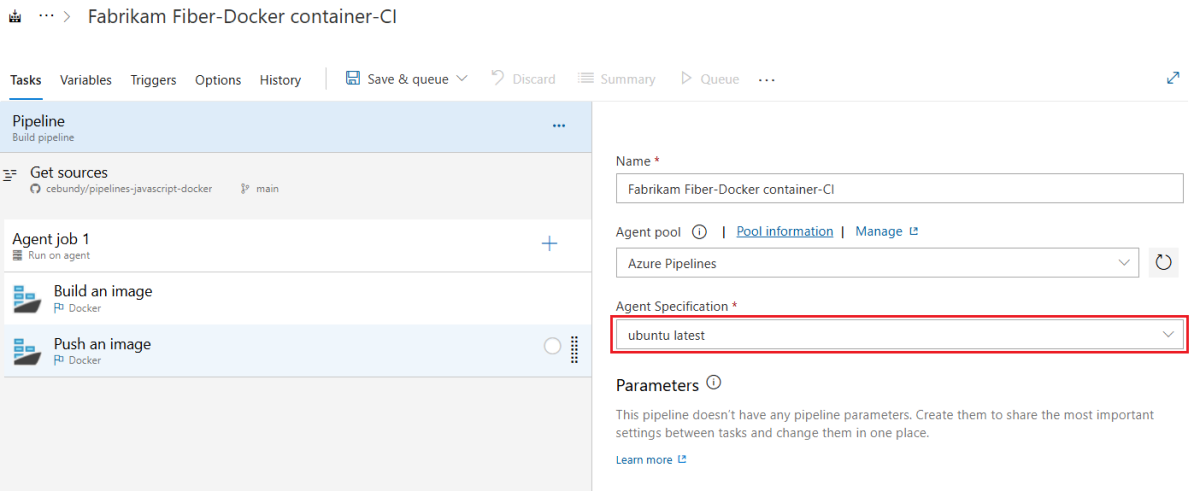
完成后,选择 保存并运行>保存并运行。
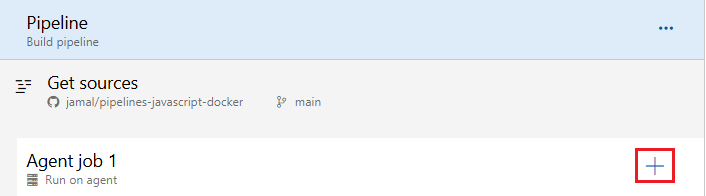
选择 作业 以查看日志并验证管道是否成功运行。
转到 Azure DevOps 项目,然后从左侧菜单中选择 Pipelines。
选择“新建管道”。
选择 GitHub 作为源代码的位置并选择存储库。
- 如果重定向到 GitHub 进行登录,请输入 GitHub 凭据。
- 如果你已重定向到 GitHub 来安装 Azure Pipelines 应用,请选择“批准并安装”。
选择 Docker - 生成映像并将其推送到 Azure 容器注册表 模板。
选择 Azure 订阅,然后选择继续。
选择容器注册表,然后选择 验证并配置。
示例 YAML 管道:
# Docker
# Build and push an image to Azure Container Registry
# https://docs.microsoft.com/azure/devops/pipelines/languages/docker

trigger:
- main

resources:
- repo: self

variables:
  # Container registry service connection established during pipeline creation
  dockerRegistryServiceConnection: '7f9dc28e-5551-43ee-891f-33bf61a995de'
  imageRepository: 'usernamepipelinesjavascriptdocker'
  containerRegistry: 'repoistoryname.azurecr.io'
  dockerfilePath: '$(Build.SourcesDirectory)/app/Dockerfile'
  tag: '$(Build.BuildId)'

  # Agent VM image name
  vmImageName: 'ubuntu-latest'

stages:
- stage: Build
  displayName: Build and push stage
  jobs:
  - job: Build
    displayName: Build
    pool:
      vmImage: $(vmImageName)
    steps:
    - task: Docker@2
      displayName: Build and push an image to container registry
      inputs:
        command: buildAndPush
        repository: $(imageRepository)
        dockerfile: $(dockerfilePath)
        containerRegistry: $(dockerRegistryServiceConnection)
        tags: |
          $(tag)
选择 保存并运行,保存并再次运行。
选择 作业 以查看日志并验证管道是否成功运行。
Docker 模板创建到 Azure 容器注册表的服务连接,并使用Docker@2任务生成 Docker 映像并将其推送到注册表。
Docker@2任务旨在简化在 Azure Pipelines 中生成、推送和管理 Docker 映像的过程。 此任务支持各种 Docker 命令,包括生成、推送、登录、注销、启动、停止和运行。
使用自托管代理时,请确保代理的主机上已安装 Docker,并且 Docker 引擎/守护程序正在使用提升的权限运行。