Important
本页包含使用 Kubernetes 部署清单(目前为预览版)管理 Azure IoT 操作组件的说明。 此功能存在若干限制,不应该用于生产工作负载。
有关 beta 版本、预览版或尚未正式发布的版本的 Azure 功能所适用的法律条款,请参阅 Microsoft Azure 预览版的补充使用条款。
MQTT 数据流终结点用于 MQTT 源和目标。 可以配置终结点设置、传输层安全性 (TLS)、身份验证和其他设置。
Prerequisites
Azure IoT 操作本地 MQTT 代理
Azure IoT 操作提供了可用于数据流的内置本地 MQTT 代理。 可将 MQTT 代理用作从其他系统接收消息的源,或将其用作向其他系统发送消息的目标。
默认终结点
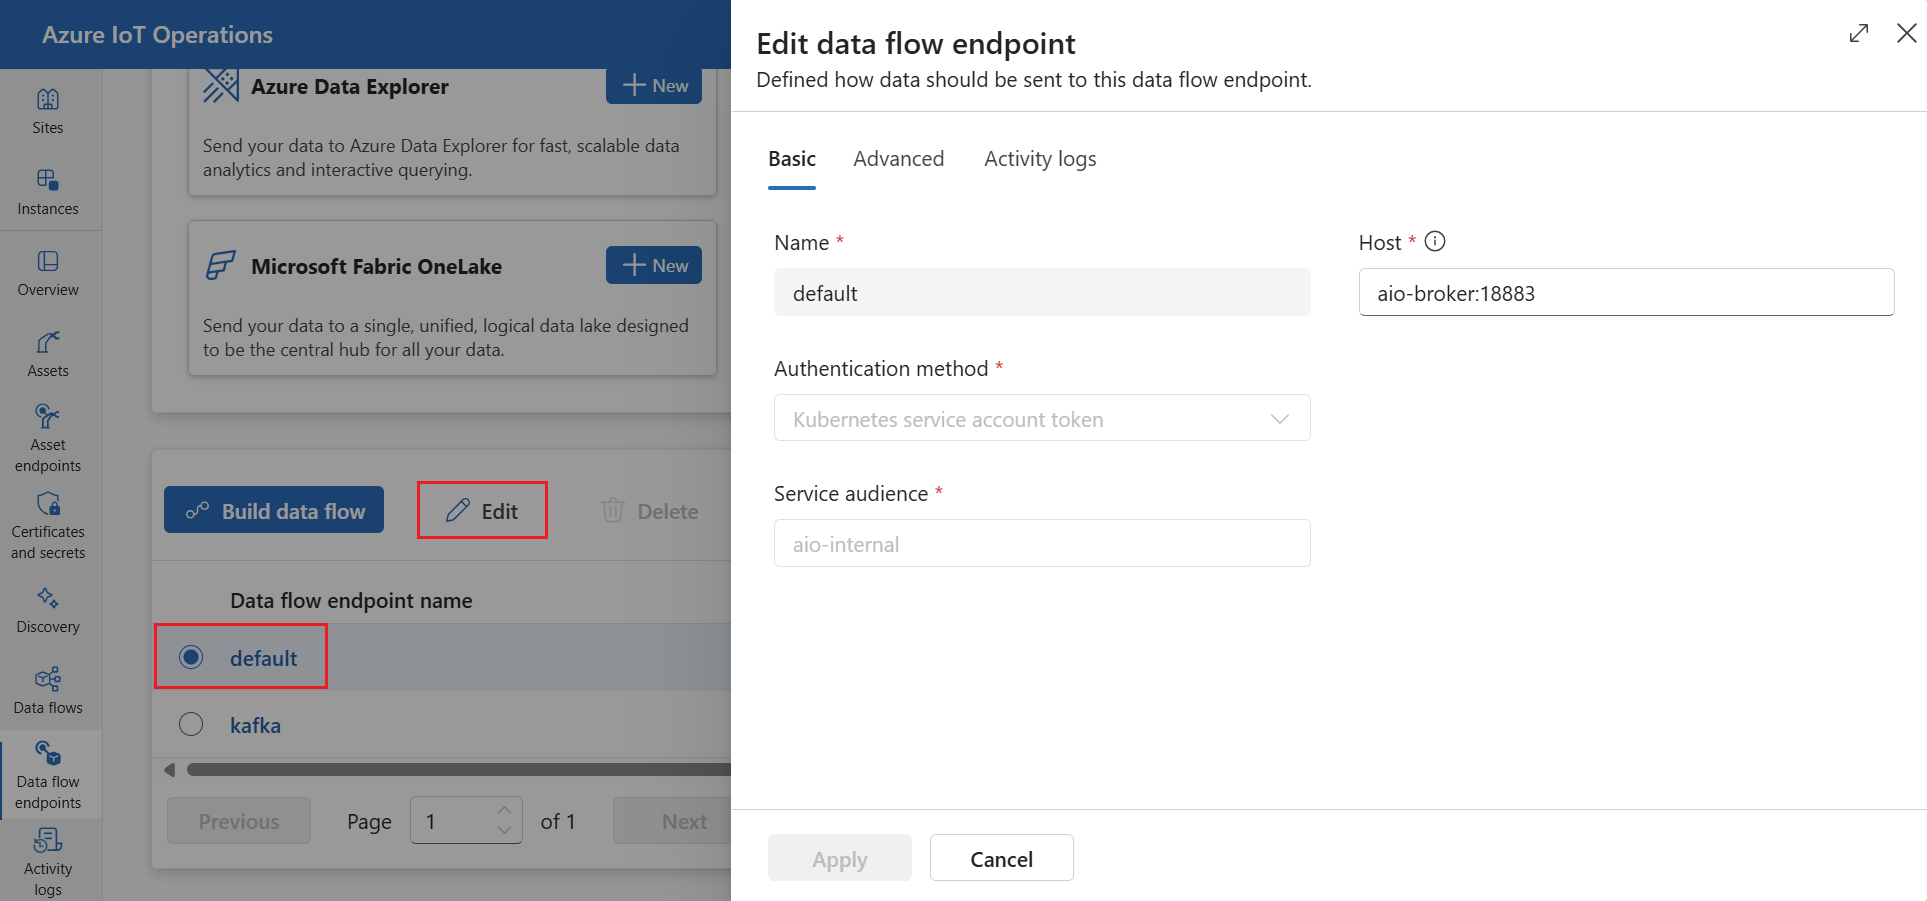
部署 Azure IoT 操作时,将会使用默认设置创建名为“默认”的 MQTT 代理数据流终结点。 可以将此终结点用作数据流的源或目标。
默认终结点使用以下设置:
- 主机:通过
aio-broker:18883的
- 身份验证:通过默认 BrokerAuthentication 资源的服务帐户令牌 (SAT)
- TLS:已启用
- 受信任 CA 证书:来自
azure-iot-operations-aio-ca-trust-bundle 的默认 CA 证书
Caution
请勿删除默认终结点。 如果删除默认终结点,则必须使用相同的设置重新创建它。
要查看或编辑默认 MQTT 代理终结点设置,请执行以下操作:
在操作体验中,选择“数据流终结点”。
选择“默认”终结点以查看或编辑设置。
使用 az iot ops dataflow endpoint apply 命令创建或更改默认 MQTT 代理数据流终结点。
az iot ops dataflow endpoint apply --resource-group <ResourceGroupName> --instance <AioInstanceName> --name default --config-file <ConfigFilePathAndName>
参数 --config-file 是包含资源属性的 JSON 配置文件的路径和文件名。
在此示例中,假定一个配置文件 default-mqtt-endpoint.json ,其中包含存储在用户主目录中的以下内容:
{
    "endpointType": "Mqtt",
    "mqttSettings": {
        "host": "aio-broker:18883",
        "authentication": {
            "method": "ServiceAccountToken",
            "serviceAccountTokenSettings": {
                "audience": "aio-internal"
            }
        },
        "tls": {
            "mode": "Enabled",
            "trustedCaCertificateConfigMapRef": "azure-iot-operations-aio-ca-trust-bundle"
        }
    }
}
下面是用于创建或更新默认 MQTT 代理数据流终结点的示例命令:
az iot ops dataflow endpoint apply --resource-group myResourceGroup --instance myAioInstance --name default --config-file ~/default-mqtt-endpoint.json
要编辑默认终结点,请创建包含以下内容的 Bicep .bicep 文件。 根据需要更新设置,并将占位符值(如 <AIO_INSTANCE_NAME>)替换为你自己的值。
param aioInstanceName string = '<AIO_INSTANCE_NAME>'
param customLocationName string = '<CUSTOM_LOCATION_NAME>'

resource aioInstance 'Microsoft.IoTOperations/instances@2024-11-01' existing = {
  name: aioInstanceName
}
resource customLocation 'Microsoft.ExtendedLocation/customLocations@2021-08-31-preview' existing = {
  name: customLocationName
}
resource defaultMqttBrokerDataflowEndpoint 'Microsoft.IoTOperations/instances/dataflowEndpoints@2024-11-01' = {
  parent: aioInstance
  name: 'default'
  extendedLocation: {
    name: customLocation.id
    type: 'CustomLocation'
  }
  properties: {
    endpointType: 'Mqtt'
    mqttSettings: {
      host: 'aio-broker:18883'
      authentication: {
        method: 'ServiceAccountToken'
        serviceAccountTokenSettings: {
          audience: 'aio-internal'
        }
      }
      tls: {
        mode: 'Enabled'
        trustedCaCertificateConfigMapRef: 'azure-iot-operations-aio-ca-trust-bundle'
      }
    }
  }
}
然后,通过 Azure CLI 进行部署。
az deployment group create --resource-group <RESOURCE_GROUP> --template-file <FILE>.bicep
可以在 Kubernetes 群集中查看默认 MQTT 代理终结点设置。 要查看设置,请使用以下命令:
kubectl get dataflowendpoint default -n azure-iot-operations -o yaml
创建新的终结点
还可以使用自定义设置创建新的本地 MQTT 代理终结点。 例如,可以使用其他端口、身份验证或授权设置创建新的 MQTT 代理终结点。 但即使创建新的终结点,也仍然必须始终使用默认终结点作为每个数据流中的源或目标。
在操作体验中,选择“数据流终结点”。
在“创建新的数据流终结点”下,选择“Azure IoT 操作本地 MQTT”“新建”。>
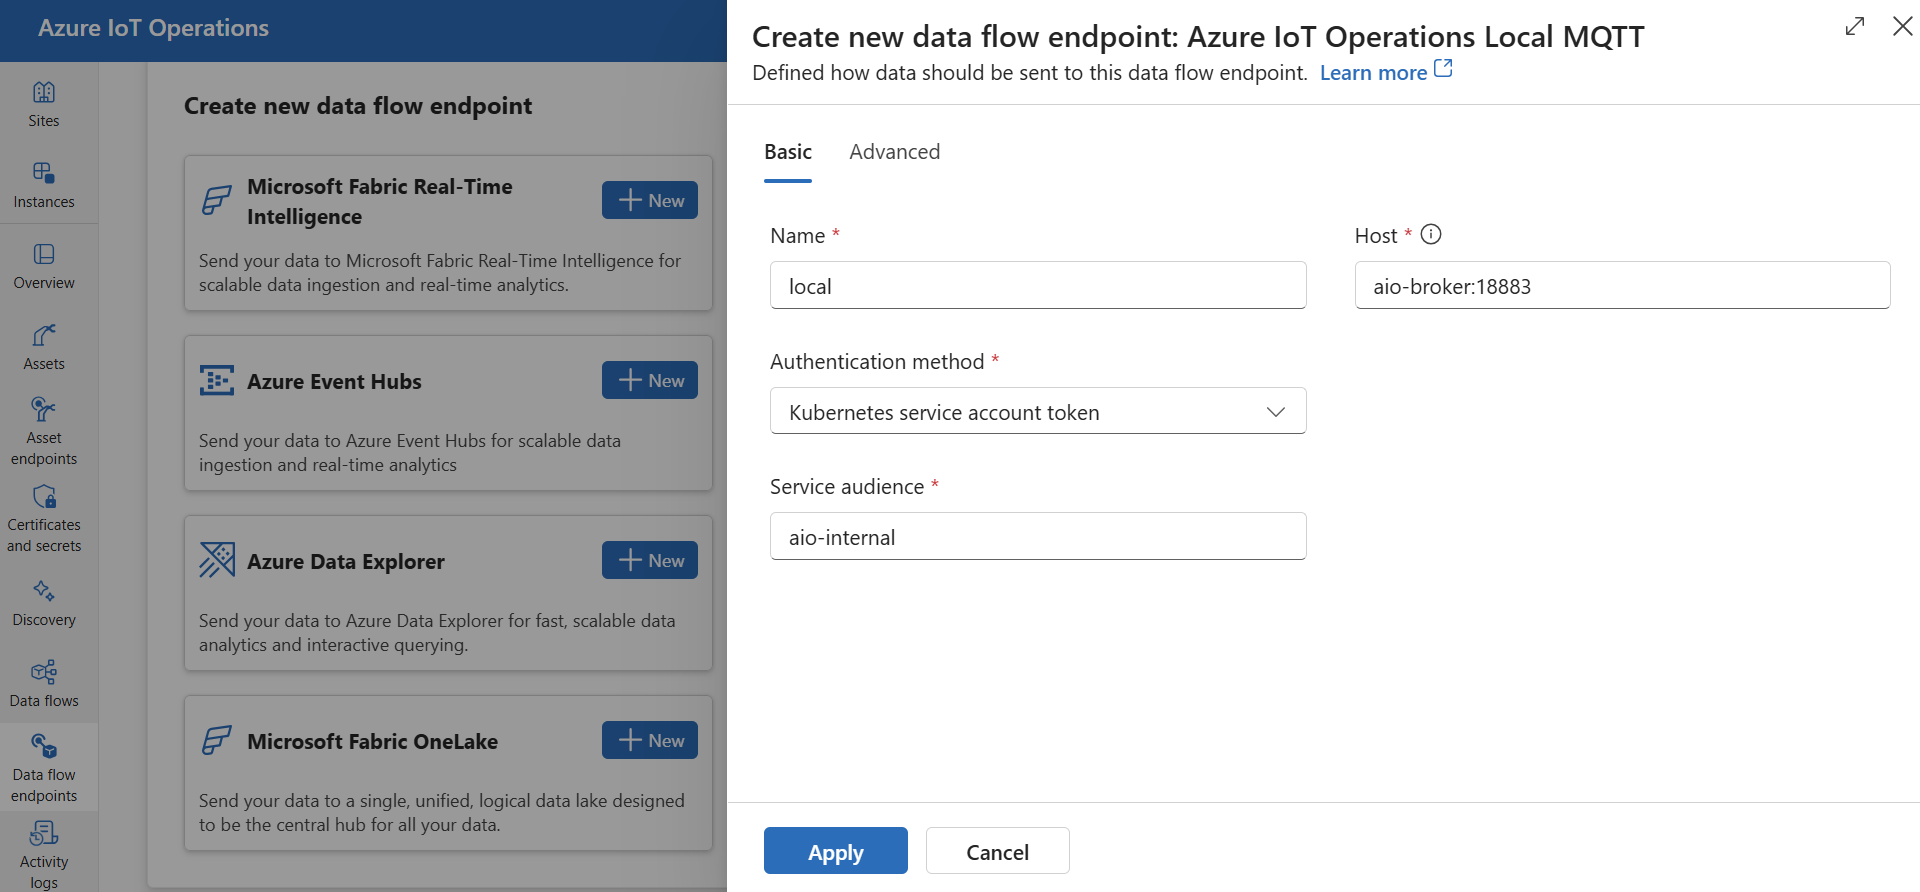
输入以下用于终结点的设置:
| Setting |
Description |
| Name |
数据流终结点的名称。 |
| Host |
MQTT 代理的主机名和端口。 使用格式 <hostname>:<port> |
| 身份验证方法 |
用于身份验证的方法。 选择“服务帐户令牌”或“X509 证书” |
| 服务受众 |
服务帐户令牌的受众。 如果使用的是“服务帐户令牌”,则为必需。 |
| X509 客户端证书 |
用于身份验证的 X.509 客户端证书。 如果使用 X509 证书,则是必需的。 可以上传符合行业标准的多行 X509 证书,以改进设备身份验证管理、安全性和灵活性。 |
| X509 客户端密钥 |
对应于 X.509 客户端证书的私钥。 如果使用 X509 证书,则是必需的。 |
| X509 中间证书 |
X.509 客户端证书链的中间证书。 如果使用 X509 证书,则是必需的。 |
创建或替换
使用 az iot ops dataflow endpoint create fabric-onelake 命令创建或替换本地 MQTT 代理数据流终结点。
az iot ops dataflow endpoint create local-mqtt --resource-group <ResourceGroupName> --instance <AioInstanceName> --name <EndpointName> --port <Port> --host <Host>
此命令使用默认设置创建本地 MQTT 代理终结点。 可以根据需要指定其他选项。
下面是用于创建或替换名为 local-mqtt-endpoint: 的本地 MQTT 中转站数据流终结点的示例命令:
az iot ops dataflow endpoint create local-mqtt --resource-group myResourceGroup --instance myAioInstance --name local-mqtt-endpoint --port 1883 --host aio-broker --auth-type ServiceAccountToken --audience aio-internal
创建或更改
使用 az iot ops dataflow endpoint apply 命令创建或更改本地 MQTT 代理数据流终结点。
az iot ops dataflow endpoint apply --resource-group <ResourceGroupName> --instance <AioInstanceName> --name <EndpointName> --config-file <ConfigFilePathAndName>
参数 --config-file 是包含资源属性的 JSON 配置文件的路径和文件名。
在此示例中,假定一个配置文件 local-mqtt-endpoint.json ,其中包含存储在用户主目录中的以下内容:
{
    "endpointType": "Mqtt",
    "mqttSettings": {
        "host": "aio-broker:1883",
        "authentication": {
            "method": "ServiceAccountToken",
            "serviceAccountTokenSettings": {
                "audience": "aio-internal"
            }
        },
        "tls": {
            "mode": "Enabled",
            "trustedCaCertificateConfigMapRef": "azure-iot-operations-aio-ca-trust-bundle"
        }
    }
}
下面是用于创建或更新名为 : 的 local-mqtt-endpoint本地 MQTT 中转站数据流终结点的示例命令:
az iot ops dataflow endpoint apply --resource-group myResourceGroup --instance myAioInstance --name local-mqtt-endpoint --config-file ~/local-mqtt-endpoint.json
param aioInstanceName string = '<AIO_INSTANCE_NAME>'
param customLocationName string = '<CUSTOM_LOCATION_NAME>'
param endpointName string = '<ENDPOINT_NAME>'
param mqttBrokerHostname string = '<HOSTNAME>:<PORT>'
param trustedCA string = '<TRUST_BUNDLE>'
param serviceAccountAudience string = '<SA_AUDIENCE>'

resource aioInstance 'Microsoft.IoTOperations/instances@2024-11-01' existing = {
  name: aioInstanceName
}
resource customLocation 'Microsoft.ExtendedLocation/customLocations@2021-08-31-preview' existing = {
  name: customLocationName
}
resource MqttBrokerDataflowEndpoint 'Microsoft.IoTOperations/instances/dataflowEndpoints@2024-11-01' = {
  parent: aioInstance
  name: endpointName
  extendedLocation: {
    name: customLocation.id
    type: 'CustomLocation'
  }
  properties: {
    endpointType: 'Mqtt'
    mqttSettings: {
      host: mqttBrokerHostname
      authentication: {
        method: 'ServiceAccountToken'
        serviceAccountTokenSettings: {
          audience: serviceAccountAudience
        }
      }
      tls: {
        mode: 'Enabled'
        trustedCaCertificateConfigMapRef: trustedCA
      }
    }
  }
}
apiVersion: connectivity.iotoperations.azure.com/v1
kind: DataflowEndpoint
metadata:
  name: <ENDPOINT_NAME>
  namespace: azure-iot-operations
spec:
  endpointType: Mqtt
  mqttSettings:
    host: "<HOSTNAME>:<PORT>"
    tls:
      mode: Enabled
      trustedCaCertificateConfigMapRef: <TRUST_BUNDLE>
    authentication:
      method: ServiceAccountToken
      serviceAccountTokenSettings:
        audience: <SA_AUDIENCE>
Azure 事件网格
Azure 事件网格提供完全托管的 MQTT 代理,可与 Azure IoT 操作数据流配合使用。 要配置 Azure 事件网格 MQTT 代理终结点,建议使用托管标识进行身份验证。
如果尚未配置,请先创建事件网格命名空间。
启用 MQTT
创建事件网格命名空间后,转到“配置”,并检查以下内容:
-
启用 MQTT:选中该复选框。
-
每个身份验证名称的最大客户端会话数:设置为 3 或更大。
“最大客户端会话数”选项非常重要,它支持数据流纵向扩展,并且仍然能够连接。 要了解详细信息,请参阅事件网格 MQTT 多会话支持。
创建主题空间
要支持数据流向事件网格 MQTT 代理发送或接收消息,需要在事件网格命名空间中至少创建一个主题空间。 可以通过选择“主题空间”“新建主题空间”来在事件网格命名空间中创建主题空间。>
若要快速开始和进行测试,可以创建具有通配符主题 # 的主题空间作为主题模板。
为托管标识分配权限
要为事件网格 MQTT 代理配置数据流终结点,建议使用用户分配的托管标识或系统分配的托管标识。 此方法是安全的,并且无需手动管理凭据。
创建主题空间后,需要为 Azure IoT 操作托管标识分配一个角色,以授予其向事件网格 MQTT 代理发送或接收消息的权限。
如果使用系统分配的托管标识,请在 Azure 门户中转到 Azure IoT 操作实例并选择“概述”。 复制“Azure IoT 操作 Arc 扩展”后列出的扩展名称。 例如 azure-iot-operations-xxxx7。 可以使用 Azure IoT 操作 Arc 扩展的名称查找系统分配的托管标识。
然后,转到事件网格命名空间 >“访问控制(IAM)”“添加角色分配”。>
- 在“角色”选项卡上,选择相应的角色,如“”或“
EventGrid TopicSpaces Publisher”EventGrid TopicSpaces Subscriber。 这为托管标识提供了必要的权限来为命名空间中的所有主题空间发送或接收消息。 有关详细信息,请参阅进行 Microsoft Entra JWT 身份验证和 Azure RBAC 授权以发布或订阅 MQTT 消息。
- 在“成员”选项卡上:
- 如果使用系统分配的托管标识,请在“将访问权限分配到”中,选择“用户、组或服务主体”选项,然后选择“+ 选择成员”并搜索 Azure IoT 操作 Arc 扩展的名称。
- 如果使用用户分配的托管标识,请在“将访问权限分配到”中,选择“托管标识”选项,然后选择“+ 选择成员”选项并搜索为云连接设置的用户分配的托管标识。
或者,可以在主题空间级别分配角色。 转到主题空间 >“访问控制(IAM)”“添加角色分配”。> 使用相应的角色来分配托管标识,例如 EventGrid TopicSpaces Publisher 或 EventGrid TopicSpaces Subscriber。 这为托管标识提供了必要的权限来为特定主题空间发送或接收消息。
Note
具有相同数据流配置的第二个部署将无法连接,并将导致授权错误。 为了解决此问题,请更改第二个配置中的数据流名称。 只有在第二个部署与第一个部署同时进行或者在第一个部署之后不久进行,直到 MQTT 会话过期时,才会出现这个问题。
为事件网格 MQTT 代理创建数据流终结点
配置事件网格命名空间后,可以为事件网格 MQTT 代理创建数据流终结点。
在操作体验中,选择“数据流终结点”选项卡。
在“创建新的数据流终结点”下,选择“Azure 事件网格 MQTT”“新建”。>
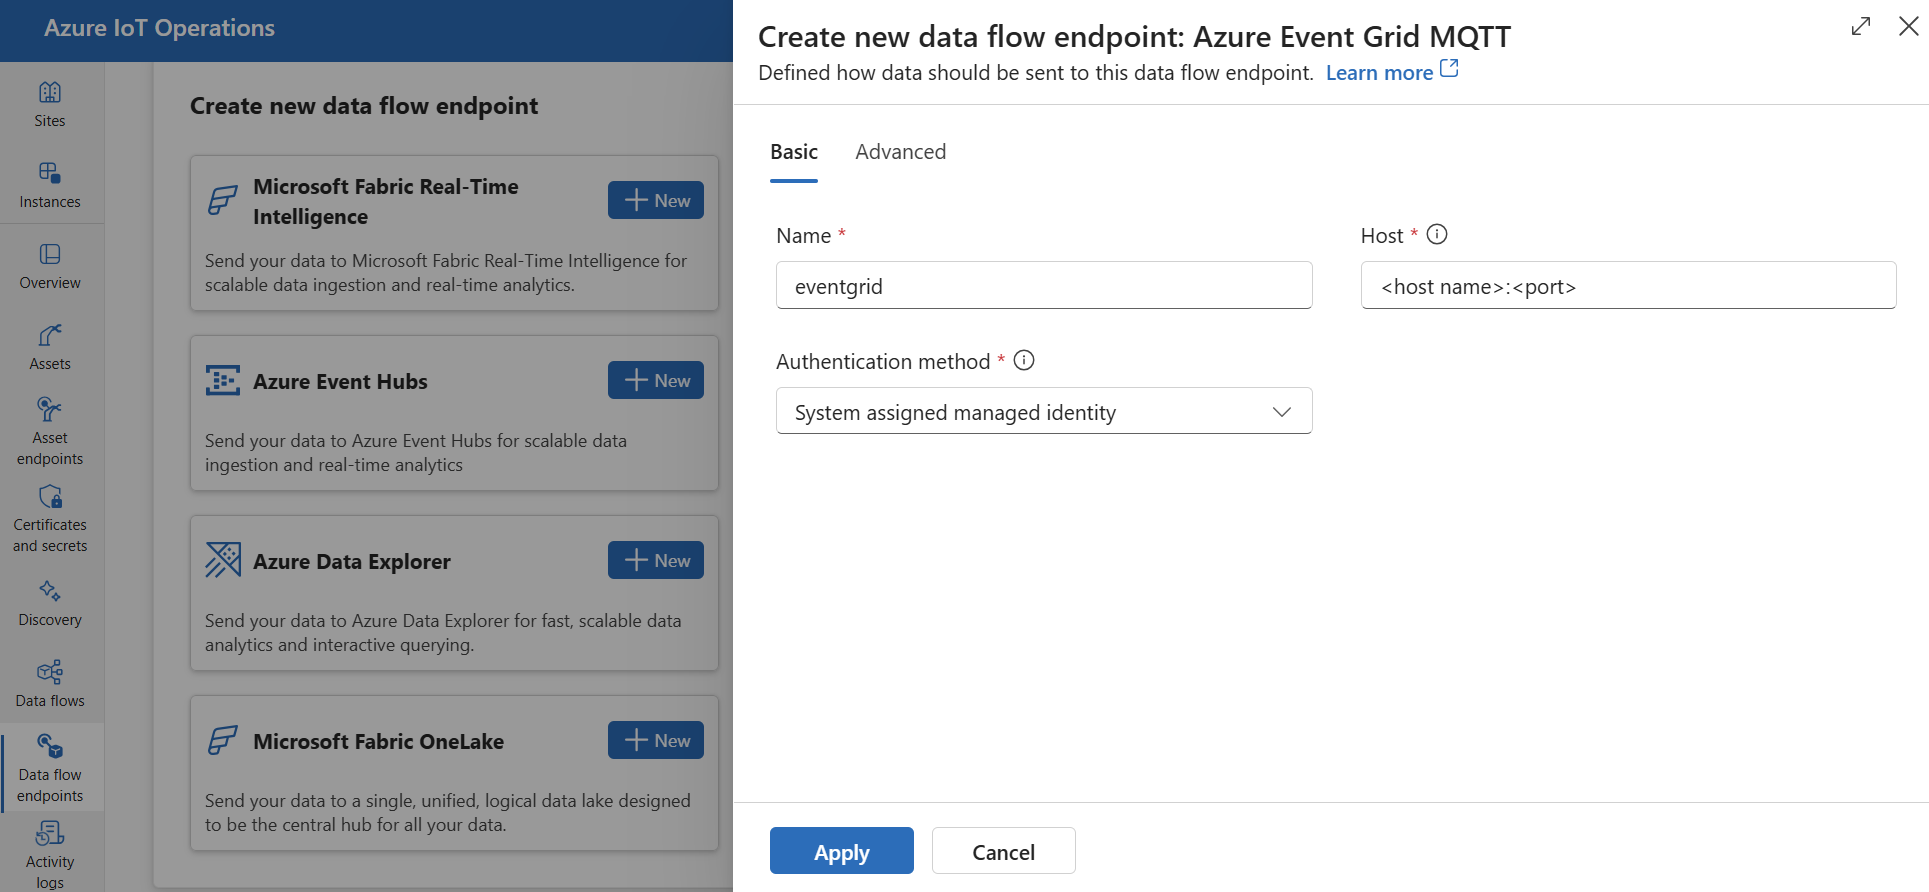
输入以下用于终结点的设置:
| Setting |
Description |
| Name |
数据流终结点的名称。 |
| Host |
事件网格 MQTT 代理的主机名和端口。 使用格式 <NAMESPACE>.<REGION>-1.ts.eventgrid.azure.net:8883 |
| 身份验证方法 |
用于身份验证的方法。 建议选择“系统分配的托管标识”或“用户分配的托管标识”。 |
选择“应用”以预配终结点。
创建或替换
使用 az iot ops 数据流终结点 create eventgrid 命令创建或替换 Azure 事件网格 MQTT 数据流终结点。
az iot ops dataflow endpoint create eventgrid --resource-group <ResourceGroupName> --instance <AioInstanceName> --name <EndpointName> --host <Namespace>.<Region>-1.ts.eventgrid.azure.net --port 9092
此命令使用默认设置和系统分配的托管标识身份验证创建一个事件网格 MQTT 代理端点。 可以根据需要指定其他选项。
下面是用于创建或替换名为 event-grid-endpoint: 的事件网格 MQTT 中转站数据流终结点的示例命令:
az iot ops dataflow endpoint create eventgrid --resource-group myResourceGroup --instance myAioInstance --name event-grid-endpoint --host mynamespace.eastus-1.ts.eventgrid.azure.net --port 9092
创建或更改
使用 az iot ops dataflow endpoint apply 命令创建或更改 Azure 事件网格 MQTT 代理数据流终结点。
az iot ops dataflow endpoint apply --resource-group <ResourceGroupName> --instance <AioInstanceName> --name <EndpointName> --config-file <ConfigFilePathAndName>
参数 --config-file 是包含资源属性的 JSON 配置文件的路径和文件名。
在此示例中,假定一个配置文件 event-grid-endpoint.json ,其中包含存储在用户主目录中的以下内容:
{
    "endpointType": "Mqtt",
    "mqttSettings": {
        "host": "mynamespace.eastus-1.ts.eventgrid.azure.net:9092",
        "authentication": {
            "method": "SystemAssignedManagedIdentity",
            "systemAssignedManagedIdentitySettings": {}
        },
        "tls": {
            "mode": "Enabled"
        }
    }
}
下面是用于创建或更新名为 event-grid-endpoint: 的事件网格 MQTT 中转站数据流终结点的示例命令:
az iot ops dataflow endpoint apply --resource-group myResourceGroup --instance myAioInstance --name event-grid-endpoint --config-file ~/event-grid-endpoint.json
创建包含以下内容的 Bicep .bicep 文件。
param aioInstanceName string = '<AIO_INSTANCE_NAME>'
param customLocationName string = '<CUSTOM_LOCATION_NAME>'
param endpointName string = '<ENDPOINT_NAME>'
param eventGridHostName string = '<NAMESPACE>.<REGION>-1.ts.eventgrid.azure.net:8883'

resource aioInstance 'Microsoft.IoTOperations/instances@2024-11-01' existing = {
  name: aioInstanceName
}
resource customLocation 'Microsoft.ExtendedLocation/customLocations@2021-08-31-preview' existing = {
  name: customLocationName
}
resource remoteMqttBrokerDataflowEndpoint 'Microsoft.IoTOperations/instances/dataflowEndpoints@2024-11-01' = {
  parent: aioInstance
  name: endpointName
  extendedLocation: {
    name: customLocation.id
    type: 'CustomLocation'
  }
  properties: {
    endpointType: 'Mqtt'
    mqttSettings: {
      host: eventGridHostName
      authentication: {
        // See available authentication methods section for method types
        // method: <METHOD_TYPE>
      }
      tls: {
        mode: 'Enabled'
      }
    }
  }
}
然后,通过 Azure CLI 进行部署。
az deployment group create --resource-group <RESOURCE_GROUP> --template-file <FILE>.bicep
创建包含以下内容的 Kubernetes 清单 .yaml 文件。
apiVersion: connectivity.iotoperations.azure.com/v1
kind: DataflowEndpoint
metadata:
  name: <ENDPOINT_NAME>
  namespace: azure-iot-operations
spec:
  endpointType: Mqtt
  mqttSettings:
    host: <NAMESPACE>.<REGION>-1.ts.eventgrid.azure.net:8883
    authentication:
      # See available authentication methods section for method types
      # method: <METHOD_TYPE>
    tls:
      mode: Enabled
然后,将清单文件应用到 Kubernetes 群集。
kubectl apply -f <FILE>.yaml
创建终结点后,可以在数据流中使用它来连接到作为源或目标的事件网格 MQTT 代理。 MQTT 主题是在数据流中配置的。
将 X.509 证书身份验证与事件网格配合使用
将 X.509 身份验证与事件网格 MQTT 代理结合使用时,请转到“事件网格命名空间”>“配置”并检查以下设置:
-
启用 MQTT:选中该复选框。
-
启用备用客户端身份验证名称源:选中该复选框。
-
证书使用者名称:在下拉列表中选择此选项。
-
每个身份验证名称的最大客户端会话数:设置为 3 或更大。
借助“备用客户端身份验证”和“最大客户端会话数”选项,数据流可以使用客户端证书使用者名称而不是 MQTT CONNECT Username 来进行身份验证。 此功能非常重要,可支持数据流生成多个实例并且仍然能够连接。 要了解详细信息,请参阅事件网格 MQTT 客户端证书身份验证和多会话支持。
然后,按照 X.509 证书中的步骤使用 X.509 证书设置配置终结点。
事件网格共享订阅限制
如果事件网格用作数据流的源(其中数据流订阅消息),Azure 事件网格 MQTT 代理将不支持共享订阅,这意味着无法在数据流配置文件中将 instanceCount 设置为大于 1 的值。 在这种情况下,如果将 instanceCount 设为大于 1 的值,数据流将无法启动。
自定义 MQTT 代理
对于其他 MQTT 代理,可以根据需要配置终结点、TLS、身份验证和其他设置。
在操作体验中,选择“数据流终结点”选项卡。
在“创建新的数据流终结点”下,选择“自定义 MQTT 代理”“新建”。>
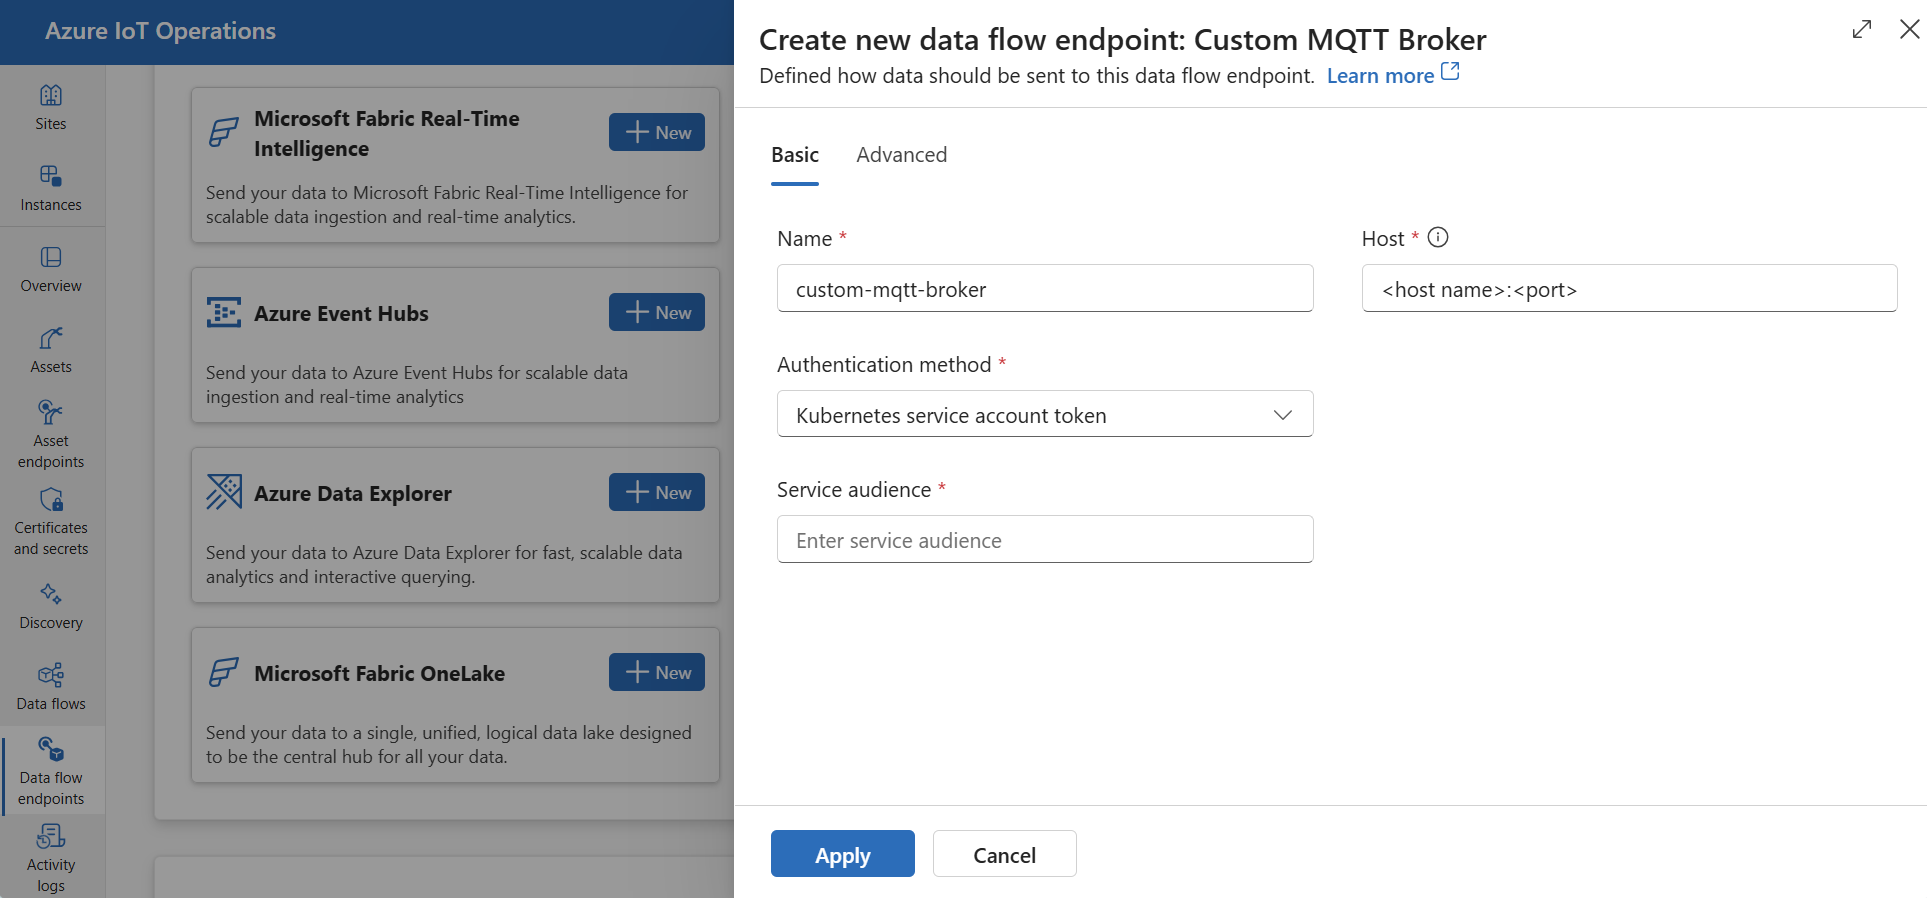
输入以下用于终结点的设置:
| Setting |
Description |
| Name |
数据流终结点的名称 |
| Host |
MQTT 代理终结点的主机名,格式为 <hostname>.<port>。 |
| 身份验证方法 |
用于身份验证的方法。 选择“服务帐户令牌”或“X509 证书”。 |
| 服务受众 |
服务帐户令牌的受众。 如果使用的是“服务帐户令牌”,则为必需。 |
| X509 客户端证书 |
用于身份验证的 X.509 客户端证书。 如果使用 X509 证书,则是必需的。 可以上传符合行业标准的多行 X509 证书,以改进设备身份验证管理、安全性和灵活性。 |
| X509 客户端密钥 |
对应于 X.509 客户端证书的私钥。 如果使用 X509 证书,则是必需的。 |
| X509 中间证书 |
X.509 客户端证书链的中间证书。 如果使用 X509 证书,则是必需的。 |
选择“应用”以预配终结点。
创建或替换
使用 az iot ops 数据流终结点创建自定义 mqtt 命令创建或替换自定义 MQTT 中转站数据流终结点。
az iot ops dataflow endpoint create custom-mqtt --resource-group <ResourceGroupName> --instance <AioInstanceName> --name <EndpointName> --host <Host> --port <Port>
此命令使用默认设置和系统分配的托管标识身份验证创建自定义 MQTT 代理终结点。 可以根据需要指定其他选项。
下面是用于创建或替换名为 custom-mqtt-endpoint: 的自定义 MQTT 中转站数据流终结点的示例命令:
az iot ops dataflow endpoint create custom-mqtt --resource-group myResourceGroup --instance myAioInstance --name custom-mqtt-endpoint --host mycustombroker.contoso.com --port 8883
创建或更改
使用 az iot ops dataflow endpoint apply 命令创建或更改自定义 MQTT 代理数据流终结点。
az iot ops dataflow endpoint apply --resource-group <ResourceGroupName> --instance <AioInstanceName> --name <EndpointName> --config-file <ConfigFilePathAndName>
参数 --config-file 是包含资源属性的 JSON 配置文件的路径和文件名。
在此示例中,假定一个配置文件 custom-mqtt-endpoint.json ,其中包含存储在用户主目录中的以下内容:
{
    "endpointType": "Mqtt",
    "mqttSettings": {
        "host": "mycustombroker.contoso.com:8883",
        "authentication": {
          "method": "SystemAssignedManagedIdentity",
          "systemAssignedManagedIdentitySettings": {}
        },
        "tls": {
            "mode": "Enabled"
        }
    }
}
下面是用于创建或更新名为 custom-mqtt-endpoint: 的自定义 MQTT 中转站数据流终结点的示例命令:
az iot ops dataflow endpoint apply --resource-group myResourceGroup --instance myAioInstance --name custom-mqtt-endpoint --config-file ~/custom-mqtt-endpoint.json
mqttSettings: {
  authentication: {
    // See available authentication methods section for method types
    // method: <METHOD_TYPE>
  }
  host: '<HOST>:<PORT>'
  tls: {
    mode: 'Enabled' // or 'Disabled'
    trustedCaCertificateConfigMapRef: '<TRUSTED_CA_CERT_CONFIGMAP>'
  }
}
spec:
  endpointType: Mqtt
  mqttSettings:
    host: <HOST>:<PORT>
    authentication:
      # See available authentication methods section for method types
      # method: <METHOD_TYPE>
    tls:
      mode: Enabled # or Disabled
      trustedCaCertificateConfigMapRef: <TRUSTED_CA_CERT_CONFIGMAP>
要自定义 MQTT 终结点设置,请参阅以下部分来了解详细信息。
可用身份验证方法
以下身份验证方法可用于 MQTT 代理数据流终结点。
系统分配的托管标识
在配置数据流终结点之前,请向 Azure IoT 操作托管标识分配一个角色,以授予连接到 MQTT 代理的权限:
- 在 Azure 门户中,转到 Azure IoT 操作实例并选择“概述”。
- 复制“Azure IoT 操作 Arc 扩展”后列出的扩展名称。 例如 azure-iot-operations-xxxx7。
- 转到需要授予权限的云资源。 例如,转到事件网格命名空间“访问控制 (IAM)”>“添加角色分配”>。
- 在“角色”选项卡上,选择适当的角色。
- 在“成员”选项卡上,在“将访问权限分配到”中,选择“用户、组或服务主体”选项,然后选择“+ 选择成员”并搜索 Azure IoT 操作托管标识。 例如 azure-iot-operations-xxxx7。
然后,使用系统分配的托管标识设置配置数据流终结点。
在操作体验数据流终结点设置页中,选择“基本”选项卡,然后选择“身份验证方法”“系统分配的托管标识”。>
创建或替换
使用 az iot ops dataflow endpoint create 命令(将 --auth-type 参数设置为 SystemAssignedManagedIdentity)来进行系统分配的托管标识身份验证。
az iot ops dataflow endpoint create <Command> --auth-type SystemAssignedManagedIdentity --audience <Audience> --resource-group <ResourceGroupName> --instance <AioInstanceName> --name <EndpointName>
创建或更改
使用带有 参数的 --config-file 命令。
在此示例中,假设配置文件包含以下内容:
{
    "endpointType": "Mqtt",
    "mqttSettings": {
        "host": "mycustombroker.contoso.com:8883",
        "authentication": {
          "method": "SystemAssignedManagedIdentity",
          "systemAssignedManagedIdentitySettings": {}
        },
        "tls": {
            "mode": "Enabled"
        }
    }
}
mqttSettings: {
  authentication: {
    method: 'SystemAssignedManagedIdentity'
    systemAssignedManagedIdentitySettings: {}
  }
}
mqttSettings:
  authentication:
    method: SystemAssignedManagedIdentity
    systemAssignedManagedIdentitySettings:
      {}
用户分配的托管标识
要使用用户分配的托管标识进行身份验证,必须先部署已启用安全设置的 Azure IoT 操作。 然后,需要设置用户分配的托管标识以进行云连接。 要了解详细信息,请参阅在 Azure IoT 操作部署中启用安全设置。
在配置数据流终结点之前,请向用户分配的托管标识分配角色,以授予连接到 MQTT 代理的权限:
- 在 Azure 门户中,转到需要授予权限的云资源。 例如,转到事件网格命名空间“访问控制 (IAM)”>“添加角色分配”>。
- 在“角色”选项卡上,选择适当的角色。
- 在“成员”选项卡上,在“将访问权限分配到”中,选择“托管标识”选项,然后选择“+ 选择成员”并搜索用户分配的托管标识。
然后,使用用户分配的托管标识设置配置数据流终结点。
在操作体验数据流终结点设置页中,选择“基本”选项卡,然后选择“身份验证方法”“用户分配的托管标识”。>
创建或替换
使用 az iot ops dataflow endpoint create 命令(将 --auth-type 参数设置为 UserAssignedManagedIdentity)来进行用户分配的托管标识身份验证。
az iot ops dataflow endpoint create <Command> --auth-type UserAssignedManagedIdentity --client-id <ClientId> --tenant-id <TenantId> --resource-group <ResourceGroupName> --instance <AioInstanceName> --name <EndpointName>
创建或更改
使用带有 参数的 --config-file
在此示例中,假设配置文件包含以下内容:
{
    "endpointType": "Mqtt",
    "mqttSettings": {
        "authentication": {
          "method": "UserAssignedManagedIdentity",
          "userAssignedManagedIdentitySettings": {
            "clientId": "<ID>",
            "tenantId": "<ID>",
            // Optional
            "scope": "https://<Scope_Url>"
          }
        }
    }
}
mqttSettings: {
  authentication: {
    method: 'UserAssignedManagedIdentity'
    userAssignedManagedIdentitySettings: {
      clientId: '<ID>'
      tenantId: '<ID>'
      // Optional, defaults to 'https://eventgrid.azure.net/.default'
      // scope: 'https://<SCOPE_URL>'
    }
  }
}
mqttSettings:
  authentication:
    method: UserAssignedManagedIdentity
    userAssignedManagedIdentitySettings:
      clientId: <ID>
      tenantId: <ID>
      # Optional, defaults to 'https://eventgrid.azure.net/.default'
      # scope: https://<SCOPE_URL>
Kubernetes 服务帐户令牌 (SAT)
如果使用 Kubernetes 服务帐户令牌 (SAT) 进行身份验证,则无需创建机密。 SAT 用于通过匹配受众向 MQTT 代理进行身份验证。
在操作体验数据流终结点设置页中,选择“基本”选项卡,然后选择“身份验证方法”“服务帐户令牌”。>
输入服务受众。
创建或替换
使用 az iot ops dataflow endpoint create 命令(将 --auth-type 参数设置为 ServiceAccountToken)来进行 Kubernetes 服务帐户令牌身份验证。
az iot ops dataflow endpoint create <Command> --auth-type ServiceAccountToken --audience <Audience> --resource-group <ResourceGroupName> --instance <AioInstanceName> --name <EndpointName>
创建或更改
使用带有 参数的 --config-file。
在此示例中,假设配置文件包含以下内容:
{
    "endpointType": "Mqtt",
    "mqttSettings": {
        "authentication": {
          "method": "ServiceAccountToken",
          "serviceAccountTokenSettings": {
            "audience": "<ServiceAccountAudience>"
          }
        }
    }
}
mqttSettings: {
  authentication: {
    method: 'ServiceAccountToken'
    serviceAccountTokenSettings: {
      audience: '<YOUR_SERVICE_ACCOUNT_AUDIENCE>'
    }
  }
}
mqttSettings:
  authentication:
    method: ServiceAccountToken
    serviceAccountTokenSettings:
      audience: <YOUR_SERVICE_ACCOUNT_AUDIENCE>
X.509 证书
许多 MQTT 代理(如事件网格)都支持 X.509 身份验证。 数据流可以提供客户端 X.509 证书并协商 TLS 通信。
证书和私钥必须采用 PEM 格式,且不受密码保护。
Tip
PEM 格式是证书和密钥的通用格式。 PEM 格式的证书和密钥是 base64 编码的 ASCII 文件,其标头类似于 -----BEGIN CERTIFICATE----- 和 -----BEGIN EC PRIVATE KEY----
如果证书采用其他格式,则可以使用 OpenSSL 将其转换为 PEM 格式。 要了解详细信息,请参阅如何将证书转换为适当的格式。
在配置数据流终结点之前,请使用证书和私钥创建机密。
如果使用操作门户,则机密会自动格式化并同步到 Kubernetes 群集。
如果使用 Bicep 或 Kubernetes,请在 MQTT 数据流终结点所在命名空间中使用证书和私钥手动创建机密。
kubectl create secret generic <X509_SECRET_NAME> -n azure-iot-operations --from-file=client_cert.pem=<CLIENT_CERT_FILE>.pem --from-file=client_key.pem=<PRIVATE_KEY_FILE>.pem --from-file=client_intermediate_certs.pem=<INTERMEDIATE_CERT_FILE>.pem
此处,机密必须具有 client_cert.pem 和 client_key.pem,作为证书和私钥的密钥名称。 (可选)机密还可以将 client_intermediate_certs.pem 作为中间证书的密钥名称。
Important
为了使用操作体验 Web UI 管理机密,必须先通过配置 Azure Key Vault 和启用工作负荷标识来启用 Azure IoT 操作的安全设置。 要了解详细信息,请参阅在 Azure IoT 操作部署中启用安全设置。
Important
操作体验 Web UI 当前存在一个已知问题,即创建 X.509 机密会导致机密包含错误编码的数据。 要了解详细信息和解决方法,请参阅已知问题。
在操作体验数据流终结点设置页中,选择“基本”选项卡,然后选择“身份验证方法”“X509 证书”。>
此时,在“同步的机密名称”下,输入机密的名称。 此名称用于在数据流终结点设置中引用机密,并且是机密存储在 Kubernetes 集群中的名称。
然后,在“X509 客户端证书”、“X509 客户端密钥”和“X509 中间证书”下,选择“添加引用”以添加证书、私钥和中间证书。 在下一页上,使用“从 Azure Key Vault 添加”从 Azure Key Vault 选择机密,或选择“新建”创建新机密。
如果选择“新建”,请输入以下设置:
| Setting |
Description |
| 机密名称 |
Azure 密钥保管库中机密的名称。 选取易记名称,以便稍后从列表中选择该机密。 |
| 机密值 |
PEM 格式的证书、私钥或中间证书。 可以上传符合行业标准的多行 X509 证书,以改进设备身份验证管理、安全性和灵活性。 |
| 设置激活日期 |
如果已启用,则为机密生效的日期。 |
| 设置过期日期 |
如果已启用,则为机密过期的日期。 |
有关机密的详细信息,请参阅在 Azure IoT 操作中创建和管理机密。
创建或替换
使用 az iot ops 数据流终结点 create 命令,并将 --auth-type 参数设置为 X509Certificate X.509 证书身份验证。
az iot ops dataflow endpoint create <Command> --auth-type X509Certificate --secret-name <X509SecretName> --resource-group <ResourceGroupName> --instance <AioInstanceName> --name <EndpointName>
创建或更改
使用带有 参数的 --config-file。
在此示例中,假设配置文件包含以下内容:
{
    "endpointType": "Mqtt",
    "mqttSettings": {
        "authentication": {
          "method": "X509Certificate",
          "x509CertificateSettings": {
            "secretRef": "<X509SecretName>"
          }
        }
    }
}
mqttSettings: {
  authentication: {
    method: 'X509Certificate'
      x509CertificateSettings:
        secretRef: '<X509_SECRET_NAME>'
  }
}
mqttSettings:
  authentication:
    method: X509Certificate
    x509CertificateSettings:
      secretRef: <X509_SECRET_NAME>
Anonymous
要使用匿名身份验证,请将身份验证方法设置为 Anonymous。
在操作体验数据流终结点设置页中,选择“基本”选项卡,然后选择“身份验证方法”“无”。>
创建或替换
使用 az iot ops 数据流终结点 create 命令,并使用参数 --no-auth 进行匿名身份验证。
az iot ops dataflow endpoint create <Command> --no-auth --resource-group <ResourceGroupName> --instance <AioInstanceName> --name <EndpointName>
创建或更改
使用带有 参数的 --config-file。
在此示例中,假设配置文件包含以下内容:
{
    "endpointType": "Mqtt",
    "mqttSettings": {
        "authentication": {
          "method": "Anonymous"
        }
    }
}
mqttSettings: {
  authentication: {
    method: 'Anonymous'
  }
}
mqttSettings:
  authentication:
    method: Anonymous
    anonymousSettings:
      {}
高级设置
可以为 MQTT 代理数据流终结点设置高级设置,例如 TLS、受信任 CA 证书、MQTT 消息传送设置和 CloudEvents。 在数据流终结点自定义资源中,可以在数据流终结点的“高级”门户选项卡中进行这些设置。
{
    "mqttSettings": {
        "qos": 1,
        "retain": "Keep",
        "sessionExpirySeconds": 3600,
        "keepAliveSeconds": 60,
        "maxInflightMessages": 100,
        "protocol": "WebSockets",
        "clientIdPrefix": "dataflow",
        "cloudEventAttributes": "Propagate",
        "tls": {
          "mode": "Enabled"
        }
    }
}
// See sections below for explanation of each setting
mqttSettings: {
  qos: 1
  retain: 'Keep'
  sessionExpirySeconds: 3600
  keepAliveSeconds: 60
  maxInflightMessages: 100
  protocol: WebSockets
  clientIdPrefix: 'dataflow'
  cloudEventAttributes : 'Propagate' // or 'CreateOrRemap'
}
# See sections below for explanation of each setting
mqttSettings:
  qos: 1
  retain: Keep
  sessionExpirySeconds: 3600
  keepAliveSeconds: 60
  maxInflightMessages: 100
  protocol: WebSockets
  clientIdPrefix: dataflow
  cloudEventAttributes : Propagate # or CreateOrRemap
TLS 设置
TLS 模式
要为 MQTT 终结点启用或禁用 TLS,请在 TLS 设置中更新 mode 设置。
在操作体验数据流终结点设置页中,选择“高级”选项卡,然后使用“已启用 TLS 模式”旁边的复选框。
{
    "mqttSettings": {
        "tls": {
          "mode": "Enabled"
        }
    }
}
mqttSettings: {
  tls: {
    mode: 'Enabled' // or 'Disabled'
  }
}
mqttSettings:
  tls:
    mode: Enabled # or Disabled
TLS 模式可以设置为“Enabled”或“Disabled”。 如果该模式设置为“Enabled”,数据流将使用与 MQTT 代理的安全连接。 如果该模式设置为“Disabled”,数据流将使用与 MQTT 代理的不安全连接。
受信任 CA 证书
为 MQTT 终结点配置受信任 CA 证书,以建立与 MQTT 代理的安全连接。 如果 MQTT 代理使用自签名证书或由默认不受信任的自定义 CA 签名的证书,则此设置非常重要。
在操作体验数据流终结点设置页中,选择“高级”选项卡,然后使用“受信任 CA 证书配置映射”字段来指定包含受信任 CA 证书的 ConfigMap。
mqttSettings: {
  tls: {
    trustedCaCertificateConfigMapRef: '<YOUR_CA_CERTIFICATE>'
  }
}
{
    "mqttSettings": {
        "tls": {
          "trustedCaCertificateConfigMapRef": "<YOUR_CA_CERTIFICATE>"
        }
    }
}
mqttSettings:
  tls:
    trustedCaCertificateConfigMapRef: <YOUR_CA_CERTIFICATE>
此 ConfigMap 应包含采用 PEM 格式的 CA 证书。 ConfigMap 必须与 MQTT 数据流资源位于同一命名空间中。 例如:
kubectl create configmap client-ca-configmap --from-file root_ca.crt -n azure-iot-operations
Tip
连接到事件网格 MQTT 代理时,不需要 CA 证书,因为事件中心服务使用由默认受信任的公共 CA 签名的证书。
客户端 ID 前缀
可以为 MQTT 客户端设置客户端 ID 前缀。 客户端 ID 是通过将数据流实例名称追加到前缀生成的。
Caution
大多数应用程序不应修改客户端 ID 前缀。 在初始 IoT 操作部署后不要修改此项。 在部署后更改客户端 ID 前缀可能会导致数据丢失。
在操作体验数据流终结点设置页中,选择“高级”选项卡,然后使用“客户端 ID 前缀”字段来指定前缀。
{
    "mqttSettings": {
        "clientIdPrefix": "<YOUR_PREFIX>"
    }
}
mqttSettings: {
  clientIdPrefix: '<YOUR_PREFIX>'
}
mqttSettings:
  clientIdPrefix: <YOUR_PREFIX>
QoS
可以将 MQTT 消息的服务质量 (QoS) 级别设置为 1 或 0。 默认值为 1。
在操作体验数据流终结点设置页中,选择“高级”选项卡,然后使用“服务质量(QoS)”字段来指定 QoS 级别。
{
    "mqttSettings": {
        "qos": 1
    }
}
mqttSettings: {
  qos: 1 // Or 0
}
mqttSettings:
  qos: 1 # Or 0
Retain
使用 retain 设置指定数据流是否应保留 MQTT 消息上的保留标志。 默认为 Keep。
将此字段设置为 Keep 用于确保远程代理保留与本地代理相同的消息,这对于统一命名空间 (UNS) 方案非常重要。
如果设置为 Never,则会从 MQTT 消息中移除保留标志。 如果不希望远程代理保留任何消息,或远程代理不支持保留,此设置将非常有用。
要配置保留设置,请执行以下操作:
在操作体验数据流终结点设置页中,选择“高级”选项卡,然后使用“保留”字段来指定保留设置。
{
    "mqttSettings": {
        "retain": "Keep"
    }
}
mqttSettings: {
  retain: Keep // or Never
}
mqttSettings:
  retain: Keep # or Never
仅当数据流将 MQTT 终结点同时用作源和目标时,“保留”设置才会生效。 例如,在 MQTT 网桥方案中。
Important
Azure 事件网格 MQTT 代理当前不支持保留标记。 这意味着,如果将事件网格 MQTT 代理终结点的保留标志设置为 Keep 并将其用作目标,则会拒绝该消息。 为了避免这种情况,请在将事件网格 MQTT 代理用作目标时将保留标记设置为 Never。
会话过期
可以为数据流 MQTT 客户端设置会话到期间隔。 如果数据流客户端断开连接,则会话到期间隔是 MQTT 会话可以保持的最长时间。 默认为 600 秒。 要配置会话过期间隔,请执行以下操作:
在操作体验数据流终结点设置页中,选择“高级”选项卡,然后使用“会话到期”字段来指定会话到期间隔。
{
    "mqttSettings": {
        "sessionExpirySeconds": 600
    }
}
mqttSettings: {
  sessionExpirySeconds: 600
}
mqttSettings:
  sessionExpirySeconds: 600
MQTT 或 WebSocket 协议
默认情况下,未启用 WebSocket。 要通过 WebSocket 使用 MQTT,请将 protocol 字段设置为 WebSockets。
Important
通过 WebSocket 使用 MQTT 时,事件网格需要 /mqtt 追加到主机名值的末尾。 例如,my-event-grid.eventgrid.azure.net:443/mqtt 或 my-event-grid/mqtt。
在操作体验数据流终结点设置页中,选择“高级”选项卡,然后使用“协议”字段来指定协议。
{
    "mqttSettings": {
        "protocol": "WebSockets"
    }
}
mqttSettings: {
  protocol: 'WebSockets'
}
mqttSettings:
  protocol: WebSockets
最大传输中消息数
可以设置数据流 MQTT 客户端可以拥有的最大传输中消息数。 默认值为 100。
在操作体验数据流终结点设置页中,选择“高级”选项卡,然后使用“最大传输中消息数”字段来指定最大传输中消息数。
{
    "mqttSettings": {
        "maxInflightMessages": 100
    }
}
mqttSettings: {
  maxInflightMessages: 100
}
mqttSettings:
  maxInflightMessages: 100
如果 MQTT 终结点用作源,这是订阅时的接收最大值。 如果将 MQTT 终结点用作目标时进行发布,则这是等待确认之前可发送的最大消息数。
保持活动状态
可以为数据流 MQTT 客户端设置保持连接间隔。 保持连接间隔是数据流客户端在向代理发送 PINGREQ 消息之前可以处于空闲状态的最长时间。 默认值为 60 秒。
在操作体验数据流终结点设置页中,选择“高级”选项卡,然后使用“保持连接”字段来指定保持连接间隔。
{
    "mqttSettings": {
        "keepAliveSeconds": 60
    }
}
mqttSettings: {
  keepAliveSeconds: 60
}
mqttSettings:
  keepAliveSeconds: 60
CloudEvents
CloudEvents 是以常见方式描述事件数据的一种方法。 CloudEvents 设置用于以 CloudEvents 格式发送和接收消息。 可以将 CloudEvents 用于事件驱动的体系结构,其中不同的服务需要在相同或不同的云提供商中相互通信。
cloudEventAttributes 选项为 Propagate 或 CreateOrRemap。 要配置 CloudEvents 设置,请执行以下操作:
在操作体验数据流终结点设置页中,选择“高级”选项卡,然后使用“云事件属性”字段来指定 CloudEvents 设置。
{
    "mqttSettings": {
        "cloudEventAttributes": "Propagate"
    }
}
mqttSettings: {
  cloudEventAttributes : 'Propagate' // or 'CreateOrRemap'
}
mqttSettings:
  cloudEventAttributes : Propagate # or CreateOrRemap
以下各部分详细介绍了 CloudEvents 设置。
“传播”设置
CloudEvent 属性将传递给包含所需属性的消息。 如果消息不包含所需的属性,则消息按原样传递。
| Name |
Required |
示例值 |
输出值 |
specversion |
Yes |
1.0 |
按原样传递 |
type |
Yes |
ms.aio.telemetry |
按原样传递 |
source |
Yes |
aio://mycluster/myoven |
按原样传递 |
id |
Yes |
A234-1234-1234 |
按原样传递 |
subject |
No |
aio/myoven/sensor/temperature |
按原样传递 |
time |
No |
2018-04-05T17:31:00Z |
按原样传递。 它未重新标记。 |
datacontenttype |
No |
application/json |
在可选的转换阶段之后更改为输出数据内容类型。 |
dataschema |
No |
sr://fabrikam-schemas/123123123234234234234234#1.0.0 |
如果在转换配置中提供了输出数据转换架构,则 dataschema 将更改为输出架构。 |
CreateOrRemap 设置
CloudEvent 属性将传递给包含所需属性的消息。 如果消息不包含所需的属性,则将生成属性。
| Name |
Required |
如果缺失,则生成值 |
specversion |
Yes |
1.0 |
type |
Yes |
ms.aio-dataflow.telemetry |
source |
Yes |
aio://<target-name> |
id |
Yes |
目标客户端中生成的 UUID |
subject |
No |
发送消息的输出主题 |
time |
No |
在目标客户端中生成为 RFC 3339 |
datacontenttype |
No |
在可选的转换阶段之后更改为输出数据内容类型 |
dataschema |
No |
架构注册表中定义的架构 |
后续步骤
要了解有关数据流的详细信息,请参阅创建数据流。