从 Azure Compute Gallery 中存储的通用映像版本创建规模集。 若要使用专用映像版本创建规模集,请参阅从专用映像创建规模集实例。
从库中的映像创建规模集
在此示例中,请根据需要替换资源名称。
使用 az sig image-definition list 列出库中的映像定义,以查看定义的名称和 ID。
resourceGroup=myGalleryRG
gallery=myGallery
az sig image-definition list \
   --resource-group $resourceGroup \
   --gallery-name $gallery \
   --query "[].[name, id]" \
   --output tsv
使用 az vmss create 创建规模集。
使用 --image 的映像定义 ID 从可用的最新映像版本创建规模集实例。 还可以通过提供 --image 的映像版本 ID 从特定版本创建规模集实例。 请注意,使用特定映像版本意味着:如果该特定映像版本由于已删除或已从区域中删除而无法使用,则自动化可能会失败。 建议使用映像定义 ID 来创建新的 VM(除非需要特定的映像版本)。
在此示例中,我们将从 myImageDefinition 映像的最新版本创建实例。
az group create --name myResourceGroup --location eastus
az vmss create \
   --resource-group myResourceGroup \
   --name myScaleSet \
   --image "/subscriptions/<Subscription ID>/resourceGroups/myGalleryRG/providers/Microsoft.Compute/galleries/myGallery/images/myImageDefinition"
   --admin-username azureuser \
   --generate-ssh-keys
创建和配置所有的规模集资源和 VM 需要几分钟时间。
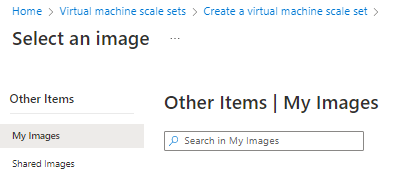
使用存储在 Azure Compute Gallery 中的映像创建规模集与使用市场映像创建规模集相同,但选择映像时,请选择“查看所有映像”。

“选择映像”页将打开。 如果所需映像位于自己的库中,请选择“我的映像”,或者,如果映像是从其他人的库中与你共享的,请选择“共享映像”。
以下示例介绍了在 SouthCentralUS 位置的 myVMSSRG 资源组中创建一个名为 myScaleSet 的规模集。 将基于“myGalleryRG”资源组的“myGallery”映像库中的“myImageDefinition”映像创建该规模集。 出现提示时,请为该规模集中的 VM 实例设置自己的管理凭据。
简化参数集
若要在提供最少信息的同时快速创建规模集,请使用简化参数集从“共享映像库”映像创建规模集。
$imageDefinition = Get-AzGalleryImageDefinition `
   -GalleryName myGallery `
   -ResourceGroupName myGalleryRG `
   -Name myImageDefinition

# Create user object

$cred = Get-Credential `
   -Message "Enter a username and password for the virtual machine."

# Create the resource group and scale set
New-AzResourceGroup -ResourceGroupName myVMSSRG -Location SouthCentralUS
New-AzVmss `
   -Credential $cred `
   -VMScaleSetName myScaleSet `
   -ImageName $imageDefinition.Id `
   -ResourceGroupName myVMSSRG
创建和配置所有的规模集资源和 VM 需要几分钟时间。
扩展参数集
若要完全控制所有资源(包括命名),请使用完整的参数集通过 Azure Compute Gallery 映像创建规模集。
# Get the image definition

$imageDefinition = Get-AzGalleryImageDefinition `
   -GalleryName myGallery `
   -ResourceGroupName myGalleryRG `
   -Name myImageDefinition

# Create user object

$cred = Get-Credential `
   -Message "Enter a username and password for the virtual machine."

# Define variables for the scale set
$resourceGroupName = "myVMSSRG"
$scaleSetName = "myScaleSet"
$location = "South Central US"

# Create a resource group
New-AzResourceGroup -ResourceGroupName $resourceGroupName -Location $location

# Create a networking pieces
$subnet = New-AzVirtualNetworkSubnetConfig `
  -Name "mySubnet" `
  -AddressPrefix 10.0.0.0/24
$vnet = New-AzVirtualNetwork `
  -ResourceGroupName $resourceGroupName `
  -Name "myVnet" `
  -Location $location `
  -AddressPrefix 10.0.0.0/16 `
  -Subnet $subnet
$publicIP = New-AzPublicIpAddress `
  -ResourceGroupName $resourceGroupName `
  -Location $location `
  -AllocationMethod Static `
  -Name "myPublicIP"
$frontendIP = New-AzLoadBalancerFrontendIpConfig `
  -Name "myFrontEndPool" `
  -PublicIpAddress $publicIP
$backendPool = New-AzLoadBalancerBackendAddressPoolConfig -Name "myBackEndPool"
$inboundNATPool = New-AzLoadBalancerInboundNatPoolConfig `
  -Name "myRDPRule" `
  -FrontendIpConfigurationId $frontendIP.Id `
  -Protocol TCP `
  -FrontendPortRangeStart 50001 `
  -FrontendPortRangeEnd 50010 `
  -BackendPort 3389
# Create the load balancer and health probe
$lb = New-AzLoadBalancer `
  -ResourceGroupName $resourceGroupName `
  -Name "myLoadBalancer" `
  -Location $location `
  -FrontendIpConfiguration $frontendIP `
  -BackendAddressPool $backendPool `
  -InboundNatPool $inboundNATPool
Add-AzLoadBalancerProbeConfig -Name "myHealthProbe" `
  -LoadBalancer $lb `
  -Protocol TCP `
  -Port 80 `
  -IntervalInSeconds 15 `
  -ProbeCount 2
Add-AzLoadBalancerRuleConfig `
  -Name "myLoadBalancerRule" `
  -LoadBalancer $lb `
  -FrontendIpConfiguration $lb.FrontendIpConfigurations[0] `
  -BackendAddressPool $lb.BackendAddressPools[0] `
  -Protocol TCP `
  -FrontendPort 80 `
  -BackendPort 80 `
  -Probe (Get-AzLoadBalancerProbeConfig -Name "myHealthProbe" -LoadBalancer $lb)
Set-AzLoadBalancer -LoadBalancer $lb

# Create IP address configurations
$ipConfig = New-AzVmssIpConfig `
  -Name "myIPConfig" `
  -LoadBalancerBackendAddressPoolsId $lb.BackendAddressPools[0].Id `
  -LoadBalancerInboundNatPoolsId $inboundNATPool.Id `
  -SubnetId $vnet.Subnets[0].Id

# Create a configuration
$vmssConfig = New-AzVmssConfig `
    -Location $location `
    -SkuCapacity 2 `
    -SkuName "Standard_DS2" `
    -UpgradePolicyMode "Automatic"

# Reference the image version
Set-AzVmssStorageProfile $vmssConfig `
  -OsDiskCreateOption "FromImage" `
  -ImageReferenceId $imageDefinition.Id

# Complete the configuration
Set-AzVmssOsProfile $vmssConfig `
  -AdminUsername $cred.UserName `
  -AdminPassword $cred.Password `
  -ComputerNamePrefix "myVM"
Add-AzVmssNetworkInterfaceConfiguration `
  -VirtualMachineScaleSet $vmssConfig `
  -Name "network-config" `
  -Primary $true `
  -IPConfiguration $ipConfig

# Create the scale set
New-AzVmss `
  -ResourceGroupName $resourceGroupName `
  -Name $scaleSetName `
  -VirtualMachineScaleSet $vmssConfig
创建和配置所有的规模集资源和 VM 需要几分钟时间。
作为最终用户,若要获取社区库的公共名称,需要使用门户。 转到“虚拟机”>“创建”>“Azure 虚拟机”>“映像”>“查看所有映像”>“社区映像”>“公共库名称”。
如果选择在本地安装并使用 CLI,社区库要求运行 Azure CLI 版本 2.35.0 或更高版本。 运行 az --version 即可查找版本。 如果需要进行安装或升级,请参阅安装 Azure CLI。
在此示例中,请根据需要替换资源名称。
注意
作为最终用户,若要获取社区库的公共名称,需要使用门户。 转到“虚拟机”>“创建”>“Azure 虚拟机”>“映像”>“查看所有映像”>“社区映像”>“公共库名称”。
若要使用共享到社区库的映像创建 VM,请使用 --image 的映像的唯一 ID,其格式如下:
/CommunityGalleries/<community gallery name>/Images/<image name>/Versions/latest
使用 az sig image-definition list-community 列出社区库中可用的所有映像定义。 在此示例中,我们列出美国西部的 ContosoImage 库中的所有映像,以及创建 VM 所需的唯一 ID(按名称)、OS 和 OS 状态。
 az sig image-definition list-community \
   --public-gallery-name "ContosoImages-1a2b3c4d-1234-abcd-1234-1a2b3c4d5e6f" \
   --location westus \
   --query [*]."{Name:name,ID:uniqueId,OS:osType,State:osState}" -o table
通过将 --image 参数设置为社区库中映像的唯一 ID 来创建规模集。
az group create --name myResourceGroup --location eastus

imgDef="/CommunityGalleries/ContosoImages-1a2b3c4d-1234-abcd-1234-1a2b3c4d5e6f/Images/myLinuxImage/Versions/latest"

az vmss create \
   --resource-group myResourceGroup \
   --name myScaleSet \
   --image $imgDef \
   --orchestration-mode Flexible \
   --admin-username azureuser \
   --generate-ssh-keys
使用社区映像时,系统会提示你接受法律条款。 消息将如下所示:
To create the scale set from community gallery image, you must accept the license agreement and privacy statement: http://contoso.com. (If you want to accept the legal terms by default, please use the option '--accept-term' when creating VM/VMSS) (Y/n):
使用社区库中的映像创建规模集与使用市场映像创建规模集相同,但选择映像时,请选择“查看所有映像”。
“选择映像”页将打开。 选择“社区映像(预览版)”,查看社区库中可用的映像列表。
后续步骤
Azure 映像生成器(预览版)可以帮助自动创建映像版本,你甚至可以使用它进行更新以及从现有的映像版本创建新映像版本。
还可使用模板创建 Azure Compute Gallery 资源。 提供多个 Azure 快速入门模板:
有关共享映像库的详细信息,请参阅概述。 如果遇到问题,请参阅排查共享映像库问题。