云原生应用通常需要可缩放的消息传送解决方案,这些解决方案提供消息队列和主题和订阅等功能。 .NET Aspire 集成简化了连接到各种消息提供程序的过程,例如 Azure Service Bus。 在本教程中,你将创建一个 ASP.NET Core 应用,该应用使用 .NET Aspire 集成连接到 Azure Service Bus 来创建通知系统。 提交的消息将发送到服务总线主题供订阅者使用。 你将了解如何:
- 创建一个基本的 .NET 应用程序,该程序已配置为使用 .NET Aspire 的集成功能。
- 请添加.NET Aspire集成以连接到Azure Service Bus
- 配置和使用 .NET.NET Aspire 集成功能来发送和接收数据
先决条件
若要使用 .NET.NET Aspire,需要在本地安装以下各项:
- .NET 8.0 或 .NET 9.0
- 符合 OCI 的容器运行时,例如:
- 集成开发人员环境(IDE)或代码编辑器,例如:
- Visual Studio 2022 17.9 或更高版本(可选)
-
Visual Studio Code (可选)
- C# Dev Kit:扩展(可选)
- JetBrains Rider 使用 .NET.NET Aspire 插件(可选)
有关详细信息,请参阅 .NET.NET Aspire 设置和工具,以及 .NET.NET Aspire SDK。
除了上述先决条件,还需要安装 Azure CLI。 若要安装 Azure CLI,请按照 Azure CLI 安装指南中的说明进行操作。
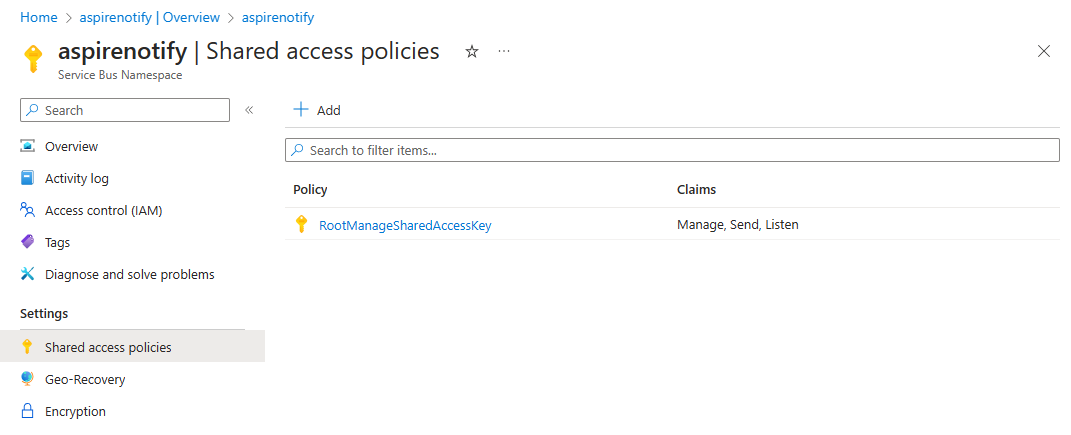
设置 Azure Service Bus 帐户
在本教程中,需要访问配置了主题和订阅的 Azure Service Bus 命名空间。 使用以下选项之一设置所需的资源:
- Azure 门户:创建具有主题和订阅的服务总线帐户。
或者:
Azure CLI:在 Azure CLI 或 CloudShell 中运行以下命令以设置所需的 Azure Service Bus 资源:
az group create -n <your-resource-group-name> --location eastus
az servicebus namespace create -g <your-resource-group-name> --name <your-namespace-name> --location eastus
az servicebus topic create -g <your-resource-group-name> --namespace-name <your-namespace-name> --name notifications
az servicebus topic subscription create -g <your-resource-group-name> --namespace-name <your-namespace-name> --topic-name notifications --name mobile
注意
将 your-resource-group-name 和 your-namespace-name 占位符替换为您自己的值。 服务总线命名空间名称必须在 Azure中保持全局唯一。
Azure 身份验证
本快速入门指南可以通过使用无密码身份验证或连接字符串来完成。 无密码连接使用 Azure Active Directory 和角色为基础的访问控制(RBAC)来连接到服务总线命名空间。 您不用担心在代码、配置文件或像 Azure Key Vault这样的安全存储中有硬编码的连接字符串。
还可以使用连接字符串连接到服务总线命名空间,但建议对实际应用程序和生产环境使用无密码方法。 有关详细信息,请阅读 身份验证和授权 或访问无密码 概述页。
在服务总线命名空间中,将以下角色分配给登录到 Visual Studio 或 Azure CLI 的用户帐户:
- 服务总线数据所有者:分配一个 Azure RBAC 角色
创建示例解决方案
若要创建新的 .NET Aspire 初学者应用程序,可以使用 Visual Studio、Visual Studio Code或 .NET CLI。
Visual Studio 提供的 .NET Aspire 模板可以为你处理一些初始设置。 完成以下步骤,为本快速入门创建项目:
在 Visual Studio顶部,导航到 文件>新建>项目。
在对话框窗口中,搜索 Aspire 并选择 .NET.NET Aspire 初学者应用。 选择“下一步”。
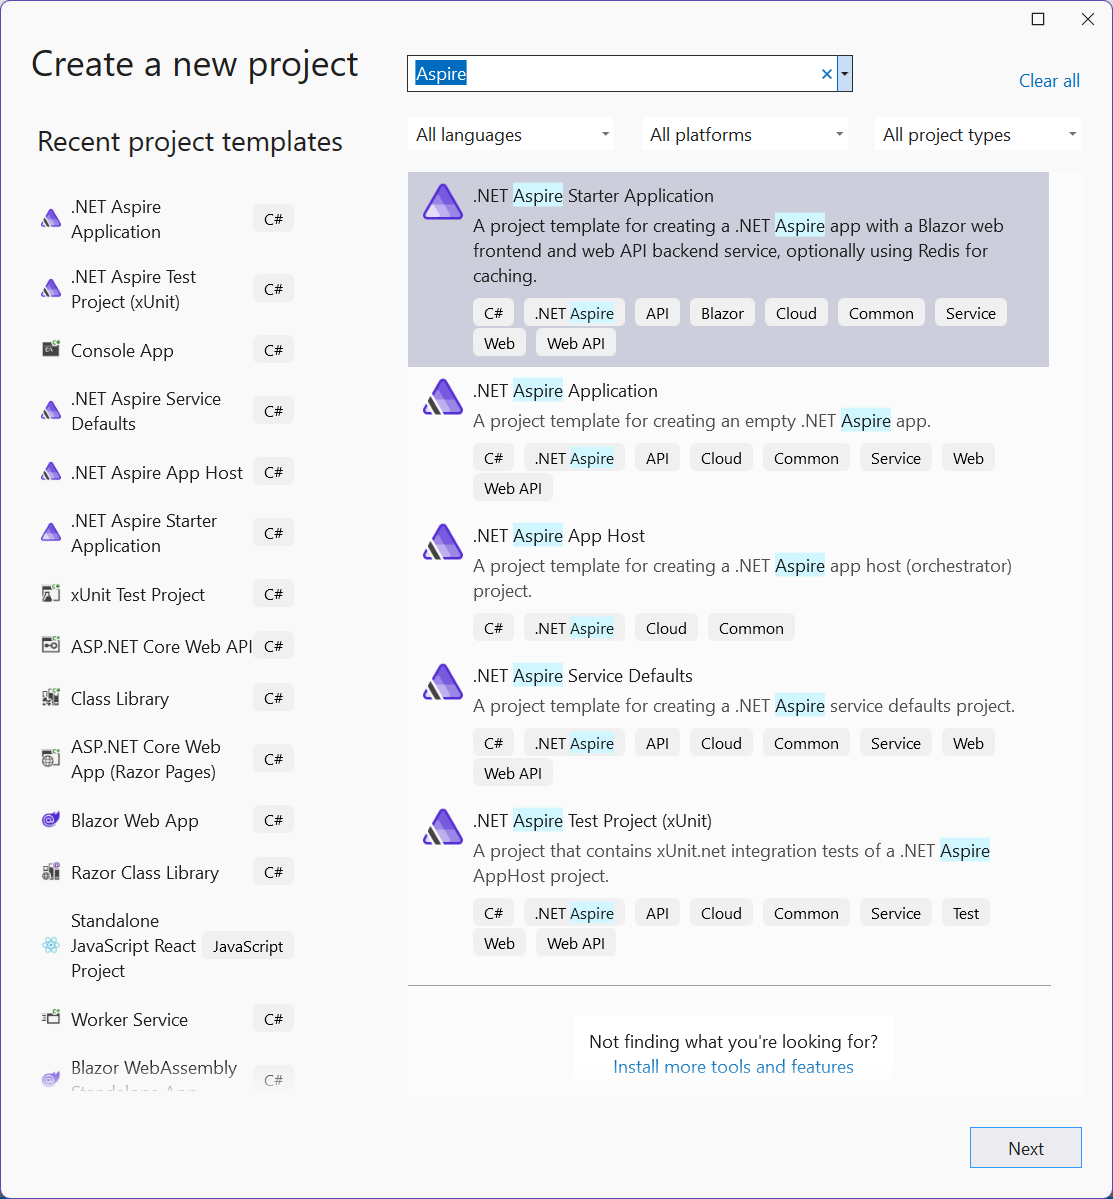
在 配置您新项目的 界面上:
- 输入 AspireSample的 项目名称。
- 将其余值保留为默认值,然后选择“下一步”
。
在 附加信息 界面上:
- 确保已选择 .NET 9.0(标准长期支持)。
- 确保选中 使用 Redis 进行缓存(需要受支持的容器运行时),然后选择 创建。
- (可选)可以选择 创建测试项目。 有关详细信息,请参阅 编写第一个 .NET.NET Aspire 测试。

Visual Studio 创建一个新解决方案,该解决方案结构化为使用 .NET Aspire。
Visual Studio Code 提供 .NET Aspire 项目模板,这些模板为您处理一些初始设置配置。 完成以下步骤,为本快速入门创建项目:
从新的 Visual Studio Code 实例(未打开文件夹)中,选择 “创建 .NET 项目”按钮。
选择 .NET.NET Aspire 初学者应用 模板。

选择新项目的文件夹,并为其输入名称。

如果尚未安装 .NET.NET Aspire 模板,请运行以下 dotnet new install 命令:
dotnet new install Aspire.ProjectTemplates
上述 .NET CLI 命令可确保 .NET Aspire 模板可用。 若要从模板创建 .NET.NET Aspire 初学者应用,请运行以下 dotnet new 命令:
dotnet new aspire-starter --use-redis-cache --output AspireSample
有关详细信息,请参阅 dotnet new。 .NET CLI 创建了一个新解决方案,该解决方案设计为使用 .NET Aspire。
添加 Worker Service 项目
接下来,将 Worker Service 项目添加到解决方案中,以便从 Azure Service Bus中检索和处理消息。
- 在解决方案资源管理器中,右键单击顶级解决方案节点
AspireSample,然后选择 “添加>新项目”。 - 搜索并选择 Worker Service 模板,然后点击 下一步。
- 对于
项目名称 ,请输入AspireSample.WorkerService ,然后选择“下一步”。 - 在 其他信息 页面上:
- 确保 .NET 9.0 已被选择。
- 确保选择 登记并选中 .NET.NET Aspire orchestration,然后选择 创建。
Visual Studio 将项目添加到解决方案中,并使用新的代码行更新 Program.cs 项目的 AspireSample.AppHost 文件:
builder.AddProject<Projects.AspireSample_WorkerService>(
    "aspiresample-workerservice");
Visual Studio 工具添加了此代码行,用于将新项目注册到 IDistributedApplicationBuilder 对象,从而启用稍后将探索的业务流程功能。
将新项目添加到解决方案:在 Visual Studio Code 中,选择解决方案名称旁边的 + 按钮。

若要筛选项目模板,请在搜索框中输入 辅助角色,然后选择找到的 Worker Service 模板:

选择 Worker Service 模板并输入项目名称作为 AspireSample.WorkerService。
选择 默认目录 以在解决方案所在的同一目录中创建项目。
选择 创建项目 将项目添加到解决方案。
右键单击 解决方案资源管理器中的 AspireSample.AppHost 项目,选择 添加项目引用,然后选择 AspireSample.WorkerService:

在调用 Program.cs之前,将以下代码行添加到 AspireSample.AppHost 项目中的
builder.Build().Run();文件中:builder.AddProject<Projects.AspireSample_WorkerService>( "aspiresample-workerservice");


在应用的根目录中,使用 dotnet new 命令创建新的 Worker Service 应用:
dotnet new worker --name AspireSample.WorkerService使用
dotnet sln命令将项目添加到解决方案:dotnet sln AspireSample.sln add AspireSample.WorkerService/AspireSample.WorkerService.csproj使用
dotnet add命令在 .AppHost 和 .WorkerService 项目之间添加项目引用:dotnet add AspireSample.AppHost/AspireSample.AppHost.csproj reference AspireSample.WorkerService/AspireSample.WorkerService.csproj在调用 Program.cs之前,将以下代码行添加到 AspireSample.AppHost 项目中的
builder.Build().Run();文件中:builder.AddProject<Projects.AspireSample_WorkerService>( "aspiresample-workerservice");
完成的解决方案结构应类似于以下内容,假设顶级目录名为 aspire-messaging:
└───📂 aspire-messaging
     ├───📂 AspireSample.WorkerService
     │    ├───📂 Properties
     │    │    └─── launchSettings.json
     │    ├─── appsettings.Development.json
     │    ├─── appsettings.json
     │    ├─── AspireSample.WorkerService.csproj
     │    ├─── Program.cs
     │    └─── Worker.cs
     ├───📂 AspireSample.ApiService
     │    ├───📂 Properties
     │    │    └─── launchSettings.json
     │    ├─── appsettings.Development.json
     │    ├─── appsettings.json
     │    ├─── AspireSample.ApiService.csproj
     │    └─── Program.cs
     ├───📂 AspireSample.AppHost
     │    ├───📂 Properties
     │    │    └─── launchSettings.json
     │    ├─── appsettings.Development.json
     │    ├─── appsettings.json
     │    ├─── AspireSample.AppHost.csproj
     │    └─── Program.cs
     ├───📂 AspireSample.ServiceDefaults
     │    ├─── AspireSample.ServiceDefaults.csproj
     │    └─── Extensions.cs
     ├───📂 AspireSample.Web
     │    ├───📂 Components
     │    │    ├───📂 Layout
     │    │    │    ├─── MainLayout.razor
     │    │    │    ├─── MainLayout.razor.css
     │    │    │    ├─── NavMenu.razor
     │    │    │    └─── NavMenu.razor.css
     │    │    ├───📂 Pages
     │    │    │    ├─── Counter.razor
     │    │    │    ├─── Error.razor
     │    │    │    ├─── Home.razor
     │    │    │    └─── Weather.razor
     │    │    ├─── _Imports.razor
     │    │    ├─── App.razor
     │    │    └─── Routes.razor
     │    ├───📂 Properties
     │    │    └─── launchSettings.json
     │    ├───📂 wwwroot
     │    │    ├───📂 bootstrap
     │    │    │    ├─── bootstrap.min.css
     │    │    │    └─── bootstrap.min.css.map
     │    │    ├─── app.css
     │    │    └─── favicon.png
     │    ├─── appsettings.Development.json
     │    ├─── appsettings.json
     │    ├─── AspireSample.Web.csproj
     │    ├─── Program.cs
     │    └─── WeatherApiClient.cs
     └─── AspireSample.sln
将 .NET.NET Aspire 集成添加到 API
将 .NET Aspire Azure Service Bus 集成添加到 AspireSample.ApiService 应用:
在 解决方案资源管理器中,双击 AspireSample.ApiService.csproj 文件以打开其 XML 文件。
将以下
<PackageReference>项添加到<ItemGroup>元素:<ItemGroup> <PackageReference Include="Aspire.Azure.Messaging.ServiceBus" Version="9.1.0" /> </ItemGroup>
在 解决方案资源管理器中,右键单击 AspireSample.ApiService 项目,然后选择 添加 NuGet 包:

在搜索框中输入 Aspire.Azure. Messaging.ServiceBus,然后从列表中选择软件包。
选择 (最新) 版本以安装包。

dotnet add package Aspire.Azure.Messaging.ServiceBus
在 AspireSample.ApiService 项目的 Program.cs 文件中,紧接在对 AddServiceDefaults的现有调用之后,添加对 AddAzureServiceBusClient 扩展方法的调用:
// Add service defaults & Aspire integrations.
builder.AddServiceDefaults();
builder.AddAzureServiceBusClient("serviceBusConnection");
有关详细信息,请参阅 AddAzureServiceBusClient。
此方法完成以下任务:
- 将 ServiceBusClient 注册到 DI 容器中以连接 Azure Service Bus。
- 自动为相关服务启用健康检查、日志记录和遥测。
在同一项目的 appsettings.json 文件中,添加相应的连接信息:
{
  // Existing configuration is omitted for brevity.
  "ConnectionStrings": {
    "serviceBusConnection": "{your_namespace}.servicebus.windows.net"
  }
}
注意
请确保将服务 URI 地址中的 {your_namespace} 替换为您自己的服务总线命名空间的名称。
创建 API 终结点
API 必须提供一个终结点来接收数据,将其发布到 Service Bus 主题并推送给订阅者。 将以下终结点添加到 AspireSample.ApiService 项目,以向服务总线主题发送消息。 将 Program.cs 文件的所有内容替换为以下 C# 代码:
using Azure.Messaging.ServiceBus;

var builder = WebApplication.CreateBuilder(args);

// Add service defaults & Aspire integrations.
builder.AddServiceDefaults();
builder.AddAzureServiceBusClient("serviceBusConnection");

// Add services to the container.
builder.Services.AddProblemDetails();

var app = builder.Build();

// Configure the HTTP request pipeline.
app.UseExceptionHandler();

app.MapPost("/notify", static async (ServiceBusClient client, string message) =>
{
    var sender = client.CreateSender("notifications");

    // Create a batch
    using ServiceBusMessageBatch messageBatch =
        await sender.CreateMessageBatchAsync();

    if (messageBatch.TryAddMessage(
            new ServiceBusMessage($"Message {message}")) is false)
    {
        // If it's too large for the batch.
        throw new Exception(
            $"The message {message} is too large to fit in the batch.");
    }

    // Use the producer client to send the batch of
    // messages to the Service Bus topic.
    await sender.SendMessagesAsync(messageBatch);

    Console.WriteLine($"A message has been published to the topic.");
});

app.MapDefaultEndpoints();

app.Run();
将 .NET Aspire 集成添加到 Worker Service
将 .NET Aspire Azure Service Bus 集成到 AspireSample.WorkerService 项目中。 按照您之前添加 Aspire及Azure.Messaging.ServiceBus NuGet 包时的步骤,执行相同操作到 AspireSample.ApiService 项目。 添加后,您可以将工作服务配置为处理来自服务总线主题的消息。
在 AspireSample.WorkerService 项目的 Program.cs 文件中,将现有代码替换为以下内容:
using AspireSample.WorkerService;

var builder = Host.CreateApplicationBuilder(args);

builder.AddAzureServiceBusClient("serviceBusConnection");

builder.Services.AddHostedService<Worker>();

var host = builder.Build();
host.Run();
AddAzureServiceBusClient 方法完成以下任务:
- 将 ServiceBusClient 注册到 DI 容器中以连接 Azure Service Bus。
- 自动为相关服务启用健康检查、日志记录和遥测。
在 appsettings.json 项目的 文件中,添加相应的连接信息:
{
  // Existing configuration is omitted for brevity.
  "ConnectionStrings": {
    "serviceBusConnection": "{your_namespace}.servicebus.windows.net"
  }
}
注意
请确保将服务 URI 中的 {your_namespace} 替换为您自己的“服务总线命名空间”名称。
处理来自订户的消息
当新消息放置在 messages 队列中时,工作服务应检索、处理和删除该消息。 更新 Worker.cs 类以匹配以下代码:
using Azure.Messaging.ServiceBus;

namespace AspireSample.WorkerService;

public sealed class Worker(
    ILogger<Worker> logger,
    ServiceBusClient client) : BackgroundService
{
    protected override async Task ExecuteAsync(CancellationToken stoppingToken)
    {
        while (!stoppingToken.IsCancellationRequested)
        {
            var processor = client.CreateProcessor(
                "notifications",
                "mobile",
                new ServiceBusProcessorOptions());

            // Add handler to process messages
            processor.ProcessMessageAsync += MessageHandler;

            // Add handler to process any errors
            processor.ProcessErrorAsync += ErrorHandler;

            // Start processing
            await processor.StartProcessingAsync();

            logger.LogInformation("""
                Wait for a minute and then press any key to end the processing
                """);

            Console.ReadKey();

            // Stop processing
            logger.LogInformation("""

                Stopping the receiver...
                """);

            await processor.StopProcessingAsync();

            logger.LogInformation("Stopped receiving messages");
        }
    }

    async Task MessageHandler(ProcessMessageEventArgs args)
    {
        string body = args.Message.Body.ToString();

        logger.LogInformation("Received: {Body} from subscription.", body);

        // Complete the message. messages is deleted from the subscription.
        await args.CompleteMessageAsync(args.Message);
    }

    // Handle any errors when receiving messages
    Task ErrorHandler(ProcessErrorEventArgs args)
    {
        logger.LogError(args.Exception, "{Error}", args.Exception.Message);

        return Task.CompletedTask;
    }
}
在本地运行和测试应用
示例应用现已准备好进行测试。 验证提交到 API 的数据是否发送到了 Azure Service Bus 主题,并由订阅者工作服务处理:
- 通过选择 .NET 调试”按钮或按 .NET Aspire,启动 项目。 .NET .NET Aspire 仪表板应用应在浏览器中打开。
- 通过选择 .NET 调试”按钮或按 .NET Aspire,启动 项目。 .NET .NET Aspire 仪表板应用应在浏览器中打开。
- 通过运行 .NET启动 .NET Aspire
dotnet run --project AspireSample.AppHost项目。 .NET .NET Aspire 仪表板应用应在浏览器中打开。
在资源页上的 apiservice 行中,找到 终结点 中打开
weatherforecast终结点的链接。 记下 HTTPS 端口号。在 .NET.NET Aspire 仪表板上,导航至 aspiresample-workerservice 项目的日志。
在终端窗口中,使用
curl命令将测试消息发送到 API:curl -X POST -H "Content-Type: application/json" https://localhost:{port}/notify?message=hello%20aspire请务必将 {port} 替换为前面记下的端口号。
切换回 aspiresample-workerservice 日志。 应会看到输出日志中打印的测试消息。
祝贺! 你创建并配置了一个 ASP.NET Core API,该 API 使用 Azure Service Bus 集成连接到 Aspire。
清理资源
运行以下 Azure CLI 命令,在不再需要创建的 Azure 资源时删除资源组。 删除资源组也会删除其中包含的资源。
az group delete --name <your-resource-group-name>
有关详细信息,请参阅 清理 Azure中的资源。