用户通知框架允许传递和处理本地和远程通知。 使用此框架,应用或应用扩展可以通过指定一组条件(例如位置或一天中的时间)来计划本地通知的传递。
此外,应用或扩展可以在将本地通知和远程通知传送到用户的设备时接收(并可能修改)。
用户通知 UI 框架允许应用或应用扩展在向用户显示本地通知和远程通知时自定义它们的外观。
此框架提供以下应用可以向用户传递通知的方法:
- 视觉警报:通知从屏幕顶部向下滚动为横幅。
- 声音和振动:可以与通知相关联。
- 应用图标标记:应用的图标上显示一个徽章,表明有新内容可用,例如未读电子邮件的数量。
此外,根据用户的当前上下文,有不同的方式来显示通知:
- 如果设备已解锁,通知将从屏幕顶部向下滚动为横幅。
- 如果设备已锁定,通知将显示在用户的锁屏界面上。
- 如果用户错过了通知,他们可以打开通知中心并查看任何可用的等待通知。
应用可以发送两种类型的用户通知:
- 本地通知:这些通知由用户设备上本地安装的应用发送。
- 远程通知:从远程服务器发送,并向用户显示,或者触发应用内容的后台更新。
关于本地通知
应用可以发送的本地通知具有以下功能和属性:
- 这些应用由用户设备上的本地应用发送。
- 可以将其配置为使用基于时间或位置的触发器。
- 应用使用用户的设备计划通知,并在满足触发器条件时显示通知。
- 当用户与通知交互时,应用将收到回调。
本地通知的一些示例包括:
- 日历警报。
- 提醒警报。
- 位置感知触发器。
有关详细信息,请参阅 Apple 的用户通知 文档。
关于远程通知
应用可以发送的远程通知具有以下功能和属性:
- 应用具有与之通信的服务器端组件。
- Apple 推送通知服务(APNs)用于从开发者的云服务器尽力而为地将远程通知传送到用户的设备。
- 当应用收到远程通知时,它将向用户显示。
- 当用户与通知交互时,应用将收到回调。
远程通知的一些示例包括:
- 新闻警报。
- 体育更新。
- 即时消息。
应用可以使用两种类型的远程通知:
- 面向用户:这些显示给设备上的用户。
- 无提示更新:这些提供一种机制来更新后台应用的内容。 收到静默更新后,应用可以连接远程服务器以获取最新内容。
有关详细信息,请参阅 Apple 的用户通知 文档。
UIApplication API
可以使用 UIApplication 向系统注册通知,并计划应按时间或位置触发通知的方式(这是 Apple 为用户通知提供的原始 API)。
但是,在使用 UIApplication 提供的现有通知时,开发人员可能会遇到以下几个问题:
- 本地或远程通知需要不同的回调,这可能会导致代码重复。
- 在通知经过系统计划之后,应用对其控制有限。
- 所有 Apple 现有平台都有不同的支持级别。
关于用户通知框架
为了改善通知体验,Apple 引入了用户通知框架,该框架取代了上面所述的现有 UIApplication 方法。
用户通知框架提供以下内容:
- 一个熟悉的 API,它包括与之前的方法的功能对等性,使代码可以轻松地从现有框架移植。
- 包括一组扩展的内容选项,允许向用户发送更丰富的通知。
- 本地和远程通知都可以由相同的代码和回调处理。
- 简化用户与通知交互时,向应用发送回调的过程。
- 增强了对挂起通知和已传递通知的管理,包括删除或更新通知的能力。
- 添加对通知进行应用内演示的功能。
- 增加了从应用扩展内计划和处理通知的功能。
- 为通知本身添加新的扩展点。
用户通知框架跨 Apple 支持的多个平台提供统一的通知 API,包括:
- iOS:完全支持管理和计划通知。
- tvOS:新增了标记本地和远程通知应用图标的支持。
- Mac Catalyst:完全支持管理和计划通知。
- macOS:完全支持管理和计划通知。
有关详细信息,请参阅 Apple 的用户 通知和用户通知UI 文档。
准备通知传递
在应用可以向用户发送通知之前,应用必须注册到系统,并且由于通知对用户造成中断,因此应用必须在发送之前显式请求权限。
用户可以批准应用的通知请求有三个不同的级别:
- 横幅显示。
- 声音警报。
- 为应用图标添加标记。
此外,必须针对本地和远程通知请求和设置这些审批级别。
应用程序启动后,应立即请求通知权限。方法是在FinishedLaunching函数或方法中添加以下代码,并设置所需的通知类型(UNAuthorizationOptions)。
using UserNotifications;

public override bool FinishedLaunching (UIApplication application, NSDictionary launchOptions)
{
    // Request notification permissions from the user
    UNUserNotificationCenter.Current.RequestAuthorization (UNAuthorizationOptions.Alert, (approved, error) => {
        // Handle approval (or disapproval)
    });

    return true;
}
在 macOS 上,在 DidFinishLaunching 实现中执行此操作。
using UserNotifications;

public override void DidFinishLaunching (NSNotification notification)
{
    // Request notification permissions from the user
    UNUserNotificationCenter.Current.RequestAuthorization (UNAuthorizationOptions.Alert | UNAuthorizationOptions.Badge | UNAuthorizationOptions.Sound, (approved, error) => {
        // Handle approval (or disapproval)
    });
}
注释
macOS 和 Mac Catalyst 应用必须签名才能显示权限对话框,即使在调试模式下本地生成也是如此。
将项目文件中的 EnableCodeSigning 属性设置为 true 强制应用签名。
此外,用户可以随时使用设备上的 “设置” 应用更改应用的通知权限。 应用应在使用以下代码显示通知之前检查用户请求的通知权限:
// Get current notification settings
UNUserNotificationCenter.Current.GetNotificationSettings ((settings) => {
    var alertsAllowed = (settings.AlertSetting == UNNotificationSetting.Enabled);
});
启用后台通知
为了使应用接收后台通知,它必须向应用启用远程通知后台模式。
为此,通过向项目的 Info.plist 文件中的 UIBackgroundModes 数组添加一个 remote-notifications 条目来完成,如下所示:
<key>UIBackgroundModes</key>
<array>
    <string>remote-notification</string>
</array>
配置远程通知环境
开发人员必须通知操作系统推送通知运行的环境是development还是production。 未能提供此信息可能会导致应用在提交到 App Store 时被拒绝,通知如下所示:
缺少推送通知权限 - 你的应用包含 Apple 推送通知服务的 API,但应用签名中缺少
aps-environment权限。
若要提供所需的权限,请执行以下操作:
在所选文本编辑器中打开项目文件。
输入两
CustomEntitlements个项目,如下所示:<ItemGroup> <CustomEntitlements Include="aps-environment" Type="String" Value="development" Condition="'$(Configuration)' != 'Release'" /> <CustomEntitlements Include="aps-environment" Type="String" Value="production" Condition="'$(Configuration)' == 'Release'" /> </ItemGroup>注意:如果要使用与
Release配置不同的方式发布到 App Store,请相应地更新条件。
注释
aps-environment也可以在 Entitlements.plist 文件中设置,历史上通常通过这种方式来设置。 使用项目文件的优点是,可以更轻松地自动为权利使用正确的值, development 或者 production根据生成配置使用正确的值。
供应
aps-environment上一部分的访问权需要使用具有Push Notifications功能的配置文件:
转到 Apple 开发人员网站的“标识符”部分:
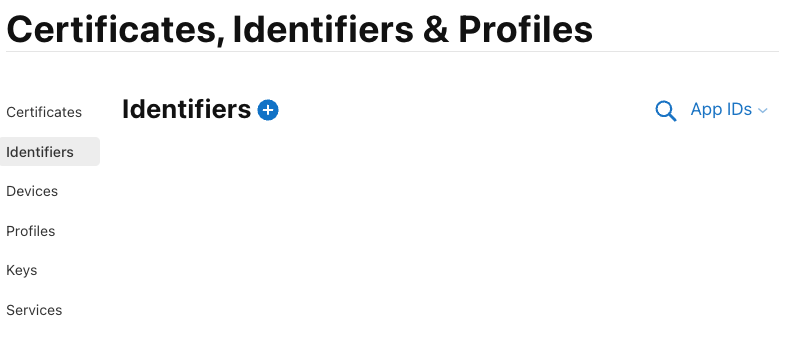
添加新标识符(注册新标识符):
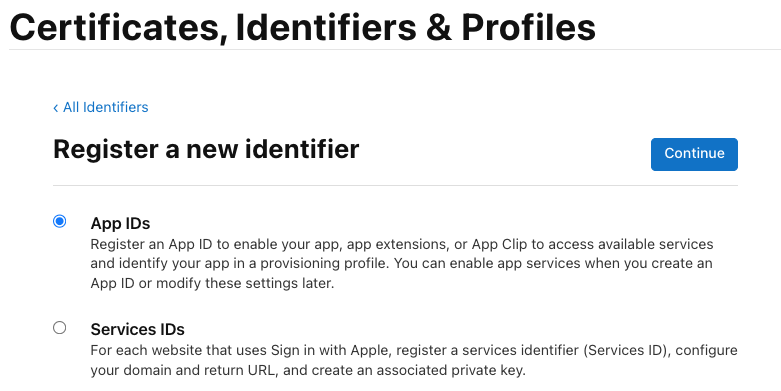
选择“应用”类型:
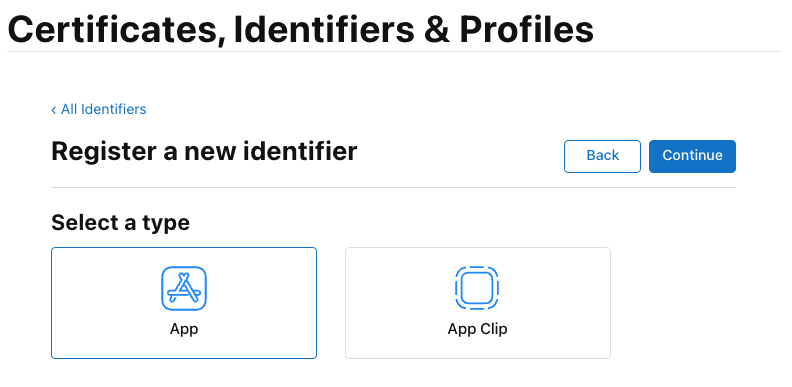
输入新应用标识符的包标识和描述:
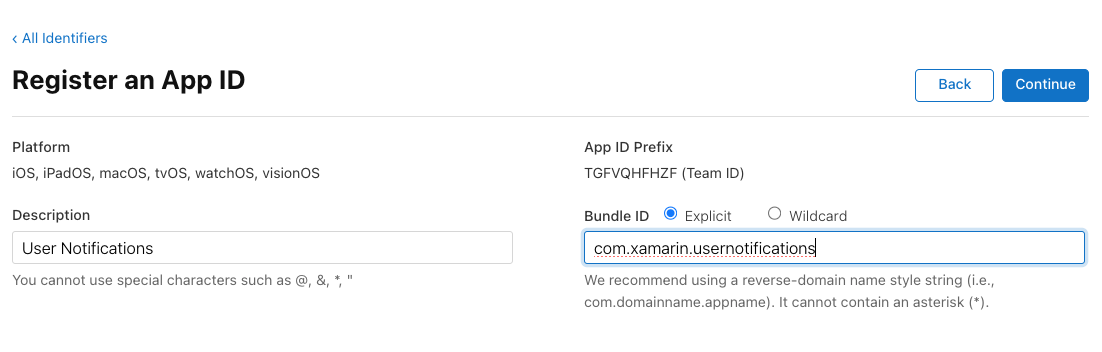
Push Notifications启用此功能:
单击
Register按钮以保存新应用标识符。


下一步是为新应用标识符创建预配配置文件:
转到 Apple 开发人员网站的“配置文件”部分:
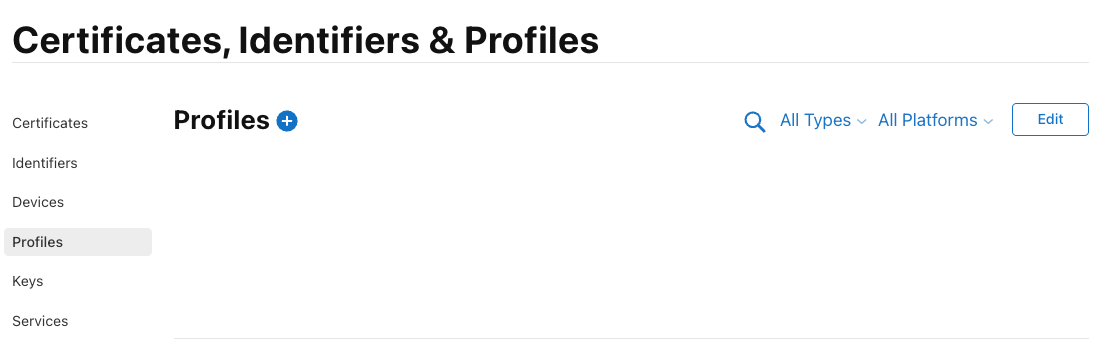
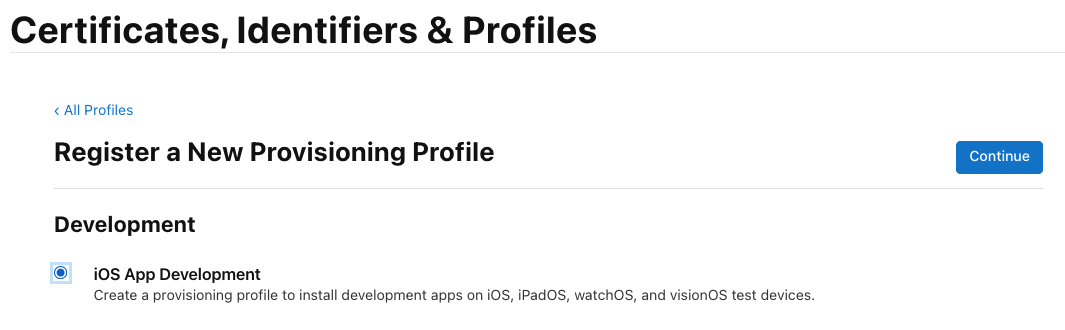
为 iOS 应用程序开发添加新的配置档:
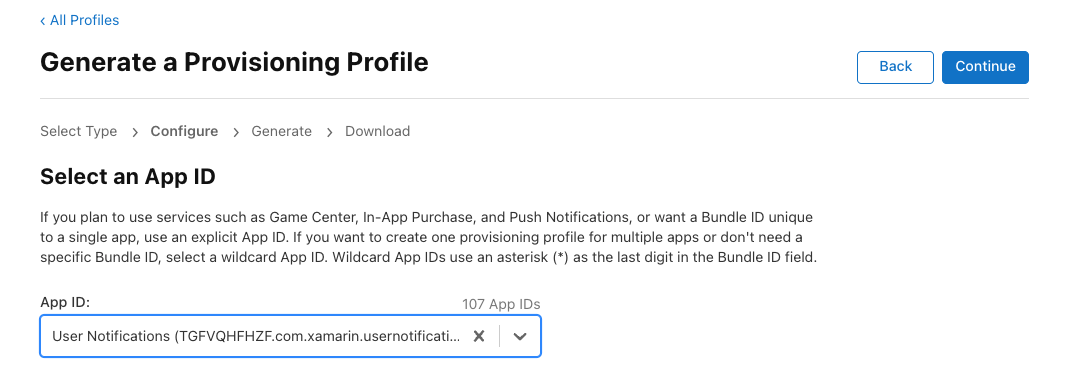
选择刚刚创建的应用 ID:
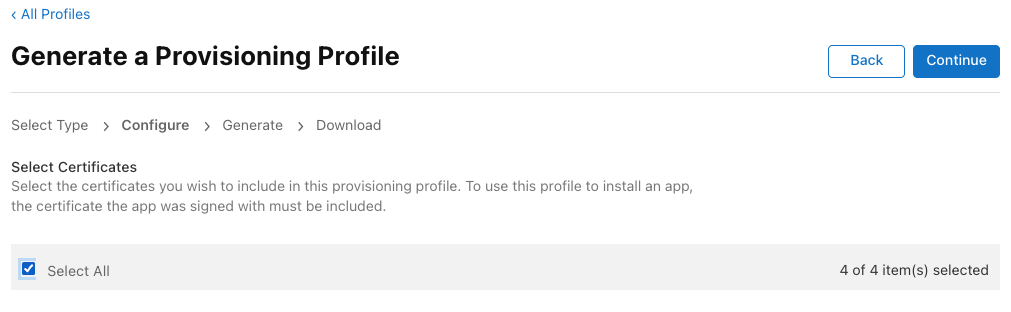
选择此配置文件中包含的所有证书(如果尚未创建任何证书,则必须创建新证书):
选择此预配配置文件中包含的所有设备(应用只能安装在这些设备上)。
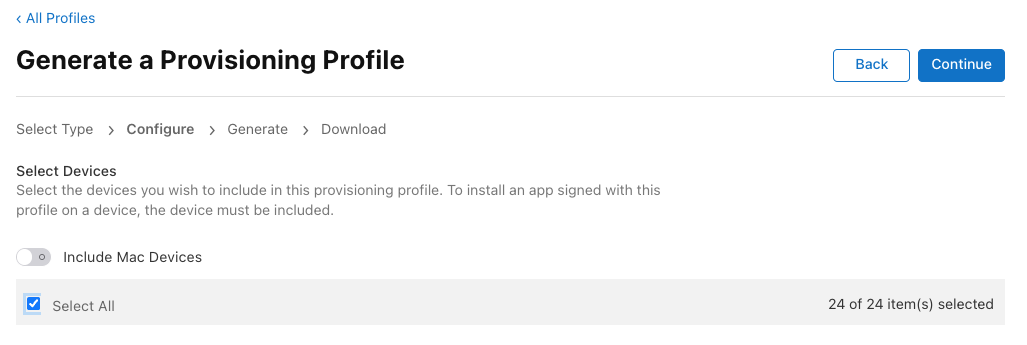
为预配配置文件选择一个名称并查看它:
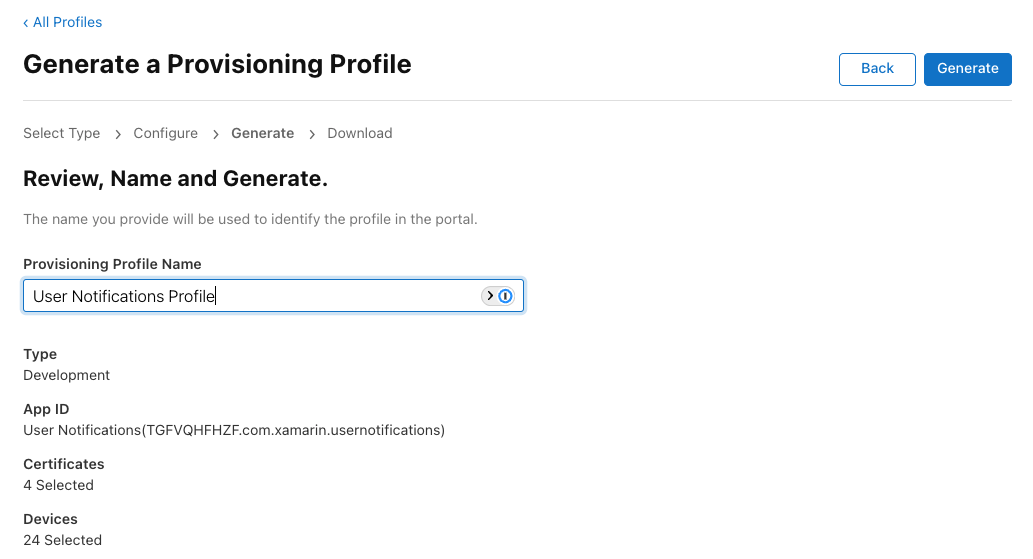
生成并下载新的预配配置文件。
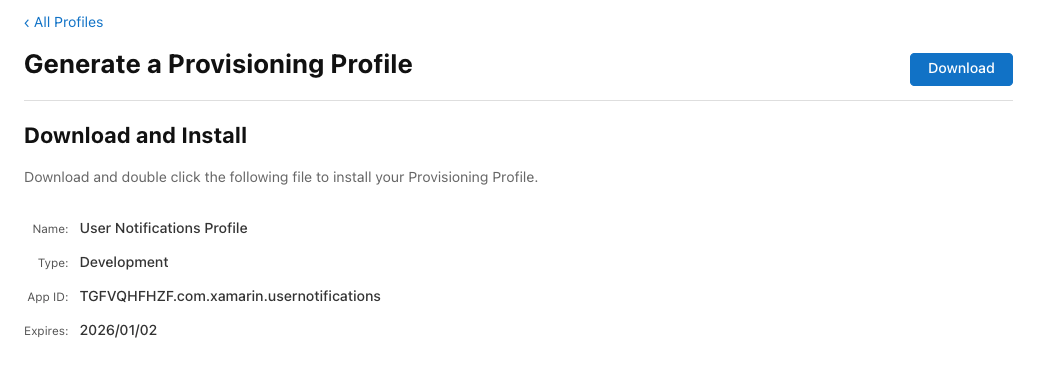
在 Xcode 中打开下载的预配配置文件(通过在 Finder 中双击它)将其安装到系统中。
将项目配置为使用新创建的预配配置文件,方法是将
CodesignProvision属性设置为步骤 6 中预配配置文件的名称:<PropertyGroup> <CodesignProvision>User Notifications Profile</CodesignProvision> </PropertyGroup>


注释
如果应用具有处理通知的任何应用扩展,则必须为每个相应的应用扩展项目重复此过程 - 它们必须具有自己的应用标识符和预配配置文件。
注册远程通知
如果应用将发送和接收远程通知,则仍需要使用现有的 UIApplication API 执行令牌注册。 此注册要求设备具有实时网络连接才能访问 APN,这将生成将发送到应用的必要令牌。 然后,应用需要将此令牌转发到开发人员的服务器端应用,以注册远程通知:

使用以下代码初始化所需的注册:
UIApplication.SharedApplication.RegisterForRemoteNotifications ();
发送到开发人员服务器端应用的令牌需要包含在发送远程通知时从服务器发送到 APN 的通知有效负载的一部分:

令牌充当将通知与用于打开或响应通知的应用联系在一起的密钥。
有关详细信息,请参阅 Apple 的用户通知 文档。
通知分发
应用已完全注册,以及用户请求和授予所需的权限后,该应用现在可以发送和接收通知。
提供通知内容
所有通知都包含一个 标题 和 副标题,该标题和副标题 始终与通知内容的 正文 一起显示。 还可以将 媒体附件 添加到通知内容。
若要创建本地通知的内容,请使用以下代码:
var content = new UNMutableNotificationContent();
content.Title = "Notification Title";
content.Subtitle = "Notification Subtitle";
content.Body = "This is the message body of the notification.";
content.Badge = 1;
对于远程通知,此过程类似:
{
    "aps":{
        "alert":{
            "title":"Notification Title",
            "subtitle":"Notification Subtitle",
            "body":"This is the message body of the notification."
        },
        "badge":1
    }
}
发送通知的时间安排
创建通知的内容后,应用需要通过设置 触发器来计划何时向用户显示通知。 有四种不同的触发器类型:
- 推送通知 - 专用于远程通知,并在 APN 将通知包发送到设备上运行的应用时触发。
- 时间间隔 - 允许计划本地通知,从现在开始并在某个未来的时间点结束。 例如:
var trigger = UNTimeIntervalNotificationTrigger.CreateTrigger (5, false); - 日历日期 - 允许计划特定日期和时间的本地通知。
- 基于位置 - 允许在设备进入或离开特定地理位置时安排本地通知,或者在处于任何蓝牙信标的特定范围内时安排通知。
当本地通知准备就绪时,应用需要调用 UNUserNotificationCenter.AddNotificationRequest ,以便向用户显示。 对于远程通知,服务器端应用会将通知有效负载发送到 APN,然后将数据包发送到用户的设备。
将所有部分组合在一起,示例本地通知可能如下所示:
using UserNotifications;

public void SendLocalNotification ()
{
    var content = new UNMutableNotificationContent ();
    content.Title = "Notification Title";
    content.Subtitle = "Notification Subtitle";
    content.Body = "This is the message body of the notification.";
    content.Badge = 1;

    var trigger =  UNTimeIntervalNotificationTrigger.CreateTrigger (5, false);

    var requestId = "sampleRequest";
    var request = UNNotificationRequest.FromIdentifier (requestId, content, trigger);

    UNUserNotificationCenter.Current.AddNotificationRequest (request, (err) => {
        if (err is not null) {
            // Do something with error
        }
    });
}
触发远程通知
在开发期间触发远程通知以进行测试有多种方法:
- Apple 推送通知控制台
- 命令行工具
- 其他第三方解决方案。
发布应用后,通常会从服务器端应用触发远程通知。
处理前台应用通知
当应用处于前台并触发通知时,应用可以以不同的方式处理通知。 通过提供 UNUserNotificationCenterDelegate 并实现 WillPresentNotification 方法,应用可以接管显示通知的责任。 例如:
using System;
using UserNotifications;

public class UserNotificationCenterDelegate : UNUserNotificationCenterDelegate
{
    #region Constructors
    public UserNotificationCenterDelegate ()
    {
    }
    #endregion

    #region Override Methods
    public override void WillPresentNotification (UNUserNotificationCenter center, UNNotification notification, Action<UNNotificationPresentationOptions> completionHandler)
    {
        // Do something with the notification
        Console.WriteLine ("Active notification: {0}", notification);

        // Tell system to display the notification anyway or use
        // `None` to say we have handled the display locally.
        completionHandler (UNNotificationPresentationOptions.Alert);
    }
    #endregion
}
此代码只是写出 UNNotification 到应用程序输出的内容,并要求系统显示通知的标准警报。
如果应用希望在前台显示通知本身,而不使用系统默认值,请将 None 传递给完成处理程序。 示例:
completionHandler (UNNotificationPresentationOptions.None);
完成此代码后,打开 AppDelegate.cs 文件进行编辑并更改 FinishedLaunching 方法,如下所示:
public override bool FinishedLaunching (UIApplication application, NSDictionary launchOptions)
{
    // Request notification permissions from the user
    UNUserNotificationCenter.Current.RequestAuthorization (UNAuthorizationOptions.Alert, (approved, err) => {
        // Handle approval
    });

    // Watch for notifications while the app is active
    UNUserNotificationCenter.Current.Delegate = new UserNotificationCenterDelegate ();

    return true;
}
此代码将自定义 UNUserNotificationCenterDelegate 从上面附加到当前 UNUserNotificationCenter ,以便应用可以在活动状态和前台处理通知。
通知管理
通知管理提供对挂起通知和传递通知的访问权限,并增加了删除、更新或提升这些通知的功能。
通知管理的一个重要部分是使用系统创建和计划通知时分配给通知 的请求标识符 。 对于远程通知,这通过 apps-collapse-id HTTP 请求标头中的字段进行分配。
请求标识符用于选择应用希望执行通知管理的通知。
删除通知
若要从系统中删除挂起的通知,请使用以下代码:
var requests = new string [] { "sampleRequest" };
UNUserNotificationCenter.Current.RemovePendingNotificationRequests (requests);
若要删除已传递的通知,请使用以下代码:
var requests = new string [] { "sampleRequest" };
UNUserNotificationCenter.Current.RemoveDeliveredNotifications (requests);
更新现有通知
若要更新现有通知,只需使用修改所需的参数(例如新的触发器时间)创建新通知,并将其添加到与需要修改的通知相同的请求标识符的系统。 示例:
using UserNotifications;

// Rebuild notification
var content = new UNMutableNotificationContent ();
content.Title = "Notification Title";
content.Subtitle = "Notification Subtitle";
content.Body = "This is the message body of the notification.";
content.Badge = 1;

// New trigger time
var trigger = UNTimeIntervalNotificationTrigger.CreateTrigger (10, false);

// Id of notification to be updated
var requestId = "sampleRequest";
var request = UNNotificationRequest.FromIdentifier (requestId, content, trigger);

// Add to system to modify existing Notification
UNUserNotificationCenter.Current.AddNotificationRequest (request, (err) => {
    if (err != null) {
        // Do something with error...
    }
});
对于已传递的通知,现有通知将更新并提升到“主页”和“锁屏”屏幕上列表顶部,如果用户已阅读通知中心。
使用通知作
向用户传递的通知不是静态的,并提供用户可与它们交互的多种方式(从内置作到自定义作)。
应用可以响应的三种类型的操作:
- 默认作 - 这是当用户点击通知以打开应用并显示给定通知的详细信息时。
- 自定义动作 - 这些为用户提供了一种快捷方式,可以直接从通知执行自定义任务,而无需启动应用程序。 它们可以显示为具有可自定义标题的按钮列表,也可以是可在后台运行的文本输入字段(其中应用提供少量时间来完成请求)或前台(应用在前台启动以满足请求)。
- 消除操作 - 用户关闭给定通知后,此操作将发送到应用程序。
创建自定义操作
若要在系统中创建和注册自定义作,请使用以下代码:
// Create action
var actionId = "reply";
var title = "Reply";
var action = UNNotificationAction.FromIdentifier (actionId, title, UNNotificationActionOptions.None);

// Create category
var categoryId = "message";
var actions = new UNNotificationAction [] { action };
var intentIds = new string [] { };
var categoryOptions = new UNNotificationCategoryOptions [] { };
var category = UNNotificationCategory.FromIdentifier (categoryId, actions, intentIds, UNNotificationCategoryOptions.None);

// Register category
var categories = new UNNotificationCategory [] { category };
UNUserNotificationCenter.Current.SetNotificationCategories (new NSSet<UNNotificationCategory>(categories));
创建新的 UNNotificationAction 时,会为其分配唯一标识符和将在按钮上显示的标题。 默认情况下,操作将被创建为后台操作,但可以提供选项来调整操作的行为(例如将其设置为前台操作)。
创建的每个动作都需要被关联到一个类别。 创建新的 UNNotificationCategory 时,会为其分配唯一标识符、可以执行的作列表、意向标识符列表,以提供有关类别中作意向的详细信息,以及用于控制类别行为的一些选项。
最后,所有类别都使用 SetNotificationCategories 方法向系统注册。
介绍自定义动作
创建并注册到系统中的一组自定义操作和类别后,可以从本地通知或远程通知中显示它们。
在远程通知的有效负载中设置一个与上述创建的类别之一匹配的 category。 例如:
{
    aps: {
        alert:"Hello world!",
        category:"message"
    }
}
对于本地通知,请设置 CategoryIdentifier 对象的属性 UNMutableNotificationContent 。 例如:
var content = new UNMutableNotificationContent ();
content.Title = "Notification Title";
content.Subtitle = "Notification Subtitle";
content.Body = "This is the message body of the notification.";
content.Badge = 1;
content.CategoryIdentifier = "message";
同样,此标识符需要匹配上面创建的类别之一。
处理消除作
如上所述,当用户关闭通知时,可以向应用发送消除作。 由于这不是标准作,因此在创建类别时需要设置一个选项。 例如:
var categoryId = "message";
var actions = new UNNotificationAction [] { action };
var intentIds = new string [] { };
var categoryOptions = new UNNotificationCategoryOptions [] { };
var category = UNNotificationCategory.FromIdentifier (categoryId, actions, intentIds, UNNotificationCategoryOptions.CustomDismissAction);
处理行动响应
当用户与上面创建的自定义作和类别交互时,应用需要满足所请求的任务。 为此,通过提供 [UNUserNotificationCenterDelegate][unnsernotificationcenterdelegate] 并实现 DidReceiveNotificationResponse 方法来完成。 例如:
using System;
using UserNotifications;

namespace MonkeyNotification
{
    public class UserNotificationCenterDelegate : UNUserNotificationCenterDelegate
    {
        ...

        #region Override methods
        public override void DidReceiveNotificationResponse (UNUserNotificationCenter center, UNNotificationResponse response, Action completionHandler)
        {
            // Take action based on Action ID
            switch (response.ActionIdentifier) {
            case "reply":
                // Do something
                break;
            default:
                // Take action based on identifier
                if (response.IsDefaultAction) {
                    // Handle default action...
                } else if (response.IsDismissAction) {
                    // Handle dismiss action
                }
                break;
            }

            // Inform caller it has been handled
            completionHandler();
        }
        #endregion
    }
}
传入 UNNotificationResponse 的类具有 ActionIdentifier 可以是默认作或消除作的属性。 请使用 response.Notification.Request.Identifier 来测试任何自定义动作。
该 UserText 属性保留任何用户文本输入的值。 该 Notification 属性包含包含带有触发器和通知内容的请求的发起通知。 应用可以根据触发器类型确定它是本地通知还是远程通知。
与通知服务扩展合作
使用远程通知时, 通知服务扩展 提供了在通知有效负载内启用端到端加密的方法。 通知服务扩展是一个非用户界面扩展,它在后台运行,主要目的是在向用户显示通知之前扩充或替换通知的可见内容。

通知服务扩展的设计目的是快速运行,并且系统只为其执行提供了很短的时间。 如果通知服务扩展在分配的时间内无法完成其任务,将调用回退方法。 如果回退失败,将向用户显示原始通知内容。
通知服务扩展的一些潜在用途包括:
- 提供远程通知内容的端到端加密。
- 将附件添加到远程通知以扩充它们。
实现通知服务扩展
若要在应用中实现通知服务扩展,请执行以下作:
为扩展项目创建新文件夹,该文件夹在主项目的文件夹旁边。 以下说明假定新文件夹已命名
MyNotificationServiceExtension。打开终端并执行:
dotnet new ios-notification-service-extension打开主项目的项目文件,然后添加:
<ItemGroup>
    <ProjectReference Include="..\MyNotificationServiceExtension\MyNotificationServiceExtension.csproj">
        <IsAppExtension>true</IsAppExtension>
    </ProjectReference>
</ItemGroup>
现在生成主项目,扩展项目也将生成并包含在最终应用捆绑包中。
重要
由于 Mac 与任何连接的设备之间的交互方式发生了更改,因此目前无法使用调试器调试应用扩展。 另请参阅 https://github.com/xamarin/xamarin-macios/issues/19484 以获取更多的up-to-date 信息。
这意味着调试应用扩展的最可靠方法是将 Console.WriteLine 语句添加到代码,然后在 设备日志中查找这些语句。
重要
服务扩展的捆绑标识符(ApplicationId)必须以主应用的捆绑标识符作为前缀。 例如,如果主应用具有捆绑标识符com.xamarin.monkeynotify,则服务扩展应具有捆绑标识符。com.xamarin.monkeynotify.monkeynotifyserviceextension
通知服务扩展中有一个主类需要修改以提供所需的功能。 例如:
using System;

using Foundation;
using UIKit;
using UserNotifications;

namespace MonkeyChatServiceExtension
{
    [Register ("NotificationService")]
    public class NotificationService : UNNotificationServiceExtension
    {
        protected NotificationServiceClass (NativeHandle handle) : base (handle)
        {
            // Note: this .ctor should not contain any initialization logic,
            // it only exists so that the OS can instantiate an instance of this class.
        }

        public override void DidReceiveNotificationRequest (UNNotificationRequest request, Action<UNNotificationContent> contentHandler)
        {
            // Called when the OS receives a notification that can be muteated

            // Create a mutable copy of the notification
            var mutableRequest = (UNMutableNotificationContent) request.Content.MutableCopy ();

            // Modify the notification content here...
            mutableRequest.Title = $"[modified] {mutableRequest.Title}";

            // Call the contentHandler callback to let the OS know about the modified notification.
            contentHandler (mutableRequest);
        }

        public override void TimeWillExpire ()
        {
            // Called just before the extension will be terminated by the system.
            // Use this as an opportunity to deliver your "best attempt" at modified content, otherwise the original push payload will be used.
        }
    }
}
第一种方法 DidReceiveNotificationRequest 将通过对象传递通知标识符和通知内容 request 。 需要调用传入的contentHandler来向用户展示通知。
第二种方法 TimeWillExpire 将在时间即将耗尽之前调用,以便通知服务扩展处理请求。 如果通知服务扩展未能调用 contentHandler 分配的时间量,则会向用户显示原始内容。
触发通知服务扩展
使用应用创建和传递通知服务扩展后,可以通过修改发送到设备的远程通知有效负载来触发它。 例如:
{
    aps : {
        alert : "New Message Available",
        mutable-content: 1
    },
    encrypted-content : "#theencryptedcontent"
}
新 mutable-content 密钥指定需要启动通知服务扩展才能更新远程通知内容。 密钥 encrypted-content 保存通知服务扩展在向用户呈现之前可以解密的加密数据。
查看以下示例通知服务扩展:
using UserNotification;

namespace myApp {
    public class NotificationService : UNNotificationServiceExtension {

        public override void DidReceiveNotificationRequest(UNNotificationRequest request, contentHandler) {
            // Decrypt payload
            var decryptedBody = Decrypt(Request.Content.UserInfo["encrypted-content"]);

            // Modify notification body
            var newContent = new UNMutableNotificationContent();
            newContent.Body = decryptedBody;

            // Present to user
            contentHandler(newContent);
        }

        public override void TimeWillExpire() {
            // Handle out-of-time fallback event
        }

    }
}
此代码从 encrypted-content 密钥解密加密内容,创建新的 UNMutableNotificationContent,将 Body 属性设置为解密的内容,并使用 contentHandler 通知向用户显示通知。