Microsoft Entra ID 保护使组织能够深入了解基于标识的风险以及调查和自动修正这些风险的方法。 本教程指导你使用 ID 保护 API 来识别风险并设置工作流,以确认入侵或启用修正。
本教程介绍如何使用 ID 保护 API:
- 生成有风险的登录。
- 允许具有风险登录的用户使用条件访问策略修正风险状态,该策略需要多重身份验证 (MFA) 。
- 阻止用户使用条件访问策略登录。
- 消除用户风险。
先决条件
若要完成本教程,请确保:
- 具有 Microsoft Entra ID P1 或 P2 许可证的Microsoft Entra租户。
- 访问 图形资源管理器等 API 客户端,使用具有 条件访问管理员 角色的帐户登录。
- 以下委派权限: IdentityRiskEvent.Read.All、 IdentityRiskyUser.ReadWrite.All、 Policy.Read.All、 Policy.ReadWrite.ConditionalAccess 和 User.ReadWrite.All。
- 用于登录到匿名会话以触发风险检测的测试用户帐户。 使用专用浏览会话或 Tor 浏览器。 在本教程中,测试用户邮件昵称为
MyTestUser1。
步骤 1:触发风险检测
在匿名浏览器会话中,以 身份MyTestUser1登录到 Microsoft Entra 管理中心。
步骤 2:列出风险检测
当 MyTestUser1 使用匿名浏览器登录到Microsoft Entra 管理中心时,anonymizedIPAddress检测到风险事件。 可以使用 $filter 查询参数仅获取与 MyTestUser1 用户帐户关联的风险检测。 返回事件可能需要几分钟时间。
请求
GET https://graph.microsoft.com/v1.0/identityProtection/riskDetections?$filter=userDisplayName eq 'MyTestUser1'
// Code snippets are only available for the latest version. Current version is 5.x

// To initialize your graphClient, see https://learn.microsoft.com/en-us/graph/sdks/create-client?from=snippets&tabs=csharp
var result = await graphClient.IdentityProtection.RiskDetections.GetAsync((requestConfiguration) =>
{
	requestConfiguration.QueryParameters.Filter = "userDisplayName eq 'MyTestUser1'";
});
请阅读 SDK 文档,了解如何将 SDK 添加到项目并创建 authProvider 实例的详细信息。
// Code snippets are only available for the latest major version. Current major version is $v1.*

// Dependencies
import (
	  "context"
	  msgraphsdk "github.com/microsoftgraph/msgraph-sdk-go"
	  graphidentityprotection "github.com/microsoftgraph/msgraph-sdk-go/identityprotection"
	  //other-imports
)


requestFilter := "userDisplayName eq 'MyTestUser1'"

requestParameters := &graphidentityprotection.IdentityProtectionRiskDetectionsRequestBuilderGetQueryParameters{
	Filter: &requestFilter,
}
configuration := &graphidentityprotection.IdentityProtectionRiskDetectionsRequestBuilderGetRequestConfiguration{
	QueryParameters: requestParameters,
}

// To initialize your graphClient, see https://learn.microsoft.com/en-us/graph/sdks/create-client?from=snippets&tabs=go
riskDetections, err := graphClient.IdentityProtection().RiskDetections().Get(context.Background(), configuration)
请阅读 SDK 文档,了解如何将 SDK 添加到项目并创建 authProvider 实例的详细信息。
// Code snippets are only available for the latest version. Current version is 6.x

GraphServiceClient graphClient = new GraphServiceClient(requestAdapter);

RiskDetectionCollectionResponse result = graphClient.identityProtection().riskDetections().get(requestConfiguration -> {
	requestConfiguration.queryParameters.filter = "userDisplayName eq 'MyTestUser1'";
});
请阅读 SDK 文档,了解如何将 SDK 添加到项目并创建 authProvider 实例的详细信息。
const options = {
	authProvider,
};

const client = Client.init(options);

let riskDetections = await client.api('/identityProtection/riskDetections')
	.filter('userDisplayName eq \'MyTestUser1\'')
	.get();
请阅读 SDK 文档,了解如何将 SDK 添加到项目并创建 authProvider 实例的详细信息。
<?php
use Microsoft\Graph\GraphServiceClient;
use Microsoft\Graph\Generated\IdentityProtection\RiskDetections\RiskDetectionsRequestBuilderGetRequestConfiguration;


$graphServiceClient = new GraphServiceClient($tokenRequestContext, $scopes);

$requestConfiguration = new RiskDetectionsRequestBuilderGetRequestConfiguration();
$queryParameters = RiskDetectionsRequestBuilderGetRequestConfiguration::createQueryParameters();
$queryParameters->filter = "userDisplayName eq 'MyTestUser1'";
$requestConfiguration->queryParameters = $queryParameters;


$result = $graphServiceClient->identityProtection()->riskDetections()->get($requestConfiguration)->wait();
请阅读 SDK 文档,了解如何将 SDK 添加到项目并创建 authProvider 实例的详细信息。
Import-Module Microsoft.Graph.Identity.SignIns

Get-MgRiskDetection -Filter "userDisplayName eq 'MyTestUser1'"
请阅读 SDK 文档,了解如何将 SDK 添加到项目并创建 authProvider 实例的详细信息。
# Code snippets are only available for the latest version. Current version is 1.x
from msgraph import GraphServiceClient
from msgraph.generated.identity_protection.risk_detections.risk_detections_request_builder import RiskDetectionsRequestBuilder
from kiota_abstractions.base_request_configuration import RequestConfiguration
# To initialize your graph_client, see https://learn.microsoft.com/en-us/graph/sdks/create-client?from=snippets&tabs=python
query_params = RiskDetectionsRequestBuilder.RiskDetectionsRequestBuilderGetQueryParameters(
		filter = "userDisplayName eq 'MyTestUser1'",
)

request_configuration = RequestConfiguration(
query_parameters = query_params,
)

result = await graph_client.identity_protection.risk_detections.get(request_configuration = request_configuration)
请阅读 SDK 文档,了解如何将 SDK 添加到项目并创建 authProvider 实例的详细信息。
响应
HTTP/1.1 20O OK
Content-type: application/json

{
  "@odata.context": "https://graph.microsoft.com/v1.0/$metadata#riskDetections",
  "value": [
    {
      "id": "d52a631815aaa527bf642b196715da5cf0f35b6879204ea5b5c99b21bd4c16f4",
      "requestId": "06f7fd18-b8f1-407d-86a3-f6cbe3a4be00",
      "correlationId": "2a38abff-5701-4073-a81e-fd3aac09cba3",
      "riskType": "anonymizedIPAddress",
      "riskEventType": "anonymizedIPAddress",
      "riskState": "atRisk",
      "riskLevel": "medium",
      "riskDetail": "none",
      "source": "IdentityProtection",
      "detectionTimingType": "realtime",
      "activity": "signin",
      "tokenIssuerType": "AzureAD",
      "ipAddress": "178.17.170.23",
      "activityDateTime": "2020-11-03T20:51:34.6245276Z",
      "detectedDateTime": "2020-11-03T20:51:34.6245276Z",
      "lastUpdatedDateTime": "2020-11-03T20:53:12.1984203Z",
      "userId": "4628e7df-dff3-407c-a08f-75f08c0806dc",
      "userDisplayName": "MyTestUser1",
      "userPrincipalName": "MyTestUser1@contoso.com",
      "additionalInfo": "[{\"Key\":\"userAgent\",\"Value\":\"Mozilla/5.0 (Windows NT 10.0; rv:78.0) Gecko/20100101 Firefox/78.0\"}]",
      "location": {
        "city": "Chisinau",
        "state": "Chisinau",
        "countryOrRegion": "MD",
        "geoCoordinates": {
          "latitude": 47.0269,
          "longitude": 28.8416
        }
      }
    }
  ]
}
步骤 3:创建条件访问策略
条件访问策略允许用户在检测到风险时进行自我修正,使他们能够在完成策略提示后安全地访问资源。 在此步骤中,你将创建条件访问策略,该策略要求用户在发生中等或高风险检测时使用 MFA 登录。
设置多重身份验证
为 MFA 设置帐户时,请选择适合你的情况的最佳身份验证方法。
- 使用 MyTestUser1 帐户登录到保持帐户安全站点。
- 使用适合你的情况的相应方法完成 MFA 设置过程,例如使用 Microsoft Authenticator 应用。
创建条件访问策略
条件访问策略允许设置条件以标识登录风险级别。 风险级别可以是 low、 medium、 high或 none。 以下示例演示如何要求对中等风险级别和高风险级别的登录进行 MFA。
请求
POST https://graph.microsoft.com/v1.0/identity/conditionalAccess/policies
Content-type: application/json

{
  "displayName": "Policy for risky sign-in",
  "state": "enabled",
  "conditions": {
    "signInRiskLevels": [
      "high",
      "medium"
    ],
    "applications": {
      "includeApplications": ["All"]
    },
    "users": {
      "includeUsers": [
        "4628e7df-dff3-407c-a08f-75f08c0806dc"
      ]
    }
  },
  "grantControls": {
    "operator": "OR",
    "builtInControls": [
      "mfa"
    ]
  }
}
// Code snippets are only available for the latest version. Current version is 5.x

// Dependencies
using Microsoft.Graph.Models;

var requestBody = new ConditionalAccessPolicy
{
	DisplayName = "Policy for risky sign-in",
	State = ConditionalAccessPolicyState.Enabled,
	Conditions = new ConditionalAccessConditionSet
	{
		SignInRiskLevels = new List<RiskLevel?>
		{
			RiskLevel.High,
			RiskLevel.Medium,
		},
		Applications = new ConditionalAccessApplications
		{
			IncludeApplications = new List<string>
			{
				"All",
			},
		},
		Users = new ConditionalAccessUsers
		{
			IncludeUsers = new List<string>
			{
				"4628e7df-dff3-407c-a08f-75f08c0806dc",
			},
		},
	},
	GrantControls = new ConditionalAccessGrantControls
	{
		Operator = "OR",
		BuiltInControls = new List<ConditionalAccessGrantControl?>
		{
			ConditionalAccessGrantControl.Mfa,
		},
	},
};

// To initialize your graphClient, see https://learn.microsoft.com/en-us/graph/sdks/create-client?from=snippets&tabs=csharp
var result = await graphClient.Identity.ConditionalAccess.Policies.PostAsync(requestBody);
请阅读 SDK 文档,了解如何将 SDK 添加到项目并创建 authProvider 实例的详细信息。
// Code snippets are only available for the latest major version. Current major version is $v1.*

// Dependencies
import (
	  "context"
	  msgraphsdk "github.com/microsoftgraph/msgraph-sdk-go"
	  graphmodels "github.com/microsoftgraph/msgraph-sdk-go/models"
	  //other-imports
)

requestBody := graphmodels.NewConditionalAccessPolicy()
displayName := "Policy for risky sign-in"
requestBody.SetDisplayName(&displayName)
state := graphmodels.ENABLED_CONDITIONALACCESSPOLICYSTATE
requestBody.SetState(&state)
conditions := graphmodels.NewConditionalAccessConditionSet()
signInRiskLevels := []graphmodels.RiskLevelable {
	riskLevel := graphmodels.HIGH_RISKLEVEL
	conditions.SetRiskLevel(&riskLevel)
	riskLevel := graphmodels.MEDIUM_RISKLEVEL
	conditions.SetRiskLevel(&riskLevel)
}
conditions.SetSignInRiskLevels(signInRiskLevels)
applications := graphmodels.NewConditionalAccessApplications()
includeApplications := []string {
	"All",
}
applications.SetIncludeApplications(includeApplications)
conditions.SetApplications(applications)
users := graphmodels.NewConditionalAccessUsers()
includeUsers := []string {
	"4628e7df-dff3-407c-a08f-75f08c0806dc",
}
users.SetIncludeUsers(includeUsers)
conditions.SetUsers(users)
requestBody.SetConditions(conditions)
grantControls := graphmodels.NewConditionalAccessGrantControls()
operator := "OR"
grantControls.SetOperator(&operator)
builtInControls := []graphmodels.ConditionalAccessGrantControlable {
	conditionalAccessGrantControl := graphmodels.MFA_CONDITIONALACCESSGRANTCONTROL
	grantControls.SetConditionalAccessGrantControl(&conditionalAccessGrantControl)
}
grantControls.SetBuiltInControls(builtInControls)
requestBody.SetGrantControls(grantControls)

// To initialize your graphClient, see https://learn.microsoft.com/en-us/graph/sdks/create-client?from=snippets&tabs=go
policies, err := graphClient.Identity().ConditionalAccess().Policies().Post(context.Background(), requestBody, nil)
请阅读 SDK 文档,了解如何将 SDK 添加到项目并创建 authProvider 实例的详细信息。
// Code snippets are only available for the latest version. Current version is 6.x

GraphServiceClient graphClient = new GraphServiceClient(requestAdapter);

ConditionalAccessPolicy conditionalAccessPolicy = new ConditionalAccessPolicy();
conditionalAccessPolicy.setDisplayName("Policy for risky sign-in");
conditionalAccessPolicy.setState(ConditionalAccessPolicyState.Enabled);
ConditionalAccessConditionSet conditions = new ConditionalAccessConditionSet();
LinkedList<RiskLevel> signInRiskLevels = new LinkedList<RiskLevel>();
signInRiskLevels.add(RiskLevel.High);
signInRiskLevels.add(RiskLevel.Medium);
conditions.setSignInRiskLevels(signInRiskLevels);
ConditionalAccessApplications applications = new ConditionalAccessApplications();
LinkedList<String> includeApplications = new LinkedList<String>();
includeApplications.add("All");
applications.setIncludeApplications(includeApplications);
conditions.setApplications(applications);
ConditionalAccessUsers users = new ConditionalAccessUsers();
LinkedList<String> includeUsers = new LinkedList<String>();
includeUsers.add("4628e7df-dff3-407c-a08f-75f08c0806dc");
users.setIncludeUsers(includeUsers);
conditions.setUsers(users);
conditionalAccessPolicy.setConditions(conditions);
ConditionalAccessGrantControls grantControls = new ConditionalAccessGrantControls();
grantControls.setOperator("OR");
LinkedList<ConditionalAccessGrantControl> builtInControls = new LinkedList<ConditionalAccessGrantControl>();
builtInControls.add(ConditionalAccessGrantControl.Mfa);
grantControls.setBuiltInControls(builtInControls);
conditionalAccessPolicy.setGrantControls(grantControls);
ConditionalAccessPolicy result = graphClient.identity().conditionalAccess().policies().post(conditionalAccessPolicy);
请阅读 SDK 文档,了解如何将 SDK 添加到项目并创建 authProvider 实例的详细信息。
const options = {
	authProvider,
};

const client = Client.init(options);

const conditionalAccessPolicy = {
  displayName: 'Policy for risky sign-in',
  state: 'enabled',
  conditions: {
    signInRiskLevels: [
      'high',
      'medium'
    ],
    applications: {
      includeApplications: ['All']
    },
    users: {
      includeUsers: [
        '4628e7df-dff3-407c-a08f-75f08c0806dc'
      ]
    }
  },
  grantControls: {
    operator: 'OR',
    builtInControls: [
      'mfa'
    ]
  }
};

await client.api('/identity/conditionalAccess/policies')
	.post(conditionalAccessPolicy);
请阅读 SDK 文档,了解如何将 SDK 添加到项目并创建 authProvider 实例的详细信息。
<?php
use Microsoft\Graph\GraphServiceClient;
use Microsoft\Graph\Generated\Models\ConditionalAccessPolicy;
use Microsoft\Graph\Generated\Models\ConditionalAccessPolicyState;
use Microsoft\Graph\Generated\Models\ConditionalAccessConditionSet;
use Microsoft\Graph\Generated\Models\RiskLevel;
use Microsoft\Graph\Generated\Models\ConditionalAccessApplications;
use Microsoft\Graph\Generated\Models\ConditionalAccessUsers;
use Microsoft\Graph\Generated\Models\ConditionalAccessGrantControls;
use Microsoft\Graph\Generated\Models\ConditionalAccessGrantControl;


$graphServiceClient = new GraphServiceClient($tokenRequestContext, $scopes);

$requestBody = new ConditionalAccessPolicy();
$requestBody->setDisplayName('Policy for risky sign-in');
$requestBody->setState(new ConditionalAccessPolicyState('enabled'));
$conditions = new ConditionalAccessConditionSet();
$conditions->setSignInRiskLevels([new RiskLevel('high'),new RiskLevel('medium'),	]);
$conditionsApplications = new ConditionalAccessApplications();
$conditionsApplications->setIncludeApplications(['All', 	]);
$conditions->setApplications($conditionsApplications);
$conditionsUsers = new ConditionalAccessUsers();
$conditionsUsers->setIncludeUsers(['4628e7df-dff3-407c-a08f-75f08c0806dc', 	]);
$conditions->setUsers($conditionsUsers);
$requestBody->setConditions($conditions);
$grantControls = new ConditionalAccessGrantControls();
$grantControls->setOperator('OR');
$grantControls->setBuiltInControls([new ConditionalAccessGrantControl('mfa'),	]);
$requestBody->setGrantControls($grantControls);

$result = $graphServiceClient->identity()->conditionalAccess()->policies()->post($requestBody)->wait();
请阅读 SDK 文档,了解如何将 SDK 添加到项目并创建 authProvider 实例的详细信息。
Import-Module Microsoft.Graph.Identity.SignIns

$params = @{
	displayName = "Policy for risky sign-in"
	state = "enabled"
	conditions = @{
		signInRiskLevels = @(
		"high"
	"medium"
)
applications = @{
	includeApplications = @(
	"All"
)
}
users = @{
includeUsers = @(
"4628e7df-dff3-407c-a08f-75f08c0806dc"
)
}
}
grantControls = @{
operator = "OR"
builtInControls = @(
"mfa"
)
}
}

New-MgIdentityConditionalAccessPolicy -BodyParameter $params
请阅读 SDK 文档,了解如何将 SDK 添加到项目并创建 authProvider 实例的详细信息。
# Code snippets are only available for the latest version. Current version is 1.x
from msgraph import GraphServiceClient
from msgraph.generated.models.conditional_access_policy import ConditionalAccessPolicy
from msgraph.generated.models.conditional_access_policy_state import ConditionalAccessPolicyState
from msgraph.generated.models.conditional_access_condition_set import ConditionalAccessConditionSet
from msgraph.generated.models.risk_level import RiskLevel
from msgraph.generated.models.conditional_access_applications import ConditionalAccessApplications
from msgraph.generated.models.conditional_access_users import ConditionalAccessUsers
from msgraph.generated.models.conditional_access_grant_controls import ConditionalAccessGrantControls
from msgraph.generated.models.conditional_access_grant_control import ConditionalAccessGrantControl
# To initialize your graph_client, see https://learn.microsoft.com/en-us/graph/sdks/create-client?from=snippets&tabs=python
request_body = ConditionalAccessPolicy(
	display_name = "Policy for risky sign-in",
	state = ConditionalAccessPolicyState.Enabled,
	conditions = ConditionalAccessConditionSet(
		sign_in_risk_levels = [
			RiskLevel.High,
			RiskLevel.Medium,
		],
		applications = ConditionalAccessApplications(
			include_applications = [
				"All",
			],
		),
		users = ConditionalAccessUsers(
			include_users = [
				"4628e7df-dff3-407c-a08f-75f08c0806dc",
			],
		),
	),
	grant_controls = ConditionalAccessGrantControls(
		operator = "OR",
		built_in_controls = [
			ConditionalAccessGrantControl.Mfa,
		],
	),
)

result = await graph_client.identity.conditional_access.policies.post(request_body)
请阅读 SDK 文档,了解如何将 SDK 添加到项目并创建 authProvider 实例的详细信息。
响应
HTTP/1.1 201 Created
Content-type: application/json

{
  "@odata.context": "https://graph.microsoft.com/v1.0/$metadata#identity/conditionalAccess/policies/$entity",
  "id": "9ad78153-b1f8-4714-adc1-1445727678a8",
  "displayName": "Policy for risky sign-in",
  "createdDateTime": "2020-11-03T20:56:38.6210843Z",
  "modifiedDateTime": null,
  "state": "enabled",
  "sessionControls": null,
  "conditions": {
    "signInRiskLevels": [
      "high",
      "medium"
    ],
    "clientAppTypes": [
      "all"
    ],
    "platforms": null,
    "locations": null,
    "applications": {
      "includeApplications": [
        "All"
      ],
      "excludeApplications": [],
      "includeUserActions": []
    },
    "users": {
      "includeUsers": [
        "4628e7df-dff3-407c-a08f-75f08c0806dc"
      ],
      "excludeUsers": [],
      "includeGroups": [],
      "excludeGroups": [],
      "includeRoles": [],
      "excludeRoles": []
    }
  },
  "grantControls": {
    "operator": "OR",
    "builtInControls": [
      "mfa"
    ],
    "customAuthenticationFactors": [],
    "termsOfUse": []
  }
}
步骤 4:触发另一个有风险的登录,但完成多重身份验证
通过登录到匿名浏览器,会检测到风险,但可以通过完成 MFA 来修正风险。
使用 MyTestUser1 帐户登录到 entra.microsoft.com 并完成 MFA 过程。
步骤 5:列出风险检测
在步骤 2 中重新运行请求,以获取 MyTestUser1 用户帐户的最新风险检测。 由于 MFA 已在步骤 4 中完成,因此此最新登录事件的 riskState 现在 remediated为 。
[可选]阻止用户登录
如果希望阻止与风险登录关联的用户,而不是允许自我修正,请创建新的条件访问策略。 如果发生中等或高风险检测,此策略将阻止用户登录。 与步骤 3 中的策略的主要区别在于 ,builtInControls 现在设置为 block。
请求
POST https://graph.microsoft.com/v1.0/identity/conditionalAccess/policies
Content-type: application/json

{
  "displayName": "Policy for risky sign-in block access",
  "state": "enabled",
  "conditions": {
    "signInRiskLevels": [
      "high",
      "medium"
    ],
    "applications": {
      "includeApplications": ["All"]
    },
    "users": {
      "includeUsers": [
        "4628e7df-dff3-407c-a08f-75f08c0806dc"
      ]
    }
  },
  "grantControls": {
    "operator": "OR",
    "builtInControls": [
      "block"
    ]
  }
}
// Code snippets are only available for the latest version. Current version is 5.x

// Dependencies
using Microsoft.Graph.Models;

var requestBody = new ConditionalAccessPolicy
{
	DisplayName = "Policy for risky sign-in block access",
	State = ConditionalAccessPolicyState.Enabled,
	Conditions = new ConditionalAccessConditionSet
	{
		SignInRiskLevels = new List<RiskLevel?>
		{
			RiskLevel.High,
			RiskLevel.Medium,
		},
		Applications = new ConditionalAccessApplications
		{
			IncludeApplications = new List<string>
			{
				"All",
			},
		},
		Users = new ConditionalAccessUsers
		{
			IncludeUsers = new List<string>
			{
				"4628e7df-dff3-407c-a08f-75f08c0806dc",
			},
		},
	},
	GrantControls = new ConditionalAccessGrantControls
	{
		Operator = "OR",
		BuiltInControls = new List<ConditionalAccessGrantControl?>
		{
			ConditionalAccessGrantControl.Block,
		},
	},
};

// To initialize your graphClient, see https://learn.microsoft.com/en-us/graph/sdks/create-client?from=snippets&tabs=csharp
var result = await graphClient.Identity.ConditionalAccess.Policies.PostAsync(requestBody);
请阅读 SDK 文档,了解如何将 SDK 添加到项目并创建 authProvider 实例的详细信息。
// Code snippets are only available for the latest major version. Current major version is $v1.*

// Dependencies
import (
	  "context"
	  msgraphsdk "github.com/microsoftgraph/msgraph-sdk-go"
	  graphmodels "github.com/microsoftgraph/msgraph-sdk-go/models"
	  //other-imports
)

requestBody := graphmodels.NewConditionalAccessPolicy()
displayName := "Policy for risky sign-in block access"
requestBody.SetDisplayName(&displayName)
state := graphmodels.ENABLED_CONDITIONALACCESSPOLICYSTATE
requestBody.SetState(&state)
conditions := graphmodels.NewConditionalAccessConditionSet()
signInRiskLevels := []graphmodels.RiskLevelable {
	riskLevel := graphmodels.HIGH_RISKLEVEL
	conditions.SetRiskLevel(&riskLevel)
	riskLevel := graphmodels.MEDIUM_RISKLEVEL
	conditions.SetRiskLevel(&riskLevel)
}
conditions.SetSignInRiskLevels(signInRiskLevels)
applications := graphmodels.NewConditionalAccessApplications()
includeApplications := []string {
	"All",
}
applications.SetIncludeApplications(includeApplications)
conditions.SetApplications(applications)
users := graphmodels.NewConditionalAccessUsers()
includeUsers := []string {
	"4628e7df-dff3-407c-a08f-75f08c0806dc",
}
users.SetIncludeUsers(includeUsers)
conditions.SetUsers(users)
requestBody.SetConditions(conditions)
grantControls := graphmodels.NewConditionalAccessGrantControls()
operator := "OR"
grantControls.SetOperator(&operator)
builtInControls := []graphmodels.ConditionalAccessGrantControlable {
	conditionalAccessGrantControl := graphmodels.BLOCK_CONDITIONALACCESSGRANTCONTROL
	grantControls.SetConditionalAccessGrantControl(&conditionalAccessGrantControl)
}
grantControls.SetBuiltInControls(builtInControls)
requestBody.SetGrantControls(grantControls)

// To initialize your graphClient, see https://learn.microsoft.com/en-us/graph/sdks/create-client?from=snippets&tabs=go
policies, err := graphClient.Identity().ConditionalAccess().Policies().Post(context.Background(), requestBody, nil)
请阅读 SDK 文档,了解如何将 SDK 添加到项目并创建 authProvider 实例的详细信息。
// Code snippets are only available for the latest version. Current version is 6.x

GraphServiceClient graphClient = new GraphServiceClient(requestAdapter);

ConditionalAccessPolicy conditionalAccessPolicy = new ConditionalAccessPolicy();
conditionalAccessPolicy.setDisplayName("Policy for risky sign-in block access");
conditionalAccessPolicy.setState(ConditionalAccessPolicyState.Enabled);
ConditionalAccessConditionSet conditions = new ConditionalAccessConditionSet();
LinkedList<RiskLevel> signInRiskLevels = new LinkedList<RiskLevel>();
signInRiskLevels.add(RiskLevel.High);
signInRiskLevels.add(RiskLevel.Medium);
conditions.setSignInRiskLevels(signInRiskLevels);
ConditionalAccessApplications applications = new ConditionalAccessApplications();
LinkedList<String> includeApplications = new LinkedList<String>();
includeApplications.add("All");
applications.setIncludeApplications(includeApplications);
conditions.setApplications(applications);
ConditionalAccessUsers users = new ConditionalAccessUsers();
LinkedList<String> includeUsers = new LinkedList<String>();
includeUsers.add("4628e7df-dff3-407c-a08f-75f08c0806dc");
users.setIncludeUsers(includeUsers);
conditions.setUsers(users);
conditionalAccessPolicy.setConditions(conditions);
ConditionalAccessGrantControls grantControls = new ConditionalAccessGrantControls();
grantControls.setOperator("OR");
LinkedList<ConditionalAccessGrantControl> builtInControls = new LinkedList<ConditionalAccessGrantControl>();
builtInControls.add(ConditionalAccessGrantControl.Block);
grantControls.setBuiltInControls(builtInControls);
conditionalAccessPolicy.setGrantControls(grantControls);
ConditionalAccessPolicy result = graphClient.identity().conditionalAccess().policies().post(conditionalAccessPolicy);
请阅读 SDK 文档,了解如何将 SDK 添加到项目并创建 authProvider 实例的详细信息。
const options = {
	authProvider,
};

const client = Client.init(options);

const conditionalAccessPolicy = {
  displayName: 'Policy for risky sign-in block access',
  state: 'enabled',
  conditions: {
    signInRiskLevels: [
      'high',
      'medium'
    ],
    applications: {
      includeApplications: ['All']
    },
    users: {
      includeUsers: [
        '4628e7df-dff3-407c-a08f-75f08c0806dc'
      ]
    }
  },
  grantControls: {
    operator: 'OR',
    builtInControls: [
      'block'
    ]
  }
};

await client.api('/identity/conditionalAccess/policies')
	.post(conditionalAccessPolicy);
请阅读 SDK 文档,了解如何将 SDK 添加到项目并创建 authProvider 实例的详细信息。
<?php
use Microsoft\Graph\GraphServiceClient;
use Microsoft\Graph\Generated\Models\ConditionalAccessPolicy;
use Microsoft\Graph\Generated\Models\ConditionalAccessPolicyState;
use Microsoft\Graph\Generated\Models\ConditionalAccessConditionSet;
use Microsoft\Graph\Generated\Models\RiskLevel;
use Microsoft\Graph\Generated\Models\ConditionalAccessApplications;
use Microsoft\Graph\Generated\Models\ConditionalAccessUsers;
use Microsoft\Graph\Generated\Models\ConditionalAccessGrantControls;
use Microsoft\Graph\Generated\Models\ConditionalAccessGrantControl;


$graphServiceClient = new GraphServiceClient($tokenRequestContext, $scopes);

$requestBody = new ConditionalAccessPolicy();
$requestBody->setDisplayName('Policy for risky sign-in block access');
$requestBody->setState(new ConditionalAccessPolicyState('enabled'));
$conditions = new ConditionalAccessConditionSet();
$conditions->setSignInRiskLevels([new RiskLevel('high'),new RiskLevel('medium'),	]);
$conditionsApplications = new ConditionalAccessApplications();
$conditionsApplications->setIncludeApplications(['All', 	]);
$conditions->setApplications($conditionsApplications);
$conditionsUsers = new ConditionalAccessUsers();
$conditionsUsers->setIncludeUsers(['4628e7df-dff3-407c-a08f-75f08c0806dc', 	]);
$conditions->setUsers($conditionsUsers);
$requestBody->setConditions($conditions);
$grantControls = new ConditionalAccessGrantControls();
$grantControls->setOperator('OR');
$grantControls->setBuiltInControls([new ConditionalAccessGrantControl('block'),	]);
$requestBody->setGrantControls($grantControls);

$result = $graphServiceClient->identity()->conditionalAccess()->policies()->post($requestBody)->wait();
请阅读 SDK 文档,了解如何将 SDK 添加到项目并创建 authProvider 实例的详细信息。
Import-Module Microsoft.Graph.Identity.SignIns

$params = @{
	displayName = "Policy for risky sign-in block access"
	state = "enabled"
	conditions = @{
		signInRiskLevels = @(
		"high"
	"medium"
)
applications = @{
	includeApplications = @(
	"All"
)
}
users = @{
includeUsers = @(
"4628e7df-dff3-407c-a08f-75f08c0806dc"
)
}
}
grantControls = @{
operator = "OR"
builtInControls = @(
"block"
)
}
}

New-MgIdentityConditionalAccessPolicy -BodyParameter $params
请阅读 SDK 文档,了解如何将 SDK 添加到项目并创建 authProvider 实例的详细信息。
# Code snippets are only available for the latest version. Current version is 1.x
from msgraph import GraphServiceClient
from msgraph.generated.models.conditional_access_policy import ConditionalAccessPolicy
from msgraph.generated.models.conditional_access_policy_state import ConditionalAccessPolicyState
from msgraph.generated.models.conditional_access_condition_set import ConditionalAccessConditionSet
from msgraph.generated.models.risk_level import RiskLevel
from msgraph.generated.models.conditional_access_applications import ConditionalAccessApplications
from msgraph.generated.models.conditional_access_users import ConditionalAccessUsers
from msgraph.generated.models.conditional_access_grant_controls import ConditionalAccessGrantControls
from msgraph.generated.models.conditional_access_grant_control import ConditionalAccessGrantControl
# To initialize your graph_client, see https://learn.microsoft.com/en-us/graph/sdks/create-client?from=snippets&tabs=python
request_body = ConditionalAccessPolicy(
	display_name = "Policy for risky sign-in block access",
	state = ConditionalAccessPolicyState.Enabled,
	conditions = ConditionalAccessConditionSet(
		sign_in_risk_levels = [
			RiskLevel.High,
			RiskLevel.Medium,
		],
		applications = ConditionalAccessApplications(
			include_applications = [
				"All",
			],
		),
		users = ConditionalAccessUsers(
			include_users = [
				"4628e7df-dff3-407c-a08f-75f08c0806dc",
			],
		),
	),
	grant_controls = ConditionalAccessGrantControls(
		operator = "OR",
		built_in_controls = [
			ConditionalAccessGrantControl.Block,
		],
	),
)

result = await graph_client.identity.conditional_access.policies.post(request_body)
请阅读 SDK 文档,了解如何将 SDK 添加到项目并创建 authProvider 实例的详细信息。
响应
HTTP/1.1 201 Created
Content-type: application/json

{
  "@odata.context": "https://graph.microsoft.com/v1.0/$metadata#identity/conditionalAccess/policies/$entity",
  "id": "9ad78153-b1f8-4714-adc1-1445727678a8",
  "displayName": "Policy for risky sign-in block access",
  "createdDateTime": "2020-11-03T20:56:38.6210843Z",
  "modifiedDateTime": null,
  "state": "enabled",
  "sessionControls": null,
  "conditions": {
    "signInRiskLevels": [
      "high",
      "medium"
    ],
    "clientAppTypes": [
      "all"
    ],
    "platforms": null,
    "locations": null,
    "applications": {
      "includeApplications": [
        "All"
      ],
      "excludeApplications": [],
      "includeUserActions": []
    },
    "users": {
      "includeUsers": [
        "4628e7df-dff3-407c-a08f-75f08c0806dc"
      ],
      "excludeUsers": [],
      "includeGroups": [],
      "excludeGroups": [],
      "includeRoles": [],
      "excludeRoles": []
    }
  },
  "grantControls": {
    "operator": "OR",
    "builtInControls": [
      "block"
    ],
    "customAuthenticationFactors": [],
    "termsOfUse": []
  }
}
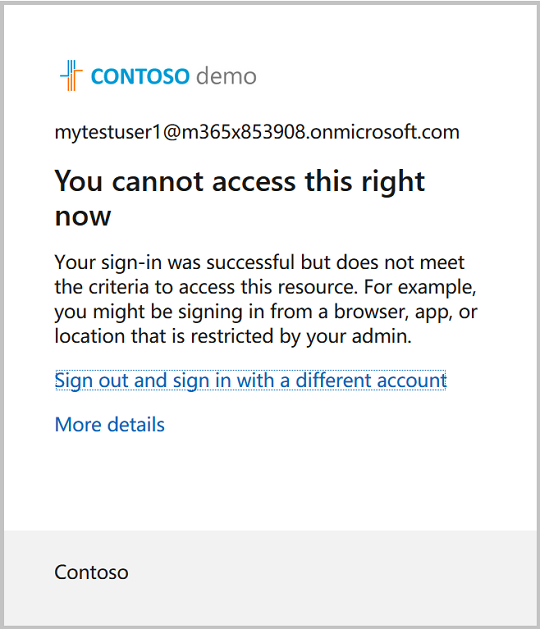
此条件访问策略到位后,由于登录风险级别中等或高, MyTestUser1 帐户现在被阻止登录。
步骤 6:消除有风险的用户
如果你认为用户没有风险并且不想强制实施条件访问策略,请手动关闭有风险的用户,如以下请求中所示。 请求返回 204 No Content 响应。
请求
POST https://graph.microsoft.com/v1.0/identityProtection/riskyUsers/dismiss
Content-Type: application/json

{
  "userIds": [
    "4628e7df-dff3-407c-a08f-75f08c0806dc"
  ]
}
// Code snippets are only available for the latest version. Current version is 5.x

// Dependencies
using Microsoft.Graph.IdentityProtection.RiskyUsers.Dismiss;

var requestBody = new DismissPostRequestBody
{
	UserIds = new List<string>
	{
		"4628e7df-dff3-407c-a08f-75f08c0806dc",
	},
};

// To initialize your graphClient, see https://learn.microsoft.com/en-us/graph/sdks/create-client?from=snippets&tabs=csharp
await graphClient.IdentityProtection.RiskyUsers.Dismiss.PostAsync(requestBody);
请阅读 SDK 文档,了解如何将 SDK 添加到项目并创建 authProvider 实例的详细信息。
// Code snippets are only available for the latest major version. Current major version is $v1.*

// Dependencies
import (
	  "context"
	  msgraphsdk "github.com/microsoftgraph/msgraph-sdk-go"
	  graphidentityprotection "github.com/microsoftgraph/msgraph-sdk-go/identityprotection"
	  //other-imports
)

requestBody := graphidentityprotection.NewDismissPostRequestBody()
userIds := []string {
	"4628e7df-dff3-407c-a08f-75f08c0806dc",
}
requestBody.SetUserIds(userIds)

// To initialize your graphClient, see https://learn.microsoft.com/en-us/graph/sdks/create-client?from=snippets&tabs=go
graphClient.IdentityProtection().RiskyUsers().Dismiss().Post(context.Background(), requestBody, nil)
请阅读 SDK 文档,了解如何将 SDK 添加到项目并创建 authProvider 实例的详细信息。
// Code snippets are only available for the latest version. Current version is 6.x

GraphServiceClient graphClient = new GraphServiceClient(requestAdapter);

com.microsoft.graph.identityprotection.riskyusers.dismiss.DismissPostRequestBody dismissPostRequestBody = new com.microsoft.graph.identityprotection.riskyusers.dismiss.DismissPostRequestBody();
LinkedList<String> userIds = new LinkedList<String>();
userIds.add("4628e7df-dff3-407c-a08f-75f08c0806dc");
dismissPostRequestBody.setUserIds(userIds);
graphClient.identityProtection().riskyUsers().dismiss().post(dismissPostRequestBody);
请阅读 SDK 文档,了解如何将 SDK 添加到项目并创建 authProvider 实例的详细信息。
const options = {
	authProvider,
};

const client = Client.init(options);

const dismiss = {
  userIds: [
    '4628e7df-dff3-407c-a08f-75f08c0806dc'
  ]
};

await client.api('/identityProtection/riskyUsers/dismiss')
	.post(dismiss);
请阅读 SDK 文档,了解如何将 SDK 添加到项目并创建 authProvider 实例的详细信息。
<?php
use Microsoft\Graph\GraphServiceClient;
use Microsoft\Graph\Generated\IdentityProtection\RiskyUsers\Dismiss\DismissPostRequestBody;


$graphServiceClient = new GraphServiceClient($tokenRequestContext, $scopes);

$requestBody = new DismissPostRequestBody();
$requestBody->setUserIds(['4628e7df-dff3-407c-a08f-75f08c0806dc', 	]);

$graphServiceClient->identityProtection()->riskyUsers()->dismiss()->post($requestBody)->wait();
请阅读 SDK 文档,了解如何将 SDK 添加到项目并创建 authProvider 实例的详细信息。
Import-Module Microsoft.Graph.Identity.SignIns

$params = @{
	userIds = @(
	"4628e7df-dff3-407c-a08f-75f08c0806dc"
)
}

Invoke-MgDismissRiskyUser -BodyParameter $params
请阅读 SDK 文档,了解如何将 SDK 添加到项目并创建 authProvider 实例的详细信息。
# Code snippets are only available for the latest version. Current version is 1.x
from msgraph import GraphServiceClient
from msgraph.generated.identityprotection.riskyusers.dismiss.dismiss_post_request_body import DismissPostRequestBody
# To initialize your graph_client, see https://learn.microsoft.com/en-us/graph/sdks/create-client?from=snippets&tabs=python
request_body = DismissPostRequestBody(
	user_ids = [
		"4628e7df-dff3-407c-a08f-75f08c0806dc",
	],
)

await graph_client.identity_protection.risky_users.dismiss.post(request_body)
请阅读 SDK 文档,了解如何将 SDK 添加到项目并创建 authProvider 实例的详细信息。
关闭风险用户后,可以在步骤 2 中重新运行请求,并注意到 MyTestUser1 用户帐户现在的风险级别 none 为 ,riskState 为 dismissed。
第 7 步:清理资源
在此步骤中,删除创建的两个条件访问策略。 请求返回 204 No Content 响应。
DELETE https://graph.microsoft.com/v1.0/identity/conditionalAccess/policies/9ad78153-b1f8-4714-adc1-1445727678a8
// Code snippets are only available for the latest version. Current version is 5.x

// To initialize your graphClient, see https://learn.microsoft.com/en-us/graph/sdks/create-client?from=snippets&tabs=csharp
await graphClient.Identity.ConditionalAccess.Policies["{conditionalAccessPolicy-id}"].DeleteAsync();
请阅读 SDK 文档,了解如何将 SDK 添加到项目并创建 authProvider 实例的详细信息。
// Code snippets are only available for the latest major version. Current major version is $v1.*

// Dependencies
import (
	  "context"
	  msgraphsdk "github.com/microsoftgraph/msgraph-sdk-go"
	  //other-imports
)


// To initialize your graphClient, see https://learn.microsoft.com/en-us/graph/sdks/create-client?from=snippets&tabs=go
graphClient.Identity().ConditionalAccess().Policies().ByConditionalAccessPolicyId("conditionalAccessPolicy-id").Delete(context.Background(), nil)
请阅读 SDK 文档,了解如何将 SDK 添加到项目并创建 authProvider 实例的详细信息。
// Code snippets are only available for the latest version. Current version is 6.x

GraphServiceClient graphClient = new GraphServiceClient(requestAdapter);

graphClient.identity().conditionalAccess().policies().byConditionalAccessPolicyId("{conditionalAccessPolicy-id}").delete();
请阅读 SDK 文档,了解如何将 SDK 添加到项目并创建 authProvider 实例的详细信息。
const options = {
	authProvider,
};

const client = Client.init(options);

await client.api('/identity/conditionalAccess/policies/9ad78153-b1f8-4714-adc1-1445727678a8')
	.delete();
请阅读 SDK 文档,了解如何将 SDK 添加到项目并创建 authProvider 实例的详细信息。
<?php
use Microsoft\Graph\GraphServiceClient;


$graphServiceClient = new GraphServiceClient($tokenRequestContext, $scopes);


$graphServiceClient->identity()->conditionalAccess()->policies()->byConditionalAccessPolicyId('conditionalAccessPolicy-id')->delete()->wait();
请阅读 SDK 文档,了解如何将 SDK 添加到项目并创建 authProvider 实例的详细信息。
Import-Module Microsoft.Graph.Identity.SignIns

Remove-MgIdentityConditionalAccessPolicy -ConditionalAccessPolicyId $conditionalAccessPolicyId
请阅读 SDK 文档,了解如何将 SDK 添加到项目并创建 authProvider 实例的详细信息。
# Code snippets are only available for the latest version. Current version is 1.x
from msgraph import GraphServiceClient
# To initialize your graph_client, see https://learn.microsoft.com/en-us/graph/sdks/create-client?from=snippets&tabs=python

await graph_client.identity.conditional_access.policies.by_conditional_access_policy_id('conditionalAccessPolicy-id').delete()
请阅读 SDK 文档,了解如何将 SDK 添加到项目并创建 authProvider 实例的详细信息。
相关内容