作者:Gurpreet Singh
介绍
IIS 7.0 及以上版本的管理工具是一个可插入模块的可扩展平台。 开发人员可以编写自己的 UI 功能,intemgr 将把他们视为一等公民。
本演练演示如何从头开始创建 UI 模块。 它展示了 IIS 团队在创建模块时遵循的最佳做法。
该任务包括创建两个程序集。 这一过程可概括为两个步骤。
- 创建 Client 程序集
- 创建 Server 程序集
新版 inetmgr 采用类似网络服务的架构设计,将用户界面逻辑与操作服务器设置的代码干净利落地分离开来。 这主要通过 ModuleService 和 ModuleServiceProxy 两个类来实现。 ModuleService 派生类通过 ModuleProvider ServiceType 属性与其 ModuleProvider 关联。
创建空解决方案
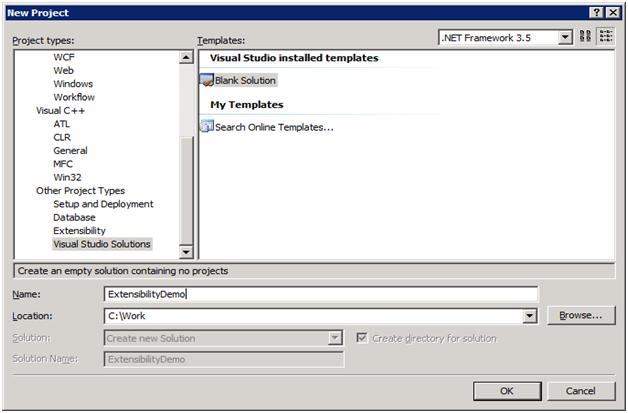
单击“开始”,然后单击“程序”并运行 Microsoft Visual Studio 2005 或 Microsoft Visual C# 2005 学习版。在“文件”菜单中,选择“新建项目”选项,转到“其他项目类型”和“Visual Studio 解决方案”。 从右侧选择空白解决方案,并将解决方案命名为 ExtensibilityDemo。
创建 Client 程序集
创建 Client 程序集的任务包括
- 为 Client 程序集设置项目
- 创建 ModuleServiceProxy
- 创建 ModuleListPage 并使用 ModuleServiceProxy。
- 创建 Module 类。
为 Client 程序集设置项目
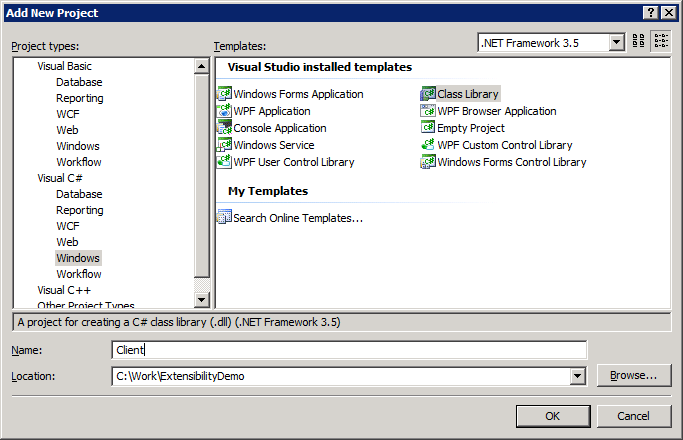
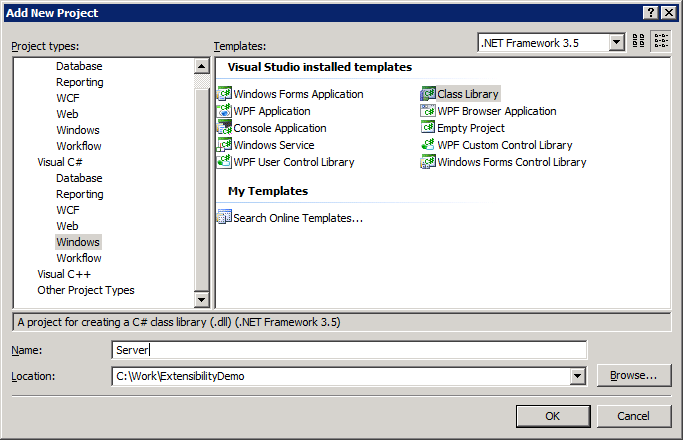
在解决方案资源管理器中,右键单击解决方案,选择“添加和新建项目”,启动该窗口。 从右窗格中选择 Visual C# 和类库,并将项目命名为 Client。
使用解决方案资源管理器中的上下文菜单“删除”选项,删除默认添加的文件 Class1.cs(因为我们不会使用该文件)。
使用“添加引用...” 在“项目”菜单中,使用“浏览”选项卡添加对 Microsoft.Web.Management.dll 的引用,并在 \Windows\system32\inetsrv 目录中搜索它。 该目录包含用于在 inetmgr 中创建模块的扩展性类。 由于我们将引用 System.Windows.Forms 中的某些类,因此还包含对 System.Windows.Forms 的引用。
最佳做法:切勿在 Client 项目中引用 Microsoft.Web.Administration.dll。
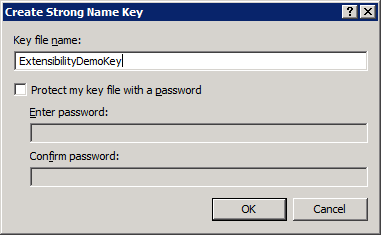
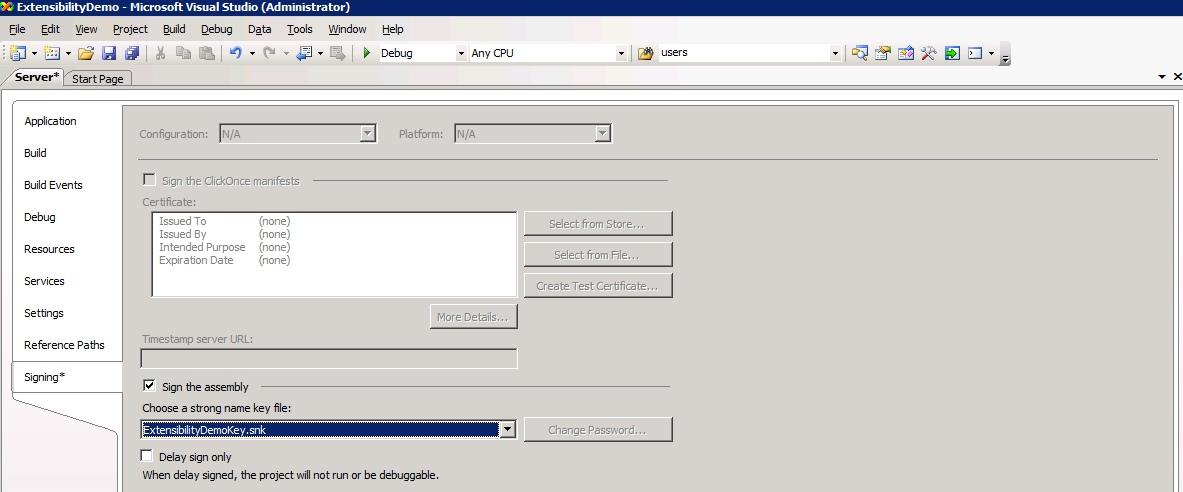
在 InetMgr 中使用库的要求之一是需要在 GAC 中注册。 为此,我们需要确保 DLL 具有强名称。 Visual Studio 提供了一种简单的方法来创建新名称。 若要对程序集进行签名,请转到“项目属性”和“签名”选项卡,单击“对程序集进行签名”。 在对话框中,将密钥命名为 ExtensibilityDemoKey,并取消选中“使用密码保护密钥文件”。
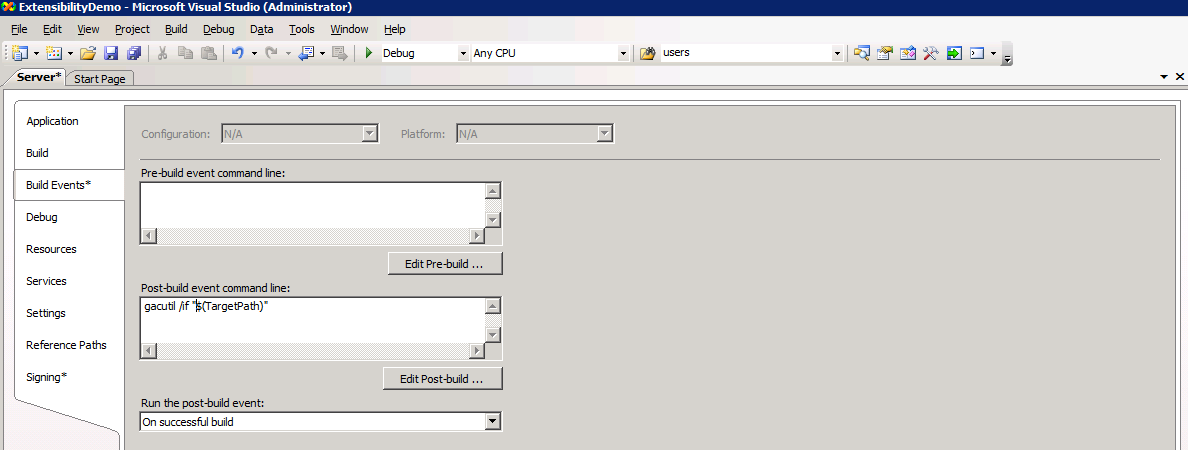
按“确定”对程序集进行签名。 此外,由于我们希望程序集位于 GAC 中,因此需要添加一些生成后事件,以便每次编译时它都会自动添加到 GAC 中。 当我们添加新功能时,这会使调试和更改变得非常简单。 为此,请选择“生成事件”选项卡,并添加以下“生成后事件”命令行:
gacutil.exe /if "$(TargetPath)"
最后,关闭项目属性,选择“文件”菜单中的“全部保存”选项。现在,使用“生成”菜单下的“生成解决方案”编译项目。 这将自动生成 dll 并将其添加到 GAC。
注意:如果用于设置 vsvars32.bat 的命令不适用于错误代码 9009,请替换在生成后事件中添加的命令,方法是将完整路径添加到 gacutil.exe,例如:
"C:\Program Files\Microsoft Visual Studio 8\SDK\v2.0\Bin\gacutil.exe" /if "$(TargetPath)
创建 ModuleServiceProxy
ModuleServiceProxy 是一个类,用于简化在 ModuleService 类中调用方法的过程。 该类非常重要,因为它抽象了管理本地服务器或使用网络管理服务 (wmsvc) 管理远程机器时的逻辑。
在此示例中,我们将编写“appSettings”的读取内容。 在“项目”菜单中选择“添加新项”选项。 选择“代码”并键入 DemoModuleServiceProxy 作为文件名。

更改代码,使其如下所示。
using System;
using System.Collections.Generic;
using System.Text;
using Microsoft.Web.Management.Client;
using Microsoft.Web.Management.Server;

namespace Client {
    internal class DemoModuleServiceProxy : ModuleServiceProxy {
        public ArrayList GetAppSettings() {
            return (ArrayList )Invoke("GetAppSettings");
        }
    }
}
正如我们所见,编写代理很简单,只需编写一个派生自 ModuleServiceProxy 的类,然后在服务器端调用 ModuleService 中的方法即可。
创建 ModuleListPage
在“项目”菜单中选择“添加新项”选项。 选择“代码”并键入 DemoModuleListPage.cs 作为文件名。
更改代码,使其如下所示。
using System.Collections;
using System.ComponentModel;
using System.Windows.Forms;
using Microsoft.Web.Management.Client.Win32;
using Microsoft.Web.Management.Server;

namespace Client {
    internal class DemoModuleListPage : ModuleListPage {
        private ColumnHeader _keyColumnHeader;
        private ColumnHeader _valueColumnHeader;
        private DemoModuleServiceProxy _serviceProxy;

        private DemoModuleServiceProxy ServiceProxy {
            get {
                if (_serviceProxy == null) {
                    _serviceProxy = (DemoModuleServiceProxy)CreateProxy(typeof(DemoModuleServiceProxy));
                }
                return _serviceProxy;
            }
        }

        protected override void InitializeListPage() {
            _keyColumnHeader = new ColumnHeader();
            _keyColumnHeader.Text = "Key";
            _keyColumnHeader.Width = 200;

            _valueColumnHeader = new ColumnHeader();
            _valueColumnHeader.Text = "Value";
            _valueColumnHeader.Width = 200;

            ListView.Columns.Add(_keyColumnHeader);
            ListView.Columns.Add(_valueColumnHeader);
        }

        protected override void OnActivated(bool initialActivation) {
            base.OnActivated(initialActivation);
            if (initialActivation) {
                GetAppSettings();
            }
        }

        private void GetAppSettings() {
            StartAsyncTask("Getting Settings", new DoWorkEventHandler(GetSettings),
                                              new RunWorkerCompletedEventHandler(GetSettingsCompleted));
        }

        private void GetSettings(object sender, DoWorkEventArgs e) {
            e.Result = ServiceProxy.GetAppSettings();
        }

        private void GetSettingsCompleted(object sender, RunWorkerCompletedEventArgs e) {
            ListView.BeginUpdate();
            try {
                ArrayList settingsList = (ArrayList)e.Result;
                foreach (PropertyBag bag in settingsList) {
                    ListViewItem item = new ListViewItem();
                    item.Text = (string)bag[0];
                    item.SubItems.Add((string)bag[1]);

                    ListView.Items.Add(item);
                }
            }
            finally {
                ListView.EndUpdate();
            }
        }
    }
}
在此演示中,我们将扩展 ModuleListPage 类。 它重写 InitializeListPage 方法以初始化列并将其添加到 listview。 它还会重写 OnActivated 方法。 访问此页面时会调用此方法
创建 Module 类
这是所有现有对象的客户端入口点。 它有三个主要方法,分别称为 Initialize、GetService 和 Dispose。 页面注册、为页面分配类别等所有操作都是通过这种方法完成的。
在“项目”菜单中选择“添加新项”选项。 选择“代码”并键入 DemoModule.cs 作为文件名。
更改代码,使其如下所示。
using System;
using System.Collections.Generic;
using System.Text;
using Microsoft.Web.Management.Client;

namespace Client {
    internal class DemoModule : Module {
        protected override void Initialize(IServiceProvider serviceProvider, Microsoft.Web.Management.Server.ModuleInfo moduleInfo) {
            base.Initialize(serviceProvider, moduleInfo);

            IControlPanel controlPanel = (IControlPanel)GetService(typeof(IControlPanel));
            controlPanel.RegisterPage(new ModulePageInfo(this, typeof(DemoModuleListPage), "DemoPage"));
        }
    }
}
DemoModule 重写 Initialize 方法。 它首先调用基类上的 Initialize。 然后,它通过 GetService 访问控制面板服务。 然后,它通过 ControlPanel 的 RegisterPage 自行注册。
创建 Server 程序集
Server 程序集包括编写两个主类
- ModuleProvider
- ModuleService
服务器还应引用 Windows system32/inetsrv 目录中的两个主程序集,即 Microsoft.Web.Management.dll 和 Microsoft.Web.Management.Administration.dll。 第一个程序集包含用于为 intemgr 创建 UI 的所有框架类,第二个程序集包含用于读取配置和写入配置的类。
在解决方案资源管理器中,右键单击解决方案,选择“添加和新建项目”,启动该窗口。 从右窗格中选择 Visual C# 和类库,并将项目命名为 Server。
使用解决方案资源管理器中的上下文菜单“删除”选项,删除默认添加的文件 Class1.cs(因为我们不会使用该文件)。
使用“添加引用...” 在“项目”菜单中,使用“浏览”选项卡添加对 Microsoft.Web.Management.dll 和 Microsoft.Web.Management.Administration.dll 的引用,并在 \Windows\system32\inetsrv 目录中搜索它。 该目录包含用于在 inetmgr 中创建模块的扩展性类。
在 InetMgr 中使用库的要求之一是需要在 GAC 中注册。 为此,我们需要确保 DLL 具有强名称。 Visual Studio 提供了一种简单的方法来创建新名称。 若要对程序集进行签名,请转到“项目属性”和“签名”选项卡,单击“对程序集进行签名”。在下拉菜单中,单击“浏览”。 在对话框中,转到 Client 文件夹,选择 ExtensibilityDemoKey 并点击“打开”。 保存项目属性。
按“确定”对程序集进行签名。 此外,由于我们希望程序集位于 GAC 中,因此需要添加一些生成后事件,以便每次编译时它都会自动添加到 GAC 中。 当我们添加新功能时,这会使调试和更改变得非常简单。 为此,请选择“生成事件”选项卡,并添加以下“生成后事件”命令行:
gacutil.exe /if "$(TargetPath)"

最后,关闭项目属性,选择“文件”菜单中的“全部保存”选项。现在,使用“生成”菜单下的“生成解决方案”编译项目。 这将自动生成 dll 并将其添加到 GAC。
注意:如果用于设置 vsvars32.bat 的命令不适用于错误代码 9009,请替换在生成后事件中添加的命令,方法是将完整路径添加到 gacutil.exe,例如:
"C:\Program Files\Microsoft Visual Studio 8\SDK\v2.0\Bin\gacutil.exe" /if "$(TargetPath)"
创建 Module 服务
在此任务中,我们将创建新的 ModuleService。 该类使用 Microsoft.Web.Administration.dll 来读取或写入基础配置文件。
从“项目”菜单中选择“添加新项”选项。 在“添加新项”对话框中,选择“代码”模板并键入 DemoModuleService.cs 作为文件的名称。
更改代码,使其如下所示:
using System.Collections;
using Microsoft.Web.Administration;
using Microsoft.Web.Management.Server;

namespace Server {
    internal class DemoModuleService : ModuleService {

        [ModuleServiceMethod(PassThrough = true)]
        public ArrayList GetAppSettings() {

            ArrayList settingsList = new ArrayList();

            ConfigurationSection appSettingsSection =
                ManagementUnit.Configuration.GetSection(@"appSettings");
            ConfigurationElementCollection settingsCollection = appSettingsSection.GetCollection();

            foreach (ConfigurationElement element in settingsCollection) {
                PropertyBag bag = new PropertyBag();
                bag[0] = element.GetAttributeValue("key");
                bag[1] = element.GetAttributeValue("value");
                settingsList.Add(bag);
            }

            return settingsList;
        }
    }
}
创建 AssemblyRef 类
在此任务中,你将创建 AssemblyRef 类。 此类将由 moduleprovider 引用,以实例化模块类。
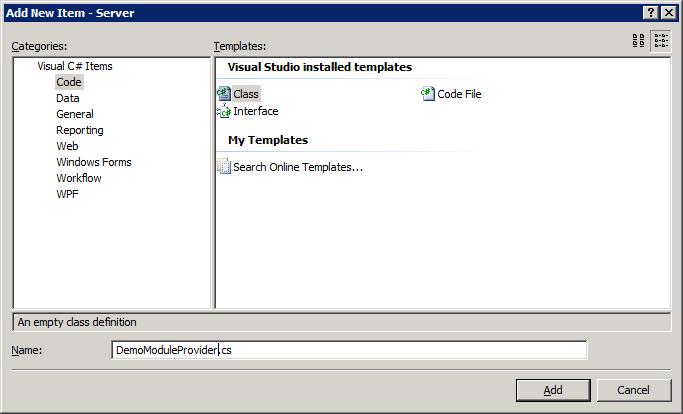
从“项目”菜单中选择“添加新项”选项。 在“添加新项”对话框中,选择“代码”模板并键入 DemoModuleProvider.cs 作为文件的名称。
using System.Reflection;

internal static class AssemblyRef {

    private static string client;

    internal static string Client {
        get {
            if (client == null) {
                AssemblyName assemblyName = typeof(AssemblyRef).Assembly.GetName();
                string assemblyFullName = assemblyName.FullName;
                client = assemblyFullName.Replace(assemblyName.Name, "Client");
            }

            return client;
        }
    }
}
创建模块提供程序
在此任务中,你将创建模块提供程序;这是 Inetmgr 中模块注册的主要入口点。 Administration.config 中已列明这些模块提供程序。
从“项目”菜单中选择“添加新项”选项。 在“添加新项”对话框中,选择“代码”模板并键入 DemoModuleProvider.cs 作为文件的名称。
更改代码,使其如下所示:
using System;
using Microsoft.Web.Management.Server;

namespace Server {
    internal class DemoModuleProvider : ModuleProvider {
        public override ModuleDefinition GetModuleDefinition(IManagementContext context) {
            return new ModuleDefinition(Name, "Client.DemoModule," + AssemblyRef.Client);
        }

        public override Type ServiceType {
            get {
                return typeof(DemoModuleService);
            }
        }

        public override bool SupportsScope(ManagementScope scope) {
            return true;
        }
    }
}
在 Administration.Config 中添加条目
在此部分,我们将在 moduleProviders 列表中添加 administration.config 条目。 程序集的全名可以在 \Windows\Assembly 文件夹中找到。 搜索程序集 Client,右键单击并选择“属性”。
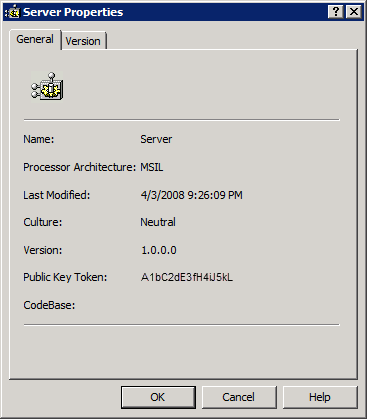
通过该窗口可以确定程序集的全名。 例如,在本例中程序集的全名是 Server, Version=1.0.0.0, Culture=neutral, PublicKeyToken=e788138af6131538。应在 moduleProviders 中将添加到 administration.config 的条目是
<moduleProviders>
<..
<add name="DemoModule" type="Server.DemoModuleProvider,Server, Version=1.0.0.0, Culture=neutral, PublicKeyToken=e788138af6131538"/>

../ moduleProviders>
注意
添加此条目后,该模块仅注册用于服务器连接。
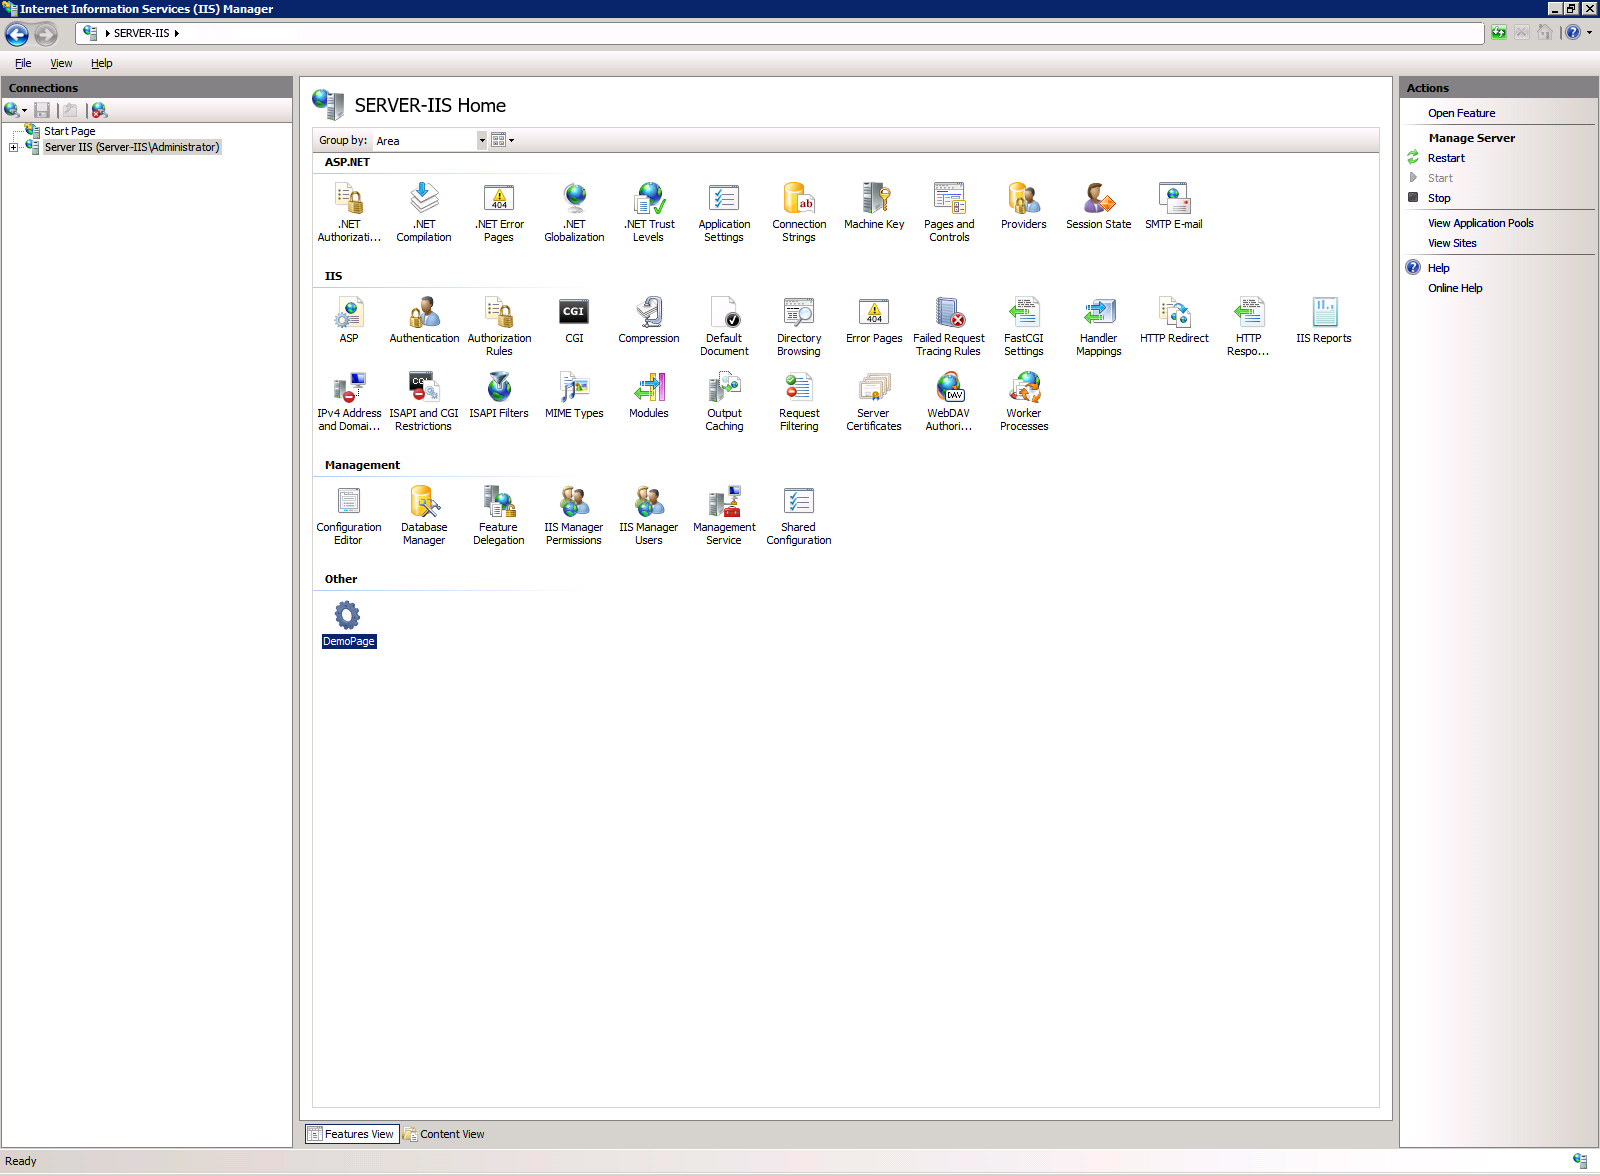
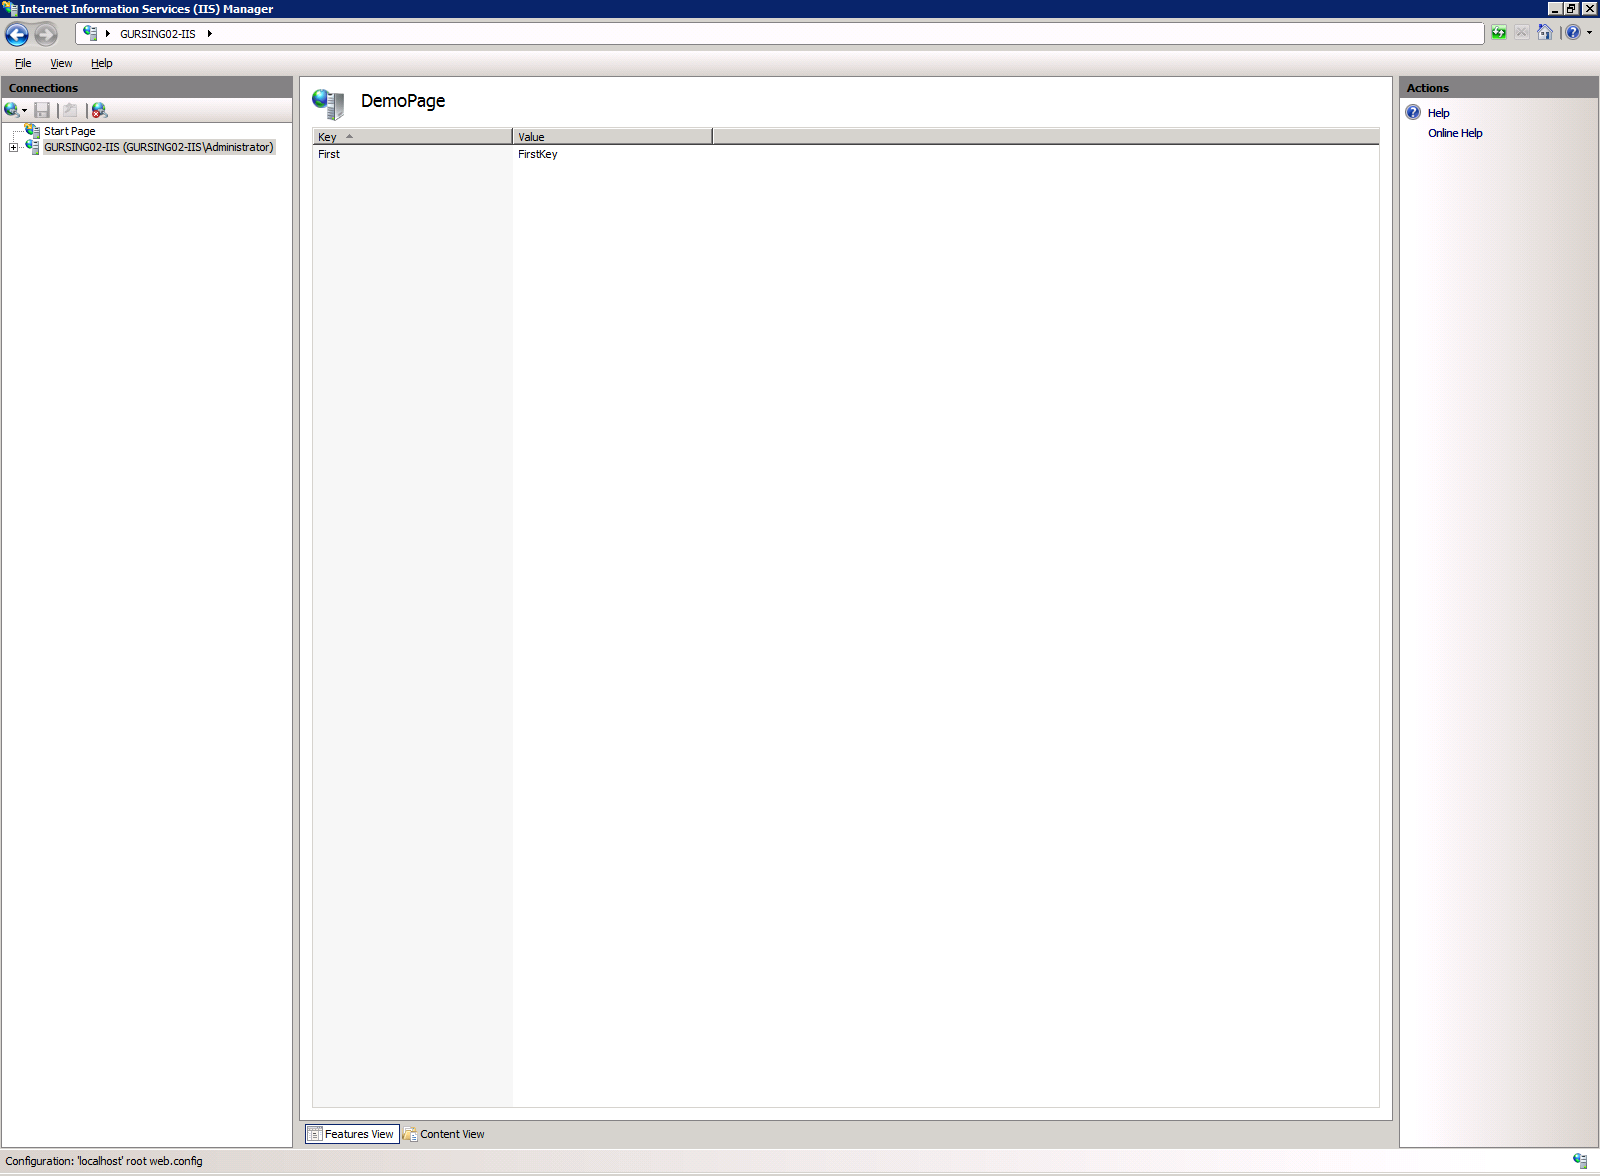
生成解决方案并运行 inetmgr,你将看到以下屏幕截图
总结
你已了解如何使用 inetmgr 的扩展性模型并创建自己的自定义页面。 在今后的文章中,我还将介绍如何添加 taskItems 和写入配置文件。