介绍
在 IIS 6.0 中,管理员有一个安全网,可轻松确定 IIS 配置中发生的更改。 它作为可轻松还原的历史记录文件实现,并作为配置中发生事件的可用历史记录。 如果在应用程序安装、升级或对元数据库进行单独更改期间出现错误,用户可以还原到工作状态。
使用 IIS 7.0 及更高版本时,IIS 团队想要相同的“安全网”,但由于配置体系结构的变化,我们无法再使用 IIS 6.0 历史记录功能。 在 IIS 7.0 及更高版本中,我们通过创建一个服务来解决此问题,该服务会监视主配置文件 ApplicationHost.config 的更改,并定期创建快照,以便在必要时进行检索。
此功能称为 IIS 配置历史记录。 下面的步骤说明演示了此功能如何工作。
任务 1:查看 configHistory 默认配置设置
在此任务中,你将查看默认 IIS 安装后可用的配置选项。 在后续任务中,你将修改其中一些设置,以显示功能如何灵活地适应不同环境。
步骤 1:打开 applicationHost.config
- 单击“开始”,单击“运行”,然后在“打开:”对话框中,键入“记事本”,然后单击“确定”。
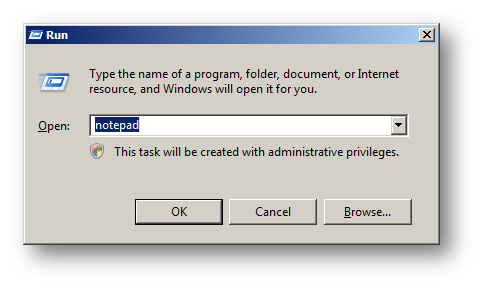
图 1:使用记事本打开配置 - 单击“文件”,然后在“文件名:”对话框中键入
%windir%\system32\inetsrv\config\applicationHost.config。 单击“Open”。
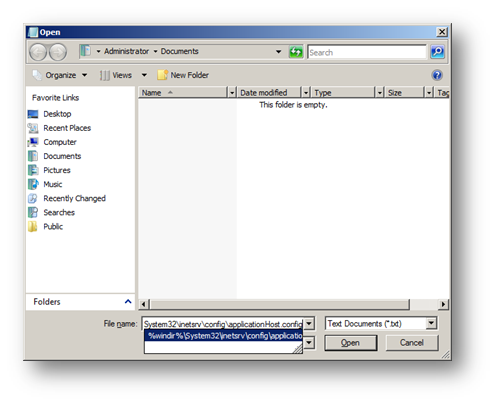
图 2:ApplicationHost.config 路径 - 若要查找 configHistory 节,请单击“CTRL-F”并输入“configHistory”,然后单击“查找下一步”。
打开主文件后,会看到类似如下的 configHistory 条目:
<sectionGroup name"system.applicationHost>
    <section name="applictionPools" allowDefinition="AppHostOnly" overrideMode="Deny" />
    <section name="configHistory" allowDefinition="AppHostOnly" overrideModeDefault="Deny" />
    <section name="customMetadata" allowDefinition="AppHostOnly" overrideModeDefault="Deny" />
    <section name="listenerAdapters" allowDefinition="AppHostOnly" overrideModeDefault="Deny" />
    <section name="log" allowDefinition="AppHostOnly" overrideModeDefault="Deny" />
    <section name="sites" allowDefinition="AppHostOnly" overrideModeDefault="Deny" />
    <section name="webLimits" allowDefinition="AppHostOnly" overrideModeDefault="Deny" />
</sectionGroup>
请注意,applicationHost.config 中没有此功能的进一步设置。这是预期行为,因为默认情况下,IIS 使用存储在 IIS 架构中的值。 若要查看默认设置,请打开 IIS 架构文件 (IIS_schema.xml)。
步骤 2:在 IIS 架构中找到 configHistory 默认值
单击“开始”,单击“运行”,然后在“打开:”对话框中,键入“记事本”,然后单击“确定”。
单击“文件”,然后在“文件名:”对话框中键入
%windir%\system32\inetsrv\config\schema\iis\_schema.xml。
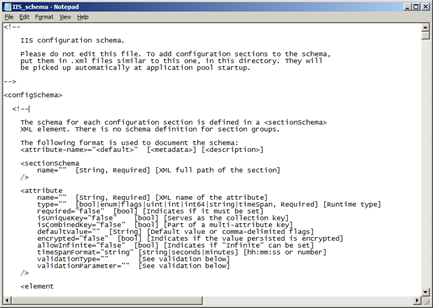
图 3:IIS 架构- 若要查找 configHistory 部分,请单击“CTRL-F”并输入“configHistory”。在 Windows Server® 2008 上,你将看到以下内容:
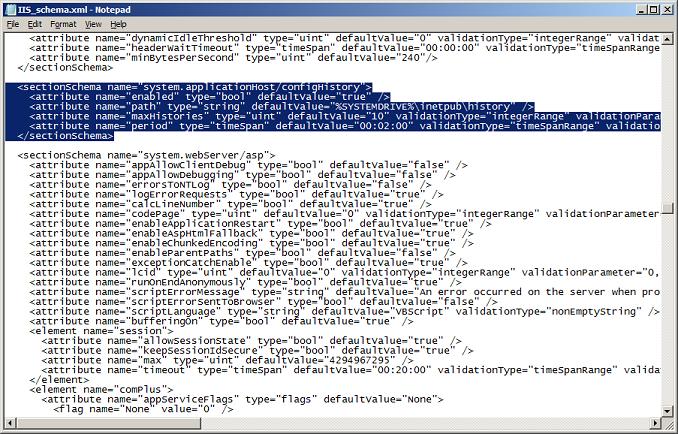
图 4:configHistory 架构定义
configHistory 部分有四个可配置的设置(属性):
属性 默认设置 定义 enabled True 此值指示配置历史记录是启用还是禁用 path %systemdrive%\inetpub\history创建和存储历史记录目录的路径 maxHistories 10 保留的最大目录数 period 00:02:00 每次进行更改检查之间的时间
总结
尽管相对简单,但不要忽视此任务。 它提供了对 configHistory 部分可用配置属性的直接见解。 稍后将修改这些设置,以演示基于环境的功能灵活性。
任务 2:验证 configHistory 功能是否正常工作
此任务的目标是查看 configHistory 的运行情况。 此外,对于了解 IIS 6.0 元数据库历史记录的经验丰富的管理员,此任务有助于其了解这两个功能之间的差异。
元数据库历史记录是基于文件的,而不是像 IIS 7.0 及更高版本的配置历史记录那样基于目录。 例如,IIS 6.0 中的所有备份都存储在同一个不可自定义的位置。 在 IIS 7.0 及更高版本中,每个唯一副本在创建时都存储在自己的目录中。 在本任务中,你将使用 IIS 管理器对 IIS 配置文件进行一些更改,并查看这些更改的结果。
步骤 1:创建网站
单击“开始”、“运行”,然后键入“Inetmgr”,然后单击“确定”。
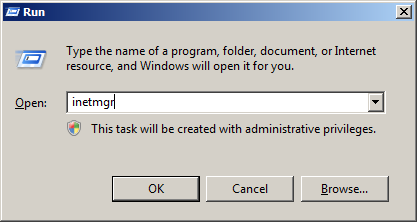
图 5:打开 IIS 管理器- 双击服务器名称(例如 IIs7Server)以展开导航树。右键单击服务器,然后选择“添加网站”。
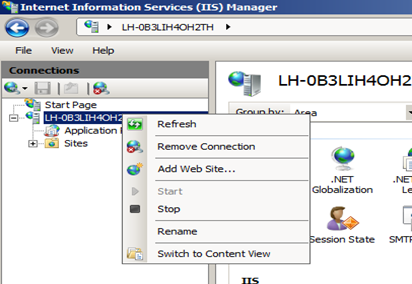
图 6:添加网站在“添加网站”向导中,输入信息以创建新网站。 例如:
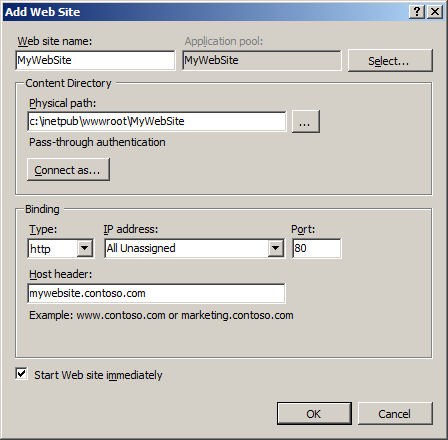
图 7:添加网站向导单击“确定”。
现在,你会看到在 IIS 管理器中创建的新网站,如下所示:

图 8:IIS 管理器主页现在,我们验证应用程序主机帮助程序服务是否已成功捕获了配置更改的备份。
步骤 2:找到 applicationHost.config 的历史记录文件
注意
执行这些步骤后,副本可能不会立即显示。 这是基于两分钟的默认值。 如果发现未创建任何副本,请确保已等待了两分钟。
单击“开始”、“运行”,然后“打开
%systemdrive%\inetpub\history”。
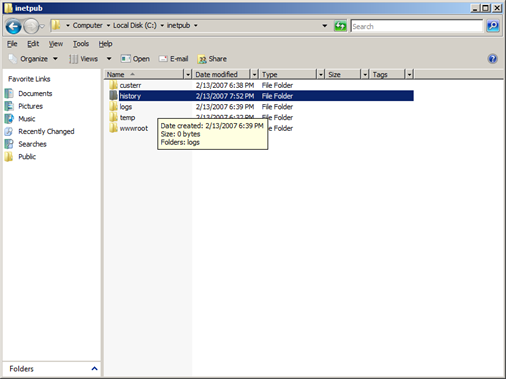
图 9:配置历史记录默认路径双击历史记录文件夹并找到最新的更改。
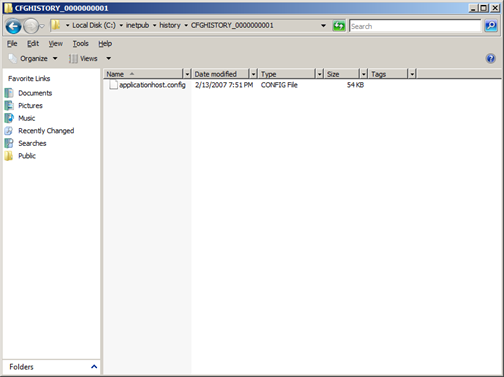
图 10:ApplicationHost.config 的历史记录文件注意
如果在历史记录文件夹中找不到副本,请验证应用程序主机帮助程序服务是否正在运行。 检查事件查看器中是否存在由 IIS-AppHstSvc 引发的任何潜在错误。
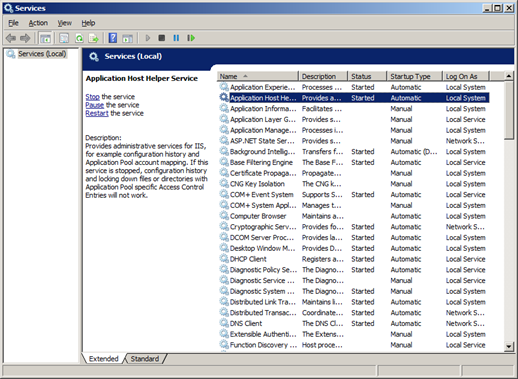
图 11:应用程序主机帮助程序服务
总结
在此任务中,我们采取了几个步骤来深入理解 IIS 配置历史记录功能如何工作。 首先,我们对 ApplicationHost.config 进行了更改,从而触发应用程序主机帮助程序服务,以在下一个计划周期创建副本。 接着,我们找到副本并验证是否已成功在 %systemdrive%\inetpub\history 中创建副本。
任务 3:修改保留的目录数 (maxHistories) 和 Period 属性
此任务的目标是成功修改 IIS 7.0 及更高版本保留的历史记录文件数。 由于默认值存储在架构中,因此必须在 applicationHost.config 中创建 configHistory 部分,并为 maxHistories 和 period 属性添加相应的属性和值。
在此任务中,使用记事本修改此属性,以显示编辑 ApplicationHost.config 的灵活性和简单性。
步骤 1:打开 applicationHost.config
- 单击“开始”,单击“运行”,然后在“打开:”对话框中,键入“记事本”,然后单击“确定”。
- 依次单击“文件”、“打开”,然后在“文件名:”对话框中,键入
%windir%\system32\inetsrv\config\applicationHost.config并单击“打开”。
下一步是添加配置节,然后添加带有值的属性。
步骤 2:添加 configHistory 节并添加 maxHistory
若要查找 configHistory 节,请单击“CTRL-F”并输入 system.applicationHost。
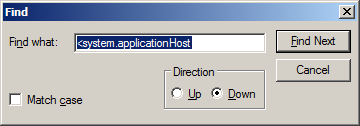
图 12:查找 system.applicationHost 节组现在,你已位于右侧节,请为 maxHistory 添加正确的属性和值。 在 system.applicationHost 节组中键入以下文本:
<configHistory maxHistories="15" />
注意
为了节省下一步的时间,请在完成此任务后让记事本保持打开状态。
最后,验证更改是否已生效。 我们知道,根据 IIS 架构定义的默认设置,我们一次只能看到 10 个目录。
在增加 IIS 保留的最大值后,需要一种简单的方法来触发创建多个目录。 为了模拟这种情况,我们将 period 属性的默认值降低到其默认最小值 10 秒。 这会增加检查更改的间隔,因此可能会在动态环境中创建更多文件副本。
步骤 3:为 configHistory 设置 Period 属性
- 使用上一个会话,通过添加 period="00:00:10" 来添加 period 属性。
- 单击“文件”、“保存”以提交更改。
完成后,configHistory 节如下所示:
<configHistory maxHistories="15" period="00:00:10" />
步骤 4:执行脚本以进行历史记录创建
打开记事本。 复制并粘贴以下内容:
Option Explicit

' Global objects, variables
Dim objShell, argObj, oExec
Dim strDirectory, strFile, strCmd, strFullCmd, stdIn, i

set objShell = CreateObject("Wscript.Shell")
strDirectory = "%windir%\system32\inetsrv\"
strFile = "AppCmd.exe"

set ArgObj = Wscript.Arguments

' No args (default case), hard-code StdIn
If ArgObj.Count = 0 Then
stdIn = 17

i = 0 'initilize i

For i = 0 to stdIn
' Call Select Case to change Statement
strCmd = getStrCmd(i)
strFullCmd = strDirectory & strFile & " " & strCmd

Set oExec = objShell.Exec(strFullCmd)

Do While oExec.Status = 0
WScript.Sleep 100
Loop

If oExec.ExitCode <> 0 Then
' Something wrong with the IIS Installation

' Is AppCmd installed on the machine? \inetsrv directory?
msgBox "Executing AppCmd Command Failed. Please Try Again!"

wscript.Quit
End if

WScript.Sleep(2 * 1000)

Next

' Handle the case where we passed arguments to
' the script

Else
stdIn = ArgObj(0)

' Same code as above but handle arguments being passed.

i = 0 ' initialize i

For i = 0 to stdIn
' Call Select Case to change Statement
strCmd = getStrCmd(i)
strFullCmd = strDirectory & strFile & " " & strCmd

Set oExec = objShell.Exec(strFullCmd)

Do While oExec.Status = 0
WScript.Sleep 100
Loop

' Validate that AppCmd calls succeeded by checking Error code
If oExec.ExitCode <> 0 Then
' Something wrong with the IIS Installation
' Is AppCmd installed on the machine? \inetsrv directory?
msgBox "Executing AppCmd Command Failed. Please Try Again!"
wscript.Quit
End if

' Go to sleep for x period (default: 20)
WScript.Sleep(20 * 1000)

Next

' End the StdIn Input Tree

End if

' AppCMD Command Function
Function getStrCmd(MyIndex)
Select Case (MyIndex)
Case 0 ' set Server Runtime
getStrCmd = "set config /section:serverRuntime /enabled:false"
Case 1 ' set Default Document
getStrCmd = "set config /section:defaultDocument /enabled:true"
Case 2 'set httpRedirect
getStrCmd = "set config /section:httpRedirect /enabled:true"
Case 3 ' set Client Certificate Mapping Auth
getStrCmd = "set config /section:security/authentication/clientCertificateMappingAuthentication /enabled:true"
Case 4 ' set Directory Browse
getStrCmd = "set config /section:directoryBrowse /enabled:true"
Case 5 ' set httpRedirect
getStrCmd = "set config /section:httpRedirect /enabled:false"
Case 6 ' set anonymousAuth
getStrCmd = "set config /section:security/authentication/anonymousAuthentication /enabled:false"
Case 7 ' set basicAuth
getStrCmd = "set config /section:security/authentication/basicAuthentication /enabled:true"
Case 8 ' set digestAuth
getStrCmd = "set config /section:security/authentication/digestAuthentication /enabled:true"
Case 9 ' set client cert mapping auth
getStrCmd = "set config /section:security/authentication/clientCertificateMappingAuthentication /enabled:false"
Case 10 ' set windows auth
getStrCmd = "set config /section:security/authentication/windowsAuthentication /enabled:true"
Case 11 ' server runtime
getStrCmd = "set config /section:serverRuntime /enabled:true"
Case 12 ' set Server Runtime
getStrCmd = "set config /section:serverRuntime /enabled:false"
Case 13 ' set Server Runtime
getStrCmd = "set config /section:serverRuntime /enabled:true"
Case 14 ' set Server Runtime
getStrCmd = "set config /section:serverRuntime /enabled:true"
Case 15 ' set Server Runtime
getStrCmd = "set config /section:serverRuntime /enabled:true"
Case 16 ' set Server Runtime
getStrCmd = "set config /section:serverRuntime /enabled:true"
Case 17 ' set Server Runtime
getStrCmd = "set config /section:serverRuntime /enabled:true"

End select
End Function
将此保存为 ConfigHst.vbs(确保选择“所有文件”以避免另存为文本文件)。
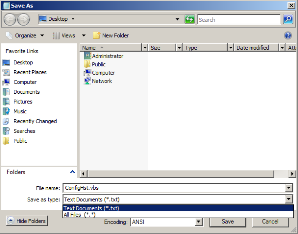
图 13:保存 VBS 脚本通过打开命令提示符、查找保存的文件位置并键入以下内容来运行此 VBS 文件:
cscript //nologo configHst.vbs此脚本每 15 秒调用一次以修改 IIS 的配置。 这段时间足以让配置历史记录检查更改并创建备份。 完成此操作后,我们将在备份目录中看到大量配置备份。
接下来,通过单击“开始”,然后单击“运行”并键入
%systemdrive%\inetpub\history来打开 configHistory 的默认路径可以看到备份文件夹,例如 CFGHISTORY_0000001、CFGHISTORY_0000002 等。
运行此脚本后,请注意当达到最大值(即 maxHistories)时此功能如何将最早的记录推出来。在本例中,达到 CFGHISTORY_0000000015 后,在创建第 16 个目录之前会删除最早的项。
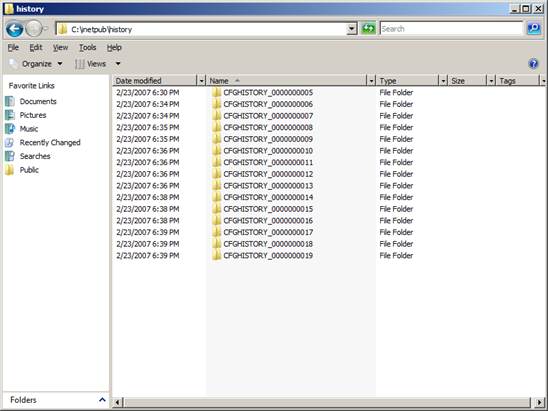
图 14:最大值为 15 的历史记录目录
总结
在此任务中,我们已成功修改了 IIS 存储的备份数。 对于许多环境来说,默认的 10 个备份设置就足够了;然而对于动态环境(如共享托管服务器),客户可以随机且频繁地注册站点,则保留更详细的历史记录是好的做法。
在此任务中,我们修改了 configHistory 节的 maxHistories 和 period 属性,然后生成了多个更改,这些更改显示我们存储了超过 10 个(默认)副本。
任务 4:更改用于保存 configHistory 备份的默认路径
IIS 存储的历史记录目录和关联文件的数量可根据环境的变化灵活配置。 在许多情况下,将历史记录文件存储在系统路径上(即 %systemdrive%inetpub\history)是不可取的。 与没有可配置的配置历史记录机制的 IIS 6.0 历史记录不同,IIS 7.0 及更高版本的配置历史记录现在具有更改 IIS 历史记录目录和文件存储位置的功能。
在此任务中,我们使用一种方法来修改配置——在本例中为 IIS 命令行接口。 此任务的目标不仅是要了解如何更改配置历史记录目录的路径,而且还要熟悉用于配置和运行时数据的 IIS 命令行接口 AppCmd.exe。
步骤 1:为历史记录创建目录
单击“开始”,选择“运行”,然后键入“CMD”,然后单击“确定”。
在命令提示符处,键入以下内容以创建目录:
md MyWebHistory
此步骤是必需的,因为如果目录不存在,不会自动创建该目录。 如果执行此步骤失败,将看到以下内容:
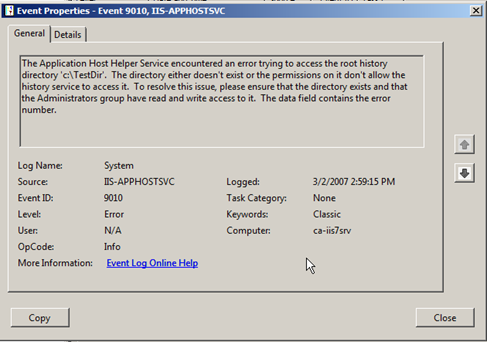
图 15:对历史记录路径权限不足的事件消息
步骤 2:找到 AppCmd.exe
单击“开始”,选择“运行”,然后键入“CMD”,然后单击“确定”。
在命令提示符处,键入以下内容以更改目录:
Cd %windir%\system32\inetsrv为了熟悉 AppCmd 的语法,请键入以下内容:
Appcmd /?
此时,请将路径属性的值更改为更合适环境的值。 在本例中,请将其更改为系统分区上的自定义目录——%systemdrive%\MyWebHistory 目录。
注意
通常,必须将此数据移到单独的分区,或者最好移到其他控制器上的驱动器,例如 D:。使用 AppCmd: - 更改路径值
步骤 3:更改 configHistory 的路径值
为了进一步熟悉 AppCmd.exe,请打开命令提示符并键入以下内容:
Appcmd set config –section:?此命令可帮助了解如何查看当前允许编辑的可用节。
Appcmd list config –section:configHistory –config:*此命令可帮助了解当前在我们的系统上设置的属性和值。
现在发出以下命令,将路径属性从
%systemdrive%inetpub\history的默认值更改为%systemdrive%MyWebHistory–Appcmd set config -section:configHistory –path:"%systemdrive%MyWebHistory"若要验证更改,请键入以下内容并验证是否已正确设置了 maxHistories 和 period。
<configHistory maxHistories="15" period="00:00:10" path="%systemdrive%\MyWebHistory" />
会看到如下内容:
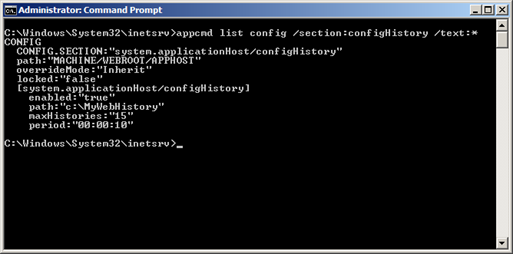
图 16:使用 AppCmd 列出配置
最后,我们将生成对配置的更改,从而触发备份——请注意目录和文件的新位置。
步骤 4:重新运行先前的脚本
- 通过键入以下内容执行 ConfigHst.vbs:
cscript //nologo configHst.vbs
如果查看 %systemdrive%\MyWebHistory,则会看到包含文件夹名称类似于 CFGHISTORY_0000001、2 等的多个目录。
总结
标准做法是将重要、易失的数据从服务器系统分区(默认为 %systemdrive%)移到其他分区或驱动器。 在此任务中,已成功更改了 IIS 配置历史记录目录的目标位置。
任务 5:从备份文件还原配置
如果没有提供用于还原以前工作配置的方法,则历史记录功能就失去了作用。 此任务的目的是指导你完成从之前创建的配置副本进行还原的手动过程。
步骤 1:列出可用的备份
- 单击“开始”、“运行”,然后键入“CMD”,然后单击“确定”。
- 使用以下命令更改为 inetsrv 目录:
cd %windir%\system32\inetsrv。 - 若要获取 configHistory 节当前配置的路径,请键入以下内容:
appcmd list backups
此命令将列出可用的备份,包括使用 appcmd add backup 命令进行的手动备份,以及配置历史记录服务进行的备份。 可以使用 appcmd restore backup 命令还原其中任意一个备份,如下一步所示
步骤 2:还原备份
按照上述步骤中的说明列出备份后,选择要还原的备份并键入以下内容进行还原:
appcmd restore backup BACKUPNAME
其中 BACKUPNAME 是步骤 1 中列出的备份之一,例如 CFGHISTORY_0000000016。
还可以手动搜索备份文件夹中的配置文件,以确定要还原哪个备份:
单击“开始”、“运行”,然后键入“CMD”,然后单击“确定”。
- 使用上述步骤 1 中的信息更改到历史记录目录。
- 使用 Windows findstr 命令查找正在寻找的更改。 在本例中,找到将 directoryBrowse 设置为 false 的配置。
Findstr /S /I /C:"directoryBrowse enabled=\"false\"" *.config
此命令会在当前目录和所有子目录中搜索字符串 directoryBrowse 等于 false。 这只会返回一个项,例如 CFGHISTORY_0000000016,它指示我们要还原的内容。
总结
在此任务中,我们找到了一个历史记录副本并进行了还原。 此任务是配置历史记录功能最重要的说明,因为它提供了轻松回滚到以前工作配置的功能。