[本主题是预发行文档,有可能会有所更改。]
本教程演示如何为依赖于另一个组件中包含的库的模型驱动应用生成代码组件。 了解有关依赖库预览的详细信息
目标
按照本教程中的步骤创建库控件和依赖于它的控件。 本教程包含以下步骤:
- 生成库组件:创建仅包含可重用库的组件。 为简单起见,此控件仅包含可重用库。 它完全可以提供相应功能。
- 生成依赖控件:创建使用库控件中定义的库的组件,并将其添加到模型驱动应用的形式,以验证它是否正常工作。
- 按需加载依赖库:展开示例,使依赖组件按需加载库资源,而不是让框架在控件加载时加载库。
先决条件
你应该已经知道如何:
1.生成库组件
此组件本身不提供任何功能。 它仅仅是该库的一个容器。
第一步是使用 pac pcf init 命令创建新组件:
pac pcf init -n StubLibrary -ns SampleNamespace -t field -npm
定义库
需要一个新的声明文件(d.ts)来描述库中包含的对象和函数。 在项目的根目录中创建一个名为
myLib.d.ts的新文件:declare module 'myLib' { export function sayHello(): string; }我们将将库公开为 UMD 模块,我们需要将变量置于全局范围内。 为此,我们需要一个新的声明文件(d.ts)。 在项目根文件夹中创建一个名为
global.d.ts的新文件:/* eslint-disable no-var */ declare global { var myLib: typeof import('myLib'); } export { };更新 tsconfig.json 以允许 UMD 模块和 javascript 代码,如下所示:
添加库
在新的控件文件夹中,添加新文件夹以包含此示例的库 libs 创建新的 JavaScript 文件。 此示例使用一个名为 myLib-v_0_0_1.js 具有单个 sayHello 函数的库。
// UMD module pattern
var myLib = (function (exports) {
"use strict";

function sayHello() {
   return "Hello from myLib";
}

exports.sayHello = sayHello;

return exports;
})(/** @type {import('myLib')}  */ ({}));
添加配置数据
在项目的根文件夹中添加一个名为
featureconfig.json的文件。将以下文本添加到
featureconfig.json该文件:{ "pcfAllowCustomWebpack": "on", "pcfAllowLibraryResources": "on" }在
webpack.config.js项目的根文件夹中添加新文件。 此配置数据可确保库不会与控制输出捆绑在一起。 无需捆绑,因为它们在构建项目时就已经分别打包好了。/* eslint-disable */ "use strict"; module.exports = { externals: { "myLib": "myLib" }, }在控件清单中的
resources下添加对该库的引用。
将库添加到窗口
最后一步是编辑 index.ts 控件以将库绑定到 窗口。
import { IInputs, IOutputs } from "./generated/ManifestTypes";

export class StubLibrary
implements ComponentFramework.StandardControl<IInputs, IOutputs>
{
 constructor() {
   // Empty
 }

 public init(
    context: ComponentFramework.Context<IInputs>,
    notifyOutputChanged: () => void,
    state: ComponentFramework.Dictionary,
    container: HTMLDivElement
 ): void {
   // Add control initialization code
 }

 public updateView(context: ComponentFramework.Context<IInputs>): void {
   // Add code to update control view
 }

 public getOutputs(): IOutputs {
    return {};
 }

  public destroy(): void {
    // Add code to cleanup control if necessary
  }
}
库项目应如下所示:
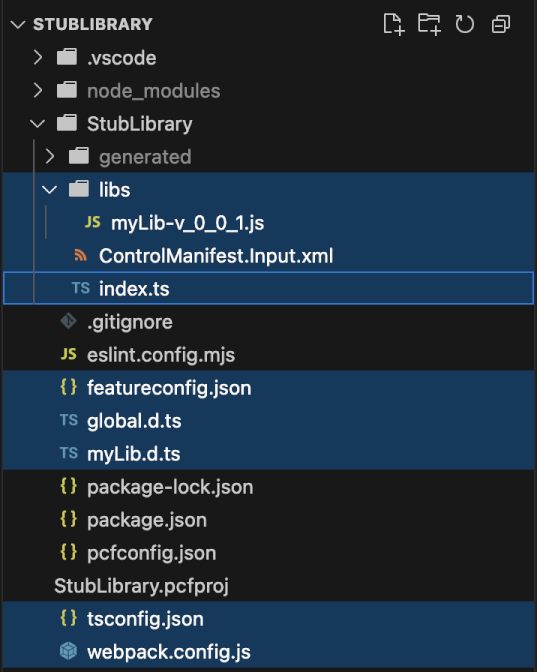
生成并打包库组件
若要完成库组件,请像往常一样完成以下步骤:
2.生成依赖控件
拥有库控件后,需要一个控件来依赖它。
使用以下命令创建新组件:
pac pcf init -n DependencyControl -ns SampleNamespace -t field -fw react -npm在项目的
featureconfig.json根文件夹中添加包含以下文本的新功能控制文件:{ "pcfResourceDependency": "on" }在控件清单中添加依赖资源。
使用依赖控件
[solution prefix]_[namespace].[control name]的schemaName,您可以在依赖组件的solution.xml文件中找到它。 solution.xml 文件中的 XML 可能如下所示:<RootComponents> <RootComponent type="66" schemaName="samples_SampleNamespace.StubLibrary" behavior="0" /> </RootComponents>
<resources>
      <code path="index.ts"
         order="1" />
      <platform-library name="React"
         version="16.14.0" />
      <platform-library name="Fluent"
         version="9.46.2" />
</resources>
添加Global.d.ts
由于 StubLibrary 作为 UMD 模块公开,因此我们需要将变量置于全局范围内。 为此,我们需要一个新的声明文件(d.ts)。 在项目的根文件夹中创建一个名为 global.d.ts 的新文件:
/* eslint-disable no-var */
interface MyLib {
sayHello(): string;
}
declare global {
var myLib: MyLib;
}
export { };
使用库函数
更新组件 HelloWorld.tsx 文件,使其使用从依赖库的函数。 库在运行时加载到 Window 对象中。
import * as React from 'react';
import { Label } from '@fluentui/react-components';
export interface IHelloWorldProps {
name?: string;
}
export class HelloWorld extends React.Component<IHelloWorldProps> {
public render(): React.ReactNode {
return (
<Label>
{this.props.name}
</Label>
)
}
}
生成并打包依赖组件
若要完成依赖组件,请像往常一样完成以下步骤:
将组件添加到表单
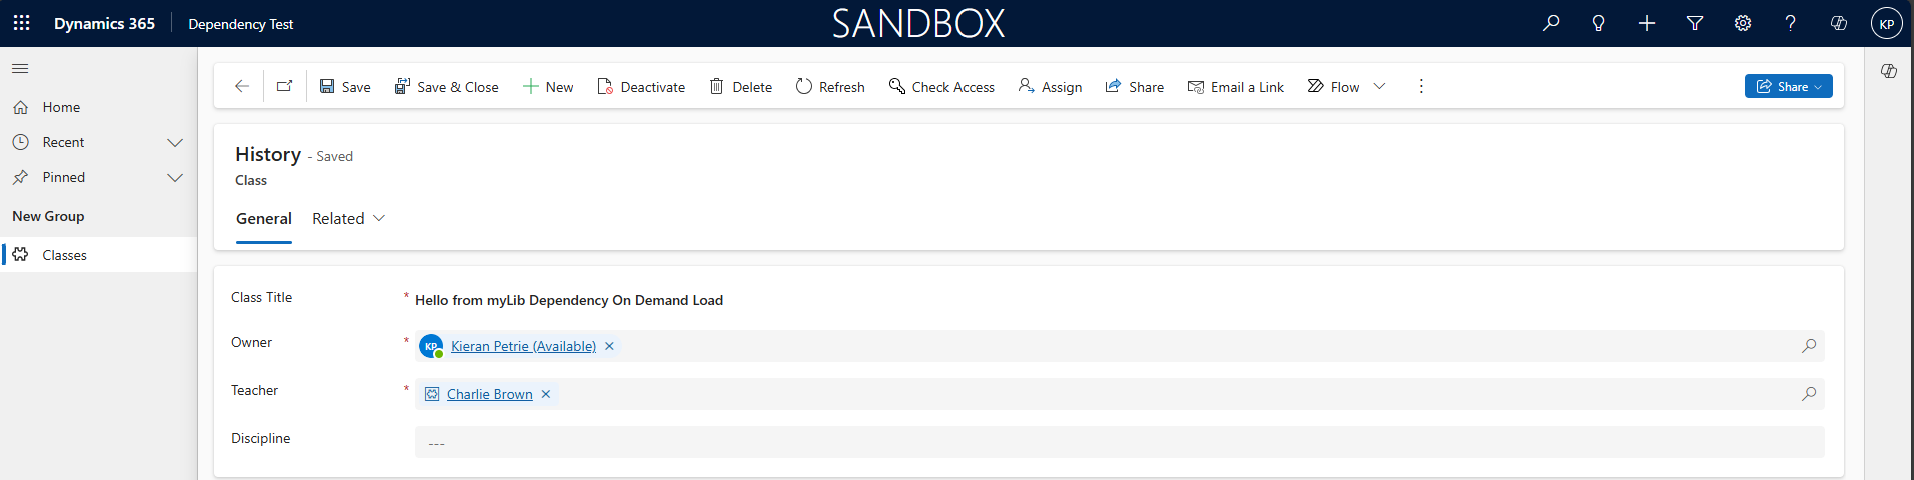
转到该表单后,你应该会看到该组件显示文本
Hello from myLib from Dependency。
3. 按需加载依赖库
可以通过更改依赖组件按需加载库资源,而不是在组件加载时让框架加载库来扩展此示例。 如果控件使用的库很大,并且会增加窗体的加载时间,则按需加载行为非常有用。
指定按需加载行为
若要指定按需加载行为,请修改在 2 中创建的组件的控件清单 。生成依赖控件。
<resources>
      <dependency type="control"
         name="samples_SampleNamespace.StubLibrary"
         order="1" />
      <code path="index.ts"
         order="2" />
      <platform-library name="React"
         version="16.14.0" />
      <platform-library name="Fluent"
         version="9.46.2" />
</resources>
修改依赖组件以按需加载库
修改 HelloWorld.tsx,添加一个状态和用于在依赖项加载后更新该状态的方法。
import * as React from 'react';
import { Label } from '@fluentui/react-components';

export interface IHelloWorldProps {
  name?: string;
}

export class HelloWorld extends React.Component<IHelloWorldProps> {
  public render(): React.ReactNode {
    return (
      <Label>
        { window.myLib.sayHello() + " from Dependency" || "Hello World"}
      </Label>
    )
  }
}
更新 index.ts
按需加载脚本时,需要对组件的创建和初始化方式稍作调整。 例如,用于引用上下文和容器以更新状态的新变量。
最重要的是添加一个 getActions 方法以响应 On Load 并请求加载依赖控件。
import { IInputs, IOutputs } from "./generated/ManifestTypes";
import { HelloWorld, IHelloWorldProps } from "./HelloWorld";
import * as React from "react";

export class DependencyControl implements ComponentFramework.ReactControl<IInputs, IOutputs> {
    private notifyOutputChanged: () => void;

    constructor() {
        // Empty
    }

    public init(
        context: ComponentFramework.Context<IInputs>,
        notifyOutputChanged: () => void,
        state: ComponentFramework.Dictionary
    ): void {
        this.notifyOutputChanged = notifyOutputChanged;
    }

    public updateView(context: ComponentFramework.Context<IInputs>): React.ReactElement {
        const props: IHelloWorldProps = { name: 'Power Apps' };
        return React.createElement(
            HelloWorld, props
        );
    }

    public getOutputs(): IOutputs {
        return { };
    }

    public destroy(): void {
        // Add code to cleanup control if necessary
    }
}
最终步骤
- 更新
ControlManifest.Input.xml中控件的版本号以及Solution.xml中的版本 - 使用更新的控件重新生成、打包、部署和发布解决方案。
验证结果
现在,当页面加载时,你会看到该控件已加载,并显示为 Loading...。
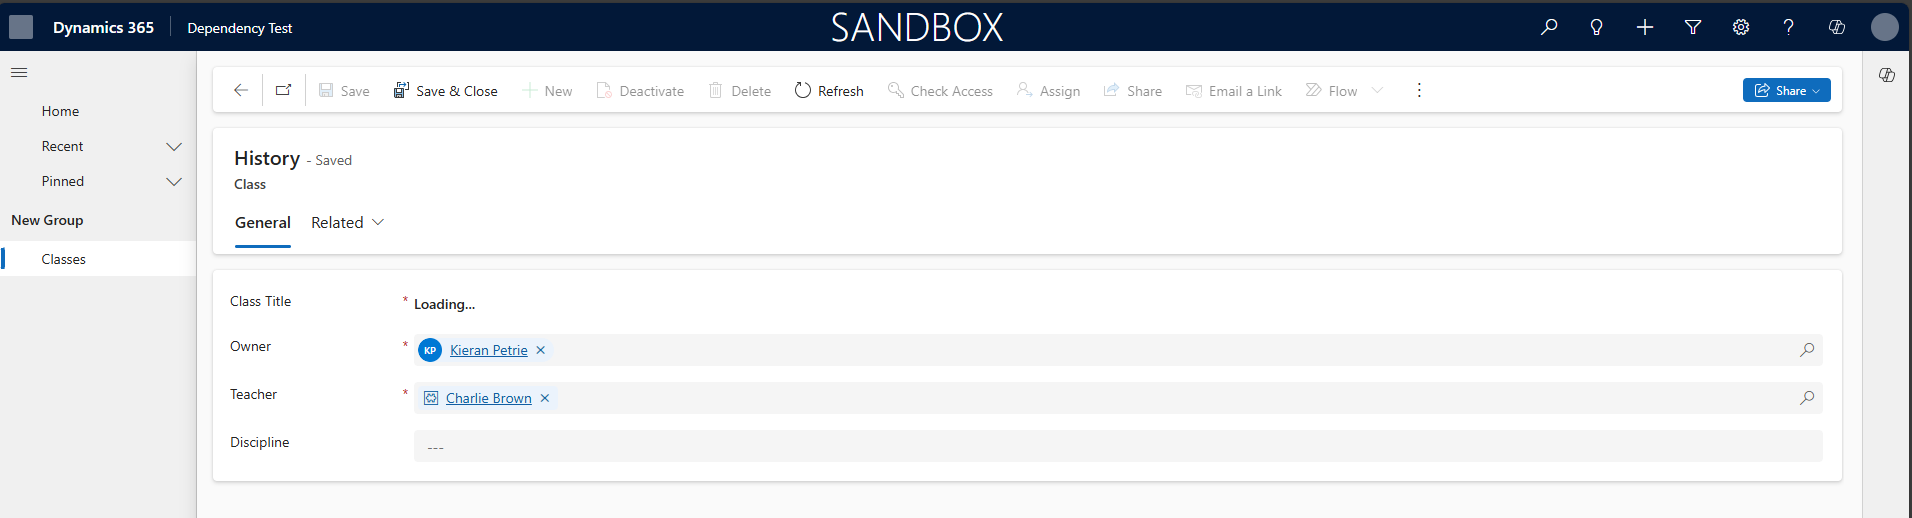
加载页面后,控件将更新以显示 Hello from myLib Dependency On Demand Load。