在本快速入门中,你将创建一个控制台应用程序,该应用程序连接到 Microsoft Dataverse 环境并调用一个简单的函数。 了解此处介绍的基本功能后,可以浏览其他 Web API 操作,例如创建、检索、更新和删除 Dataverse 表行。
该程序通过身份验证并使用 HttpClient 向 WhoAmI 函数发送 GET 请求。 此函数检索有关已登录 Dataverse 用户的信息。 响应是 WhoAmIResponse ComplexType。 程序显示 UserId 从响应获取的属性值。
可以在 C#-NETx/QuickStart 下的 dataverse/webapi/PowerApps-Samples 存储库中找到此 .NET 10 项目的完整 Visual Studio 解决方案。
先决条件
- Visual Studio 2026 或更高版本
- Internet 连接
- Dataverse 环境的有效用户帐户
- 要连接到的 Dataverse 环境的 URL
- 基本了解 C# 语言
注释
若要进行身份验证,必须在 Microsoft Entra ID 中注册应用。 本快速入门示例提供了一个应用注册 clientid 值,可用于运行Microsoft发布的示例代码。 但是,对于自己的自定义应用程序,必须将应用注册到 AD。 详细信息:演练指南:使用 Microsoft Entra ID 注册应用
创建 Visual Studio 项目
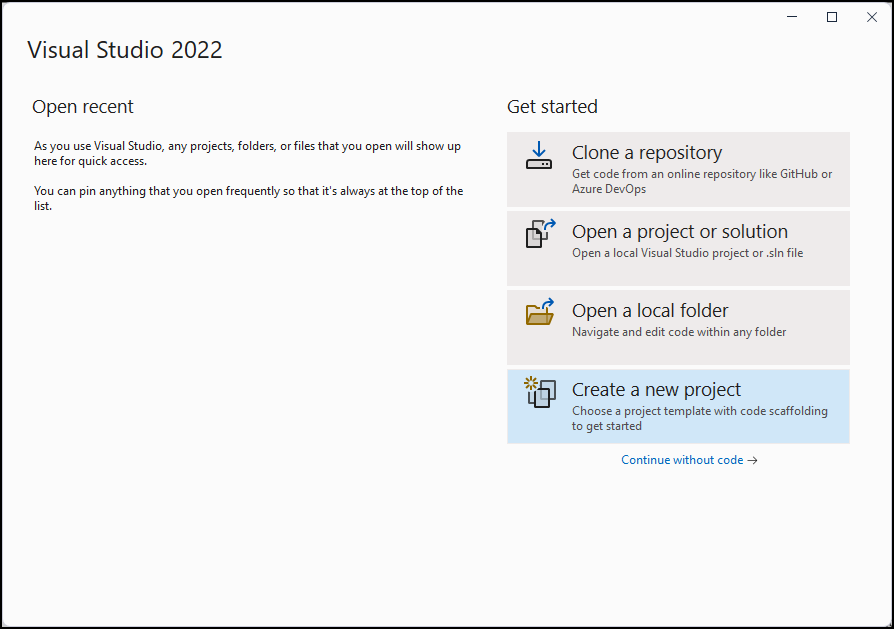
启动 Visual Studio 2026 并选择“ 创建新项目”。
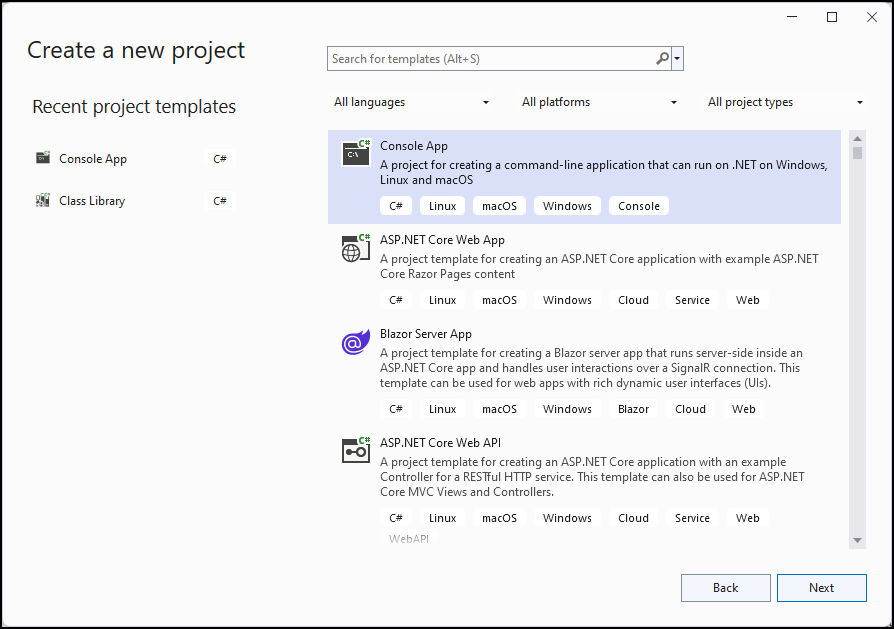
创建新的 控制台应用 项目。
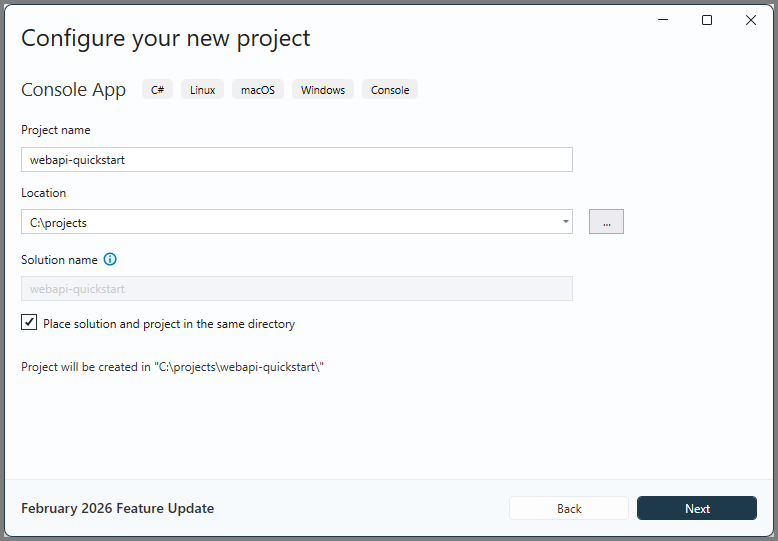
通过设置位置和项目名称来配置项目。
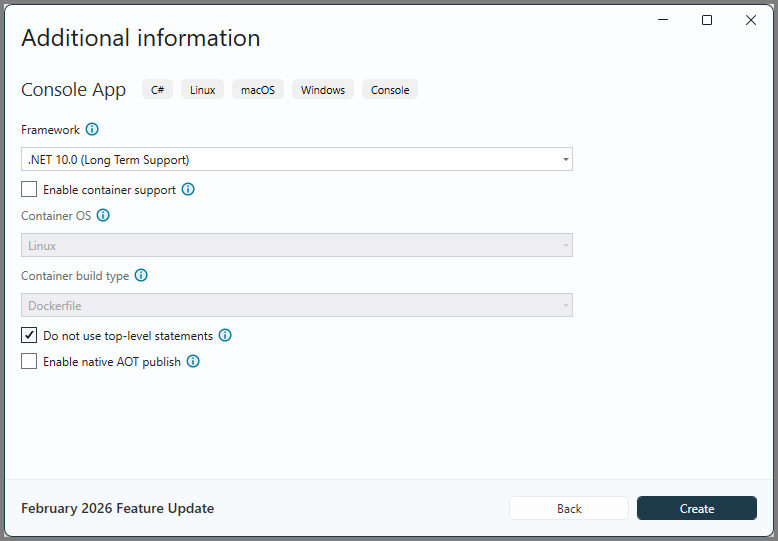
通过选择 .NET 10.0(长期支持) 并 不使用顶级语句来配置项目。 然后选择创建。
在 解决方案资源管理器中,右键单击创建的项目,然后在上下文菜单中选择“ 管理 NuGet 包...” 。 NuGet 允许将所需的程序集引入项目中。
浏览名为 Microsoft 身份验证库(MSAL)的 NuGet 包
Microsoft.Identity.Client,选择它,然后选择“安装”。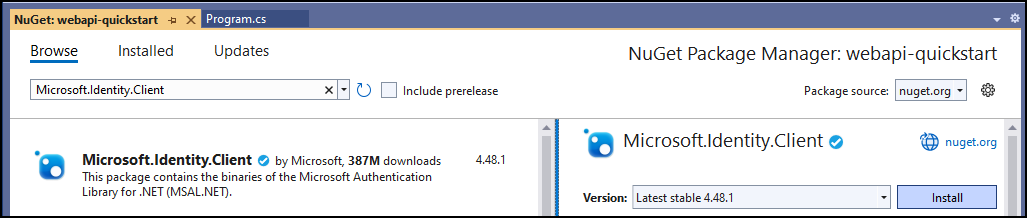
注释
在安装之前,系统会提示你接受许可条款。 在“许可证接受”对话框中,选择“我接受” 。

编辑 Program.cs
请按照以下后续步骤为主程序添加代码。
将
Program.cs的所有内容替换为以下代码。using Microsoft.Identity.Client; // Microsoft Authentication Library (MSAL) using System; using System.Net.Http; using System.Net.Http.Headers; using System.Text.Json; using System.Threading.Tasks; namespace PowerApps.Samples { /// <summary> /// Demonstrates Azure authentication and execution of a Dataverse Web API function. /// </summary> class Program { static async Task Main() { // TODO Specify the Dataverse environment name to connect with. // See https://learn.microsoft.com/power-apps/developer/data-platform/webapi/compose-http-requests-handle-errors#web-api-url-and-versions string resource = "https://<env-name>.api.<region>.dynamics.com"; // Microsoft Entra ID app registration shared by all Power App samples. var clientId = "51f81489-12ee-4a9e-aaae-a2591f45987d"; var redirectUri = "http://localhost"; // Loopback for the interactive login. // For your custom apps, you will need to register them with Microsoft Entra ID yourself. // See https://docs.microsoft.com/powerapps/developer/data-platform/walkthrough-register-app-azure-active-directory #region Authentication var authBuilder = PublicClientApplicationBuilder.Create(clientId) .WithAuthority(AadAuthorityAudience.AzureAdMultipleOrgs) .WithRedirectUri(redirectUri) .Build(); var scope = resource + "/user_impersonation"; string[] scopes = { scope }; AuthenticationResult token = await authBuilder.AcquireTokenInteractive(scopes).ExecuteAsync(); #endregion Authentication #region Client configuration var client = new HttpClient { // See https://docs.microsoft.com/powerapps/developer/data-platform/webapi/compose-http-requests-handle-errors#web-api-url-and-versions BaseAddress = new Uri(resource + "/api/data/v9.2/"), Timeout = new TimeSpan(0, 2, 0) // Standard two minute timeout on web service calls. }; // Default headers for each Web API call. // See https://docs.microsoft.com/powerapps/developer/data-platform/webapi/compose-http-requests-handle-errors#http-headers HttpRequestHeaders headers = client.DefaultRequestHeaders; headers.Authorization = new AuthenticationHeaderValue("Bearer", token.AccessToken); headers.Add("OData-MaxVersion", "4.0"); headers.Add("OData-Version", "4.0"); headers.Accept.Add( new MediaTypeWithQualityHeaderValue("application/json")); #endregion Client configuration #region Web API call // Invoke the Web API 'WhoAmI' unbound function. // See https://docs.microsoft.com/powerapps/developer/data-platform/webapi/compose-http-requests-handle-errors // See https://docs.microsoft.com/powerapps/developer/data-platform/webapi/use-web-api-functions#unbound-functions var response = await client.GetAsync("WhoAmI"); if (response.IsSuccessStatusCode) { // Parse the JSON formatted service response (WhoAmIResponse) to obtain the user ID value. // See https://learn.microsoft.com/power-apps/developer/data-platform/webapi/reference/whoamiresponse Guid userId = new(); string jsonContent = await response.Content.ReadAsStringAsync(); // Using System.Text.Json using (JsonDocument doc = JsonDocument.Parse(jsonContent)) { JsonElement root = doc.RootElement; JsonElement userIdElement = root.GetProperty("UserId"); userId = userIdElement.GetGuid(); } // Alternate code, but requires that the WhoAmIResponse class be defined (see below). // WhoAmIResponse whoAmIresponse = JsonSerializer.Deserialize<WhoAmIResponse>(jsonContent); // userId = whoAmIresponse.UserId; Console.WriteLine($"Your user ID is {userId}"); } else { Console.WriteLine("Web API call failed"); Console.WriteLine("Reason: " + response.ReasonPhrase); } #endregion Web API call } } /// <summary> /// WhoAmIResponse class definition /// </summary> /// <remarks>To be used for JSON deserialization.</remarks> /// <see cref="https://learn.microsoft.com/power-apps/developer/data-platform/webapi/reference/whoamiresponse"/> public class WhoAmIResponse { public Guid BusinessUnitId { get; set; } public Guid UserId { get; set; } public Guid OrganizationId { get; set; } } }在前面的代码中的 TODO 注释下方,将
resource变量值替换为 Dataverse 测试环境的实际 URL。 若要查找测试环境的 URL 值,请执行以下步骤:- 转到 Power Apps。
- 选择环境图标(搜索字段右侧),然后选择测试环境。
- 选择设置图标
 然后选择 “开发人员资源”。
 - 从
https:到.com复制 Web API 端点 URL,并省略末尾的/api/data/v9.2。 - 将程序代码中的资源字符串值替换为该终结点 URL 值。 例如:
string resource = "https://contoso.api.crm.dynamics.com";
运行程序
按 F5 生成并运行程序。
此时会打开浏览器窗口并提示你选取帐户。 选择用于访问 Dataverse 环境的帐户。 如果该帐户未显示在列表中,请选择“ 使用其他帐户”。
选择帐户后,输入密码,然后选择 “登录”。
查看控制台应用程序窗口。 输出应如下所示:
Your user ID is 22cc22cc-dd33-ee44-ff55-66aa66aa66aa

C:\projects\webapi-quickstart\bin\Debug\net10.0\webapi-quickstart.exe (process 21524) exited with code 0.
To automatically close the console when debugging stops, enable Tools->Options->Debugging->Automatically close the console when debugging stops.
Press any key to close this window . . .
恭喜!
已连接到 Web API。
本快速入门示例演示了一种简单的方法来创建 Visual Studio 项目,而无需进行任何异常处理或刷新访问令牌的方法。 此方法足以验证是否可以连接并尝试不同的操作。
.NET 示例代码
有关演示建议的设计模式的更完整示例,请参阅 WebAPIService 类库 (C#)。 它演示了:
- 使用 .NET 复原能力和暂时性故障处理库 Polly 管理 Dataverse 服务保护 API 限制。
- 使用 IHttpClientFactory 在 .NET 中管理 HttpClient。
- 使用配置数据管理客户端的行为。
- 管理 Dataverse Web API 返回的错误。
- 通过某种模式进行代码重用:
- 创建从 HttpRequestMessage 和 HttpResponseMessage 继承的类。
- 使用这些类的方法。
- 一种模块化模式,用于根据需要添加新功能。
The [Web API Data operations Samples (C#)](web-api-samples-csharp.md) use theWebAPIService 的类库。
后续步骤
尝试创建 Web 应用程序。
通过了解服务文档详细了解 Dataverse Web API 功能。
通过运行和研究示例代码了解有关 Dataverse Web API 功能的详细信息。