使用 Power Automate 桌面版中的自定义操作提高生产力、可重用性和可扩展性。 本文讨论了 Power Automate 桌面版中的自定义操作如何帮助制作者创建他们自己可重复使用的操作,这些操作可以跨多个流使用。 制作者通过将一系列步骤或功能组合成一个新操作来创建自定义操作。 自定义操作是使用 Power Automate 桌面版操作 SDK 创建的,该 SDK 提供一组 API,允许制作者使用 .NET language C# 创建自定义操作。 自定义操作也可以通过 Power Automate (make.powerautomate.com) 中的自定义操作部分与其他用户共享。 在本文中,可以找到如何创建、构建、部署、使用和更新自定义操作的详细演练。
重要提示
虽然支持创建自定义操作时使用的基本功能,但此处提到的提供的解决方案、资产和示例脚本仅作为这些功能的示例实施,不包括支持。
概览
Power Automate 桌面版中的自定义操作功能允许您创建自己的可重用操作,这些操作可以跨多个桌面流使用。 自定义操作允许您重用复杂或常用的操作,而不必在每次构建新流时重新创建,从而节省您的时间和精力。 制作者可以应用他们现有的技能和知识来创建与其他系统和服务集成的自定义操作。 此外,专业开发人员可以包装现有的函数或代码库,以创建新的自定义操作,从而提高组织资产的可重用性。
您可以通过将一系列方法或函数组合成一个新操作来创建自定义操作。 创建自定义操作后,就可以将其拖放到 Power Automate 桌面版设计器画布上,以便在任何桌面流中使用。
自定义操作可以通过 Power Automate 中的自定义操作部分与其他用户共享,这为共享和发现自定义操作提供了一个中央存储库。 这意味着用户可以从组织中其他人的专业技能和知识中受益,并且可以轻松找到和使用由其他制定者创建的自定义操作。
总的来说,Power Automate 桌面版中的自定义操作提供一种强大的方法来扩展产品的功能,简化流程构建过程,并促进组织内的协作和创新。
先决条件
- Power Automate 桌面版的最新版本 — 安装 Power Automate
- C# 创作工具,Visual Studio Community/Professional/Enterprise 2022,具有 .NET 桌面开发工作负荷
- 自定义操作 SDK – NuGet 库 | Microsoft.PowerPlatform.PowerAutomate.Desktop.Actions.SDK
- 数字证书:
- 生成自签名证书 — 生成自签名证书概述 – .NET
- 企业部署 – 您的组织从证书颁发机构获得的可信证书 – 数字签名和证书 – Office支持
- SignTool:
- Windows PowerShell Script (.ps1) – 创建自定义操作 — Power Automate
创建您自己的自定义操作
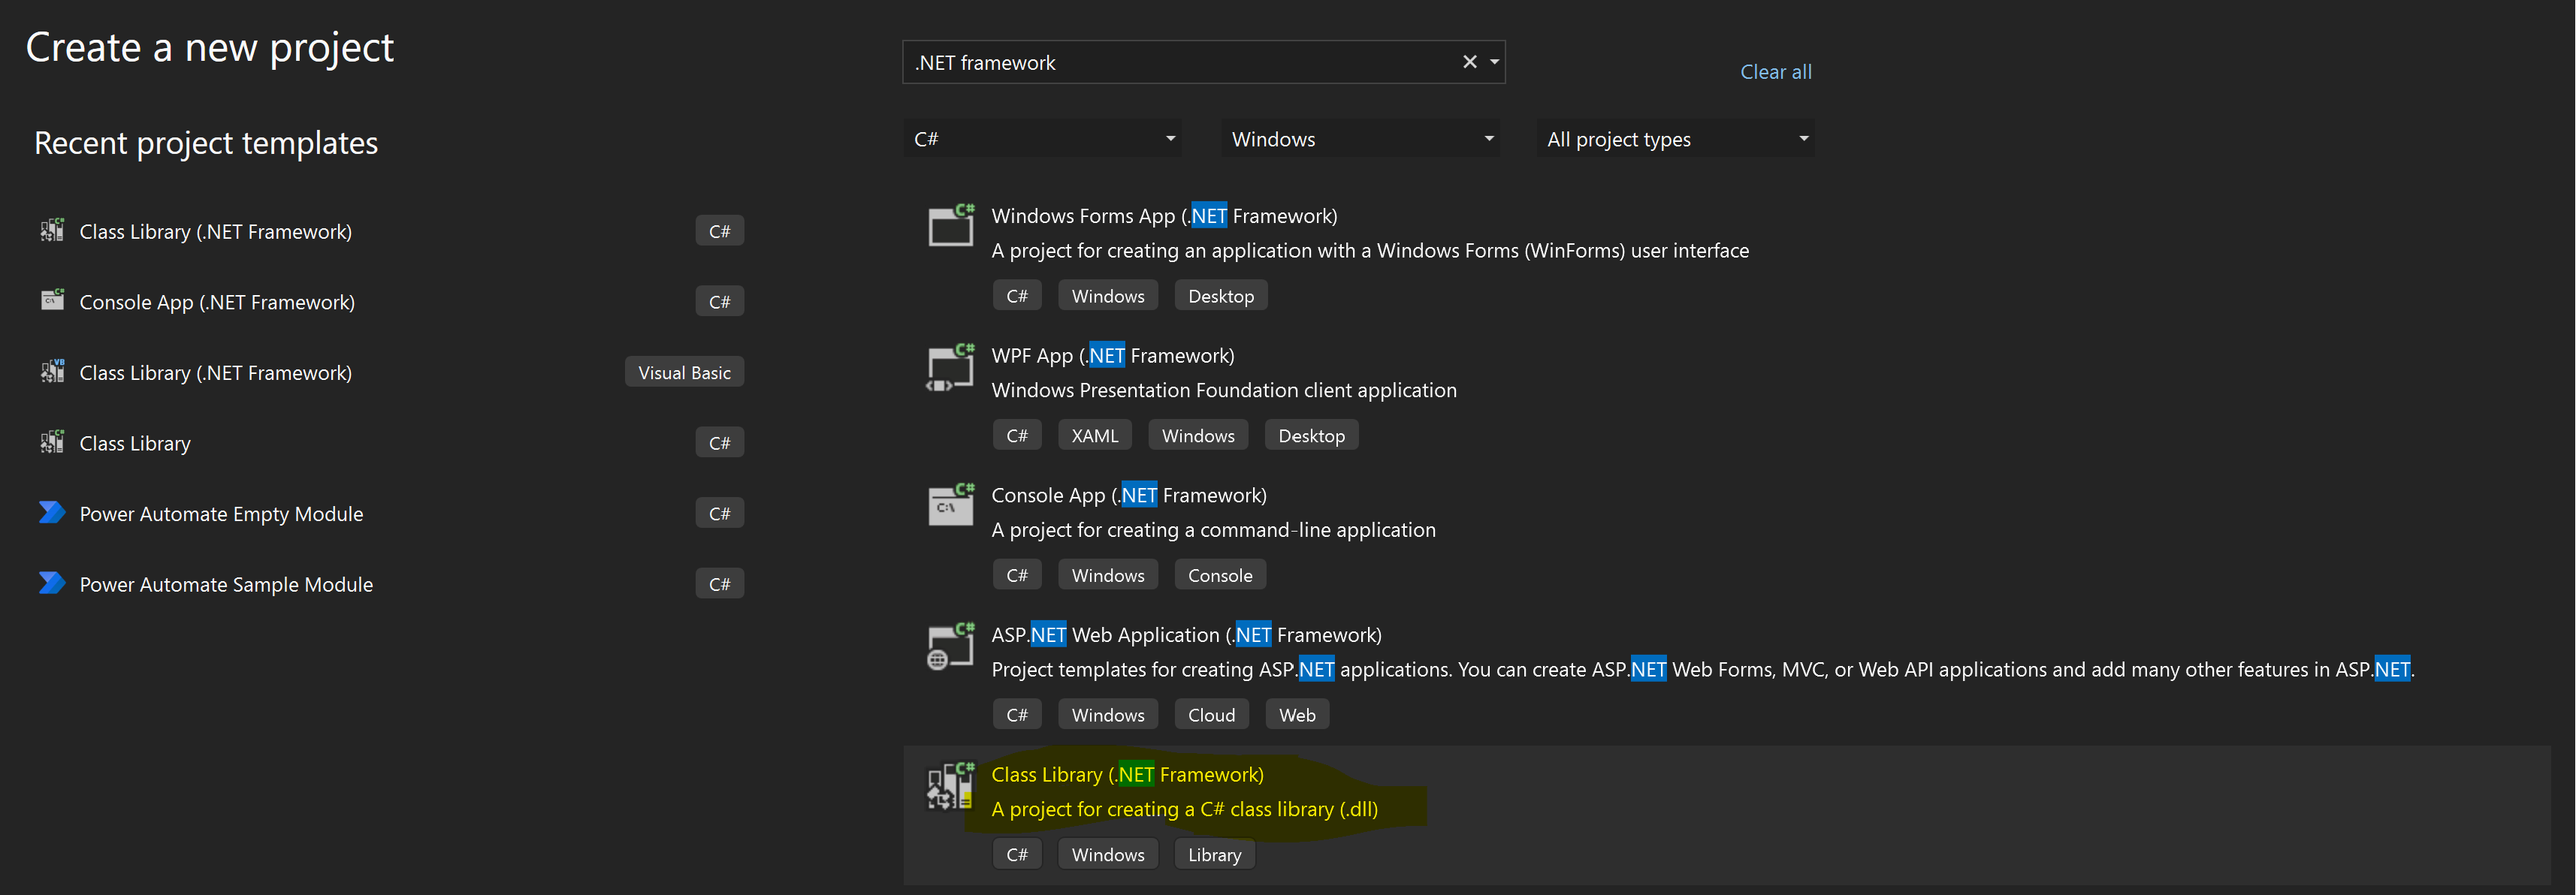
打开 Visual Studio 使用类库 (.NET Framework) 模板创建一个新项目。
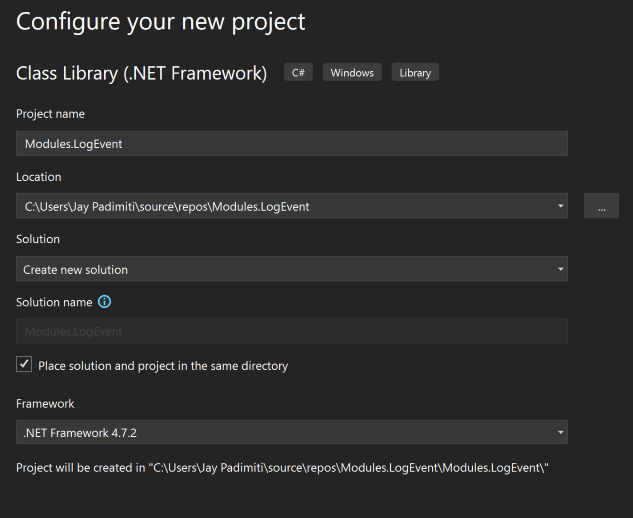
使用项目名称和文件位置配置新项目,并将 Framework 设置为 .NET Framework 4.7.2。
备注
确保遵循命名约定。 更多信息:自定义模块名称约定
在 Visual Studio 中,选择工具>NuGet 包管理器>包管理器控制台。
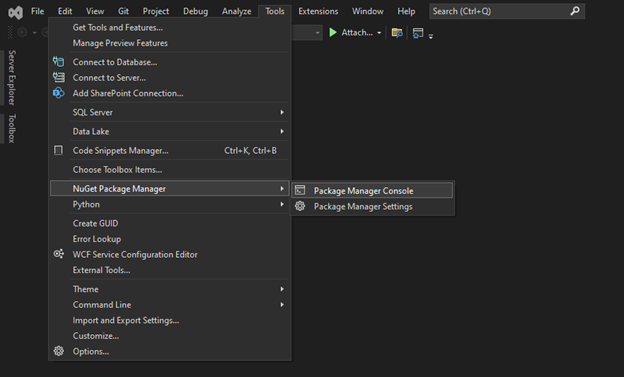
使用此 PowerShell 命令,打开 PowerShell 窗口并安装 NuGet 包 PowerAutomate.Desktop.Actions.SDK。
Find-Package Microsoft.PowerPlatform.PowerAutomate.Desktop.Actions.SDK NuGet\Install-Package Microsoft.PowerPlatform.PowerAutomate.Desktop.Actions.SDK按照创建自定义操作中的步骤为您的自定义操作创建类文件。


可以作为操作参考的信息
参考解决方案档案:.NET 模块解决方案
操作:将消息写入本地文件。
输入参数:文件名,要写入文件的消息。
输出参数:状态代码 - 如果成功则为 true,如果不成功则为 false。
类别定义:
using System;
using System.IO;
using Microsoft.PowerPlatform.PowerAutomate.Desktop.Actions.SDK;
using Microsoft.PowerPlatform.PowerAutomate.Desktop.Actions.SDK.Attributes;

namespace ModulesLogEvent
{
    [Action(Id = "LogEventToFile" , Order = 1, Category = "Logging")]
    [Throws("LogEventError")]
    public class LogEventToFile : ActionBase
    {
        [InputArgument]
        public string LogFileName { get; set; }

        [InputArgument]
        public string LogMessage { get; set; }

        [OutputArgument]
        public bool StatusCode { get; set; }

        public override void Execute(ActionContext context)
        {
            try
            {
                    // To append all of the text to the file
                    File.AppendAllText(LogFileName, LogMessage);
                    StatusCode = true;
            }
            catch (Exception e)
            {
                if (e is ActionException) throw;

                throw new ActionException("LogEventError", e.Message, e.InnerException);
            }
        }
    }
}
资源
此表列出了 Resources.resx 文件中参数的描述和友好名称。
| 客户 | 价值 | Comment |
|---|---|---|
| LogEventToFile_Description | 将消息记录到提供的文件中的自定义操作 | 操作描述 |
| LogEventToFile_FriendlyName | LogEventToFile | 操作名称 |
| LogEventToFile_LogFileName_Description | 文本类型的输入参数 | 操作输入描述 |
| LogEventToFile_LogFileName_FriendlyName | LogFileName | 操作输入名称 |
| LogEventToFile_LogMessage_Description | 文本类型的输入参数 | 操作输入描述 |
| LogEventToFile_LogMessage_FriendlyName | LogMessage | 操作输入名称 |
| LogEventToFile_StatusCode_Description | 布尔型输出参数 | 操作输出描述 |
| LogEventToFile_StatusCode_FriendlyName | LogMessage | 操作输出名称 |
| ModulesLogEvent_Description | 管理日志事件的模块 | 模块描述 |
| ModulesLogEvent_FriendlyName | LogEvent | 模块名称 |
构建包并部署您的自定义操作
创建包并部署到 Power Automate。
获取数字证书,以便可以对自定义操作 DLL 文件进行签名。
重要提示
自签名证书仅用于测试目的,不建议用于生产。 为了在您的环境中组织部署自定义操作,我们建议您使用遵循组织准则的可信数字证书。
小费
为了简化整个组织开发和使用 Power Automate 桌面版自定义操作的流程,您可以将可信数字证书与通过 SCCM/Appstore 分发的 Power Automate 桌面版安装程序捆绑在一起。 >这将使证书自动安装在需要 Power Automate 桌面版的制造者和无人参与运行时计算机上,而无需任何其他操作。
对于此示例,使用了自签名证书。
使用此脚本创建自签名证书。
$certPFXFileName="C:\PADCustomAction\PADCustomActionCert.pfx";
$certCERFileName="C:\PADCustomAction\PADCustomActionCert.cer";
$certStoreLocation="Cert:\LocalMachine\AuthRoot";
$certname = "PADCustomActionSelfSignCert"
##Create certificate
$cert = New-SelfSignedCertificate -CertStoreLocation Cert:\CurrentUser\My -Type CodeSigningCert  -Subject "CN=$certname" -KeyExportPolicy Exportable -KeySpec Signature -KeyLength 2048 -KeyAlgorithm RSA -HashAlgorithm SHA256
$mypwd = ConvertTo-SecureString -String <YOUR CERT PASSWORD GOES HERE> -Force -AsPlainText
##Export certificate
$certPFXFile = Export-PfxCertificate -Cert $cert -FilePath $certPFXFileName -Password $mypwd
$certCERFile = Export-Certificate -Cert $cert -FilePath $certCERFileName -Type CERT -Verbose -Force
使用此命令将证书导入证书存储。
##Import certificate
Import-Certificate -CertStoreLocation $certStoreLocation -FilePath $certCERFile
验证导入的证书是否出现在 Certificates Microsoft Manager Console (MMC) 管理单元中的可信根证书颁发机构>证书下。
最终确定通过使用可信证书对 DLL 文件进行签名而创建的自定义模块。 使用 Visual Studio 的开发人员命令提示符将 Signtool 用于此活动。
Signtool sign /f "C:/PADActions/PADCustomActionCert.pfx" /p <YOURCERTPASSWORD> /fd SHA256 "C:/PADActions/PADCustomActionEventLog/Modules.LogEvent.dll"要部署自定义操作,请通过使用此 PowerShell 脚本,将包内容构建到一个 cabinet 文件 (.cab)。
.\BuildCAB.ps1 "C:/PADActions/PADCustomActionEventLog" "C:/PADActions/PADCustomActionEventLog" PADCustomActionEventLog.cab使用 Signtool 对生成的 cabinet 文件进行签名。
Signtool sign /f "C:/PADActions/PADCustomActionCert.pfx" /p <YOURCERTPASSWORD> /fd SHA256 "C:/PADActions/PADCustomActionEventLog/PADCustomActionEventLog.cab"转到 Power Automate 自定义操作部分,上传您创建的自定义操作。 提供名称、描述和 cabinet 文件,然后选择上传。
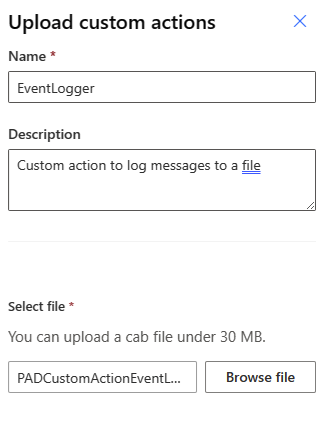
当操作成功上传时,您会收到通知。

按照这些步骤,自定义操作模块被打包到一个 cabinet 文件中,并使用可信证书进行签名。 此外,自定义操作 cabinet 文件上传到 Power Automate 中的自定义操作库。
更多信息:上传自定义操作
使用 Power Automate 桌面版在桌面流中使用您的自定义操作活动
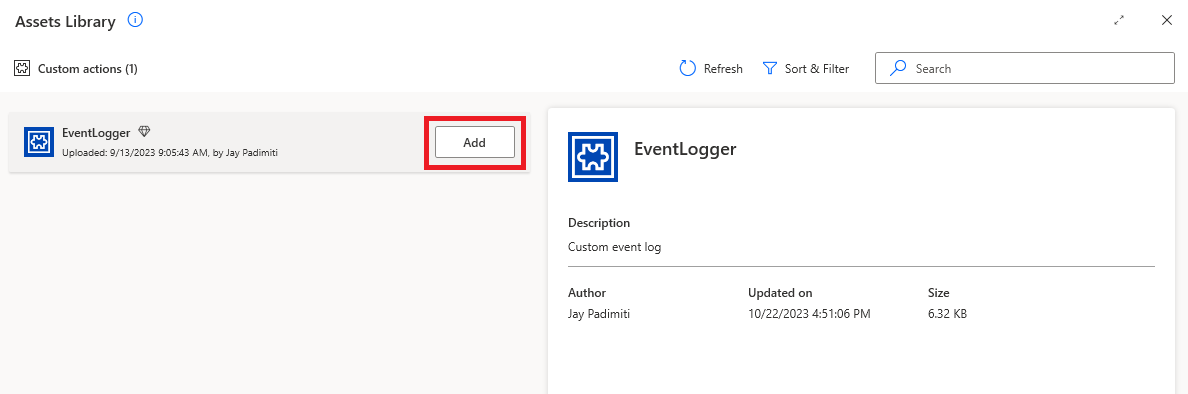
创建新的桌面流,然后在设计器中选择资产库。

检查资源库中可用的自定义操作。 请注意之前创建并上传到 Power Automate 的自定义操作部分的操作。
选择添加将此自定义操作添加到设计器的操作部分。
验证自定义操作是否已成功添加。 在 Power Automate 桌面版设计器中的操作搜索栏中搜索。

拖动自定义操作或双击以添加到桌面流。
提供输入参数和其他步骤来测试自定义操作。
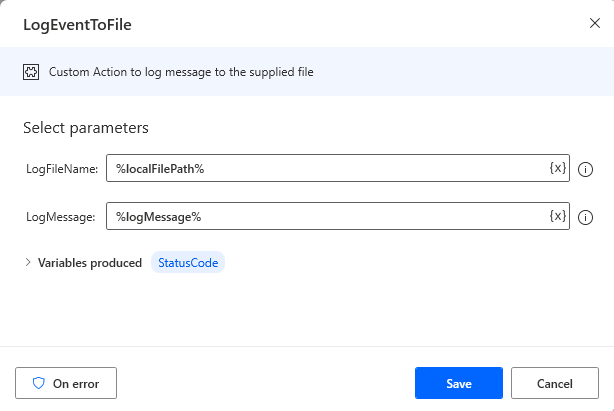
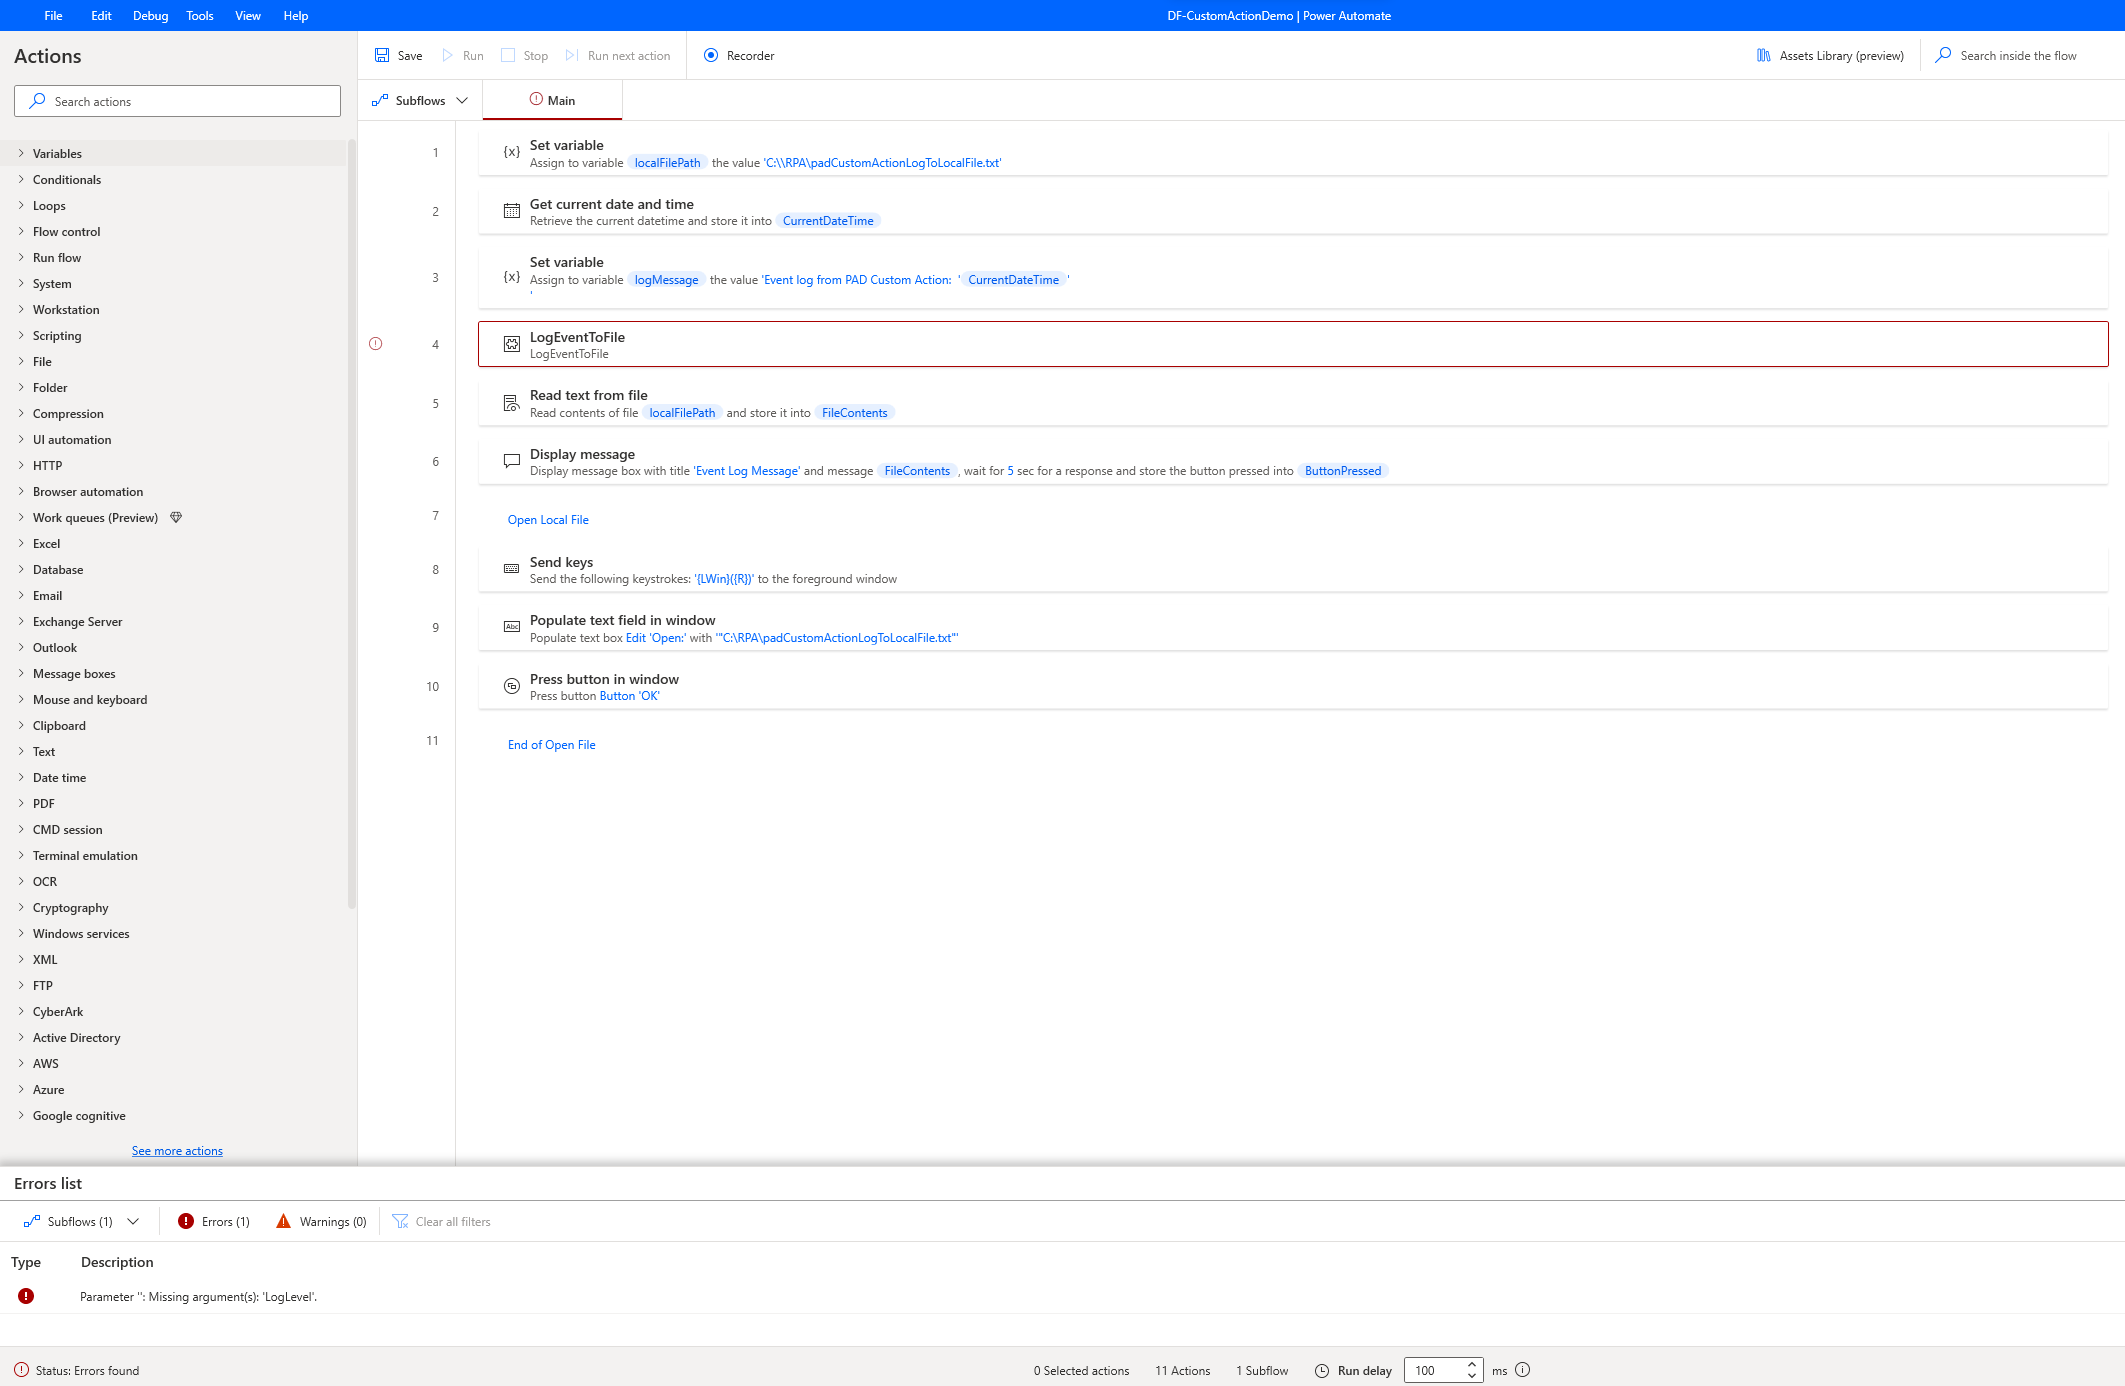
使用自定义操作的桌面流示例。
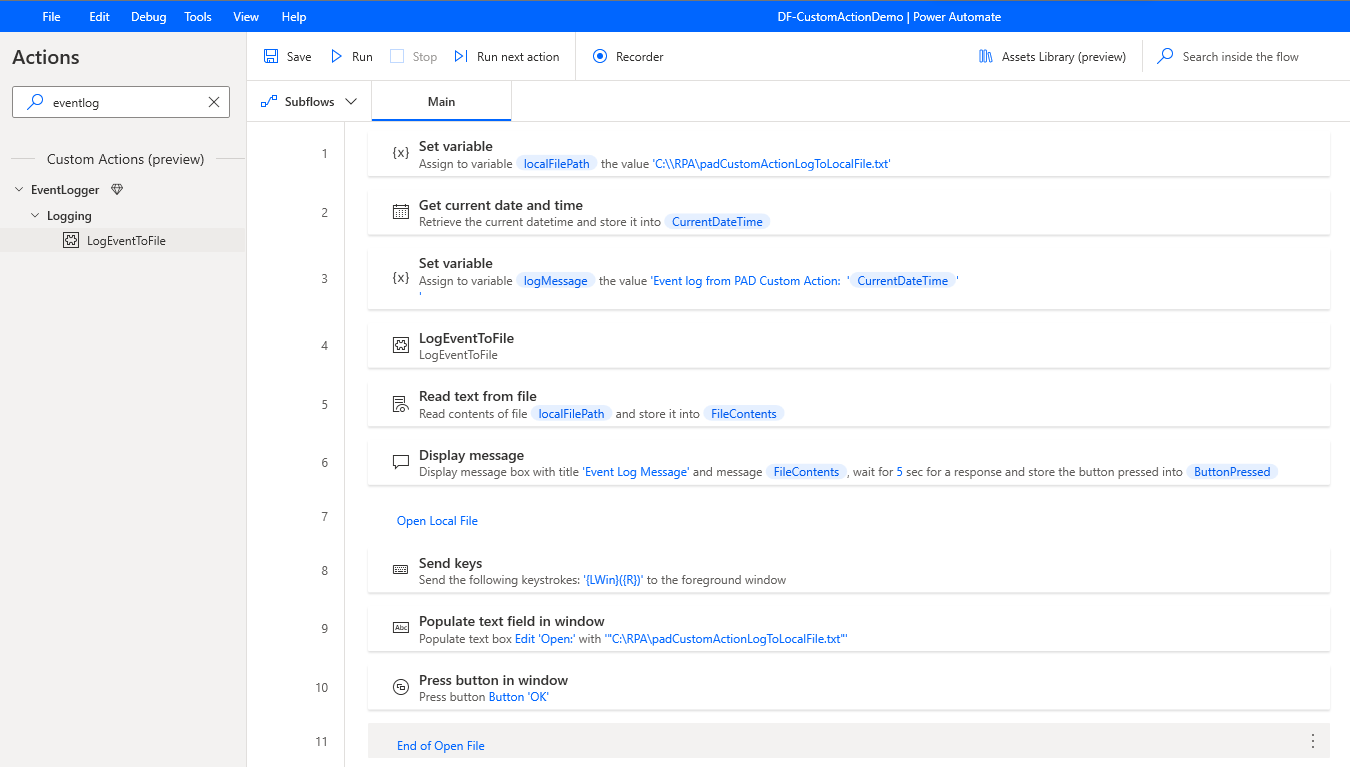
测试流以查看实时运行的更新版自定义操作。


备注
将用于签署 cab 文件的证书导入到用于通过自定义操作构建桌面流的计算机以及将运行桌面流的每台运行时计算机。
按照这些步骤,创建一个自定义操作,将模块打包到 cabinet 文件中,用可信证书签名,上传到 Power Automate 中的自定义操作库,创建一个桌面流来使用自定义操作,并对其成功运行进行测试。
更新并重新部署自定义操作
按照下列步骤更新自定义操作的功能,以反映更新的功能。
使用新的操作功能更新 Visual Studio 解决方案中的类文件。 更多信息:已更新 .NET Module 解决方案
修改了类文件的签名,以接受第三个输入参数,如下所示。
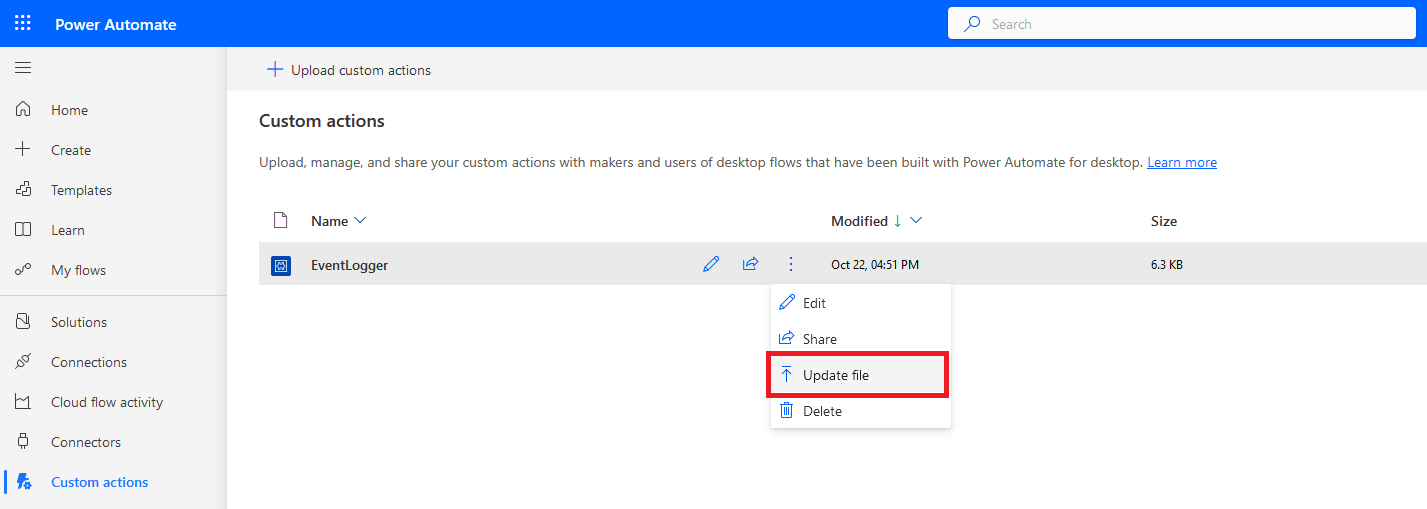
using System;
using System.IO;
using Microsoft.PowerPlatform.PowerAutomate.Desktop.Actions.SDK;
using Microsoft.PowerPlatform.PowerAutomate.Desktop.Actions.SDK.Attributes;

namespace ModulesLogEvent
{
 [Action(Id = "LogEventToFile" , Order = 1, Category = "Logging")]
 [Throws("LogEventError")]
 public class LogEventToFile : ActionBase
 {
     [InputArgument]
     public string LogFileName { get; set; }

     [InputArgument]
     public string LogMessage { get; set; }

     [InputArgument]
     public string LogLevel { get; set; }

     [OutputArgument]
     public bool StatusCode { get; set; }

     public override void Execute(ActionContext context)
     {
         try
         {
                 // To append all of the text to the file
                 File.AppendAllText(LogFileName, LogLevel + ": " + LogMessage);
                 StatusCode = true;
         }
         catch (Exception e)
         {
             if (e is ActionException) throw;

             throw new ActionException("LogEventError", e.Message, e.InnerException);
         }
     }
  }
}
使用前面描述的类似步骤,即签署 DLL 文件、创建 cabinet 文件、签署 cabinet 文件并将 cabinet 文件上传到 Power Automate 中的自定义操作部分。 更多信息:构建包并部署您的自定义操作
备注
在上传更新的自定义操作 cabinet 文件之前,请确保分析此更改的影响,因为具有此操作的桌面流将更新为新功能。
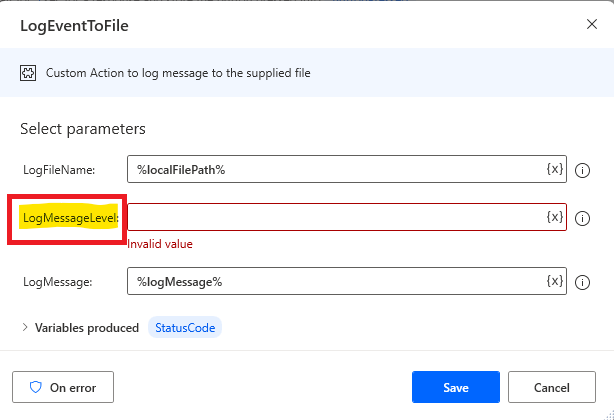
根据需要更新桌面流。
为了验证更新功能,我们向自定义操作添加了第三个输入参数。 请注意,自定义操作活动在设计器中被标记为 Error,需要用新的输入参数进行更新。
测试该流,以查看实时运行的更新版自定义操作。


在本部分中,您更新了自定义操作的底层功能,构建了包,部署到 Power Automate,重构了桌面流,并通过使用 Power Automate 桌面版中自定义操作的更新功能运行桌面流来验证功能。