Syntax guidance for basic Markdown usage
TFS 2017 | TFS 2015
Important
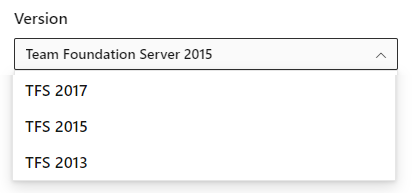
To view the content available for your platform, make sure that you select the correct version of this article from the version selector which is located above the table of contents. Feature support differs depending on the on-premises version of TFS you are using. .
To learn which on-premises version you are using, see What platform/version am I using?
Here you can find some basic Markdown syntax guidance and specific guidance for using Markdown in Azure DevOps features. You can use both common Markdown conventions and GitHub-flavored extensions.
Having the right guidance at the right time is critical to success. Use Markdown to add rich formatting, tables, and images to your project pages, README files, dashboards, and pull request comments.
For more syntax that's supported for Wiki pages, see Wiki Markdown guidance.
You can provide guidance in the following areas using Markdown:
- Markdown widget added to a dashboard
- Project page or Welcome pages
- Repository README files
- Definition of Done (Kanban board)
Important
Not all Markdown syntax is supported across all features. Each section in this article identifies the features the syntax is supported with the Supported in line.
Headers
Supported in: Definition of Done | Markdown widget | README files
Structure your comments using headers. Headers segment longer comments, making them easier to read.
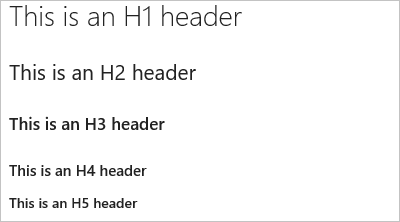
Start a line with a hash character # to set a heading. Organize your remarks with subheadings by starting a line with more hash characters, for example ####. Up to six levels of headings are supported.
Example:
# This is a H1 header
## This is a H2 header
### This is a H3 header
#### This is a H4 header
##### This is a H5 header
Result:
Paragraphs and line breaks
Supported in: Definition of Done | Markdown widget | README files
Make your text easier to read by breaking it into paragraphs or with line breaks.
Markdown files or widgets
In a Markdown file or widget, enter two spaces before the line break, and then select Enter. This action begins a new paragraph.
Example - Markdown file or widget:
Add two spaces before the end of the line, and then select **Enter**.(space, space, Enter)
A space gets added in between paragraphs.
Result:
Add two spaces before the end of the line, and then select Enter.
A space gets added in between paragraphs.
Blockquotes
Supported in: Definition of Done | Markdown widget | README files
Quote previous comments or text to set the context for your comment or text.
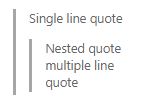
Quote single lines of text with > before the text. Use many > characters to nest quoted text.
Quote blocks of lines of text by using the same level of > across many lines.
Example:
> Single line quote
>> Nested quote
>> multiple line
>> quote
Result:
Horizontal rules
Supported in: Definition of Done | Markdown widget | README files
To add a horizontal rule, add a line that's a series of dashes ---. The line above the line containing the --- must be blank.
Example:
above

----
below
Result:
above
below
Emphasis (bold, italics, strikethrough)
Supported in: Definition of Done | Markdown widget | README files
You can emphasize text by applying bold, italics, or strikethrough to characters:
- To apply italics: surround the text with an asterisk
*or underscore_ - To apply bold: surround the text with double asterisks
**. - To apply strikethrough: surround the text with double tilde characters
~~.
Combine these elements to apply emphasis to text.
Note
There is no Markdown syntax that supports underlining text.
Example:
Use _emphasis_ in comments to express **strong** opinions and point out ~~corrections~~
**_Bold, italicized text_**
**~~Bold, strike-through text~~**
Result:
Use emphasis in comments to express strong opinions and point out corrections
Bold, italicized text
Bold, strike-through text
Tables
Supported in: Markdown widget | README files
Organize structured data with tables. Tables are especially useful for describing function parameters, object methods, and other data that have a clear name to description mapping. You can format tables in pull requests, wiki, and Markdown files such as README files and Markdown widgets.
- Place each table row on its own line
- Separate table cells using the pipe character
| - The first two lines of a table set the column headers and the alignment of elements in the table
- Use colons (
:) when dividing the header and body of tables to specify column alignment (left, center, right) - To start a new line, use the HTML break tag (
<br/>) (Works within a Wiki but not elsewhere) - Make sure to end each row with a CR or LF.
- A blank space is required before and after work item or pull request (PR) mentions inside a table cell.
Example:
| Heading 1 | Heading 2 | Heading 3 |
|-----------|:-----------:|-----------:|
| Cell A1 | Cell A2 | Cell A3 |
| Cell B1 | Cell B2 | Cell B3<br/>second line of text |
Result:
| Heading 1 | Heading 2 | Heading 3 |
|---|---|---|
| Cell A1 | Cell A2 | Cell A3 |
| Cell B1 | Cell B2 | Cell B3 second line of text |
Lists
Supported in: Definition of Done | Markdown widget | README files
Organize related items with lists. You can add ordered lists with numbers, or unordered lists with just bullets.
Ordered lists start with a number followed by a period for each list item. Unordered lists start with a -. Begin each list item on a new line. In a Markdown file or widget, enter two spaces before the line break to begin a new paragraph, or enter two line breaks consecutively to begin a new paragraph.
Ordered or numbered lists
Example:
1. First item.
1. Second item.
1. Third item.
Result:
- First item.
- Second item.
- Third item.
Bulleted lists
Example:
- Item 1
- Item 2
- Item 3
Result:
- Item 1
- Item 2
- Item 3
Nested lists
Example:
1. First item.
   - Item 1
   - Item 2
   - Item 3
1. Second item.
   - Nested item 1
      - Further nested item 1
      - Further nested item 2
      - Further nested item 3
   - Nested item 2
   - Nested item 3
Result:
- First item.
- Item 1
- Item 2
- Item 3
- Second item.
- Nested item 1
- Further nested item 1
- Further nested item 2
- Further nested item 3
- Nested item 2
- Nested item 3
- Nested item 1
Links
Supported in: Definition of Done | Markdown widget | README files
In pull request comments and wikis, HTTP and HTTPS URLs are automatically formatted as links. You can link to work items by entering the # key and a work item ID, and then choosing the work item from the list.
Avoid auto suggestions for work items by prefixing # with a backslash (\). This action can be useful if you want to use # for color hex codes.
In Markdown files and widgets, you can set text hyperlinks for your URL using the standard Markdown link syntax:
[Link Text](Link URL)
When you're linking to another Markdown page in the same Git or TFVC repository, the link target can be a relative path or an absolute path in the repository.
Supported links for Welcome pages:
- Relative path:
[text to display](target.md) - Absolute path in Git:
[text to display](/folder/target.md) - Absolute path in TFVC:
[text to display]($/project/folder/target.md) - URL:
[text to display](http://address.com)
Supported links for Markdown widget:
- URL:
[text to display](http://address.com)
Supported links for Wiki:
- Absolute path of Wiki pages:
[text to display](/parent-page/child-page) - URL:
[text to display](http://address.com)
Example:
[C# language reference](/dotnet/csharp/language-reference/)
Result:
Ignore or escape Markdown syntax to enter specific or literal characters
Supported in: Definition of Done | Markdown widget | README files
Syntax
Example/notes
To insert one of the following characters, prefix with a \(backslash).
\, backslash
`, backtick
_, underscore
{}, curly braces
[], square brackets
(), parentheses
#, hash mark
+, plus sign
-, minus sign (hyphen)
., period
!, exclamation mark
*, asterisk
Some examples on inserting special characters:
Enter \\ to get \
Enter \_ to get _
Enter \# to get #
Enter \( to get (
Enter \. to get .
Enter \! to get !
Enter \* to get *