应用程序定制器提供了访问 SharePoint 页面上已知位置的权限,可基于业务和功能要求进行修改。 例如,可以创建动态页眉和页脚体验,以在 SharePoint Online 的所有页面上呈现。
该模型类似于在 Site 或 Web 对象中使用 UserCustomAction 集合,以通过自定义 JavaScript 来修改页面体验。 SharePoint 框架 (SPFx) 扩展的主要区别在于,如果对 SharePoint Online 中的 HTML/DOM 结构进行更改,页面元素不会更改。
本文介绍如何扩展 Hello World 扩展以利用页面占位符。
还可以通过在 Microsoft 365 平台社区 (PnP) YouTube 频道上观看该视频来执行这些步骤:
获取页面占位符的访问权限
网站、Web 和列表范围支持应用程序自定义工具扩展。 若要控制范围,可以确定应用自定义工具在 SharePoint 租户中注册的位置和方式。
注意
仅 Web 或列表级别支持基于功能 XML 的应用程序定制器注册。 但是,可以使用 租户范围的扩展功能部署 或将应用程序自定义工具关联到 UserCustomAction 对象上的 Site 集合来更广泛地激活应用程序自定义工具。
应用程序定制器在作用域中存在并呈现时,可以使用以下方法来获取占位符的访问权限。
// Handling the Bottom placeholder
if (!this._bottomPlaceholder) {
  this._bottomPlaceholder =
    this.context.placeholderProvider.tryCreateContent(
      PlaceholderName.Bottom,
      { onDispose: this._onDispose });
...
}
获取占位符对象后,可以完全控制向最终用户呈现的内容。
请注意,要使用众所周知的标识符来请求获取众所周知的相应占位符。 在这种情况下,代码将使用枚举上的 选项访问页面 Bottom 的 PlaceholderName 页脚部分。
通过添加自定义 HTML 元素,将应用自定义工具修改为访问和修改占位符
安装 @microsoft/sp-office-ui-fabric-core 包以启用从 SPFabricCore.scss 导入。 我们将使用它来定义位置持有者的呈现样式。
npm install @microsoft/sp-office-ui-fabric-core创建名为 ./src/extensions/helloWorld/AppCustomizer.module.scss 的新文件。
按如下所示,更新“AppCustomizer.module.scss”:
注意
这些是在页眉和页脚占位符的 HTML 输出中使用的样式。
@import '~@microsoft/sp-office-ui-fabric-core/dist/sass/SPFabricCore.scss';

.app {
  .top {
      height:60px;
      text-align:center;
      line-height:2.5;
      font-weight:bold;
      display: flex;
      align-items: center;
      justify-content: center;
      background-color: $ms-color-themePrimary;
      color: $ms-color-white;

  }

  .bottom {
      height:40px;
      text-align:center;
      line-height:2.5;
      font-weight:bold;
      display: flex;
      align-items: center;
      justify-content: center;
      background-color: $ms-color-themePrimary;
      color: $ms-color-white;
  }
}
在 Visual Studio Code (或首选 IDE) 中,打开 ./src/extensions/helloWorld/HelloWorldApplicationCustomizer.ts。
PlaceholderContent通过更新 import 语句,将 和PlaceholderName添加到 @microsoft/sp-application-base 中的 import 语句,如下所示:import { BaseApplicationCustomizer, PlaceholderContent, PlaceholderName } from '@microsoft/sp-application-base';此外,在
strings导入位于文件顶部之后添加下面的导入语句:import styles from './AppCustomizer.module.scss'; import { escape } from '@microsoft/sp-lodash-subset';你将使用
escape函数对应用程序自定义工具属性进行转义。 将在下面的步骤中创建输出的样式定义。注意
在上面的代码片段中粘贴后,如果使用Visual Studio Code,可能会显示错误。 当 scss 文件编译为类时,生成解决方案后,这些错误将消失。
在 HelloWorldApplicationCustomizer.ts 文件中,更新
IHelloWorldApplicationCustomizerProperties接口以添加页眉和页脚的特定属性,如下所示:注意
如果应用程序自定义工具使用
ClientSideComponentPropertiesJSON 输入,则会将其反序列化到 对象中BaseExtension.properties。 可以定义用于描述它的接口。export interface IHelloWorldApplicationCustomizerProperties { Top: string; Bottom: string; }在 类中添加
HelloWorldApplicationCustomizer以下私有变量。 在此示例中,这些变量可以仅为onRender()方法中的本地变量,但若要与其他对象共享它们,需要将它们定义为私有变量。export default class HelloWorldApplicationCustomizer extends BaseApplicationCustomizer<IHelloWorldApplicationCustomizerProperties> { // These have been added private _topPlaceholder: PlaceholderContent | undefined; private _bottomPlaceholder: PlaceholderContent | undefined; // ... }按如下所示,更新
onInit()方法代码:public onInit(): Promise<void> { Log.info(LOG_SOURCE, `Initialized ${strings.Title}`); // Wait for the placeholders to be created (or handle them being changed) and then // render. this.context.placeholderProvider.changedEvent.add(this, this._renderPlaceHolders); return Promise.resolve(); }使用以下代码新建
_renderPlaceHolders()私有方法:private _renderPlaceHolders(): void { console.log("HelloWorldApplicationCustomizer._renderPlaceHolders()"); console.log( "Available placeholders: ", this.context.placeholderProvider.placeholderNames .map(name => PlaceholderName[name]) .join(", ") ); // Handling the top placeholder if (!this._topPlaceholder) { this._topPlaceholder = this.context.placeholderProvider.tryCreateContent( PlaceholderName.Top, { onDispose: this._onDispose } ); // The extension should not assume that the expected placeholder is available. if (!this._topPlaceholder) { console.error("The expected placeholder (Top) was not found."); return; } if (this.properties) { let topString: string = this.properties.Top; if (!topString) { topString = "(Top property was not defined.)"; } if (this._topPlaceholder.domElement) { this._topPlaceholder.domElement.innerHTML = ` <div class="${styles.app}"> <div class="${styles.top}"> <i class="ms-Icon ms-Icon--Info" aria-hidden="true"></i> ${escape( topString )} </div> </div>`; } } } // Handling the bottom placeholder if (!this._bottomPlaceholder) { this._bottomPlaceholder = this.context.placeholderProvider.tryCreateContent( PlaceholderName.Bottom, { onDispose: this._onDispose } ); // The extension should not assume that the expected placeholder is available. if (!this._bottomPlaceholder) { console.error("The expected placeholder (Bottom) was not found."); return; } if (this.properties) { let bottomString: string = this.properties.Bottom; if (!bottomString) { bottomString = "(Bottom property was not defined.)"; } if (this._bottomPlaceholder.domElement) { this._bottomPlaceholder.domElement.innerHTML = ` <div class="${styles.app}"> <div class="${styles.bottom}"> <i class="ms-Icon ms-Icon--Info" aria-hidden="true"></i> ${escape( bottomString )} </div> </div>`; } } } }关于此代码,请注意以下几点:
- 使用
this.context.placeholderProvider.tryCreateContent获取对占位符的访问权限。 - 扩展代码不应假定预期的占位符可用。
- 代码应使用自定义属性
Top和Bottom。 若有这两个属性,它们呈现在占位符中。 - 请注意,top 和 bottom 占位符的代码路径几乎完全相同。 唯一区别在于,使用的变量和样式定义不同。
- 可以直接使用样式表中定义的类名称,但不建议这样做。 如果在代码中找不到
styles变量中定义的样式表引用,则样式表将不会添加到页面中。 这是因为生成过程中将删除未使用的引用。
- 使用
将下列方法添加到
_renderPlaceHolders()方法后。 在这种情况下,当从页面中删除扩展时,只输出控制台消息。private _onDispose(): void { console.log('[HelloWorldApplicationCustomizer._onDispose] Disposed custom top and bottom placeholders.'); }
现在准备好在 SharePoint Online 中测试代码。
测试代码
在 ./config/serve.json 文件中,将 文件中的属性部分更新为顶部和底部消息。
{
  "$schema": "https://developer.microsoft.com/json-schemas/spfx-build/spfx-serve.schema.json",
  "port": 4321,
  "https": true,
  "serveConfigurations": {
    "default": {
      "pageUrl": "https://sppnp.sharepoint.com/sites/mySite/SitePages/myPage.aspx",
      "customActions": {
        "54328ea6-0591-4fbd-aadb-5dc51fd53235": {
          "location": "ClientSideExtension.ApplicationCustomizer",
          "properties": {
            "Top": "Top area of the page",
            "Bottom": "Bottom area of the page"
          }
        }
      }
    },
    "helloWorld": {
      "pageUrl": "https://sppnp.sharepoint.com/sites/mySite/SitePages/myPage.aspx",
      "customActions": {
        "54328ea6-0591-4fbd-aadb-5dc51fd53235": {
          "location": "ClientSideExtension.ApplicationCustomizer",
          "properties": {
            "Top": "Top area of the page",
            "Bottom": "Bottom area of the page"
          }
        }
      }
    }
  }
}
注意
上述 JSON 节选中的 GUID 是 SPFx 扩展组件的唯一 ID。 这是在组件的清单中定义的。 你的解决方案中的 GUID 将有所不同,因为每个组件 ID 都是唯一的。
切换到运行 gulp 服务的 控制台窗口并检查错误。 Gulp 报告控制台中的任何错误;在继续之前,需要修复它们。 如果解决方案已在运行,请重启它,以便从 serve.json 文件中应用更新的设置。
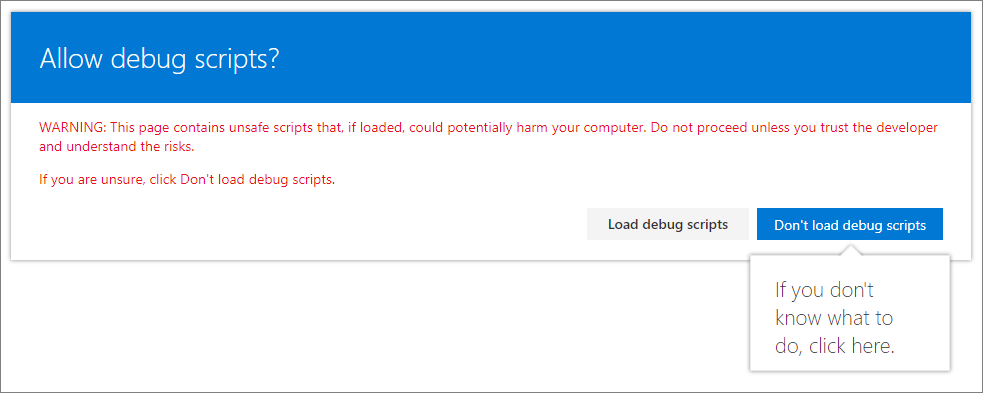
gulp serve选择“加载调试脚本”,以继续从本地主机加载脚本。
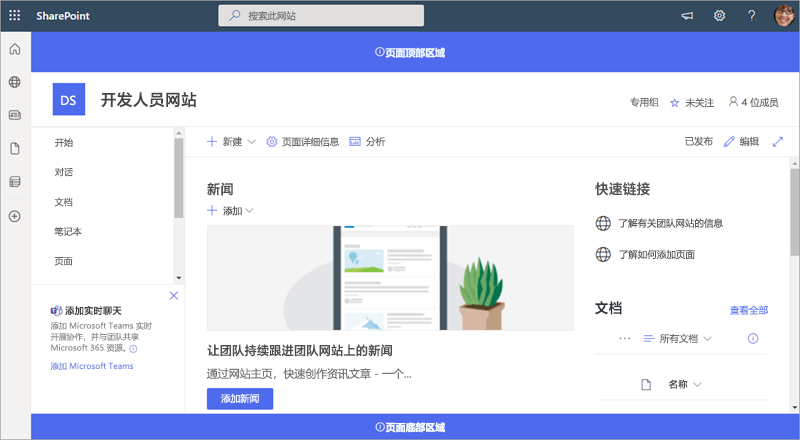
现在,应该会在页面中看到自定义的页眉和页脚内容。
后续步骤
恭喜!已使用应用自定义工具生成了自己的自定义页眉和页脚!
若要继续生成扩展,请参阅将扩展部署到 SharePoint(Hello World 第 3 部分)。 你将了解如何在 SharePoint 网站集中部署和预览 Hello World 扩展,而无需使用调试查询参数。