练习 - 创建并部署 Azure 资源管理器模板
在本练习中,你将创建一个 Azure 资源管理器 (ARM) 模板,将其部署到 Azure,然后更新该 ARM 模板以添加参数和输出。
创建 ARM 模板
打开 Visual Studio Code 并创建名为 azuredeploy.json 的新文件。
将以下代码复制并粘贴到文件中。
{
  "$schema": "https://schema.management.azure.com/schemas/2019-04-01/deploymentTemplate.json#",
  "contentVersion": "1.0.0.0",
  "parameters": {},
  "functions": [],
  "variables": {},
  "resources": [],
  "outputs": {}
}
请注意,此文件拥有我们在上一单元中讨论过的 ARM 模板的所有部分。
按 Ctrl+S 保存对文件所做的更改。
将 ARM 模板部署到 Azure
若要将此模板部署到 Azure,你需要从 Visual Studio Code 终端登录到 Azure 帐户。 请确保已安装 Azure CLI 工具。
选择“终端”>“新建终端”,打开一个终端窗口。
如果终端窗口的命令栏显示“bash”,即表示你有要使用的正确 shell,可以跳到下一节继续进行操作。
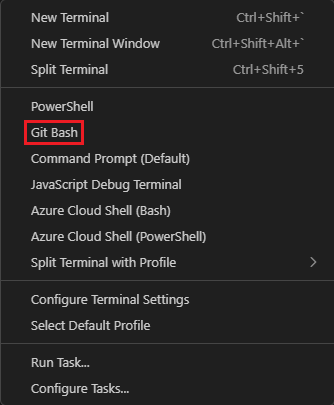
如果没有,请选择下拉列表,然后选择 “选择默认配置文件”。

选择“Git Bash”。
将目录更改为包含 ARM 模板文件的文件夹。
登录到 Azure
在终端窗口中,运行此命令以登录到 Azure。
az login
在打开的浏览器窗口中,登录到帐户。 登录后,与此帐户关联的订阅列表将显示在终端中。 默认订阅标记为星号 \. 如果你有多个订阅,请选择要用于本练习的订阅。
创建和设置默认资源组
az group create --name <resource-group-name> --location <location>
将资源组名称<替换为>资源组的唯一名称。 将位置<替换为>离你最近的 Azure 区域。 例如,将 eastus 用于美国东部。
通过设置默认资源组,可以省略本练习中 Azure CLI 命令中的该参数。 若要设置资源组,请运行以下命令。
az configure --defaults group="<resource-group-name>"
将<resource-group-name>替换为您的资源组名称。
将模板部署到 Azure
运行以下命令将 ARM 模板部署到 Azure。 ARM 模板尚无任何资源,因此没有任何创建的资源。 部署应会成功。
templateFile="azuredeploy.json"
today=$(date +"%d-%b-%Y")
DeploymentName="blanktemplate-"$today

az deployment group create \
 --name $DeploymentName \
 --template-file $templateFile
前面代码的顶部部分设置了 Azure CLI 变量,其中包括要部署的模板文件的路径和部署的名称。 底部部分 az deployment group create将模板部署到 Azure。 请注意,部署名称是 blanktemplate,后缀是一个日期。
终端中应会显示 Running...。
若要将此模板部署到 Azure,你需要从 Visual Studio Code 终端登录到 Azure 帐户。 确保从 Visual Studio Code 扩展安装 Azure PowerShell 工具。
在命令栏中,选择“终端”>“新建终端”,打开 PowerShell 窗口。
如果终端窗口的命令栏显示“PowerShell”,即表示你有要使用的正确 shell,可以跳到下一节继续进行操作。

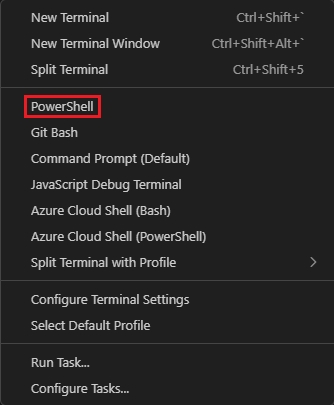
如果没有显示,请选择向下箭头,然后在下拉列表中选择“PowerShell”。 如果缺少该选项,请选择“选择默认配置文件”。
在输入字段中,向下滚动并选择“PowerShell”。
将目录更改为包含 ARM 模板文件的文件夹。
使用 Azure PowerShell 登录到 Azure
从 Visual Studio Code 中的终端运行以下命令以登录到 Azure。 浏览器将打开,你可以登录到帐户。
Connect-AzAccount
在打开的浏览器窗口中(浏览器窗口可能在当前窗口后面打开,最小化当前窗口以查看它),登录到你的帐户。 登录后,与此帐户关联的订阅列表将显示在终端中。 默认订阅标记为星号 \. 如果你有多个订阅,请选择要用于本练习的订阅。
将模板部署到 Azure
New-AzResourceGroup -Name <ResourceGroupName> -Location <Location>
为你的资源组设置一个唯一的名称。 替换为离你最近的 Azure 区域。 例如,将 eastus 用于美国东部。
通过设置默认资源组,可以省略本练习中 Azure CLI 命令中的该参数。 若要设置资源组,请运行以下命令。
Set-AzDefault -ResourceGroupName <ResourceGroupName>
将 ResourceGroupName< 替换为>资源组名称。
通过运行以下命令将模板部署到 Azure。 ARM 模板尚无任何资源,因此没有任何创建的资源。
$templateFile="azuredeploy.json"
$today=Get-Date -Format "MM-dd-yyyy"
$deploymentName="blanktemplate-"+"$today"
New-AzResourceGroupDeployment `
  -Name $deploymentName `
  -TemplateFile $templateFile
前面代码的顶部设置了 Azure PowerShell 变量,其中包括部署文件的路径和部署的名称。 然后,New-AzResourceGroupDeployment 命令将模板部署到 Azure。 请注意,部署名称是 blanktemplate,后缀是一个日期。
将 ARM 模板部署到 Azure 时,请转到 Azure 门户。
在“资源”菜单中,选择“资源组”。
选择在本练习中创建的资源组。
在“概述”窗格中,你会看到一个成功的部署。
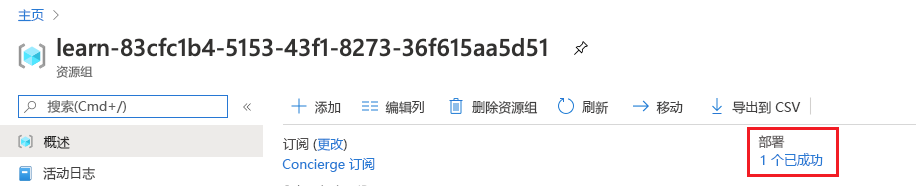
选择“1 个已成功”以查看部署的详细信息。
Azure 门户界面显示一个部署,并且该部署的状态为成功。
选择
blanktemplate以查看部署了哪些资源。 在这种情况下,它将为空,因为尚未在模板中指定任何资源。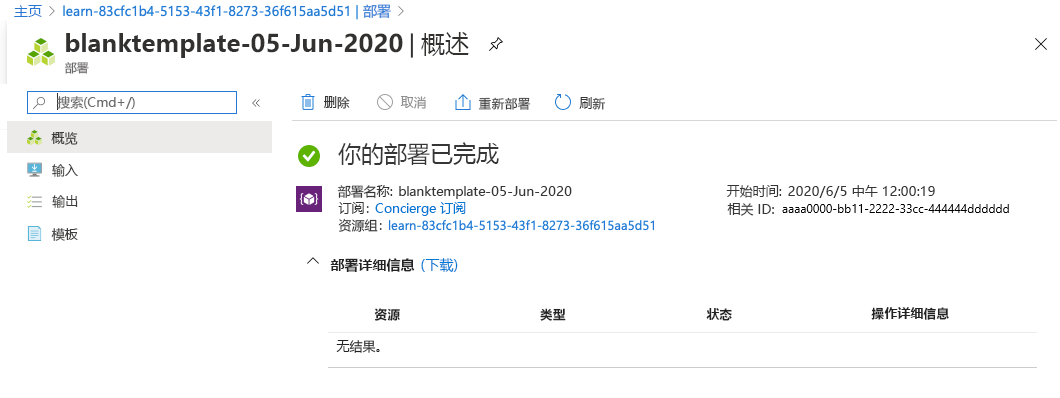
让页面在浏览器中保持打开状态,以便可以再次检查部署。
向 ARM 模板添加资源
在上一个任务中,你了解了如何创建一个空白模板并部署它。 现在,可以开始部署实际资源了。 在此任务中,将 Azure 存储帐户资源添加到 ARM 模板。
在 Visual Studio Code 中的 azuredeploy.json 文件中,更新文件,使其如下所示:
{
  "$schema": "https://schema.management.azure.com/schemas/2019-04-01/deploymentTemplate.json#",
  "contentVersion": "1.0.0.0",
  "parameters": {},
  "functions": [],
  "variables": {},
  "resources": [
    {
      "type": "Microsoft.Storage/storageAccounts",
      "apiVersion": "2025-01-01",
      "name": "storageaccount1",
      "tags": {
        "displayName": "storageaccount1"
      },
      "location": "[resourceGroup().location]",
      "kind": "StorageV2",
      "sku": {
        "name": "Standard_LRS"
      }
    }
  ],
  "outputs": {}
}
将资源 name 和 displayName 的值更改为唯一的值(例如 learnexercise12321)。 此名称在 Azure 中必须全局唯一,包含 3 到 24 个字符,并且仅包含小写字母、数字和连字符。
资源位置设置为与部署资源的资源组相同的位置。 保留默认值。
保存文件。
部署已更新的 ARM 模板
此处,你将更改部署的名称以更好地反映此部署的作用。
在终端中运行以下 Azure CLI 命令。 此代码片段与之前使用的代码相同,但部署的名称已更改。
templateFile="azuredeploy.json"
today=$(date +"%d-%b-%Y")
DeploymentName="addstorage-"$today

az deployment group create \
  --name $DeploymentName \
  --template-file $templateFile
在终端中运行以下 Azure PowerShell 命令。 此代码片段与之前使用的代码相同,但部署的名称已更改。
$templateFile="azuredeploy.json"
$today=Get-Date -Format "MM-dd-yyyy"
$deploymentName="addstorage-"+"$today"
New-AzResourceGroupDeployment `
  -Name $deploymentName `
  -TemplateFile $templateFile
检查你的部署
部署完成后,返回到浏览器中的 Azure 门户。 转到资源组,可以看到现在有“2 个已成功”的部署。 选择此链接。
请注意,此列表中包含了所有两个部署。
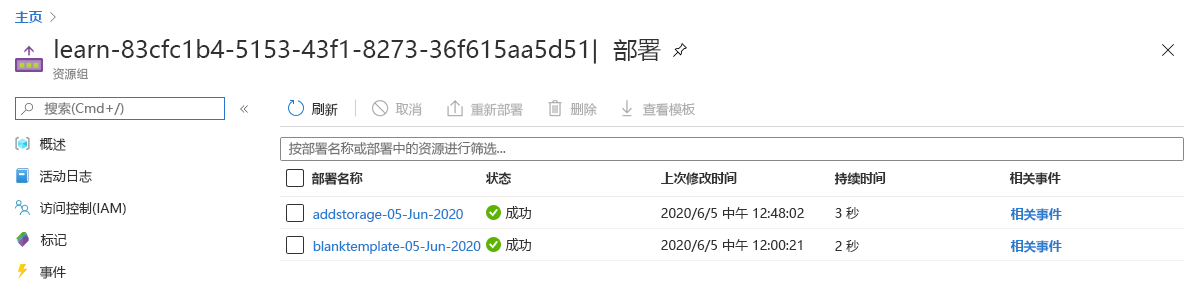
选择 addstorage。
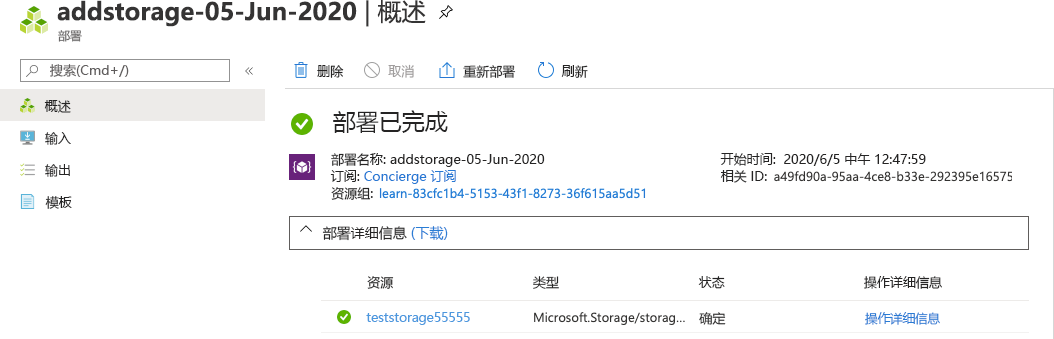
请注意,存储帐户已部署。