练习 - 将 Web 应用程序部署到 Azure 应用服务
在本模块中,你将创建一个多阶段管道,以生成应用程序并将其部署到 Azure 应用服务。 你将学会如何:
- 创建应用服务实例来托管 Web 应用程序。
- 创建多阶段管道。
- 部署到 Azure 应用服务。
创建应用服务实例
登录到 Azure 门户。
从左窗格中选择 “应用服务 ”。
选择“ 创建>Web 应用 ”以创建新的 Web 应用。
在“基本信息”选项卡上,输入下列值。
设置 价值 项目详细信息 订阅 订阅 资源组 选择 “新建”,然后输入 tailspin-space-game-rg,然后选择“ 确定”。 实例详细信息 名称 提供唯一的名称,例如 tailspin-space-game-web-1234。 该名称在 Azure 中必须唯一。 它将成为域名的一部分。 在实践中,请选择描述服务的名称。 记下名称供以后使用。 发布 代码 运行时堆栈 .NET 8 (LTS) 操作系统 Linux的 区域 选择一个区域,最好选择一个靠近你的区域。 定价计划 Linux 计划 接受默认值。 定价计划 从下拉菜单中选择 基本 B1 定价层。 选择 “审阅 + 创建”,查看窗体,然后选择“ 创建”。 此部署需要一些时间才能完成。
在部署完成之后,请选择“转到资源”。 应用服务概要显示与部署相关的详细信息。

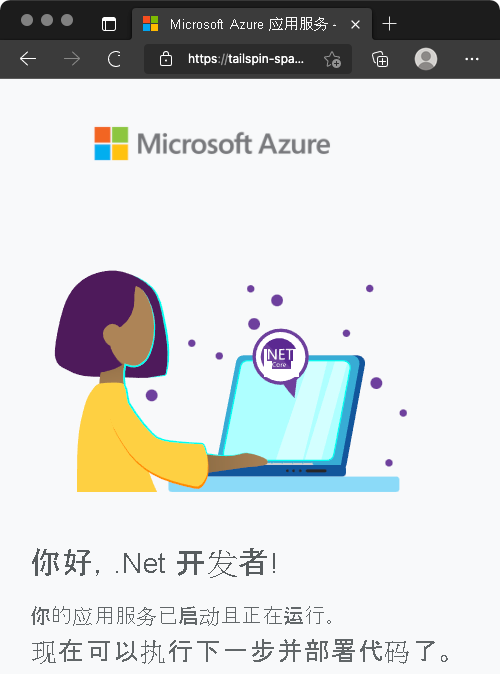
选择 URL 以验证应用服务的状态。

重要
本模块中的“ 清理 Azure DevOps 环境 ”页介绍了如何在完成应用服务实例后将其拆毁。 清理有助于确保在完成本模块后不会为 Azure 资源付费。 确保遵循清理步骤,即使未完成本模块。
创建服务连接
重要
请确保在同一Microsoft帐户下登录到 Azure 和 Azure DevOps。
在 Azure DevOps 中,转到 Space Game - web - Release 项目。
在页面左下角,选择 “项目设置”。
在“管道”下,选择“服务连接”。
选择“创建服务连接”,然后选择“Azure 资源管理器”,再选择“下一步”。
选择 “服务主体”(自动),然后选择“ 下一步”。
填写必填字段,如下所示:如果出现提示,请登录到Microsoft帐户。
领域 价值 范围级别 订阅 订阅 你的 Azure 订阅 资源组 tailspin-space-game-rg 服务连接名称 资源管理器 - Tailspin - Space Game 确保选择 “授予对所有管道的访问权限 ”。
选择“ 保存”。
将生成阶段添加到管道
使用多阶段管道可以定义更改在管道中进行推广时所经历的不同阶段。 每个阶段定义执行管道阶段所需的代理、变量和步骤。 在本部分中,您将定义一个阶段来执行构建。 定义将 Web 应用程序部署到应用服务的第二个阶段。
若要将现有生成配置转换为多阶段管道,请向配置添加一个 stages 节,然后为管道的每个阶段添加一个或多个 stage 节。 阶段分解为作业,这是一系列按顺序作为单元运行的步骤。
在 Visual Studio Code 中的项目中,打开 azure-pipelines.yml 并将其内容替换为以下代码:
trigger:
- '*'

variables:
  buildConfiguration: 'Release'

stages:
- stage: 'Build'
  displayName: 'Build the web application'
  jobs:
  - job: 'Build'
    displayName: 'Build job'
    pool:
      vmImage: 'ubuntu-20.04'
      demands:
      - npm

    variables:
      wwwrootDir: 'Tailspin.SpaceGame.Web/wwwroot'
      dotnetSdkVersion: '6.x'

    steps:
    - task: UseDotNet@2
      displayName: 'Use .NET SDK $(dotnetSdkVersion)'
      inputs:
        version: '$(dotnetSdkVersion)'

    - task: Npm@1
      displayName: 'Run npm install'
      inputs:
        verbose: false

    - script: './node_modules/.bin/node-sass $(wwwrootDir) --output $(wwwrootDir)'
      displayName: 'Compile Sass assets'

    - task: gulp@1
      displayName: 'Run gulp tasks'

    - script: 'echo "$(Build.DefinitionName), $(Build.BuildId), $(Build.BuildNumber)" > buildinfo.txt'
      displayName: 'Write build info'
      workingDirectory: $(wwwrootDir)

    - task: DotNetCoreCLI@2
      displayName: 'Restore project dependencies'
      inputs:
        command: 'restore'
        projects: '**/*.csproj'

    - task: DotNetCoreCLI@2
      displayName: 'Build the project - $(buildConfiguration)'
      inputs:
        command: 'build'
        arguments: '--no-restore --configuration $(buildConfiguration)'
        projects: '**/*.csproj'

    - task: DotNetCoreCLI@2
      displayName: 'Publish the project - $(buildConfiguration)'
      inputs:
        command: 'publish'
        projects: '**/*.csproj'
        publishWebProjects: false
        arguments: '--no-build --configuration $(buildConfiguration) --output $(Build.ArtifactStagingDirectory)/$(buildConfiguration)'
        zipAfterPublish: true

    - publish: '$(Build.ArtifactStagingDirectory)'
      artifact: drop
在集成终端中,运行以下命令来暂存、提交,然后将更改推送到远程分支。
git add azure-pipelines.yml
git commit -m "Add a build stage"
git push origin release-pipeline
在 Azure Pipelines 中,导航到管道以查看日志。
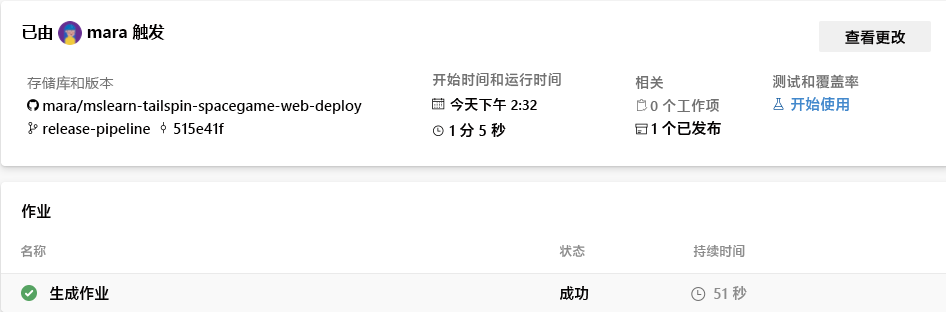
构建完成后,选择返回按钮返回摘要页,并检查管道和已发布的工件的状态。
创建开发环境
环境是部署环境的抽象表示形式。 可以使用环境来定义发布的特定条件,例如授权将哪个管道部署到环境。 还可以使用环境为特定用户/组设置手动审批,以便在部署恢复之前批准。
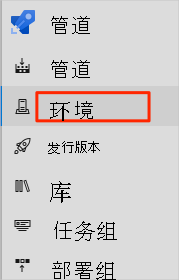
在 Azure Pipelines 中,选择 “环境”。
选择“创建环境”。
在 “名称”下输入 dev。
将其余字段保留为默认值。
选择“ 创建”。
将 Web 应用名称存储在管道变量中
我们创建的 部署 阶段使用名称来标识要部署到的应用服务实例;例如 ,tailspin-space-game-web-1234。
尽管可以在管道配置中硬编码此名称,但将其定义为变量会使配置更具可重用性。
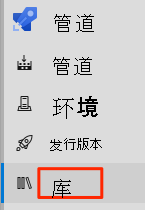
在 Azure DevOps 中,选择 “管道 ”,然后选择“ 库”。
选择 “+ 变量”组 以创建新的变量组。
输入“发布”作为“变量组名称”。
选择“变量”下的“添加”以添加新变量。
输入 WebAppName 作为变量名称和应用服务实例的值的名称:例如 tailspin-space-game-web-1234。
选择“ 保存”。
将部署阶段添加到管道
我们通过添加一个部署阶段来扩展管道,使用和download任务下载生成工件,然后将 AzureWebApp@1 部署到应用服务。
在 Visual Studio Code 中,将 azure-pipelines.yml 的内容替换为以下 yaml:
trigger:
- '*'

variables:
  buildConfiguration: 'Release'

stages:
- stage: 'Build'
  displayName: 'Build the web application'
  jobs:
  - job: 'Build'
    displayName: 'Build job'
    pool:
      vmImage: 'ubuntu-20.04'
      demands:
      - npm

    variables:
      wwwrootDir: 'Tailspin.SpaceGame.Web/wwwroot'
      dotnetSdkVersion: '6.x'

    steps:
    - task: UseDotNet@2
      displayName: 'Use .NET SDK $(dotnetSdkVersion)'
      inputs:
        version: '$(dotnetSdkVersion)'

    - task: Npm@1
      displayName: 'Run npm install'
      inputs:
        verbose: false

    - script: './node_modules/.bin/node-sass $(wwwrootDir) --output $(wwwrootDir)'
      displayName: 'Compile Sass assets'

    - task: gulp@1
      displayName: 'Run gulp tasks'

    - script: 'echo "$(Build.DefinitionName), $(Build.BuildId), $(Build.BuildNumber)" > buildinfo.txt'
      displayName: 'Write build info'
      workingDirectory: $(wwwrootDir)

    - task: DotNetCoreCLI@2
      displayName: 'Restore project dependencies'
      inputs:
        command: 'restore'
        projects: '**/*.csproj'

    - task: DotNetCoreCLI@2
      displayName: 'Build the project - $(buildConfiguration)'
      inputs:
        command: 'build'
        arguments: '--no-restore --configuration $(buildConfiguration)'
        projects: '**/*.csproj'

    - task: DotNetCoreCLI@2
      displayName: 'Publish the project - $(buildConfiguration)'
      inputs:
        command: 'publish'
        projects: '**/*.csproj'
        publishWebProjects: false
        arguments: '--no-build --configuration $(buildConfiguration) --output $(Build.ArtifactStagingDirectory)/$(buildConfiguration)'
        zipAfterPublish: true

    - publish: '$(Build.ArtifactStagingDirectory)'
      artifact: drop

- stage: 'Deploy'
  displayName: 'Deploy the web application'
  dependsOn: Build
  jobs:
  - deployment: Deploy
    pool:
      vmImage: 'ubuntu-20.04'
    environment: dev
    variables:
    - group: Release
    strategy:
      runOnce:
        deploy:
          steps:
          - download: current
            artifact: drop
          - task: AzureWebApp@1
            displayName: 'Azure App Service Deploy: website'
            inputs:
              azureSubscription: 'Resource Manager - Tailspin - Space Game'
              appName: '$(WebAppName)'
              package: '$(Pipeline.Workspace)/drop/$(buildConfiguration)/*.zip'
请注意突出显示的部分以及我们如何使用
download和AzureWebApp@1任务。 管道从我们之前创建的变量组中提取$(WebAppName)。另请注意我们如何使用
environment部署到开发环境。在集成终端中,将 azure-pipelines.yml 添加到索引。 然后提交更改并将其推送到 GitHub。
git add azure-pipelines.yml
git commit -m "Add a deployment stage"
git push origin release-pipeline
在 Azure Pipelines 中,导航到管道以查看日志。
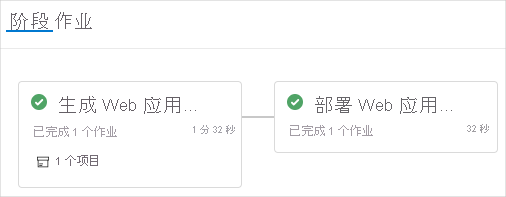
生成完成后,选择返回按钮以返回到摘要页并检查阶段的状态。 这两个阶段在我们的案例中都成功完成。
在应用服务上查看已部署的网站
如果仍然打开应用服务选项卡,请刷新页面。 否则,请在 Azure 门户中导航到 Azure 应用服务并选择实例的 URL:例如,
https://tailspin-space-game-web-1234.azurewebsites.net
Space Game 网站已成功部署到 Azure 应用服务。

祝贺! 使用 Azure Pipelines 成功将 Space Game 网站部署到 Azure 应用服务。