练习 - 执行代码覆盖率测试
与用于单元测试的工具非常类似,你对代码覆盖率使用的工具取决于编程语言和应用程序框架。
将 .NET 应用程序定向到 Linux 上运行时, coverlet 是一种常用选项。 Coverlet 是一个适用于 .NET 的跨平台代码覆盖率库。
如何在 .NET 中完成代码覆盖率?
收集代码覆盖率的方式取决于你在使用的编程语言和框架,以及可用的代码覆盖率工具。
在 Tailspin 场景中,我们发现:
Windows 上的 Visual Studio 提供了一种方法来执行代码覆盖率。
但是,由于我们在 Linux 上构建,因此可以使用适用于 .NET 的跨平台代码覆盖率库 coverlet。
单元测试项目需要 coverlet.msbuild NuGet 包。
代码覆盖率结果会被写入 XML 文件,以便其他工具可对其进行处理。 Azure Pipelines 支持 Cobertura 和 JaCoCo 覆盖率结果格式。
对于此模块,我们将使用 Cobertura。
若要将 Cobertura 覆盖率结果转换为可读的格式,可以使用名为 ReportGenerator 的工具。
ReportGenerator 提供了多种格式,包括 HTML。 HTML 格式会创建 .NET 项目中每个类的详细报表。
具体而言,有一种称为 HtmlInline_AzurePipelines 的 HTML 格式,它提供与 Azure Pipelines 匹配的视觉外观。
如何管理 .NET 工具?
.NET 工具(如 ReportGenerator)是一种特殊的 NuGet 包,其中包含控制台应用程序。 可将 .NET 工具作为全局工具或本地工具进行管理。
全局工具安装在一个集中位置,你可从任何目录调用它。 全局工具的一个版本用于计算机上的所有目录。
本地工具是 .NET 工具更独立的副本,它的作用范围是特定目录。 范围使不同的目录能够包含同一工具的不同版本。
请使用清单文件管理给定目录的本地工具。 此文件采用 JSON 格式,通常名为 dotnet-tools.json。 通过清单文件,可描述生成或运行应用程序所需的特定工具版本。
将清单文件与应用程序源一起包含在源代码管理中时,开发人员和生成系统可运行 dotnet tool restore 命令来安装清单文件中列出的所有工具。 需要较新版本的本地工具时,只需更新清单文件中的版本即可。
为了使项目更独立,在本模块中使用本地工具。 创建一个包含 ReportGenerator 工具的工具清单。 同时修改生成管道来安装 ReportGenerator 工具,将代码覆盖率结果转换为用户可读的格式。
在本地运行代码覆盖率
在编写任何管道代码之前,可以手动尝试操作以验证过程。
在 Visual Studio Code 中打开集成终端。
运行以下
dotnet new命令来创建一个本地工具清单文件。dotnet new tool-manifest命令创建一个名为 .config/dotnet-tools.json 的文件。
运行以下
dotnet tool install命令来安装 ReportGenerator:dotnet tool install dotnet-reportgenerator-globaltool此命令会安装最新版本的
ReportGenerator,并将条目添加到工具清单文件中。运行以下
dotnet add package命令,将coverlet.msbuild包添加到 Tailspin.SpaceGame.Web.Tests 项目中:dotnet add Tailspin.SpaceGame.Web.Tests package coverlet.msbuild运行以下
dotnet test命令来运行单元测试并收集代码覆盖率:注意
如果在 Visual Studio 中使用 PowerShell 终端,则续行符是反引号 (`),因此对于多行命令,请使用该字符代替反斜杠字符 (\)。
dotnet test --no-build \
  --configuration Release \
  /p:CollectCoverage=true \
  /p:CoverletOutputFormat=cobertura \
  /p:CoverletOutput=./TestResults/Coverage/
如果该命令失败,请尝试按如下所示运行它:
MSYS2_ARG_CONV_EXCL="*" dotnet test --no-build \
  --configuration Release \
  /p:CollectCoverage=true \
  /p:CoverletOutputFormat=cobertura \
  /p:CoverletOutput=./TestResults/Coverage/
此命令与你之前运行的命令很相似。
/p:标志指示 coverlet 使用哪个代码覆盖率格式以及在何处放置结果。运行以下
dotnet tool run命令,使用ReportGenerator将 Cobertura 文件转换为 HTML:dotnet tool run reportgenerator \ -reports:./Tailspin.SpaceGame.Web.Tests/TestResults/Coverage/coverage.cobertura.xml \ -targetdir:./CodeCoverage \ -reporttypes:HtmlInline_AzurePipelines项目根目录的 CodeCoverage 文件夹中会显示许多 HTML 文件。
在 Visual Studio Code 中,展开 CodeCoverage 文件夹,右键单击“index.htm”,然后选择“在文件资源管理器中显示”(在 macOS 上选择“在 Finder 中显示”或在 Linux 上选择“打开所在的文件夹”)。
在 Windows 资源管理器(macOS 上的 Finder)中双击“index.htm”,在 Web 浏览器中将其打开。
你将看到覆盖率报表摘要。
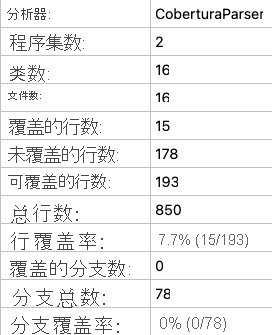
滚动到页面底部,查看按类类型划分的覆盖率情况。
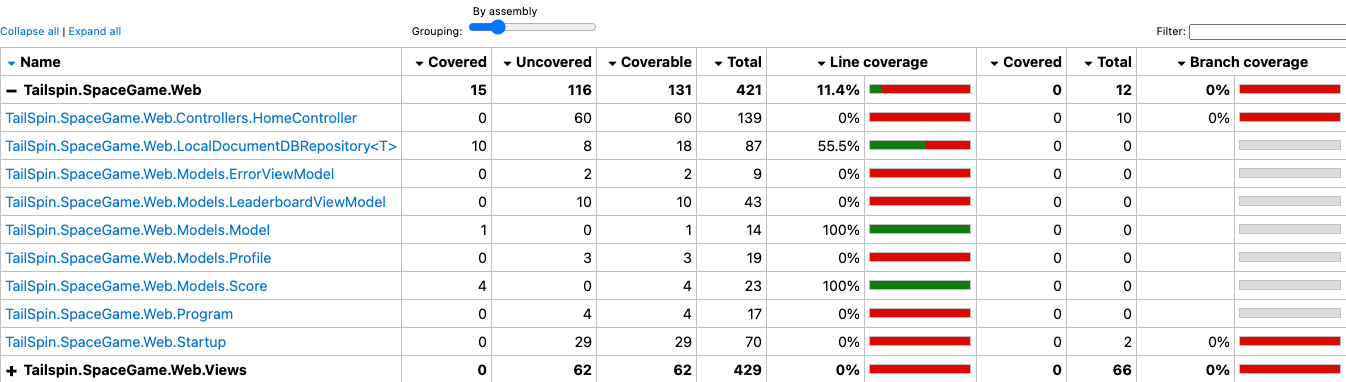
选择指向
TailSpin.SpaceGame.Web.LocalDocumentDBRepository<T>的链接,查看进一步的详细信息。请注意,
GetItemsAsync方法被单元测试覆盖,而CountItemsAsync方法并没有覆盖率。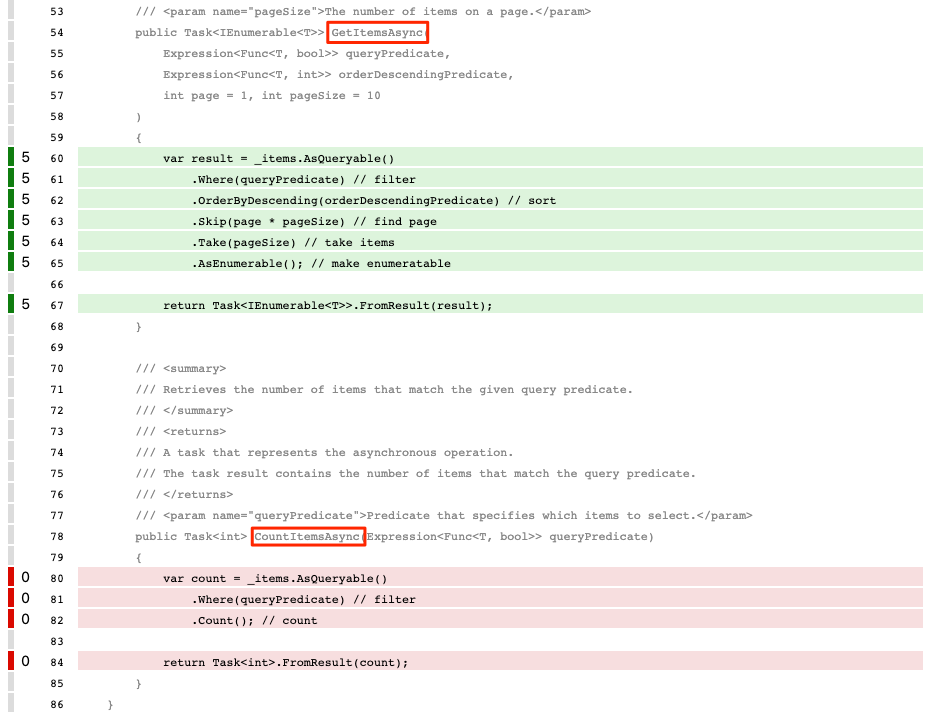
这样做很有意义,因为
FetchOnlyRequestedGameRegion测试方法调用GetItemsAsync方法,但不调用CountItemsAsync方法。 (若要查看测试代码,请查看 DocumentDBRepository_GetItemsAsyncShould.cs 文件。)
创建分支
现在你已可在本地生成代码覆盖率报表,接下来准备将任务添加到执行相同的任务的生成管道中。
在本节中,你将基于 code-coverage 分支创建名为 unit-tests 的分支来保存你的工作。 实际上,你通常会从 main 分支创建此分支。
在 Visual Studio Code 中打开集成终端。
在终端中运行以下
git checkout命令,创建一个名为code-coverage的分支:git checkout -B code-coverage
添加生成任务
在本节中,你将向生成管道添加测量代码覆盖率的任务。
在 Visual Studio Code 中,按如下所示修改 azure-pipelines.yml:
trigger:
- '*'

pool:
  vmImage: 'ubuntu-20.04'
  demands:
  - npm

variables:
  buildConfiguration: 'Release'
  wwwrootDir: 'Tailspin.SpaceGame.Web/wwwroot'
  dotnetSdkVersion: '6.x'

steps:
- task: UseDotNet@2
  displayName: 'Use .NET SDK $(dotnetSdkVersion)'
  inputs:
    version: '$(dotnetSdkVersion)'

- task: Npm@1
  displayName: 'Run npm install'
  inputs:
    verbose: false

- script: './node_modules/.bin/node-sass $(wwwrootDir) --output $(wwwrootDir)'
  displayName: 'Compile Sass assets'

- task: gulp@1
  displayName: 'Run gulp tasks'

- script: 'echo "$(Build.DefinitionName), $(Build.BuildId), $(Build.BuildNumber)" > buildinfo.txt'
  displayName: 'Write build info'
  workingDirectory: $(wwwrootDir)

- task: DotNetCoreCLI@2
  displayName: 'Restore project dependencies'
  inputs:
    command: 'restore'
    projects: '**/*.csproj'

- task: DotNetCoreCLI@2
  displayName: 'Build the project - $(buildConfiguration)'
  inputs:
    command: 'build'
    arguments: '--no-restore --configuration $(buildConfiguration)'
    projects: '**/*.csproj'

- task: DotNetCoreCLI@2
  displayName: 'Install .NET tools from local manifest'
  inputs:
    command: custom
    custom: tool
    arguments: 'restore'

- task: DotNetCoreCLI@2
  displayName: 'Run unit tests - $(buildConfiguration)'
  inputs:
    command: 'test'
    arguments: '--no-build --configuration $(buildConfiguration) /p:CollectCoverage=true /p:CoverletOutputFormat=cobertura /p:CoverletOutput=$(Build.SourcesDirectory)/TestResults/Coverage/'
    publishTestResults: true
    projects: '**/*.Tests.csproj'

- task: DotNetCoreCLI@2
  displayName: 'Create code coverage report'
  inputs:
    command: custom
    custom: tool
    arguments: 'run reportgenerator -reports:$(Build.SourcesDirectory)/**/coverage.cobertura.xml -targetdir:$(Build.SourcesDirectory)/CodeCoverage -reporttypes:HtmlInline_AzurePipelines'

- task: PublishCodeCoverageResults@1
  displayName: 'Publish code coverage report'
  inputs:
    codeCoverageTool: 'cobertura'
    summaryFileLocation: '$(Build.SourcesDirectory)/**/coverage.cobertura.xml'

- task: DotNetCoreCLI@2
  displayName: 'Publish the project - $(buildConfiguration)'
  inputs:
    command: 'publish'
    projects: '**/*.csproj'
    publishWebProjects: false
    arguments: '--no-build --configuration $(buildConfiguration) --output $(Build.ArtifactStagingDirectory)/$(buildConfiguration)'
    zipAfterPublish: true

- task: PublishBuildArtifacts@1
  displayName: 'Publish Artifact: drop'
  condition: succeeded()
此版本基于现有的配置。 以下是新增功能的概述:
Azure Pipelines 任务 显示名称 说明 DotNetCoreCLI@2从本地清单安装 .NET 工具 安装清单文件 dotnet-tools.json 中列出的工具 DotNetCoreCLI@2运行单元测试 - $(buildConfiguration) 运行单元测试,同时以 Cobertura 格式收集代码覆盖率 DotNetCoreCLI@2创建代码覆盖率报表 将 Cobertura 输出转换为 HTML PublishCodeCoverageResults@1发布代码覆盖率报表 将报表发布到管道
提交更改并将分支推送到 GitHub
现在,你需要将更改推送到 GitHub,并查看管道运行情况。 回顾一下,你目前在 code-coverage 分支中。
虽然不是必需操作,但在这里,你将单独添加和提交每个文件,以便每个更改都与说明性提交消息关联。
在 Visual Studio Code 中,转到终端。
添加并提交 Tailspin.SpaceGame.Web.Tests.csproj 文件,该文件现在包含对 包的引用
coverlet.msbuild:git add Tailspin.SpaceGame.Web.Tests/Tailspin.SpaceGame.Web.Tests.csproj git commit -m "Add coverlet.msbuild package"添加并提交工具清单文件 dotnet-tools.json:
git add .config/dotnet-tools.json
git commit -m "Add code coverage"
添加并提交 azure-pipelines.yml,其包含已更新的生成配置:
git add azure-pipelines.yml
git commit -m "Add code coverage"
将
code-coverage分支推送到 GitHub。git push origin code-coverage
观察 Azure Pipelines 运行测试
在此处,可看到运行在管道中的测试,然后直观呈现 Azure Test Plans 中的结果。
在 Azure Pipelines 中,跟踪生成的每个步骤。
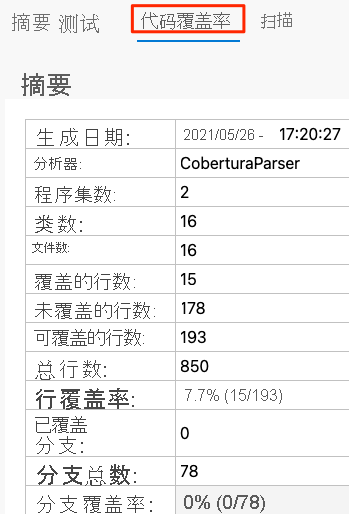
完成生成后,返回到摘要页面,并选择“代码覆盖率”选项卡。
你会看到在本地运行测试时所做的相同结果。
(可选)可从 Azure Pipelines 浏览结果。
添加仪表板小组件
在前一节中,你向仪表板添加了“Test Results Trend”小组件,这使其他人能够快速查看一段时间内的测试结果趋势。
在此处,添加汇总代码覆盖率的第二个小组件。
在新浏览器选项卡中,转到 marketplace.visualstudio.com。
在“Azure DevOps”选项卡上,搜索“code coverage”。
选择“Code Coverage Widgets”(由 Shane Davi 发布)。
选择“免费获取”。
在下拉列表中,选择你的 Azure DevOps 组织。
选择“安装” 。
返回到 Azure DevOps。
转到“概述”“仪表板”>。
选择 “编辑”。
搜索“Code Coverage”,然后选择“Code Coverage”。
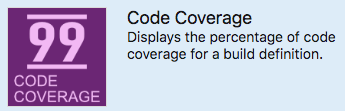
将“Code Coverage”拖到画布上。
选择齿轮图标来配置小组件。
保留所有默认设置,除了:
- 宽度:输入“2”
- 生成定义:选择管道
- 覆盖率度量:选择“行”
选择“保存”。
选择“完成编辑”。
小组件显示单元测试涵盖的代码的百分比。
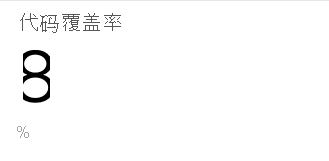
你现在已在管道中设置了代码覆盖率。 尽管现有代码覆盖率较低,但你有一个基线,你可随着时间的推移来改进它。
稍后,你可将 coverlet 配置为查看测试是否提供覆盖率的最小阈值。 阈值可能为 30%、50% 或 80%,具体取决于你的要求。 如果测试覆盖率低于此数量,则生成将失败。
删除代码覆盖率文件
回顾一下,你早前运行 Reportgenerator 时,项目根目录的 CodeCoverage 文件夹中会显示许多 HTML 文件。
这些 HTML 文件不应包含在源代码管理中,你不再需要它们。 虽然项目的 .gitignore 文件已设置为忽略 CodeCoverage 目录中的任何内容,不过删除这些文件是个好主意,使它们不会在以后的模块中添加到 Git 存储库。
在 Visual Studio Code 中,转到终端窗口,然后在项目的根目录中运行以下命令:
rm -rf CodeCoverage/