我们在 Visual Studio 2019 版本 16.8 中推出了 Git 体验的第一个版本。 这种体验提供包含常见 Git 任务的简单“Git 更改”窗口,可帮助减少上下文切换。 它还包括一个屏幕范围的“Git 存储库”窗口,用于进行更高级的 Git 操作,例如分支管理和存储库浏览。
如果你一直在使用团队资源管理器,下面的分步指南介绍了如何使用 Git 体验。
注意
下一节包含调整了大小以适应表中各列的屏幕截图。 单击每个屏幕截图以查看其放大版。 (如果使用触屏设备,请点击每个屏幕截图以查看其放大版。)
入门
|
Team Explorer |
Git 体验 |
| 克隆存储库 |
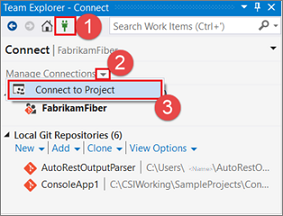 1.打开“连接”页面。
2.展开“管理连接”。
3.选择“连接到项目”。 |
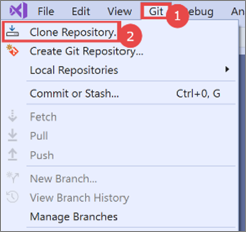 1.打开“Git”菜单。
2.选择“克隆存储库”。
|
| 切换存储库 |
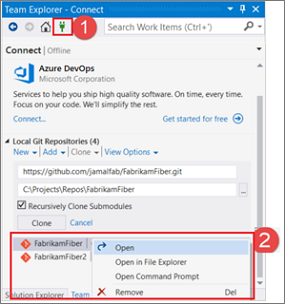 1.打开“连接”页面。
2.从“本地存储库”列表中选择一个存储库。 |
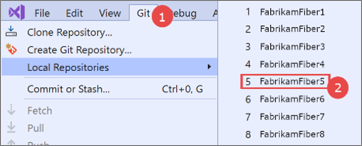 1.打开“Git”菜单。
2.从“本地存储库”列表中选择一个存储库。 |
| 打开解决方案 |
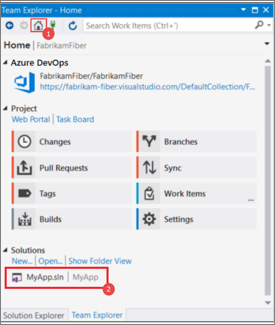 1.打开团队资源管理器中的“主页”页面。
2.从解决方案列表中选择一个解决方案。 |
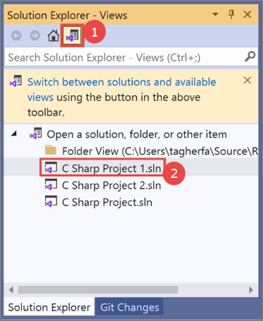 1.打开解决方案资源管理器中的“切换视图”页。
2.从解决方案列表中选择一个解决方案。 |
| 向源代码管理添加解决方案,并创建新存储库 |
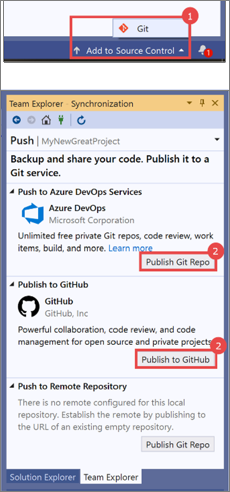 1.从“添加到源代码管理”状态栏菜单中选择“Git”。
2.选择“发布”。 |
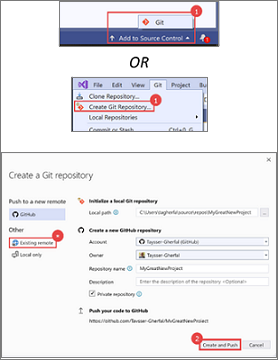 1.从“添加到源代码管理”状态栏菜单中选择“Git”,或从顶级 Visual Studio 菜单栏中选择“Git” >“创建 Git 存储库”。
2.选择“创建并推送”。 注意:如果要将代码添加到 Azure DevOps,请使用现有的远程选项。 在这种情况下,必须先创建 Azure DevOps 存储库。 |
提示
Git 体验应根据你打开的存储库或解决方案自动连接到正确的 Azure DevOps 存储库。 但是,如果需要手动连接到存储库,仍可使用团队资源管理器执行此操作。 从 Visual Studio 菜单栏中,选择“查看”>“团队资源管理器”>“管理连接”>“连接”。
Git 更改
|
Team Explorer |
Git 体验 |
| 提交和暂存 |
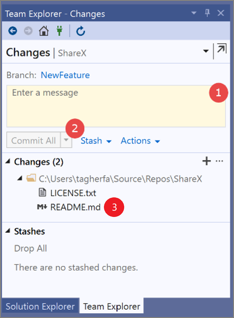 1.输入提交消息。
2.选择“全部提交”。
3.若要暂存特定文件,请右键单击该文件,然后选择“暂存”。 |
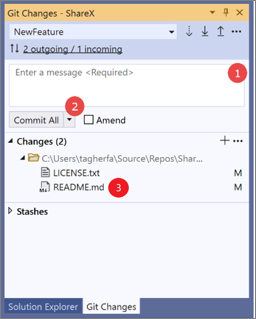 1.输入提交消息。
2.选择“全部提交”。
3.若要暂存特定文件,请将鼠标悬停在其上,然后单击“+”图标。 |
| 修改提交 |
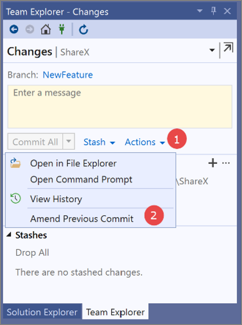 1.单击“操作”下拉菜单。
2.选择“修改上一个提交”。 |
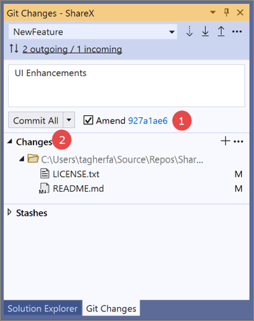 1.单击“修改”复选框。
2.单击“全部提交”以提交更新。 |
| 储藏更改 |
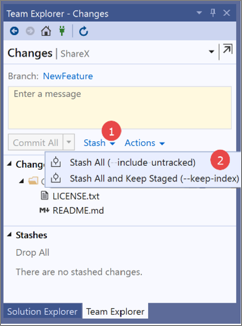 1.单击“储藏”下拉菜单。
2.选择相关的“储藏”选项。 |
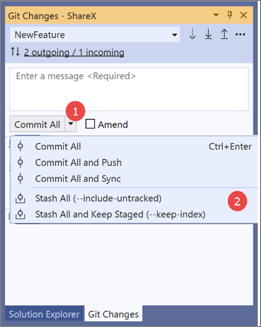 1.单击“全部提交”下拉菜单。
2.选择相关的“储藏”选项。 |
同步
|
Team Explorer |
Git 体验 |
| 提取、拉取和推送更改 |
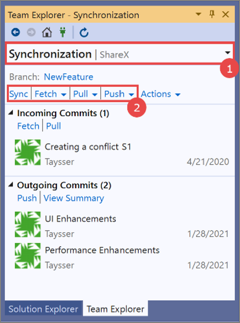 1.导航到“同步”页。
2.单击你选择的网络操作。 |
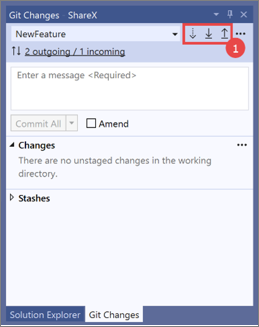 1.在“Git 更改”窗口中找到“提取”、“拉取”和“推送”按钮。
2.单击你选择的网络操作。 |
| 查看传入和传出提交 |
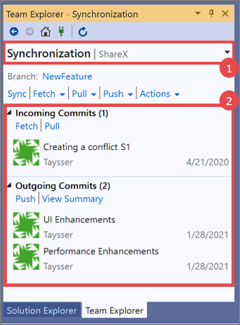 1.导航到“同步”页。
2.查看传入和传出列表。 |
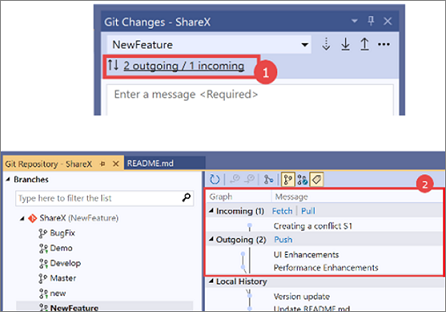 1.单击“Git 更改”窗口中的“传出/传入”链接。
2.使用“Git 存储库”窗口顶部图表中的图标,查看传入和传出的提交。 |
分支
|
Team Explorer |
Git 体验 |
| 创建分支 |
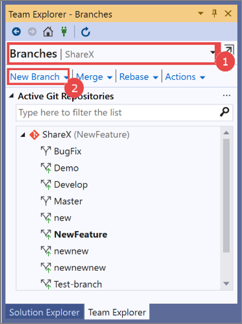 1.导航到“分支”窗口。
2.单击“新建分支”。 |
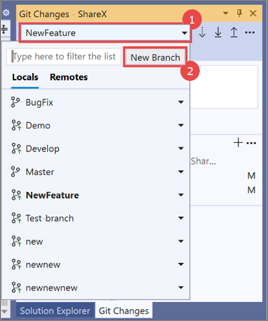 1.在“Git 更改”窗口中,单击“分支”下拉列表。
2.单击“新建分支”。 |
| 从远程分支获取最新更改 |
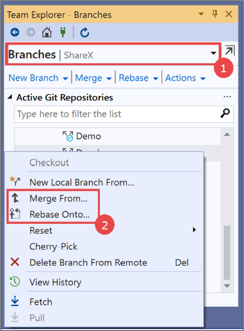 1.导航到“分支”页。
2.右键单击远程分支,然后选择“合并自”或“变基到”。 |
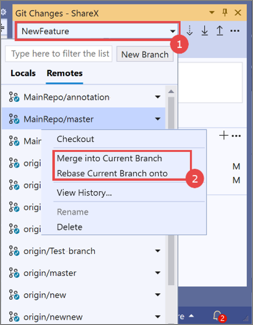 1.单击“分支”下拉列表。
2.在“远程”选项卡下,单击远程分支,然后选择“合并到当前分支”或“将当前分支变基到”。 |
| 管理分支 |
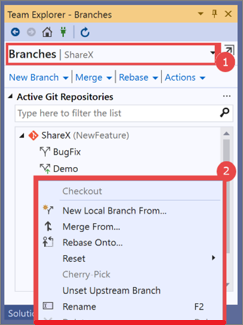 1.导航到“分支”窗口。
2.右键单击要管理的分支。
3.查看分支的“历史记录”以管理提交。 |
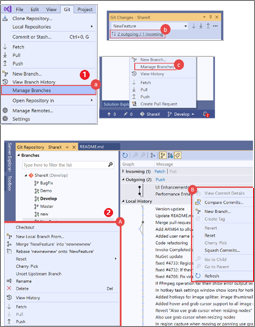 1.使用以下入口点之一导航到“Git 存储库”窗口:
a. 从顶级 Visual Studio 菜单中,选择“Git”>“管理分支”。
b. 选择“Git 更改”>“传入/传出”。
c. 在右下角的状态栏菜单中,选择“管理分支”。
2.从顶级“Git”>“管理分支”菜单中,执行以下操作之一:
A. 右键单击分支。
B. 选择要管理的提交(多选)。 |
冲突解决
|
Team Explorer |
Git 体验 |
| 访问包含冲突的文件的列表 |
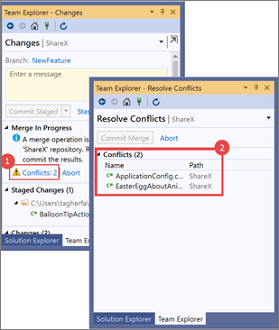 1.单击“冲突”链接以导航到“解决冲突”窗口。
2.使用“冲突”列表解决合并冲突。 |
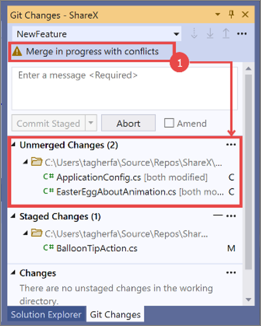 1.验证是否显示了“合并正在进行中,包含冲突”。
2.“Git 更改”窗口的“未合并的更改”部分将显示具有合并冲突的文件的列表。
解决冲突。 |
相关内容
 1.单击“冲突”链接以导航到“解决冲突”窗口。
  1.验证是否显示了“合并正在进行中,包含冲突”。


