Windows Admin Center 是一种基于浏览器的管理工具,可简化服务器、群集、Windows 电脑和 Azure 虚拟机的管理。
本文介绍如何在 Windows 电脑上 下载 并 安装 Windows Admin Center 后开始使用 Windows Admin Center。 若要详细了解 Windows Admin Center,请参阅 Windows Admin Center概述。
在 Windows PC 上打开 Windows Admin Center
Important
必须是本地管理员组的成员才能使用 Windows Admin Center。
按照以下步骤在 Windows 电脑上打开 Windows Admin Center:
在“开始”菜单上,选择“Windows Admin Center”(v2)。 或在搜索栏上输入 Windows Admin Center (v2), 然后从搜索结果中选择它。
默认浏览器随即打开 Windows Admin Center 的登录屏幕。
Windows 客户端操作系统使用端口 6600 配置用于本地访问。
Windows Server作系统配置为使用端口 443 进行远程访问。
使用管理员凭据登录到 Windows Admin Center。
会出现用于选择证书进行身份验证的提示。
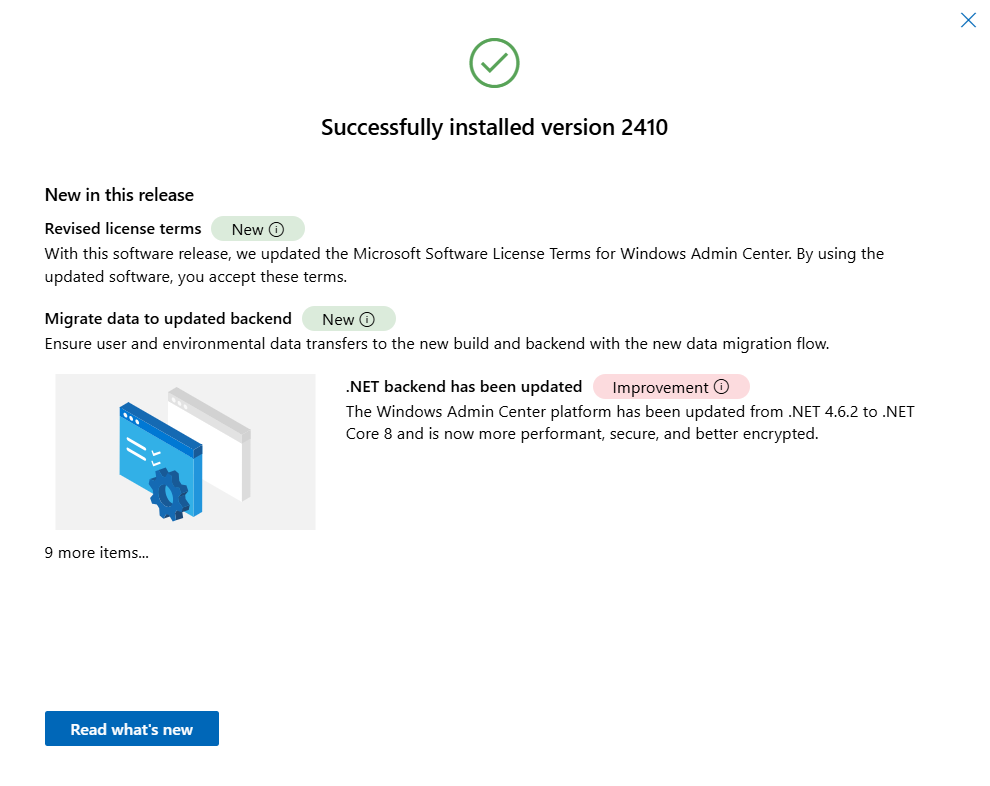
(仅第一次:)弹出窗口确认 Windows Admin Center 版本已成功安装。 还会提供有关此版本中的新增功能的信息。 关闭窗口以继续操作。
“ 所有连接 ”页显示连接列表中的 Windows 计算机名称。 现在可以在 Windows Admin Center 中添加连接。
在 Windows Admin Center 中添加连接
若要添加或创建 Azure VM,必须先向 Azure 注册 Windows Admin Center。 可以从“所有连接”页将连接作为托管节点添加到 Windows Admin Center。 所有连接 都是打开 Windows Admin Center 时显示的默认页面。 在此页上,可以将现有资源添加为连接或创建新资源。 添加的资源将显示在连接列表中。
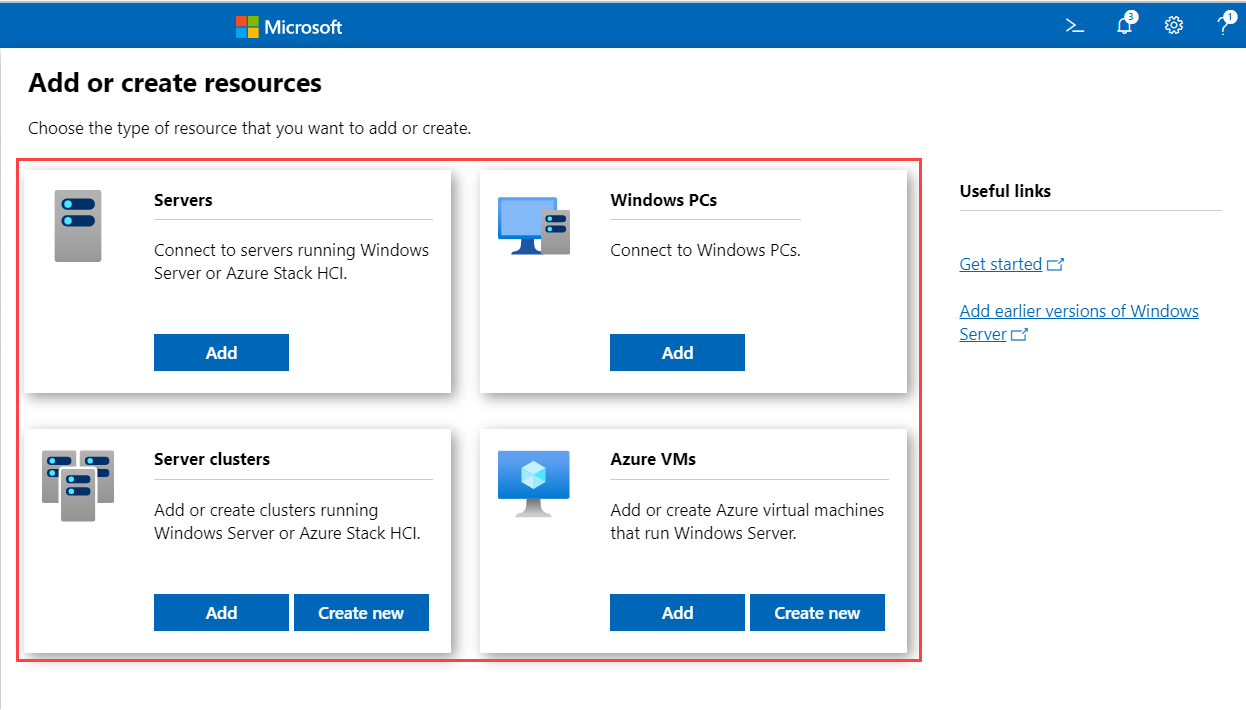
可以从 “所有连接 ”页添加的资源类型包括服务器、Windows 电脑、群集和 Azure VM。 可以创建的资源是群集和 Azure VM。
若要将连接添加到Windows Admin Center:
在 “所有连接”下,选择“ + 添加”。

将显示可以添加的资源类型。 为要添加的资源类型选择“添加”。
Windows Admin Center 支持各种添加资源的方法,具体取决于资源类型:
- 一次添加一个资源。
- 通过批量导入添加多个资源。
- 通过搜索 Active Directory 添加资源。
根据要添加资源的方式选择选项卡。 每个选项卡的标签可能因要添加的资源类型而异。
一次添加一个资源是默认方法。 添加群集时,此选项卡的标签显示为 “添加群集 ”。
选择 “添加一个 ”或 “添加群集 ”选项卡。
在 “服务器名称 ”框中,输入资源的名称。

开始输入文本时,Windows Admin Center 会基于文本字符串开始搜索资源。 如果找到匹配项,则可以完全按照输入添加名称或使用默认资源名称。 如果未找到匹配项,仍可以添加此资源以显示在连接列表中。


(可选:)选择 “添加标记” 以添加连接标记。 可以使用标记来标识和筛选连接列表中的相关资源。 有关详细信息,请参阅本文后面的 “使用标记来组织连接 ”。
添加完资源后,选择“ 添加”。
所选资源显示在“ 所有连接 ”页上的连接列表中。
使用托管节点进行身份验证
将连接添加为托管节点后,必须使用它们进行身份验证才能连接。
Windows Admin Center 支持多种机制来对托管节点进行身份验证。 单一登录是默认登录。
Note
为了执行远程管理,Windows Admin Center 会模拟所提供的用户的安全上下文,并使用该安全上下文来访问计算机。 提供的用户在“所有连接”页上的“管理方式”列中列出。
使用单一登录进行身份验证
可以使用当前的 Windows 凭据向托管节点进行身份验证。 此身份验证是默认设置,Windows Admin Center 在添加资源时会尝试单一登录。
当 Windows Admin Center 部署为 Windows Server 上的服务时,通过单一登录进行身份验证
如果在 Windows Server 上安装 Windows Admin Center,则单一登录需要其他配置。 有关详细信息,请参阅 “配置单一登录”。
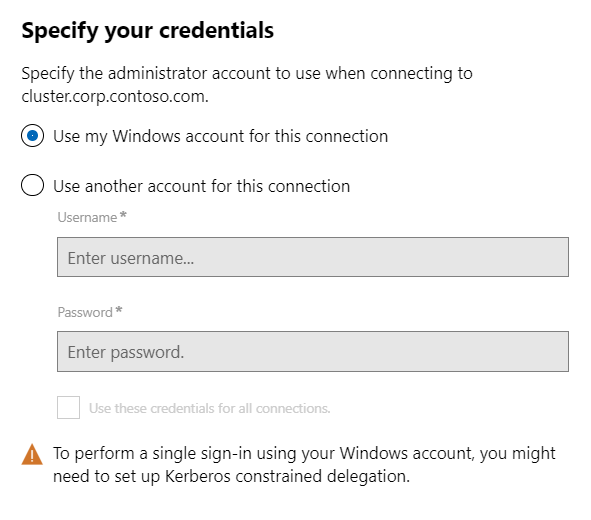
通过指定凭据进行身份验证
在 “所有连接”中,从列表中选择一个资源。
选择“管理方式”以指定用于向托管节点进行身份验证的凭据。

如果 Windows Admin Center 在 Windows Server 上以服务模式运行,但未配置 Kerberos 委派,则必须重新输入 Windows 凭据。
您可以将凭据应用于所有连接,这些凭据将在特定的浏览器会话中被缓存。 如果重新加载浏览器,则必须重新输入“管理方角色”凭据。
通过本地管理员密码解决方案进行身份验证
如果你的环境使用 本地管理员密码解决方案(LAPS),并且已在 Windows 电脑上安装了 Windows Admin Center,则可以使用 LAPS 凭据向托管节点进行身份验证。 如果使用此方案,可以提供 反馈。
使用标记来整理连接
可以使用标记来标识和筛选连接列表中的相关资源。 如果你有许多连接,那么在连接列表中查看资源子集的功能就显得尤为有用。
编辑标记
添加新连接时,可以向连接添加标记。 或者,可以稍后添加或编辑它们。 针对“所有连接”页上的一个或多个连接。
添加或编辑标记:
在连接列表中,选择一个或多个连接。
选择“编辑标记”。

在 “可用标记 ”窗格中,可以执行以下任一作:
若要向所选连接添加新标记,请选择 “添加标记 ”并输入所需的标记名称。
若要标记具有现有标记名称的所选连接,请选中要应用的标记名称旁边的复选框。
若要从所有选定的连接中删除标记,请清除要删除的标记旁边的复选框。
如果标记应用于所选连接的子集,复选框会显示在中间状态。 你可以选中该复选框并将标记应用于所有选定的连接,或清除该复选框以从所有选定的连接中删除标记。

选择 保存 以保存更改。
按标记筛选连接
将标记添加到一个或多个连接后,可以查看连接列表中的标记,并按标记筛选连接列表。
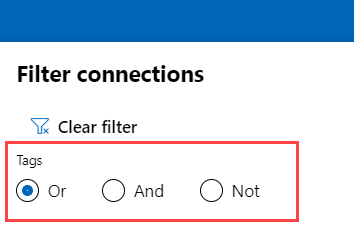
若要按标记进行筛选,请选择搜索框旁边的筛选器图标。

可以选择“或”、“与”或“不”来修改所选标记的筛选器行为。
使用 PowerShell 通过标记导入或导出连接
# Load the module
Import-Module "$env:ProgramFiles\windows admin center\PowerShell\Modules\ConnectionTools"
# Available cmdlets: Export-Connection, Import-Connection

# Export connections (including tags) to a .csv file
Export-Connection "https://wac.contoso.com" -fileName "WAC-connections.csv"
# Import connections (including tags) from a .csv file
Import-Connection "https://wac.contoso.com" -fileName "WAC-connections.csv"
# Import connections (including tags) from .csv files, and remove any connections that are not explicitly in the imported file by using the -prune switch parameter
Import-Connection "https://wac.contoso.com" -fileName "WAC-connections.csv" -prune
用于导入连接的 CSV 文件格式
CSV 文件的格式从以下四个标题开始,然后每个连接另起一行。
name:连接的 FQDN。type:连接类型。 对于 Windows Admin Center 附带的默认连接,请使用以下字符串之一:连接类型 连接字符串 Windows Server msft.sme.connection-type.server故障转移群集 msft.sme.connection-type.clustertags:以竖线分隔的标记。groupId:共享连接的列。 使用此列中的值global进行共享连接。
Note
修改共享连接仅限于网关管理员。 任何用户都可以使用 PowerShell 修改其个人连接列表。
用于导入连接的 CSV 文件示例
"name","type","tags","groupId"
"myServer.contoso.com","msft.sme.connection-type.server","hyperv"
"myDesktop.contoso.com","msft.sme.connection-type.windows-server","hyperv"
"teamcluster.contoso.com","msft.sme.connection-type.cluster","legacyCluster|WS2016","global"
"myHCIcluster.contoso.com,"msft.sme.connection-type.cluster","myHCIcluster|hyperv|JIT|WS2019"
"teamclusterNode.contoso.com","msft.sme.connection-type.server","legacyCluster|WS2016","global"
"myHCIclusterNode.contoso.com","msft.sme.connection-type.server","myHCIcluster|hyperv|JIT|WS2019"
Note
CSV 文件区分大小写。
导入 RDCMan 连接
使用以下脚本将 RDCMan 中保存的连接导出到文件。 然后,可以使用标记将文件导入 Windows Admin Center 并维护 RDCMan 分组层次结构。
将以下代码复制并粘贴到 PowerShell 会话中:
#Helper function for RdgToWacCsv
function AddServers {
 param (
 [Parameter(Mandatory = $true)]
 [Xml.XmlLinkedNode]
 $node,
 [Parameter()]
 [String[]]
 $tags,
 [Parameter(Mandatory = $true)]
 [String]
 $csvPath
 )
 if ($node.LocalName -eq 'server') {
     $serverName = $node.properties.name
     $tagString = $tags -join "|"
     Add-Content -Path $csvPath -Value ('"'+ $serverName + '","msft.sme.connection-type.server","'+ $tagString +'"')
 }
 elseif ($node.LocalName -eq 'group' -or $node.LocalName -eq 'file') {
     $groupName = $node.properties.name
     $tags+=$groupName
     $currNode = $node.properties.NextSibling
     while ($currNode) {
         AddServers -node $currNode -tags $tags -csvPath $csvPath
         $currNode = $currNode.NextSibling
     }
 }
 else {
     # Node type isn't relevant to tagging or adding connections in Windows Admin Center
 }
 return
}

<#
.SYNOPSIS
Convert an .rdg file from Remote Desktop Connection Manager into a .csv that can be imported into Windows Admin Center, maintaining groups via server tags. This will not modify the existing .rdg file and will create a new .csv file

 .DESCRIPTION
 This converts an .rdg file into a .csv that can be imported into Windows Admin Center.

 .PARAMETER RDGfilepath
 The path of the .rdg file to be converted. This file will not be modified, only read.

 .PARAMETER CSVdirectory
 Optional. The directory you want to export the new .csv file. If it's not provided, the new file is created in the same directory as the .rdg file.

 .EXAMPLE
 C:\PS> RdgToWacCsv -RDGfilepath "rdcmangroup.rdg"
 #>
function RdgToWacCsv {
 param(
     [Parameter(Mandatory = $true)]
     [String]
     $RDGfilepath,
     [Parameter(Mandatory = $false)]
     [String]
     $CSVdirectory
 )
 [xml]$RDGfile = Get-Content -Path $RDGfilepath
 $node = $RDGfile.RDCMan.file
 if (!$CSVdirectory){
     $csvPath = [System.IO.Path]::GetDirectoryName($RDGfilepath) + [System.IO.Path]::GetFileNameWithoutExtension($RDGfilepath) + "_WAC.csv"
 } else {
     $csvPath = $CSVdirectory + [System.IO.Path]::GetFileNameWithoutExtension($RDGfilepath) + "_WAC.csv"
 }
 New-item -Path $csvPath
 Add-Content -Path $csvPath -Value '"name","type","tags"'
 AddServers -node $node -csvPath $csvPath
 Write-Host "Converted $RDGfilepath `nOutput: $csvPath"
}
若要创建 CSV 文件,请运行以下命令:
RdgToWacCsv -RDGfilepath "path\to\myRDCManfile.rdg"将生成的 CSV 文件导入 Windows Admin Center。 连接列表中的标记表示 RDCMan 分组层次结构。
查看在 Windows Admin Center 中使用的 PowerShell 脚本
连接到服务器、群集或电脑后,可以查看 PowerShell 脚本,这些脚本支持 Windows Admin Center 中提供的 UI作:
在工具中,选择应用程序栏上的 PowerShell 图标。
在下拉列表中,选择感兴趣的命令以转到相应的PowerShell脚本。
